一、首先安装ROS环境
1.确保系统软件处于最新版:
$ sudo apt-get update
2.打开终端,输入命令
wget https://raw.githubusercontent.com/oroca/oroca-ros-pkg/master/ros_install.sh && \
chmod 755 ./ros_install.sh && bash ./ros_install.sh catkin_ws kinetic
直到完成,安装过程中可能出现网络问题导致某些包安装失败,请多次运行上述命令以确保安装完全。
3.初始化ROS
$ sudo rosdep init
$ rosdep update
4.初始化环境变量:
 $ echo "source /opt/ros/kinetic/setup.bash" >> ~/.bashrc
 $ source ~/.bashrc
5.安装常用插件:
$ sudo apt-get install python-rosinstall
6.测试ROS,启动ROS环境:
(1)、CTRL+ALT+T打开终端(Termial),输入以下命令,初始化ROS环境:
$ roscore
(2)、成功打开如下图所示:
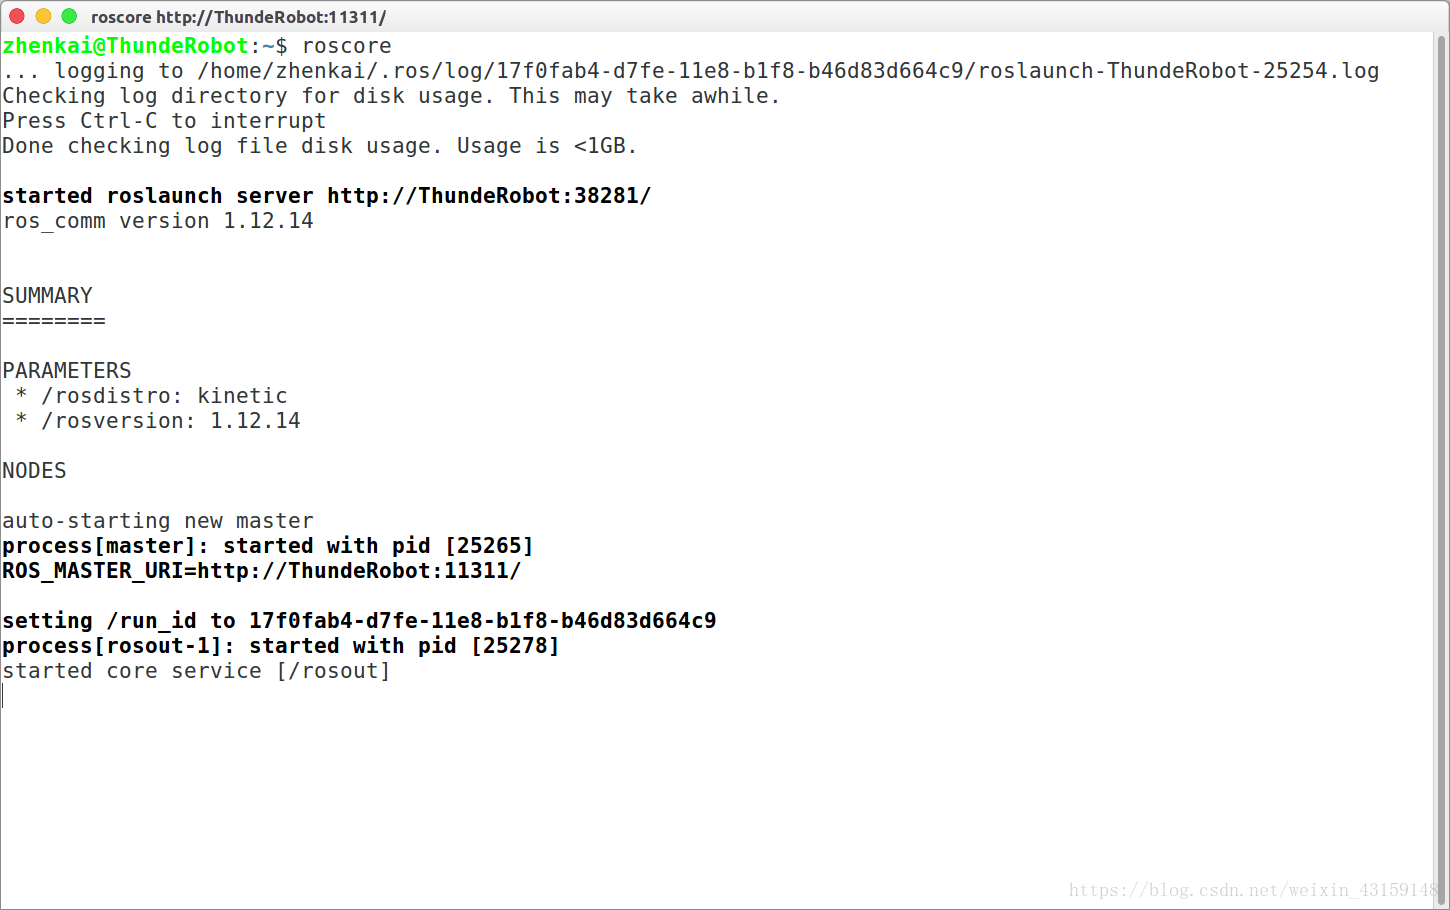
上面显示有ROS的版本,还有一些节点、端号等内容。
(3)、再 打开一个新的终端(Termial),输入以下命令,弹出一个小乌龟窗口:
rosrun turtlesim turtlesim_node
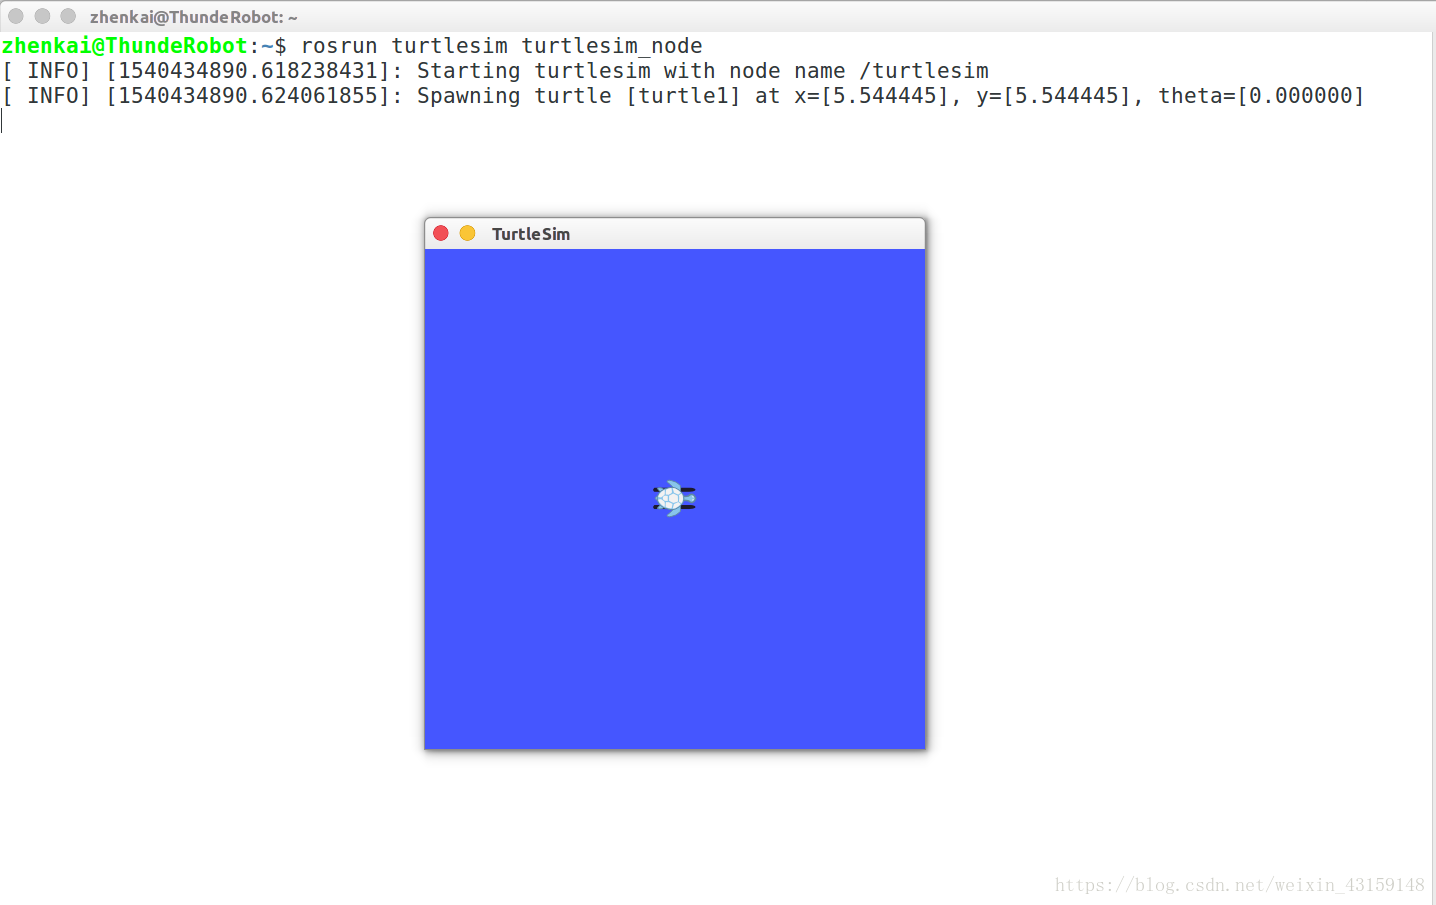
(4)、出现一个小乌龟的LOGO后,再 打开一个新的终端(Termial),输入以下命令
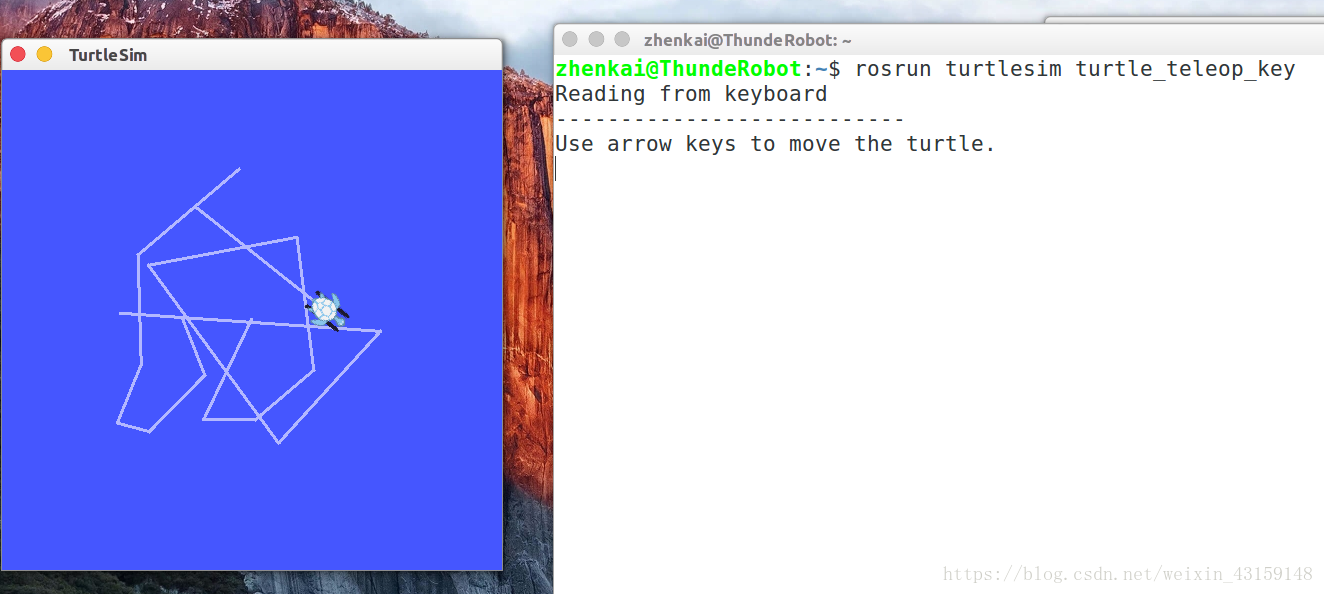
rosrun turtlesim turtle_teleop_key
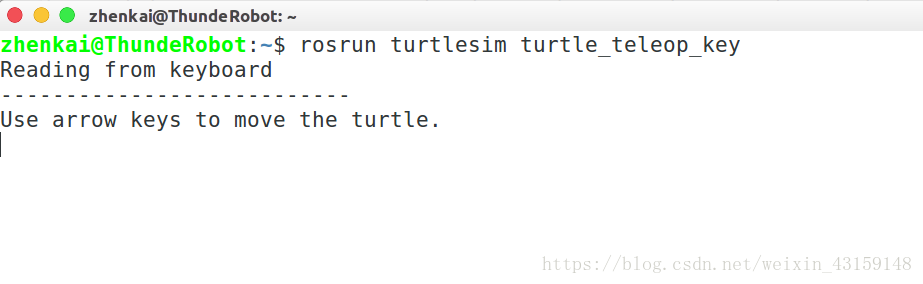
然后,通过方向键控制小乌龟的移动:如下图所示
(5)、 打开新的Termial,输入以下命令,可以查看ROS节点信息:
rosrun rqt_graph rqt_graph
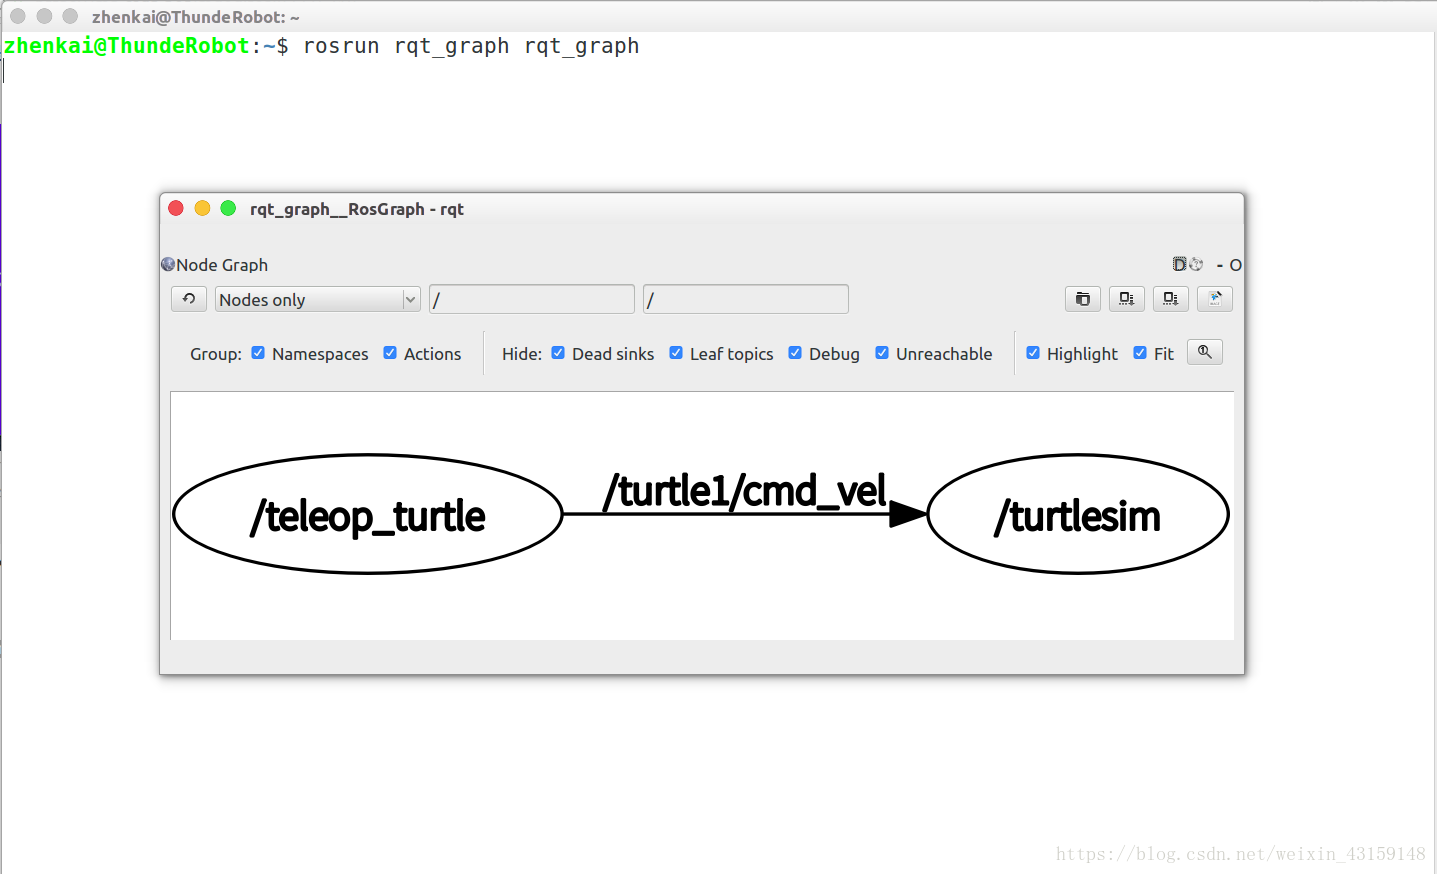
如果你能顺利进行到这一步,说明ROS安装成功了。
二、由于ROS自带OPENCV,不需要安装OPENCV,如果需要安装请按如下步骤安装
[compiler] sudo apt-get install build-essential
[required] sudo apt-get install cmake git libgtk2.0-dev pkg-config libavcodec-dev libavformat-dev libswscale-dev
[optional] sudo apt-get install python-dev python-numpy libtbb2 libtbb-dev libjpeg-dev libpng-dev libtiff-dev libjasper-dev libdc1394-22-dev

$ git clone https://github.com/opencv/opencv.git
$ cd opencv/
$ git checkout tags/3.4.1

$ mkdir _build
$ cd _build/

$ cmake \
-DCMAKE_BUILD_TYPE=RELEASE \
-DCMAKE_INSTALL_PREFIX=/usr/local \
\
-DWITH_CUDA=OFF \
\
-DBUILD_DOCS=OFF \
-DBUILD_EXAMPLES=OFF \
-DBUILD_TESTS=OFF \
-DBUILD_PERF_TESTS=OFF \
..

$ make -j4
$ sudo make install
三、 Eigen安装
1.未安装Eigen的PC可以输入以下命令进行安装:
sudo apt-get install libeigen3-dev
四、Cere的安装
1.可去GitHub上下载Ceres:Ceres下载地址
最新版本可从git库克隆:
以下安装步骤参照《SLAM十四讲》进行
安装依赖项:(若为Ubuntu14.04则应为libcxsparse3.1.2)
sudo apt-get install liblapack-dev libsuitesparse-dev libcxsparse3.1.4 libgflags-dev libgoogle-glog-dev libgtest-dev
2.以下安装参照安装教程进行
安装依赖项:
#CMake
sudo apt-get install cmake
#google-glog + gflags
sudo apt-get install libgoogle-glog-dev
#BLAS&LAPACK
sudo apt-get install libatlas-base-dev
#Eigen3
sudo apt-get install libeigen3-dev
#SuiteSparse和CXSparse(可选)
# - 如果要将Ceres构建为* static *库(默认),您可以在主Ubuntu软件包#storage中使用SuiteSparse软件包:
sudo apt-get install libsuitesparse-dev
# - 但是,如果要将Ceres构建为* shared *库,则必须添加以下PPA:
sudo add-apt-repository ppa:bzindovic / suitesparse-bugfix-1319687
sudo apt-get update
sudo apt-get install libsuitesparse-dev
3.解压Cere安装包,进入安装目录下:
tar zxf ceres-solver-1.14.0.tar.gz
cd ceres-solver-1.14.0
mkdir build
cmake ..
make
make install
五、在ROS上构建VINS-Mono
1.ROS安装额外的ROS pacakge:
sudo apt-get install ros-kinetic-cv-bridge ros-kinetic-tf ros-kinetic-message-filters ros-kinetic-image-transport
2.在ROS上构建VINS-Mono,克隆存储库和catkin_make:
    cd ~/catkin_ws/src
    git clone https://github.com/HKUST-Aerial-Robotics/VINS-Mono.git
    cd ../
    catkin_make
    source ~/catkin_ws/devel/setup.bash
六、下载安装MYNTEYE-SDK包
如果是S系列,下载
$:sudo apt-get install git
$:git clone https://github.com/slightech/MYNT-EYE-S-SDK.git
$:cd MYNT-EYE-S-SDK
$:make init
$:make samples
$:make tools
$:make ros
$:source wrappers/ros/devel/setup.bash
获取S系列图像标定参数
$:cd <SDK>
$:./samples/_output/bin/tutorials/get_img_params
会显示如下参数(每种分辨率下对应不同的图像参数)
left:
width: 640, height: 400
distortion_model: KANNALA_BRANDT
D: -0.02896942935607857,-0.00277689930999742,0.00245138690532523,-0.00153981542047065,0.00000000000000000,
K: 294.19466567760196085,0.00000000000000000,309.75872917457979838,0.00000000000000000,294.34462019424978507,208.50615088976417155,0.00000000000000000,0.00000000000000000,1.00000000000000000,
R: 0.99999982822182432,-0.00002141892191318,-0.00058574529582983,0.00002056740433583,0.99999894316475335,-0.00145370091773688,0.00058577581350001,0.00145368862076245,0.99999877182729091,
P: 296.02695539184094287,0.00000000000000000,237.47560119628906250,0.00000000000000000,0.00000000000000000,296.02695539184094287,273.33144378662109375,0.00000000000000000,0.00000000000000000,0.00000000000000000,1.00000000000000000,0.00000000000000000,

right:
width: 640, height: 400
distortion_model: KANNALA_BRANDT
D: -0.03657014187576602,0.01755082746579488,-0.02241016662577049,0.00887907394642084,0.00000000000000000,
K: 297.60539249677140106,0.00000000000000000,330.90730437322247326,0.00000000000000000,297.70929058943204382,201.85973800222234331,0.00000000000000000,0.00000000000000000,1.00000000000000000,
R: 0.99998656932563956,0.00518275947317579,-0.00001313700346399,-0.00518273491577455,0.99998551398383229,0.00145295605003922,0.00002066713489362,-0.00145286845025311,0.99999894437251069,
P: 296.02695539184094287,0.00000000000000000,237.47560119628906250,-23081.58799079771779361,0.00000000000000000,296.02695539184094287,273.33144378662109375,0.00000000000000000,0.00000000000000000,0.00000000000000000,1.00000000000000000,0.00000000000000000,
/***********************************************************我是华丽的分割线***********************************************************/
如果是D系列,下载
$:sudo apt-get install git
$:git clone https://github.com/slightech/MYNT-EYE-D-SDK.git
$:cd MYNT-EYE-D-SDK
$:make all
$:make ros
$:source ./wrappers/ros/devel/setup.bash
获取D系列图像标定参数
$:cd <sdk>
$:./samples/_output/bin/get_img_params
显示如下参数(每种分辨率下对应不同的图像参数)
Open device success

VGA Intrinsics left: {width: [640], height: [480], fx: [355.73937988281250000], fy: [355.87838745117187500], cx: [320.99044799804687500], cy: [254.22116088867187500], coeffs: [-0.28413772583007812, 0.06623840332031250, -0.00039291381835938, 0.00033187866210938, 0.00000000000000000], p: [349.19995117187500000, 0.00000000000000000, 314.51867675781250000, 0.00000000000000000, 0.00000000000000000, 349.19995117187500000, 246.40173339843750000, 0.00000000000000000, 0.00000000000000000, 0.00000000000000000, 1.00000000000000000, 0.00000000000000000], r: [0.99985599517822266, -0.00555408000946045, 0.01602888107299805, 0.00555634498596191, 0.99998450279235840, -0.00010001659393311, -0.01602804660797119, 0.00018906593322754, 0.99987149238586426]}
VGA Intrinsics right: {width: [640], height: [480], fx: [354.71011352539062500], fy: [354.73538208007812500], cx: [321.76647949218750000], cy: [242.11872863769531250], coeffs: [-0.28843688964843750, 0.06940078735351562, 0.00026321411132812, -0.00047683715820312, 0.00000000000000000], p: [349.19995117187500000, 0.00000000000000000, 314.51867675781250000, -38416.66406250000000000, 0.00000000000000000, 349.19995117187500000, 246.40173339843750000, 0.00000000000000000, 0.00000000000000000, 0.00000000000000000, 1.00000000000000000, 0.00000000000000000], r: [0.99998033046722412, -0.00285947322845459, 0.00556766986846924, 0.00285863876342773, 0.99999582767486572, 0.00015258789062500, -0.00556814670562744, -0.00013661384582520, 0.99998438358306885]}
VGA Extrinsics left to right: {rotation: [0.99994158744812012, -0.00269627571105957, 0.01046085357666016, 0.00269937515258789, 0.99999630451202393, -0.00028264522552490, -0.01046001911163330, 0.00031077861785889, 0.99994516372680664], translation: [-120.48474884033203125, 0.00000000000000000, 0.00000000000000000]}
HD Intrinsics left: {width: [1280], height: [720], fx: [713.21228027343750000], fy: [714.48046875000000000], cx: [640.00170898437500000], cy: [383.23535156250000000], coeffs: [-0.30136489868164062, 0.08316421508789062, 0.00031661987304688, -0.00005722045898438, 0.00000000000000000], p: [698.40002441406250000, 0.00000000000000000, 654.79724121093750000, 0.00000000000000000, 0.00000000000000000, 698.40002441406250000, 382.88183593750000000, 0.00000000000000000, 0.00000000000000000, 0.00000000000000000, 1.00000000000000000, 0.00000000000000000], r: [0.99998056888580322, -0.00194501876831055, -0.00590443611145020, 0.00193083286285400, 0.99999523162841797, -0.00240683555603027, 0.00590908527374268, 0.00239539146423340, 0.99997961521148682]}
HD Intrinsics right: {width: [1280], height: [720], fx: [715.32916259765625000], fy: [717.03967285156250000], cx: [640.62878417968750000], cy: [384.67080688476562500], coeffs: [-0.30041503906250000, 0.08056259155273438, 0.00089263916015625, 0.00006103515625000, 0.00000000000000000], p: [698.40002441406250000, 0.00000000000000000, 654.79724121093750000, -80116.99218750000000000, 0.00000000000000000, 698.40002441406250000, 382.88183593750000000, 0.00000000000000000, 0.00000000000000000, 0.00000000000000000, 1.00000000000000000, 0.00000000000000000], r: [0.99984347820281982, 0.00018608570098877, -0.01768839359283447, -0.00014364719390869, 0.99999701976776123, 0.00240254402160645, 0.01768887042999268, -0.00239968299865723, 0.99984061717987061]}
HD Extrinsics left to right: {rotation: [0.99992835521697998, -0.00204610824584961, 0.01178526878356934, 0.00210285186767578, 0.99998617172241211, -0.00480759143829346, -0.01177525520324707, 0.00483202934265137, 0.99991893768310547], translation: [-119.94840240478515625, 0.00000000000000000, 0.00000000000000000]}
七、搭建VINSMONO环境
1.在\VINS-Mono\config\目录下建文件夹mynteye-s或者mynteye-d,在文件夹下创建配置文件mynteye_config.yaml
S系列配置文件内容如下
%YAML:1.0

#common parameters
imu_topic: "/mynteye/imu/data_raw"
image_topic: "/mynteye/left/image_raw"
output_path: "/home/shaozu/output/"

#camera calibration
#model_type: PINHOLE
#camera_name: camera
#image_width: 752
#image_height: 480
#distortion_parameters:
#   k1: -0.0262763
#   k2: 0.00661103
#   p1:
#   p2:
#projection_parameters:
#   fx: 4.616e+02
#   fy: 4.603e+02
#   cx: 3.630e+02
#   cy: 2.481e+02

#camera calibration
model_type: KANNALA_BRANDT
camera_name: camera
image_width: 640
image_height: 400
projection_parameters:
   k2: -0.0232858
   k3: 0.000652782
   k4: -0.00323809
   k5: 0.000447879
   mu: 366.081
   mv: 366.297
   u0: 386.375
   v0: 237.74


# Extrinsic parameter between IMU and Camera.
estimate_extrinsic: 2   # 0  Have an accurate extrinsic parameters. We will trust the following imu^R_cam, imu^T_cam, don't change it.
                        # 1  Have an initial guess about extrinsic parameters. We will optimize around your initial guess.
                        # 2  Don't know anything about extrinsic parameters. You don't need to give R,T. We will try to calibrate it. Do some rotation movement at beginning.
#If you choose 0 or 1, you should write down the following matrix.
#Rotation from camera frame to imu frame, imu^R_cam
extrinsicRotation: !!opencv-matrix
   rows: 3
   cols: 3
   dt: d
   data: [0.0148655429818, -0.999880929698, 0.00414029679422,
           0.999557249008, 0.0149672133247, 0.025715529948,
           -0.0257744366974, 0.00375618835797, 0.999660727178]
#Translation from camera frame to imu frame, imu^T_cam
extrinsicTranslation: !!opencv-matrix
   rows: 3
   cols: 1
   dt: d
   data: [-0.0216401454975,-0.064676986768, 0.00981073058949]

#feature traker paprameters
max_cnt: 150            # max feature number in feature tracking
min_dist: 30            # min distance between two features
freq: 10                # frequence (Hz) of publish tracking result. At least 10Hz for good estimation. If set 0, the frequence will be same as raw image
F_threshold: 1.0        # ransac threshold (pixel)
show_track: 1           # publish tracking image as topic
equalize: 1             # if image is too dark or light, trun on equalize to find enough features
fisheye: 0              # if using fisheye, trun on it. A circle mask will be loaded to remove edge noisy points

#optimization parameters
max_solver_time: 0.04  # max solver itration time (ms), to guarantee real time
max_num_iterations: 8   # max solver itrations, to guarantee real time
keyframe_parallax: 10.0 # keyframe selection threshold (pixel)

#imu parameters       The more accurate parameters you provide, the better performance
acc_n: 0.08          # accelerometer measurement noise standard deviation. #0.2   0.04
gyr_n: 0.004         # gyroscope measurement noise standard deviation.     #0.05  0.004
acc_w: 0.00004         # accelerometer bias random work noise standard deviation.  #0.02
gyr_w: 2.0e-6       # gyroscope bias random work noise standard deviation.     #4.0e-5
g_norm: 9.81007     # gravity magnitude

#loop closure parameters
loop_closure: 1                    # start loop closure
load_previous_pose_graph: 0        # load and reuse previous pose graph; load from 'pose_graph_save_path'
fast_relocalization: 0             # useful in real-time and large project
pose_graph_save_path: "/home/shaozu/output/pose_graph/" # save and load path

#unsynchronization parameters
estimate_td: 1                      # online estimate time offset between camera and imu
td: 0.0                             # initial value of time offset. unit: s. readed image clock + td = real image clock (IMU clock)

#rolling shutter parameters
rolling_shutter: 0                  # 0: global shutter camera, 1: rolling shutter camera
rolling_shutter_tr: 0               # unit: s. rolling shutter read out time per frame (from data sheet).

#visualization parameters
save_image: 1                   # save image in pose graph for visualization prupose; you can close this function by setting 0
visualize_imu_forward: 0        # output imu forward propogation to achieve low latency and high frequence results
visualize_camera_size: 0.4      # size of camera marker in RVIZ
把$:./samples/_output/bin/tutorials/get_img_params获取的S系列图像参数进行替换上个文件相应的位置,按照规则如下
D[0, 1, 2, 3, 4] -> [k2, k3, k4, k5, 0]
K[mu, 0, u0, 0, mv, v0, 0, 0, 1]->[mu, mv, u0, v0]
用左目(left)参数替换参数既可
在VINS-Mono\vins_estimator\launch下添加mynteye-s.launch文件内容如下
<launch>
    <arg name="config_path" default = "$(find feature_tracker)/../config/mynteye-s/mynteye_config.yaml" />
	  <arg name="vins_path" default = "$(find feature_tracker)/../config/../" />

    <node name="feature_tracker" pkg="feature_tracker" type="feature_tracker" output="log">
        <param name="config_file" type="string" value="$(arg config_path)" />
        <param name="vins_folder" type="string" value="$(arg vins_path)" />
    </node>

    <node name="vins_estimator" pkg="vins_estimator" type="vins_estimator" output="screen">
       <param name="config_file" type="string" value="$(arg config_path)" />
       <param name="vins_folder" type="string" value="$(arg vins_path)" />
    </node>

    <node name="pose_graph" pkg="pose_graph" type="pose_graph" output="screen">
        <param name="config_file" type="string" value="$(arg config_path)" />
        <param name="visualization_shift_x" type="int" value="0" />
        <param name="visualization_shift_y" type="int" value="0" />
        <param name="skip_cnt" type="int" value="0" />
        <param name="skip_dis" type="double" value="0" />
    </node>

</launch>
/***********************************************************我是华丽的分割线***********************************************************/
D系列配置文件内容如下
%YAML:1.0

#common parameters
imu_topic: "/mynteye/imu/data_raw"
image_topic: "/mynteye/left/image_color"
output_path: "/home/ubuntu/output/"

#camera calibration
model_type: PINHOLE
camera_name: camera
image_width: 640
image_height: 480
distortion_parameters:
   k1: -0.28413772583007812
   k2: 0.06623840332031250
   p1:  -0.00039291381835938
   p2: 0.00033187866210938
projection_parameters:
   fx: 355.73937988281250000
   fy: 355.87838745117187500
   cx: 320.99044799804687500
   cy: 254.22116088867187500

#camera calibration
#model_type: KANNALA_BRANDT
#camera_name: camera
#image_width: 752
#image_height: 480
#projection_parameters:
#   k2: -0.0232858
#   k3: 0.000652782
#   k4: -0.00323809
#   k5: 0.000447879
#   mu: 366.081
#   mv: 366.297
#   u0: 386.375
#   v0: 237.74


# Extrinsic parameter between IMU and Camera.
estimate_extrinsic: 1   # 0  Have an accurate extrinsic parameters. We will trust the following imu^R_cam, imu^T_cam, don't change it.
                        # 1  Have an initial guess about extrinsic parameters. We will optimize around your initial guess.
                        # 2  Don't know anything about extrinsic parameters. You don't need to give R,T. We will try to calibrate it. Do some rotation movement at beginning.
#If you choose 0 or 1, you should write down the following matrix.
#Rotation from camera frame to imu frame, imu^R_cam
#extrinsicRotation: !!opencv-matrix
#   rows: 3
#   cols: 3
#   dt: d
#   data: [0.0148655429818, -0.999880929698, 0.00414029679422,
#           0.999557249008, 0.0149672133247, 0.025715529948,
#           -0.0257744366974, 0.00375618835797, 0.999660727178]
##Translation from camera frame to imu frame, imu^T_cam
#extrinsicTranslation: !!opencv-matrix
#   rows: 3
#   cols: 1
#   dt: d
#   data: [-0.0216401454975,-0.064676986768, 0.00981073058949]

extrinsicRotation: !!opencv-matrix
   rows: 3
   cols: 3
   dt: d
   data: [ 9.9998272819366218e-01, -2.3233553295674133e-03,
       5.3986419007787077e-03, -2.3110041031678651e-03,
       -9.9999470080028852e-01, -2.2929525459328749e-03,
       5.4039406358151396e-03, 2.2804366589163259e-03,
       -9.9998279836917736e-01 ]
extrinsicTranslation: !!opencv-matrix
   rows: 3
   cols: 1
   dt: d
   data: [ -4.8933740114506762e-02, 5.4761505879851085e-03,
       -9.0061334054582394e-03 ]

#feature traker paprameters
max_cnt: 150            # max feature number in feature tracking
min_dist: 30            # min distance between two features
freq: 10                # frequence (Hz) of publish tracking result. At least 10Hz for good estimation. If set 0, the frequence will be same as raw image
F_threshold: 1.0        # ransac threshold (pixel)
show_track: 1           # publish tracking image as topic
equalize: 1             # if image is too dark or light, trun on equalize to find enough features
fisheye: 0              # if using fisheye, trun on it. A circle mask will be loaded to remove edge noisy points

#optimization parameters
max_solver_time: 0.04  # max solver itration time (ms), to guarantee real time
max_num_iterations: 8   # max solver itrations, to guarantee real time
keyframe_parallax: 10.0 # keyframe selection threshold (pixel)

#imu parameters       The more accurate parameters you provide, the better performance
acc_n: 0.08          # accelerometer measurement noise standard deviation. #0.2   0.04
gyr_n: 0.004         # gyroscope measurement noise standard deviation.     #0.05  0.004
acc_w: 0.00004         # accelerometer bias random work noise standard deviation.  #0.02
gyr_w: 2.0e-6       # gyroscope bias random work noise standard deviation.     #4.0e-5
g_norm: 9.81007     # gravity magnitude

#loop closure parameters
loop_closure: 0                    # start loop closure
load_previous_pose_graph: 0        # load and reuse previous pose graph; load from 'pose_graph_save_path'
fast_relocalization: 0             # useful in real-time and large project
pose_graph_save_path: "/home/shaozu/output/pose_graph/" # save and load path

#unsynchronization parameters
estimate_td: 1                      # online estimate time offset between camera and imu
td: 0.0                             # initial value of time offset. unit: s. readed image clock + td = real image clock (IMU clock)

#rolling shutter parameters
rolling_shutter: 0                  # 0: global shutter camera, 1: rolling shutter camera
rolling_shutter_tr: 0               # unit: s. rolling shutter read out time per frame (from data sheet).

#visualization parameters
save_image: 1                   # save image in pose graph for visualization prupose; you can close this function by setting 0
visualize_imu_forward: 0        # output imu forward propogation to achieve low latency and high frequence results
visualize_camera_size: 0.4      # size of camera marker in RVIZ
把$:./samples/_output/bin/get_img_params获取的D系列图像参数替换掉上述文件对应分辨率下的参数(这里是640*480),左目(left替换)
projection_parameters:{fx,fy,cx,cy}->(fx,fy,cx,cy)
distortion_parameters:coeffs:[k1,k2,p1,p2,0]->(k1,k2,p1,p2)
在VINS-Mono\vins_estimator\launch下添加mynteye-d.launch文件内容如下
<launch>
    <arg name="config_path" default = "$(find feature_tracker)/../config//mynteye-d/mynteye_config.yaml" />
	  <arg name="vins_path" default = "$(find feature_tracker)/../config/../" />

    <node name="feature_tracker" pkg="feature_tracker" type="feature_tracker" output="log">
        <param name="config_file" type="string" value="$(arg config_path)" />
        <param name="vins_folder" type="string" value="$(arg vins_path)" />
    </node>

    <node name="vins_estimator" pkg="vins_estimator" type="vins_estimator" output="screen">
       <param name="config_file" type="string" value="$(arg config_path)" />
       <param name="vins_folder" type="string" value="$(arg vins_path)" />
    </node>

    <node name="pose_graph" pkg="pose_graph" type="pose_graph" output="screen">
        <param name="config_file" type="string" value="$(arg config_path)" />
        <param name="visualization_shift_x" type="int" value="0" />
        <param name="visualization_shift_y" type="int" value="0" />
        <param name="skip_cnt" type="int" value="0" />
        <param name="skip_dis" type="double" value="0" />
    </node>

    <node name="rvizvisualisation" pkg="rviz" type="rviz" output="log" args="-d $(find vins_estimator)/../config/vins_rviz_config.rviz" />

</launch>
2.重新编译初始化VINS
cd ~/catkin_ws/src
catkin_make
source ~/catkin_ws/devel/setup.bash
八、启动VINS
1.在sdk目录下启动摄像头
cd <SDk>
#S系列
roslaunch mynt_eye_ros_wrapper mynteye.launch
#D系列
roslaunch mynteye_wrapper_d mynteye.launch
2.在VINSMONO目录下启动vins
cd ~/catkin_ws/
#S系列
roslaunch vins_estimator mynteye-s.launch
#D系列
roslaunch vins_estimator mynteye-d.launch
3.运行节点,新窗口同时打开 RViz 预览:
#S系列
source wrappers/ros/devel/setup.bash
roslaunch mynt_eye_ros_wrapper display.launch
#D系列
source ./wrappers/ros/devel/setup.bash
roslaunch mynteye_wrapper_d display.launch
启动坐标显示,新开个窗口输入
rostopic echo /vins_estimator/odometry
4.录制播放视频包功能(可选)
(1)新建个文件夹bag,在文件夹创建两个文件
创建record_bag文件内容如下
#S系列写这个
rosbag record -O mynt-s.bag /mynteye/imu/data_raw /mynteye/left/image_raw

#注意上面下面二选一
#D系列写下面的
rosbag record -O mynt-d.bag /mynteye/imu/data_raw /mynteye/left/image_color
创建play文件内容如下
#S系列写这个
rosbag play mynt-s.bag

#注意上面下面二选一
#D系列写下面的
rosbag play mynt-d.bag
(2)录制或者播放(播放的时候要关掉sdk运行的ros)
./record_bag开始录制,CTL+C停止录制,./play开始播放
本文内容由网友自发贡献,版权归原作者所有,本站不承担相应法律责任。如您发现有涉嫌抄袭侵权的内容,请联系:hwhale#tublm.com(使用前将#替换为@)