一、Vue的路由
1、路由
路由:从源页面到目的页面的决策过程
2、前端路由
前端路由:在前端页面中维护的路由规则
(1)、hash:在地址中以’#'分隔页面
(2)、history:在地址中以’/'分隔页面
3、VueRouter路由
VueRouter路由 :路由就是根据一个请求路径选中一个组件进行渲染的决策过程。是Vue官方推出的路由管理器。
(1)、route:表示单个路由。
(2)、routes:表示多个路由的集合。是一个数组,在这个数组中包含了多个route
(3)、router:译为路由器.是route、routes的管理者。当用户点击某个按钮或超链接时,路由的查找过程是
三者的关系:router --> routes --> route
4、VueRouter的组成
(1)、VueRouter类:维护的一种路由表,根据路由的请求去渲染某个组件
(2)、router-link:类似于<a>标签。路由的链接组件
(3)、router-view:路由出口,用于显示渲染的组件
5、VueRouter常用的函数
(1)、createRouter函数:创建路由器
(2)、createWebHashHistory函数:创建Hash模式的路由
(3)、createWebHistory函数:创建History模式路由
二、VueRouter的使用
1、安装Vue-router
npm install vue-router
2、创建路由文件
(1)、定义路由表:routes,在路由表中包含多个route
(2)、router,在路由器中指定路由表(routes)以及路由模式(hash/history)
3、声明路由请求接口
定义roter-link,'to’属性声明路由的目标路径
<router-link to="/about">ABOUT</router-link>
4、声明路由出口:指定组件渲染的位置
<router-view></router-view>
举例:
Home.vue组件:
<template>
<h2>我是Home组件</h2>
</template>

<script>
export default {
  name: "Home"
}
</script>

<style scoped>

</style>
About.vue组件:
<template>
<h2>我是About组件</h2>
</template>

<script>
export default {
  name: "About"
}
</script>

<style scoped>

</style>
Router.js文件:
import {createRouter,createWebHashHistory,createWebHistory} from "vue-router";
import Home from "../components/Home.vue"
import About from "../components/About.vue";
import user from "../components/user.vue";
const routes = [
    {
        path:'/home',
        component:Home,
        name:'home'
    },
    {
        path:'/about',
        component:About,
        name:'about'
    }
]

//定义路由器

const router = createRouter({
        routes,
        history:createWebHistory()
    }

)

//导出路由器

export default router
main.js代码段:
import { createApp } from 'vue'
import './style.css'
import App from './App.vue'
import router from "./routers/router"


const app=createApp(App)
app.use(router)
app .mount('#app')
App.vue:
<script setup>
// This starter template is using Vue 3 <script setup> SFCs
// Check out https://vuejs.org/api/sfc-script-setup.html#script-setup
import HelloWorld from './components/HelloWorld.vue'
</script>
<template>
<div>
<router-link :to="{name:'home'}">Home</router-link>
<router-link :to="{name:'about'}">About</router-link>
</div>
<div>
<a href="https://vitejs.dev" target="_blank">
<img src="/vite.svg" class="logo" alt="Vite logo" />
</a>
</div>
<router-view></router-view>
</template>
<style scoped>
.logo {
height: 6em;
padding: 1.5em;
will-change: filter;
}
.logo:hover {
filter: drop-shadow(0 0 2em #646cffaa);
}
.logo.vue:hover {
filter: drop-shadow(0 0 2em #42b883aa);
}
</style>


三、动态路由
动态路由:是指路由器能够自动地建立自己的路由表,并且能够根据实际情况的变化适时地进行调整。在路由中带有路由参数,路由参数会设置到’$route.params’中
1、动态路由的路径格式
动态路由的路径格式:/组件名/:参数名;在组件中通过’$route.params.参数名’获取参数。
演示:
<script setup>
// This starter template is using Vue 3 <script setup> SFCs
// Check out https://vuejs.org/api/sfc-script-setup.html#script-setup
import HelloWorld from './components/HelloWorld.vue'
</script>
<template>
<div>
<router-link :to="{name:'home'}">Home</router-link>
<router-link :to="{name:'about'}">About</router-link>
<router-link to="/user/朱元璋">动态路由--朱元璋</router-link>
<router-link to="/user/朱标">动态路由---朱标</router-link>
</div>
<div>
<a href="https://vitejs.dev" target="_blank">
<img src="/vite.svg" class="logo" alt="Vite logo" />
</a>
</div>
<router-view></router-view>
</template>
<style scoped>
.logo {
height: 6em;
padding: 1.5em;
will-change: filter;
}
.logo:hover {
filter: drop-shadow(0 0 2em #646cffaa);
}
.logo.vue:hover {
filter: drop-shadow(0 0 2em #42b883aa);
}
</style>
user.vue组件:
<template>
  <h2>User组件</h2>
  <p>欢迎回来,{{ $route.params.name}} </p>
</template>

<script>
export default {
  name: "user"
}
</script>

<style scoped>

</style>
router.js:
import {createRouter,createWebHashHistory,createWebHistory} from "vue-router";
import Home from "../components/Home.vue"
import About from "../components/About.vue";
import user from "../components/user.vue";
const routes = [
    {
        path:'/home',
        component:Home,
        name:'home'
    },
    {
        path:'/about',
        component:About,
        name:'about'
    },
    {
        path:'/user/:name',
        component: user,
        name:'user'
    }
]

//定义路由器

const router = createRouter({
        routes,
        history:createWebHistory()
    }

)

//导出路由器

export default router


2、在URL中带查询参数
在URL中带查询参数:/组件名?参数名=参数值;在组件中通过’$route.query.参数名’获取参数
3、通配符匹配
通配符匹配:'*'表示匹配所有路径。通常用于匹配前端的404页面
四、嵌套路由
嵌套路由:在组件中包含子组件的情况.vue官方提供children属性来定义这种嵌套关系。该属性是 一个数组,本质就是路由表
演示:
1、图书列表组件:显示图书标题,每个标题都是链接组件,当用户点击链接组件(一级路由组件Books.vue)时,跳转到二级路由组件(Book.vue)
2、图书组件:显示图书的详细信息
Book.js文件:
export  default[
    {
        id:1,
        title:'Vue.js无难事',
        desc:'前端框架经典图书'
    },
    {
        id:2,
        title:'React.js工程师宝典',
        desc:'前端框架经典图书'
    },
    {
        id:3,
        title:'Go语言程序设计',
        desc:'最流行的脚本语言'
    }
]
Books.vue代码段:
<template>
<div>
<h2>图书的列表</h2>
  <ul>
    <li v-for="book in booksList" :key="book.id">
      <router-link :to="'/books/book/'+book.id">{{ book.title }}</router-link>
    </li>
  </ul>
</div>
  <hr/>
  <div>
    <router-view></router-view>
  </div>
</template>

<script>
import books from "../assets/books.js"
export default {
  name: "Book",
  data(){
    return{
      booksList:books
    }
  }
}
</script>

<style scoped>
li{
  list-style-type: none;
  margin-top: 5px;
}
</style>
Book.vue代码段:
<template>
  <div>
    <p>图书ID:{{book.id}}</p>
    <p>图书名:{{book.title}}</p>
    <p>简要描述:{{book.desc}}</p>
  </div>

</template>

<script>
import books from "../assets/books.js"
export default {
  name: "Book",
  data(){
    return{
      book:{}
    }
  },
  created() {
    this.book =books.find((item)=>item.id == this.$route.params.id);
  },
  watch:{
    '$route':{
      handler:function (to){
        this.book =books.find((item)=>item.id == this.$route.params.id);
      }
    }
  }
}
</script>

<style scoped>

</style>
router.js文件:
import {createRouter,createWebHashHistory,createWebHistory} from "vue-router";
import Home from "../components/Home.vue"
import About from "../components/About.vue";
import user from "../components/user.vue";
const routes = [
    {
        path:'/home',
        component:Home,
        name:'home'
    },
    {
        path:'/about',
        component:About,
        name:'about'
    },
    {
        path:'/user/:name',
        component: user,
        name:'user'
    },{
    path:'/books',
        name:'books',
        component:() => import ('../components/Books.vue'),
        children: [{
            path: '/books/book/:id',
            component: ()=>import('../components/Book.vue')
        }]
    }
]

//定义路由器

const router = createRouter({
        routes,
        history:createWebHistory()
    }

)

//导出路由器

export default router

五、命名路由
命名路由:有时通过一个名称来标识路由会更方便,特别是在链接到路由,或者是执行导航时。可以创建Router实例时, 在routes选项中为路由设置名称
六、命名视图
命名视图:给路由视图()一个名称,可以将组件渲染到指定名称的路由视图中
1、给路由视图添加name属性。例如:
<template>
<div>
<h2>图书的列表</h2>
  <ul>
    <li v-for="book in booksList" :key="book.id">
      <router-link :to="'/books/book/'+book.id">{{ book.title }}</router-link>
    </li>
  </ul>
</div>
  <hr/>
  <div>
    <router-view name="test"></router-view>
  </div>
  <hr/>
  <div>
    <router-view name="bookDetail"></router-view>
  </div>

</template>

<script>
import books from "../assets/books.js"
export default {
  name: "Book",
  data(){
    return{
      booksList:books
    }
  }
}
</script>

<style scoped>
li{
  list-style-type: none;
  margin-top: 5px;
}
</style>
2、在路由表中,指定components属性的值,例如:
  {
        path: '/books',
        name: 'books',
        component: ()=>import('../components/Books.vue'),
        children: [{
            path: '/books/book/:id',
            //component: ()=>import('../components/Book.vue')
            components:{
            test:()=>import('../components/Book.vue')
            }
        }]
    }
因为指定的路由视图是test,所以将会渲染到视图name为test上,也就是第一个 横线的下方,第二个横线的上方。(如果为bookDetail,则在第二条线的下方)

七、导航守卫
1、路由导航的方式
(1)、标签导航:<router-link to=“url”></router-link>
(2)、编程式导航:this.$router.push(url)
2、导航守卫
导航守卫:在导航过程中由权限验证、数据的获取等业务的需要,会出现页面的重定向。
每个导航守卫都有三个参数(to,from,next):‘to’:到哪里去; 'from’:从哪里来; ‘next’:下一步去哪儿
2.1、全局前置守卫:使用router.beforeEach注册,当一个导航触发时,前置守卫就会按路由规则进行匹配调用。保证next函数能够正常运行
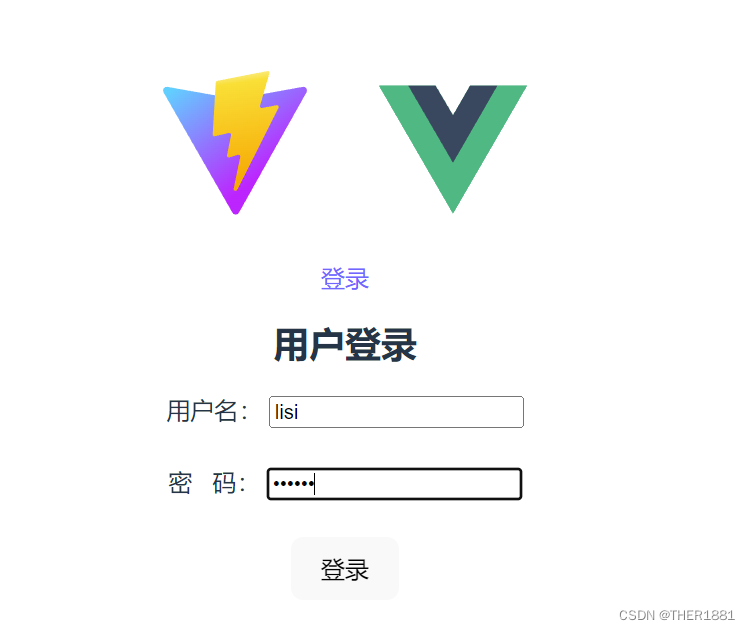
<template>
<div>
<h2>用户登录</h2>
<div>
<label>
用户名:
<input type="text" v-model.trim="username" />
</label>
<br/><br/>
<label>
密 码:
<input type="password" v-model.trim="password" />
</label>
<br/><br/>
<button type="button" @click.prevent="login">登录</button>
</div>
<h3>{{info}}</h3>
</div>
</template>
<script>
export default {
name: "Login",
data() {
return{
username: '',
password: '',
info: ''
}
},
methods:{
login(){
if("lisi"==this.username && "123456"==this.password){//合法用户将用户信息写入页面缓存中
sessionStorage.setItem("isAuth",true);
this.info="";
if(this.$route.query.redirect){ //表示合法用户请求的页面参数存在
let redirect = this.$route.query.redirect
this.$router.replace(redirect);
}else {
this.$router.replace('/home')
}
}else{
sessionStorage.setItem('isAuth',false)
this.username=''
this.password=''
this.info='用户名或密码错误'
}
}
}
}
</script>
<style scoped>
</style>
Home.vue:
<template>
<h2>我是首页</h2>
</template>

<script>
export default {
  name: "Home"
}
</script>

<style scoped>

</style>
main.js:
import { createApp } from 'vue'
import './style.css'
import App from './App.vue'
import router from './routers/index.js'
const app = createApp(App)
app.use(router)
app.mount('#app')
router.js文件:
import {createRouter,createWebHistory } from "vue-router";

import Login from "../components/Login.vue"

import Home from "../components/Home.vue"

const rs = [
    {
        path:'/home',
        name:'home',
        component:Home
    },
    {
        path:'/login',
        name:'login',
        component: Login
    }
]

const router = createRouter({
    routes:rs,
    history:createWebHistory()
})
//创建导航守卫

router.beforeEach((to,from,next)=>{
    if(to.path == '/login'){
        next();
    }else {
        if(sessionStorage.getItem('isAuth')){ //若用户已登录,则放行
        next()
        }else {
            //用户未登录,并且要访问受保护的资源,则将登录组件的地址告诉给next函数
            next({
                path:'/login',
                query:{
                    redirect:to.fullPath
                }
            })
            console.log(to.fullPath)
        }
    }
})

export default router
App.vue:
<script setup>
// This starter template is using Vue 3 <script setup> SFCs
// Check out https://vuejs.org/api/sfc-script-setup.html#script-setup
import HelloWorld from './components/HelloWorld.vue'
import Login from "./components/Login.vue";

</script>

<template>
  <div>
    <a href="https://vitejs.dev" target="_blank">
      <img src="/vite.svg" class="logo" alt="Vite logo" />
    </a>
    <a href="https://vuejs.org/" target="_blank">
      <img src="./assets/vue.svg" class="logo vue" alt="Vue logo" />
    </a>
  </div>
<router-link :to="{name:'login'}" class="login">登录</router-link>
  <router-view></router-view>
</template>

<style scoped>
.logo {
  height: 6em;
  padding: 1.5em;
  will-change: filter;
}
.logo:hover {
  filter: drop-shadow(0 0 2em #646cffaa);
}
.logo.vue:hover {
  filter: drop-shadow(0 0 2em #42b883aa);
}
</style>

当用户名和密码为空时,点击登录就会显示用户名或密码错误
当用户名和密码都输入正确后,就会出现下面的界面