MainActivity2.java
package com.example.myapplication_one;
import android.media.Image;
import android.os.Bundle;
import android.support.v7.app.AppCompatActivity;
import android.view.View;
import android.widget.Button;
import android.widget.EditText;
import android.widget.ImageView;
import android.widget.Toast;
public class MainActivity2 extends AppCompatActivity implements View.OnClickListener {
private EditText editText1;
private EditText editText2;
private Button button1, button2;
ImageView imageView1,imageView2;
@Override
protected void onCreate(Bundle savedInstanceState) {
super.onCreate(savedInstanceState);
//用于加载页面布局 R.layout.名称
setContentView(R.layout.layout2);
init();
button1.setOnClickListener(this);
button2.setOnClickListener(this);
}
private void init() {
button1 = findViewById(R.id.button1);
button2 = findViewById(R.id.button2);
editText1 = findViewById(R.id.editText1);
editText2 = findViewById(R.id.editText2);
imageView1 = findViewById(R.id.imageView1);
imageView2 = findViewById(R.id.imageView2);
}
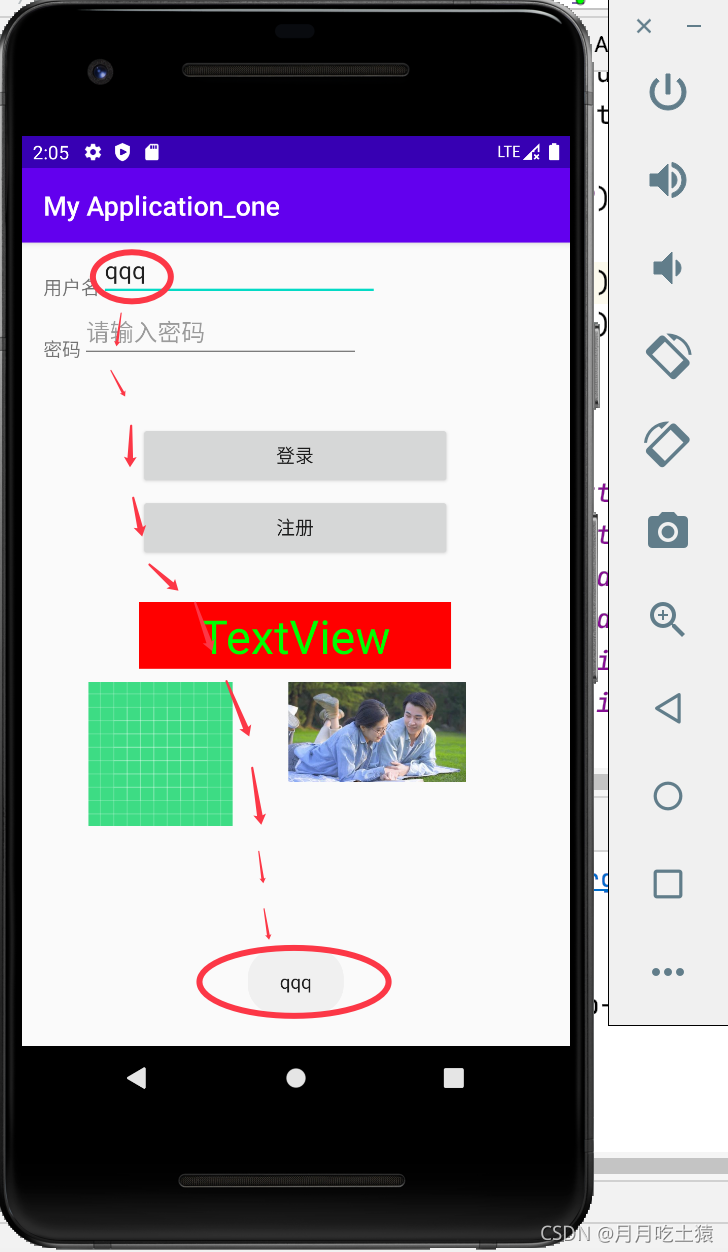
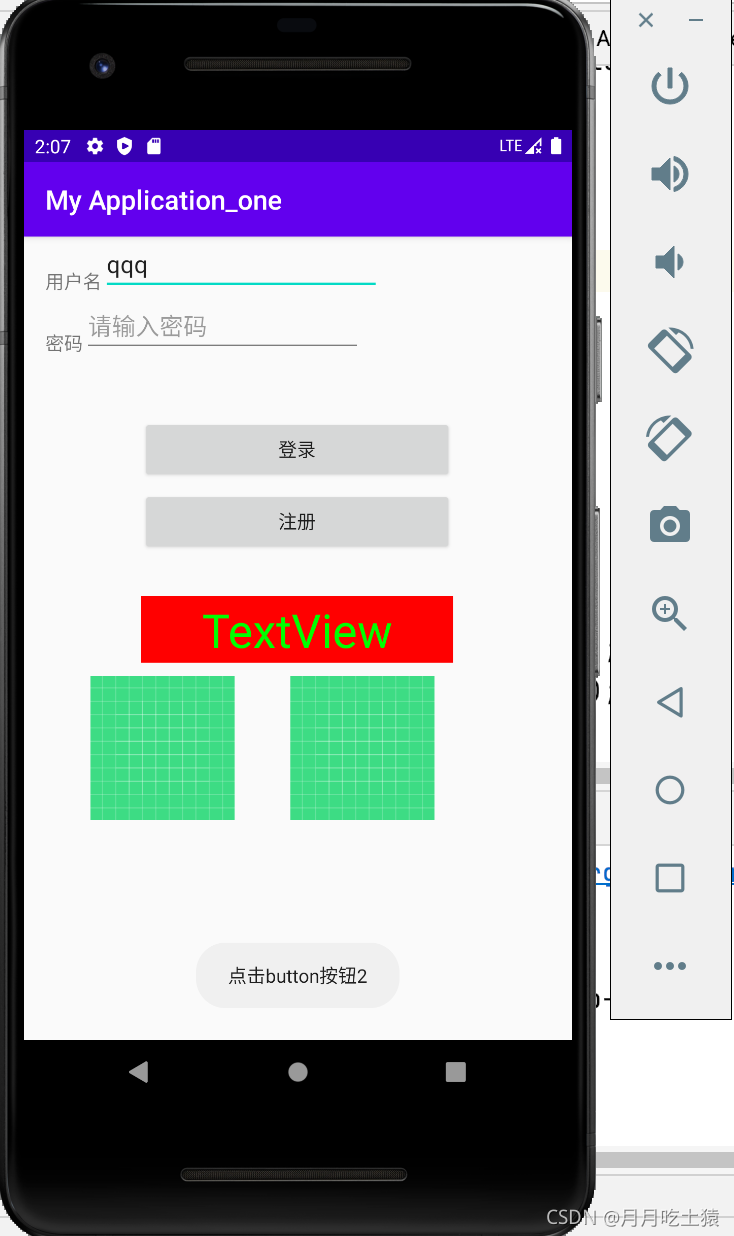
public void onClick(View view) {
switch (view.getId()) {
case R.id.button1:
//点击button1时的操作
//context:上下文,text:显示的文本的信息,duration:显示时间
String name = editText1.getText().toString();
Toast.makeText(MainActivity2.this, name, Toast.LENGTH_LONG).show();
imageView1.setImageResource(R.drawable.ic_launcher_background);
break;
case R.id.button2:
Toast.makeText(MainActivity2.this, "点击button按钮2", Toast.LENGTH_LONG).show();
imageView2.setImageResource(R.drawable.ic_launcher_background);
break;
default:
break;
}
}
}
layout2.xml
<?xml version="1.0" encoding="utf-8"?>
<RelativeLayout xmlns:android="http://schemas.android.com/apk/res/android"
    xmlns:app="http://schemas.android.com/apk/res-auto"
    xmlns:tools="http://schemas.android.com/tools"
    android:layout_width="match_parent"
    android:layout_height="match_parent">

    <TextView
        android:id="@+id/textView1"
        android:layout_width="wrap_content"
        android:layout_height="wrap_content"
        android:layout_alignParentLeft="true"
        android:layout_alignParentTop="true"
        android:layout_marginLeft="16dp"
        android:layout_marginTop="24dp"
        android:text="@string/User" />
    <EditText
        android:id="@+id/editText1"
        android:layout_width="wrap_content"
        android:layout_height="wrap_content"
        android:layout_alignBottom="@+id/textView1"
        android:layout_toRightOf="@id/textView1"
        android:hint="请输入用户名"
        android:maxLines="2"
        android:ems="10">
        <requestFocus/>
    </EditText>
    <TextView
        android:id="@+id/textView2"
        android:layout_width="wrap_content"
        android:layout_height="wrap_content"
        android:layout_alignLeft="@+id/textView1"
        android:layout_below="@+id/textView1"
        android:layout_marginTop="27dp"
        android:text="@string/Password" />
    <EditText
        android:id="@+id/editText2"
        android:layout_width="wrap_content"
        android:layout_height="wrap_content"
        android:layout_alignBottom="@+id/textView2"
        android:layout_toRightOf="@id/textView2"
        android:ems="10"
        android:hint="请输入密码"
        android:inputType="textPassword"/>

    <Button
        android:id="@+id/button1"
        android:layout_width="233dp"
        android:layout_height="wrap_content"
        android:layout_below="@+id/editText2"
        android:layout_alignParentLeft="true"
        android:layout_alignParentRight="true"
        android:layout_marginLeft="88dp"
        android:layout_marginTop="46dp"
        android:layout_marginRight="89dp"
        android:textAllCaps="true"
        android:text="登录" />

    <TextView
        android:id="@+id/textView"
        android:layout_width="wrap_content"
        android:layout_height="50dp"
        android:layout_alignParentLeft="true"
        android:layout_alignParentRight="true"
        android:layout_marginLeft="88dp"
        android:layout_marginTop="270dp"
        android:layout_marginRight="89dp"
        android:background="#ff0000"
        android:gravity="center"
        android:text="TextView"
        android:textColor="#00ff00"
        android:textSize="35sp" />

    <Button
        android:id="@+id/button2"
        android:layout_width="233dp"
        android:layout_height="wrap_content"
        android:layout_below="@+id/editText2"
        android:layout_alignParentLeft="true"
        android:layout_alignParentRight="true"
        android:layout_marginLeft="88dp"
        android:layout_marginTop="100dp"
        android:layout_marginRight="89dp"
        android:textAllCaps="true"
        android:text="注册" />

    <ImageView
        android:id="@+id/imageView1"
        android:layout_width="wrap_content"
        android:layout_height="wrap_content"
        android:layout_marginLeft="50dp"
        android:layout_marginTop="330dp"
        android:layout_marginRight="89dp"
        app:srcCompat="@mipmap/f1" />

    <ImageView
        android:id="@+id/imageView2"
        android:layout_width="wrap_content"
        android:layout_height="wrap_content"
        app:srcCompat="@mipmap/f2"
        android:layout_marginLeft="200dp"
        android:layout_marginTop="330dp"
        android:layout_marginRight="10dp"/>

</RelativeLayout>
说明:
1、 android:background="#ff0000"设置文字的背景颜色
2、android:gravity=“center"表示控件内所有部件整体的位置,注意是相对于控件本身,center就是将其组建内的文字进行了居中
android : gravity=“right/bottom” 组建右下角
3、android:textColor=”#00ff00"设置文字颜色
4、android:textSize="35sp"设置文字大小
strings.xml
<resources>
    <string name="app_name">My Application_one</string>
    <string name="User">用户名</string>
    <string name="Password">密码</string>
</resources>
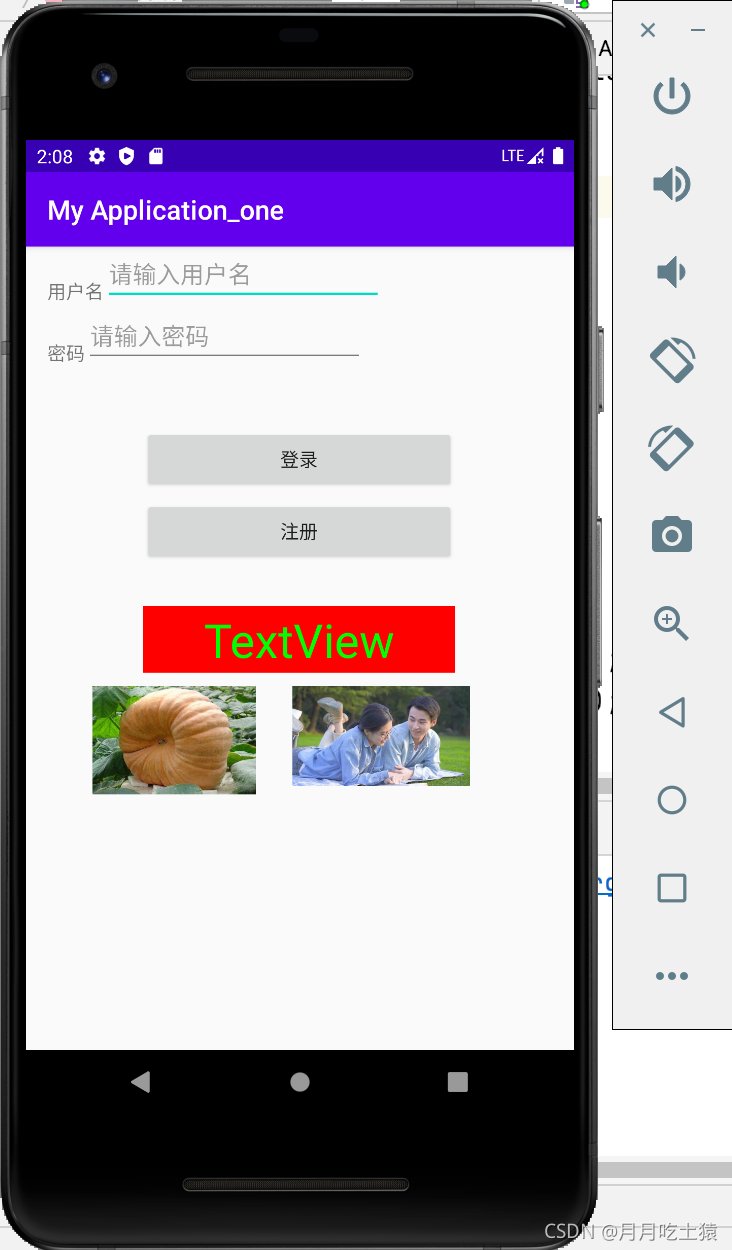
运行:
补充:
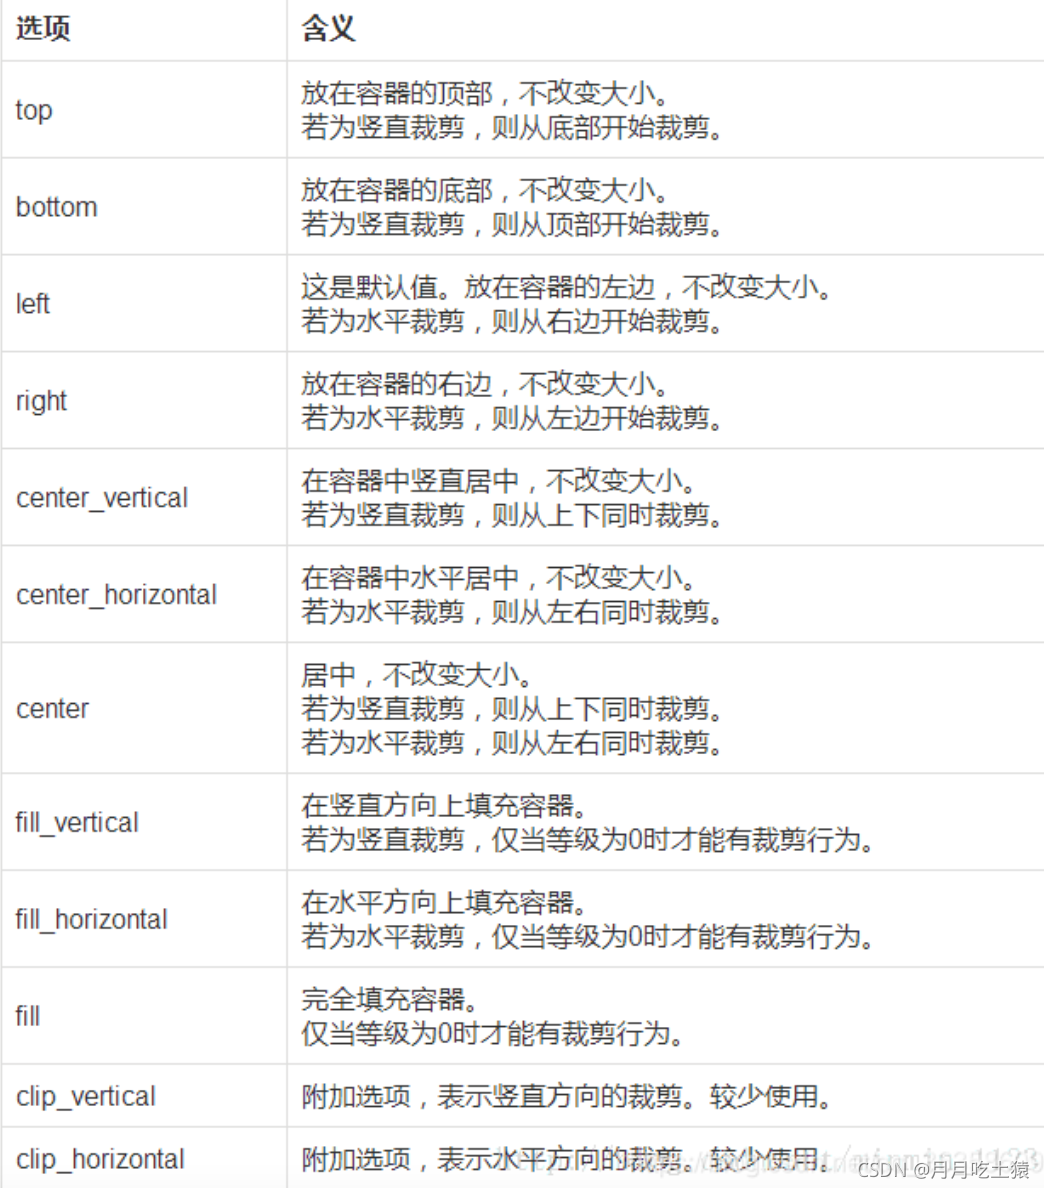
gravity属性的可选值有:
图片来自这里,请点击我