Canvas实战效果——代码雨、改变图片像素、元素拖动
摘要&概述
Canvas 是 HTML5 中新增的一个标签,用于在网页中进行图形绘制和动画渲染等操作。使用 Canvas 可以快速创建出丰富多彩的用户界面效果。
通过 Canvas,开发者可以使用 JavaScript 脚本来绘制各种图形、创建动画、渲染图片以及处理用户交互等功能。Canvas 依赖于浏览器提供的 GPU 加速技术,能够高效地进行图形处理和绘制,同时支持多种图形格式和动画效果,具有广泛的应用前景。
1、Canvas相关API操作
该文不对相关API进行说明,其中API的操作可移步到 https://www.w3school.com.cn/tags/html_ref_canvas.asp 进行查看&测试
2、使用canvas实现代码雨效果
代码雨效果,或许在刷抖音或者在一些“黑客”的桌面可以看到那种炫酷的一些“代码”滚动的效果,这个就使用canvas技术用来实现该效果
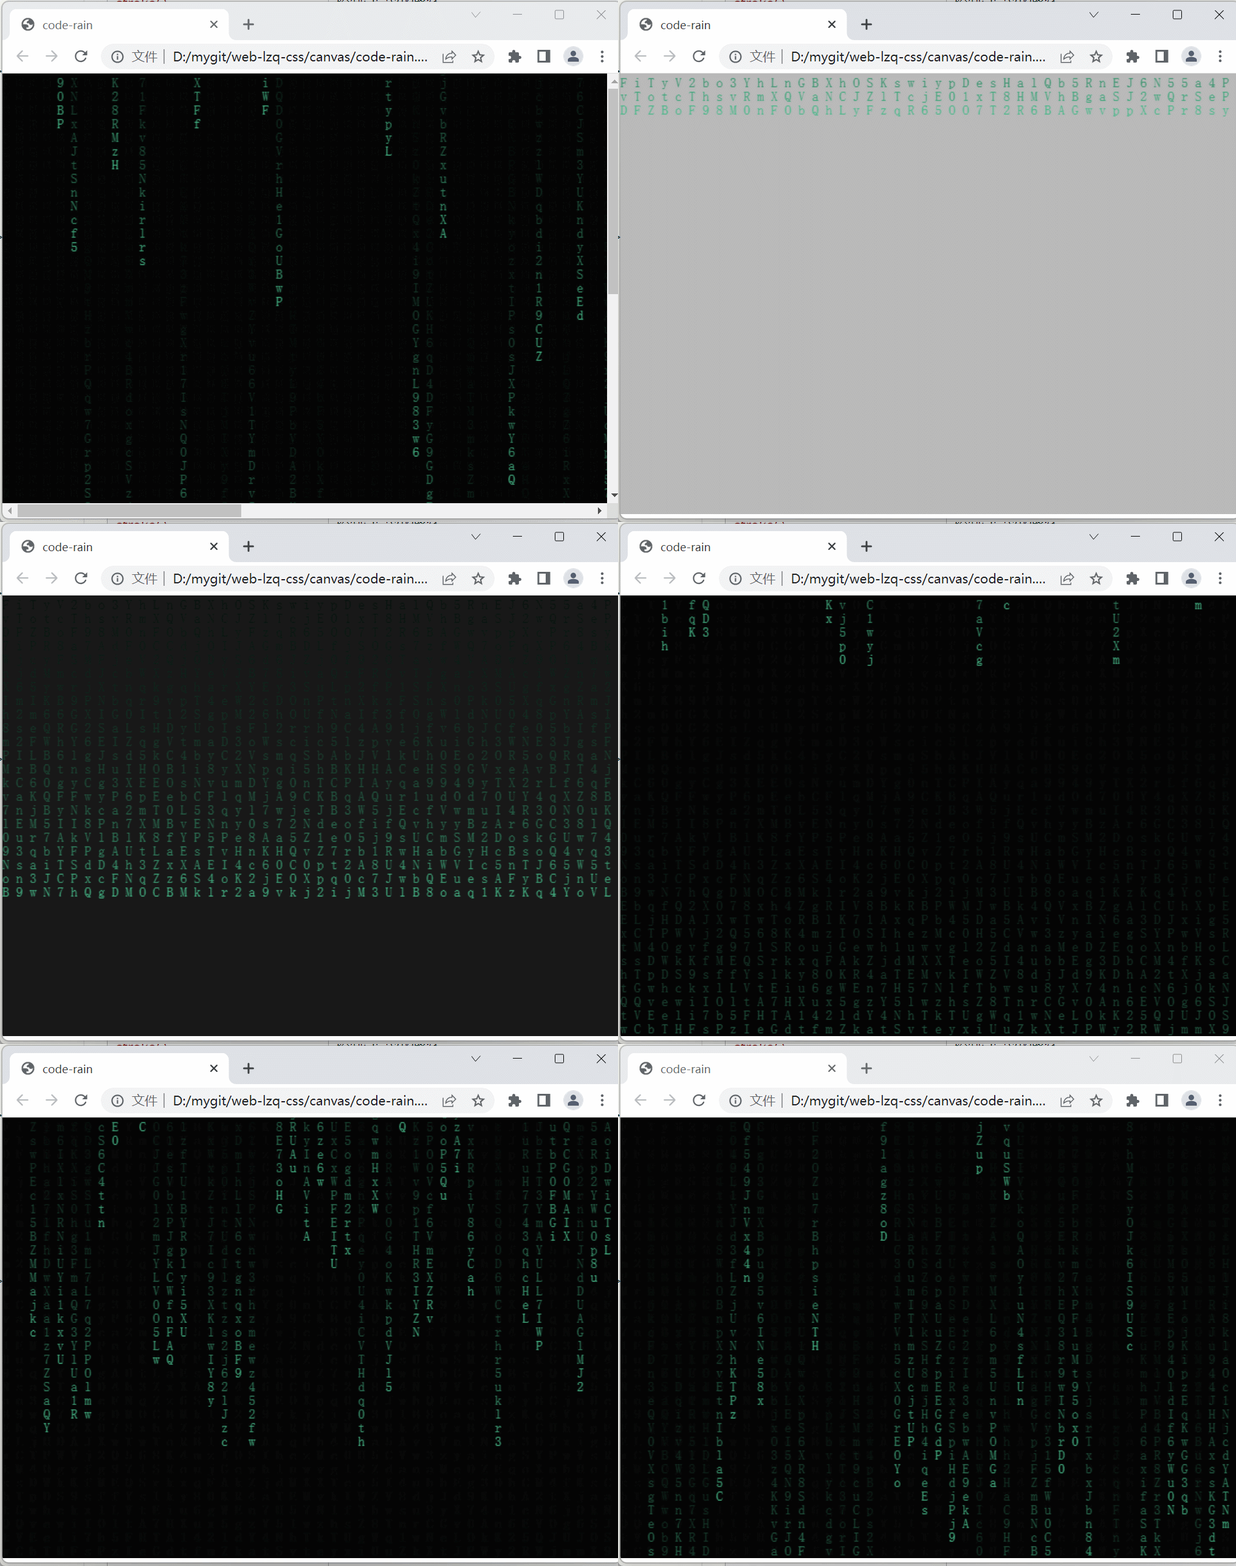
2.1、准备工作
首先我们需要定义一个canvas元素,以及初始化这个canvas画布,设置其宽高并且获取其绘制对象
<canvas id="bg"></canvas>
const bg = document.getElementById("bg")
const width = window.innerWidth - 3
const height = window.innerHeight - 5
bg.width = width
bg.height = height
const ctx = bg.getContext("2d")
2.2、绘制文字到canvas上
我们这里需要绘制的不单单是一个文字,这里的思路是绘制一行与屏幕等宽的多个文字,后面再通过多次重新渲染绘制下一行的文字,再通过给canvas重新绘制背景覆盖原有的文字
// 设置一列是多宽,15px
const colWidth = 15
// 整个屏幕宽度可以分为多少列
const colCount = Math.floor(width / colWidth)

const colNextIndex = new Array(colCount)
// 全部填充为1,表示从第一行开始
colNextIndex.fill(1)

function draw() {
	ctx.fillStyle = 'rgba(1,1,1,0.1)'
    ctx.fillRect(0, 0, width, height)
    const fz = 15
    ctx.fillStyle = '#000'
    ctx.font = `${fz}px "FangSong"`
    for (let i = 0; i < colCount; i++) {
      // 循环,按照x和y的位置绘制文字
      const x = i * colWidth
      const y = fz * colNextIndex[i]
      ctx.fillText('1', x, y)
    }
}
draw()
2.3、随机文字与随机颜色
在上面已经可以将文字绘制到canvas上面了,可以看到绘制的一直都是 黑色(#000)和 1到页面上,我们可以抽离两个方法出来,分别获取随机颜色和随机字符
function getColor() {
	const colors = ['#45b787']
	return colors[Math.floor(Math.random() * colors.length)]
}

function getFont() {
	const str = 'qwertyuioplkjhgfdsazxcvbnmQWERTYUIOPLKJHGFDSAZXCVBNM1234567890'
    return str[Math.floor(Math.random() * str.length)]
}
2.4、让字符往下运动
让字符往下,我们在前面的准备工作当中其实已经做好了,可能你并没有发现,在给colNextIndex全部填充为了1,而绘制字符的时候用到的y坐标就是取的字符大小15*这个记录的值,只需要在每一次绘制的时候将这个colNextIndex[当前列]对应的只进行累加也就实现了往下运动的效果,而当运动的高度高于了整个屏幕的高度,再将其设置为0(移动回最开始的地方)重新开始即可
if (y > height && Math.random() > 0.95) {
	colNextIndex[i] = 0
} else {
	colNextIndex[i]++
}
2.5、完整代码
<!DOCTYPE html>
<html lang="en">

<head>
  <meta charset="UTF-8" />
  <meta http-equiv="X-UA-Compatible" content="IE=edge" />
  <meta name="viewport" content="width=device-width, initial-scale=1.0" />
  <title>code-rain</title>
</head>
<style>
  html {
    width: 100%;
    height: 100%;
  }

  body {
    width: 100%;
    height: 100%;
    margin: 0;
  }
</style>

<body>
  <canvas id="bg"></canvas>
  <script>

    const bg = document.getElementById("bg")

    const width = window.innerWidth - 3
    const height = window.innerHeight - 5

    bg.width = width
    bg.height = height

    const ctx = bg.getContext("2d")
    ctx.fillStyle = 'rgba(1,1,1,0.9)'

    const colWidth = 15
    const colCount = Math.floor(width / colWidth)
    const colNextIndex = new Array(colCount)
    colNextIndex.fill(1)

    function draw() {
      ctx.fillStyle = 'rgba(1,1,1,0.1)'
      ctx.fillRect(0, 0, width, height)
      const fz = 15
      ctx.fillStyle = getColor()
      ctx.font = `${fz}px "FangSong"`
      for (let i = 0; i < colCount; i++) {
        const x = i * colWidth
        const y = fz * colNextIndex[i]
        ctx.fillText(getFont(), x, y)
        if (y > height && Math.random() > 0.95) {
          colNextIndex[i] = 0
        } else {
          colNextIndex[i]++
        }
      }
    }

    function getColor() {
      const colors = ['#45b787']
      return colors[Math.floor(Math.random() * colors.length)]
    }

    function getFont() {
      const str = 'qwertyuioplkjhgfdsazxcvbnmQWERTYUIOPLKJHGFDSAZXCVBNM1234567890'
      return str[Math.floor(Math.random() * str.length)]
    }

    draw()
    setInterval(draw, 40);
  </script>
</body>

</html>
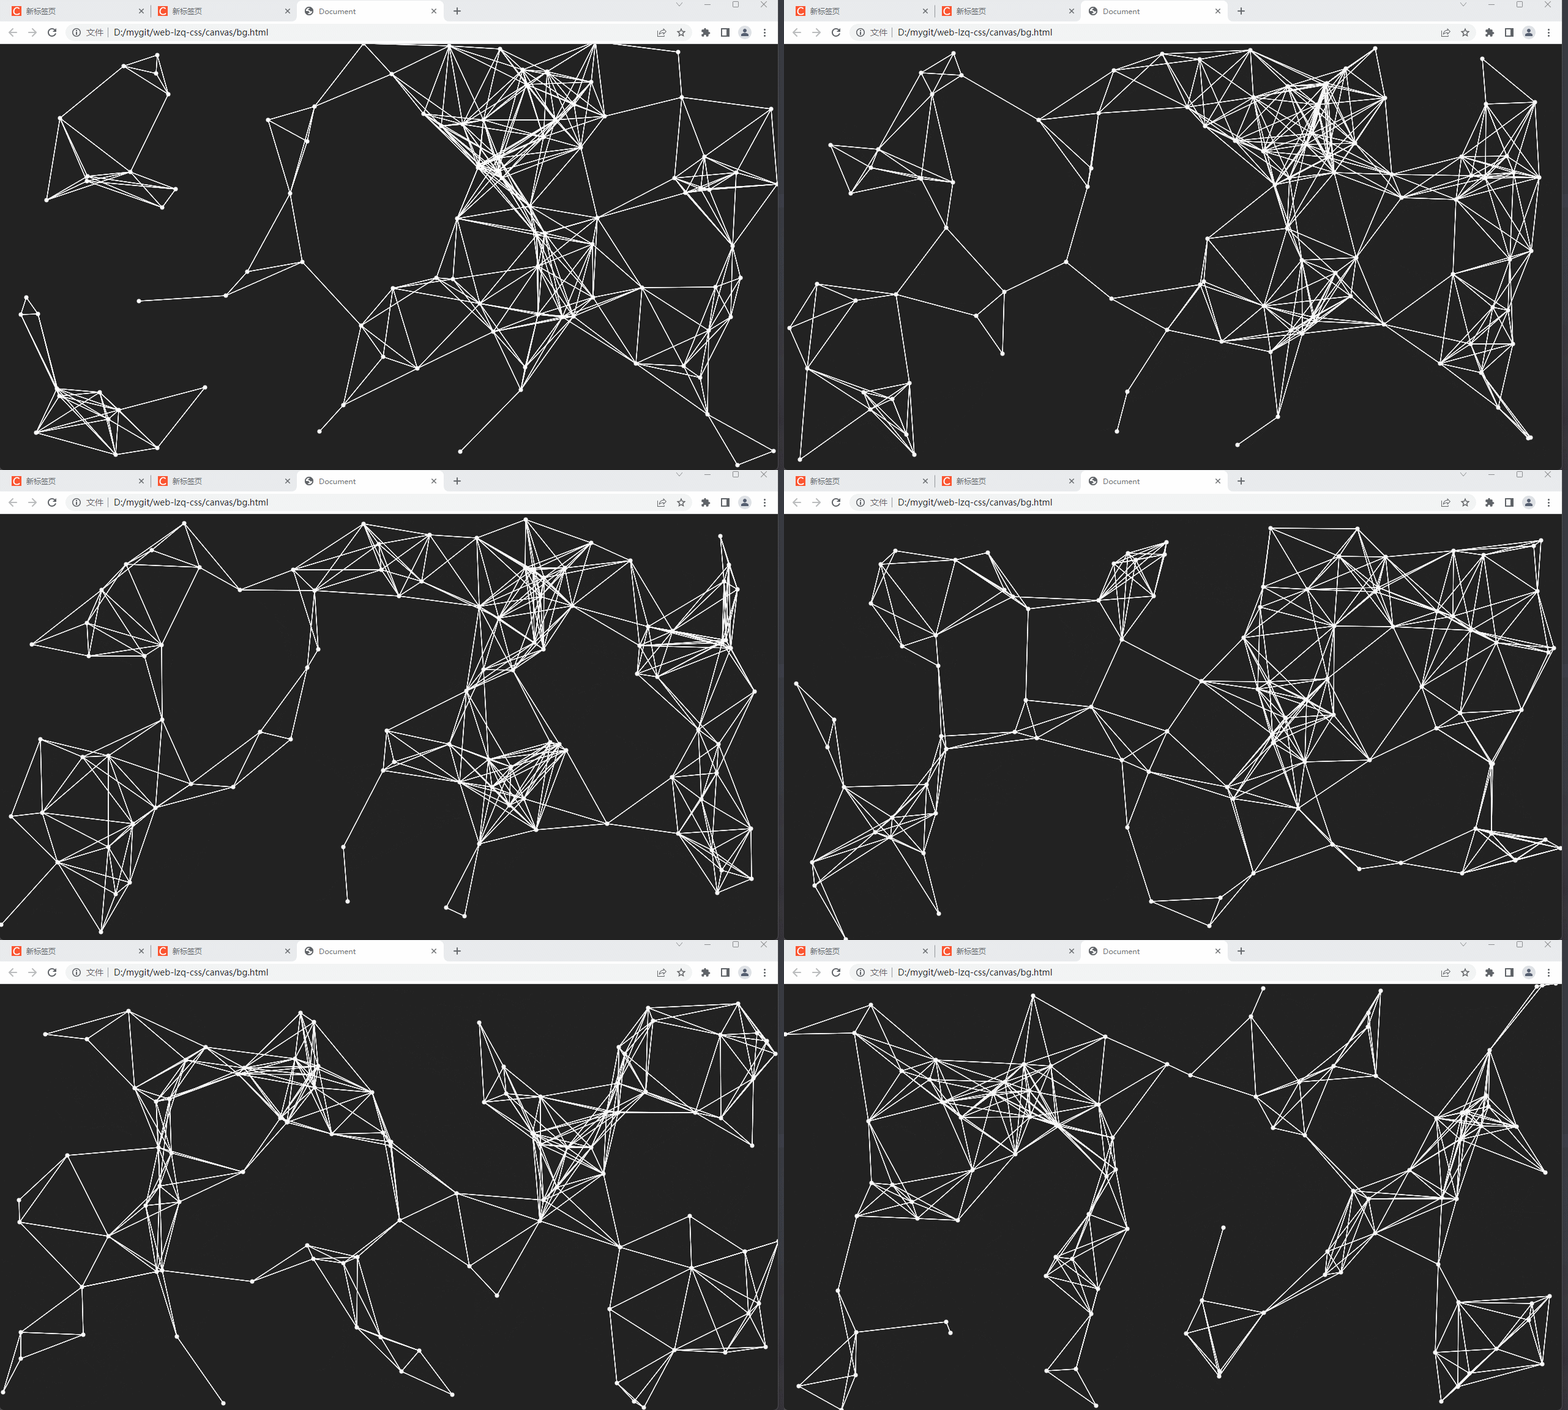
3、无规则运动小球背景
第二点是通过绘制文字实现的一种效果,这个就是通过绘制点和线实现的效果,
3.1、准备工作
和上一个案例一样,获取canvas对象设置宽高
const canvas = document.querySelector('canvas')
canvas.width = window.innerWidth * devicePixelRatio
canvas.height = window.innerHeight * devicePixelRatio
const ctx = canvas.getContext('2d')
3.2、绘制点&线
绘制点和线的相关代码还是比较简单的,这个在w3c上面可以自己试一下,
    function draw() {
        ctx.beginPath()
        ctx.moveTo(100, 50)
        ctx.lineTo(200, 100)
        ctx.closePath()
        ctx.strokeStyle = '#fff'
        ctx.stroke()

        ctx.beginPath()
        ctx.arc(100, 50, 3, 0, 2 * Math.PI)
        ctx.stroke()
    }
3.3、封装点对象
更重要的是我们可以将点对象抽离出来,单独定义为一个类,这里使用到了面向对象的思想,如果你了解java,会更熟悉面向对象,点对象需要xy坐标,以及其横纵移动的速度这里使用spandX、spandY表示。并且提供一个绘制点的方法draw。
    class Point {
        constructor(x, y, spandX, spandY) {
            this.x = x;
            this.y = y;
            this.spandX = spandX;
            this.spandY = spandY;
        }
        draw() {
            ctx.beginPath()
            ctx.arc(this.x * devicePixelRatio, this.y * devicePixelRatio, 3, 0, 2 * Math.PI)
            ctx.strokeStyle = '#fff'
            ctx.fillStyle = '#fff'
            ctx.stroke()
            ctx.fill()
        }
    }
3.4、绘制点和线到canvas上&运动
这里还是通过requestAnimationFrame帧率绘制实现,每一次绘制都需要先将canvas画布清空,第一次绘制时随机生成100个点,再通过双重for循环将100*100的线和点绘制到canvas上,这里也加了一个判断就是只有当两个点的直线距离小于150时才会绘制线,而后续第二次第三次也只是对这100个点进行移动,再重新对点的距离计算判断是否显示。
    var count = 0
    const points = []
    function drawGraph() {
        ctx.clearRect(0, 0, window.innerWidth, window.innerHeight)
        if (count === 0) {
            for (let i = 0; i < 100; i++) {
                const p = new Point(getRodom(window.innerWidth), getRodom(window.innerHeight), getRodom(10), getRodom(10))
                points.push(p)
            }
        } else {
            points.forEach(item => {
                item.x += item.spandX
                item.y += item.spandY
                if (item.x > window.innerWidth) {
                    item.spandX = -item.spandX
                }

                if (item.x < 0) {
                    item.spandX = -item.spandX
                }

                if (item.y > window.innerHeight) {
                    item.spandY = -item.spandY
                }

                if (item.y < 0) {
                    item.spandY = -item.spandY
                }
            })
        }

        points.forEach(item => {
            item.draw(item.x, item.y)
            points.forEach(node => {
                const d = Math.sqrt((node.x - item.x) ** 2 + (node.y - item.y) ** 2)
                console.log(d)
                if (d < 150) {
                    drawLine(item.x, item.y, node.x, node.y)
                }
            })
        })
        count++;
        requestAnimationFrame(drawGraph)
    }
3.5、完整代码
<!DOCTYPE html>
<html lang="en">

<head>
    <meta charset="UTF-8">
    <meta http-equiv="X-UA-Compatible" content="IE=edge">
    <meta name="viewport" content="width=device-width, initial-scale=1.0">
    <title>Document</title>
</head>
<style>
    canvas {
        position: fixed;
        left: 0;
        top: 0;
        background: #222;
    }
</style>

<body>
    <canvas></canvas>
</body>
<script>
    const canvas = document.querySelector('canvas')
    const ctx = canvas.getContext('2d')
    var count = 0

    function init() {
        canvas.width = window.innerWidth * devicePixelRatio
        canvas.height = window.innerHeight * devicePixelRatio
    }

    function getRodom(max) {
        return Math.floor(Math.random() * max) - 5
    }

    class Point {
        constructor(x, y, spandX, spandY) {
            this.x = x;
            this.y = y;
            this.spandX = spandX;
            this.spandY = spandY;
        }
        draw() {
            // console.log('draw', this.x, this.y)
            ctx.beginPath()
            ctx.arc(this.x * devicePixelRatio, this.y * devicePixelRatio, 3, 0, 2 * Math.PI)
            ctx.strokeStyle = '#fff'
            ctx.fillStyle = '#fff'
            ctx.stroke()
            ctx.fill()
        }
    }

    function drawLine(startX, startY, targetX, targetY) {
        ctx.beginPath()
        ctx.moveTo(startX * devicePixelRatio, startY * devicePixelRatio)
        ctx.lineTo(targetX * devicePixelRatio, targetY * devicePixelRatio)
        ctx.closePath()
        ctx.strokeStyle = '#fff'
        ctx.stroke()
    }

    function draw() {
        ctx.beginPath()
        ctx.moveTo(100, 50)
        ctx.lineTo(200, 100)
        ctx.closePath()
        ctx.strokeStyle = '#fff'
        ctx.stroke()

        ctx.beginPath()
        ctx.arc(100, 50, 3, 0, 2 * Math.PI)
        ctx.stroke()
    }

    init()

    const points = []
    function drawGraph() {
        ctx.clearRect(0, 0, window.innerWidth, window.innerHeight)
        if (count === 0) {
            for (let i = 0; i < 100; i++) {
                const p = new Point(getRodom(window.innerWidth), getRodom(window.innerHeight), getRodom(10), getRodom(10))
                points.push(p)
            }
        } else {
            points.forEach(item => {
                item.x += item.spandX
                item.y += item.spandY
                if (item.x > window.innerWidth) {
                    item.spandX = -item.spandX
                }

                if (item.x < 0) {
                    item.spandX = -item.spandX
                }

                if (item.y > window.innerHeight) {
                    item.spandY = -item.spandY
                }

                if (item.y < 0) {
                    item.spandY = -item.spandY
                }
            })
        }

        points.forEach(item => {
            item.draw(item.x, item.y)
            points.forEach(node => {
                const d = Math.sqrt((node.x - item.x) ** 2 + (node.y - item.y) ** 2)
                console.log(d)
                if (d < 150) {
                    drawLine(item.x, item.y, node.x, node.y)
                }
            })
        })
        count++;
        requestAnimationFrame(drawGraph)
    }

    drawGraph()

</script>

</html>
4、改变图片像素
当看到一个效果就是点击一张图片的某一个点的时候,会将该点周围的颜色都进行改变,这个想一下怎么实现是不是一头雾水,这个案例将通过canvas来进行实现
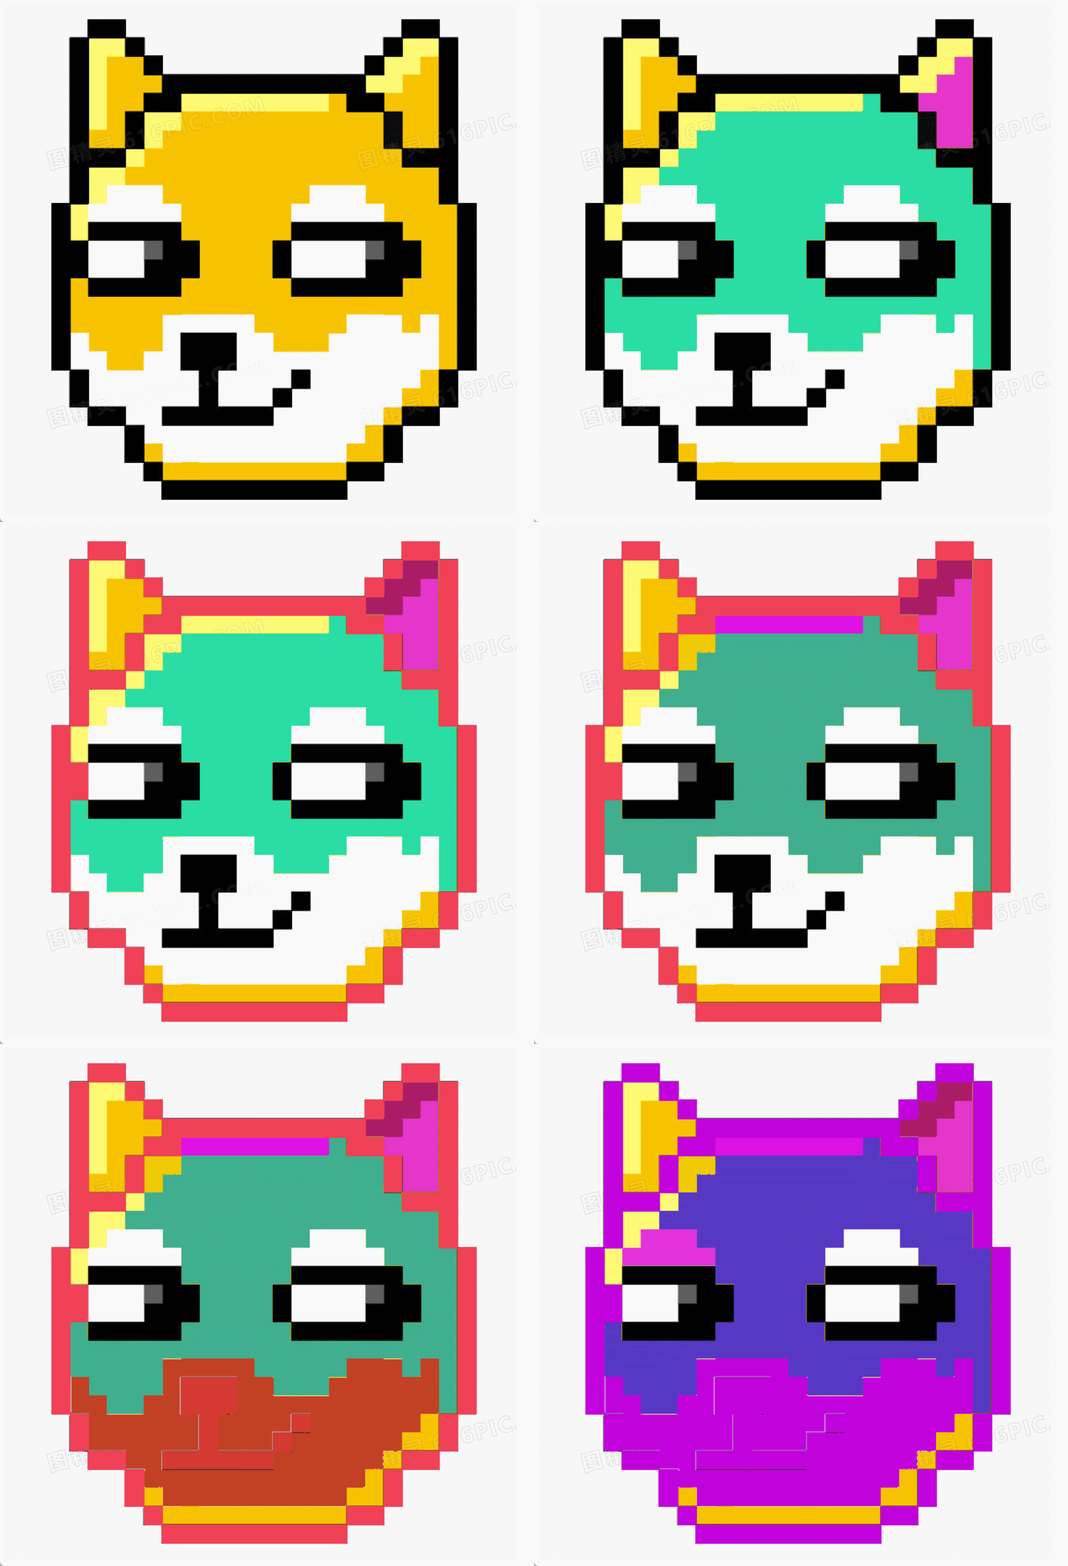
4.1、准备工作
还是一样获取canvas的上下文,不过这里我们使用canvas将一张图片绘制到页面上,willReadFrequently 是传递给 canvas.getContext() 方法的配置对象中的一个选项。当您将其设置为 true 时,表示告诉浏览器,该绘图上下文(ctx)将频繁读取并更新,因此在内部优化方面可以采取一些措施,以提高性能。
    const cvs = document.querySelector('canvas')
    const ctx = cvs.getContext('2d', {
        willReadFrequently: true
    })
    let greenColor = [0, 255, 0, 255]

    function init() {
        const img = new Image()
        img.onload = () => {
            cvs.width = img.width
            cvs.height = img.height
            ctx.drawImage(img, 0, 0)
        }
        img.src = './dog.jpg'
    }

    init()
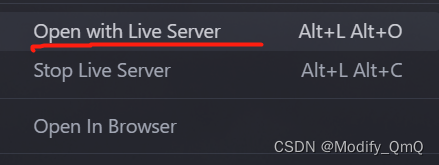
这里需要注意的是,需要在一个服务器上运行(也就是像vue或者react等等服务启动会给一个开放端口访问),这里使用的html的话,可以在vscode安装一个插件 Live Server ,而打开html的时候不再选择浏览器打开,而是使用这个插件打开
4.2、监听单击事件
监听单击事件完整代码
	cvs.addEventListener('click', (e) => {
        const x = e.offsetX, y = e.offsetY;
        const imgData = ctx.getImageData(0, 0, cvs.width, cvs.height)
        const clickColor = getColor(x, y, imgData)
        function changeColor(x, y) {
            if (x < 0 || x >= cvs.width || y < 0 || y >= cvs.height) {
                return
            }
            const i = pointIndex(x, y)
            const color = getColor(x, y, imgData)
            if (diffColor(color, clickColor) > 100) {
                return
            }
            if (diffColor(color, greenColor) === 0) {
                return
            }
            imgData.data.set(greenColor, i)
            changeColor(x + 1, y);
            changeColor(x - 1, y);
            changeColor(x, y + 1);
            changeColor(x, y - 1);
        }
        changeColor(x, y);
        ctx.putImageData(imgData, 0, 0)
    })
4.2.1、获取单击点颜色
这里通过ctx.getImageData(0, 0, cvs.width, cvs.height)可以获取到当前canvas对象的所有像素点的颜色信息,它返回的是一个数组,每四个元素为一组,分别对应的是rgba
并且封装两个方法用来获取鼠标点击点的颜色信息
    function pointIndex(x, y) {
        return (y * cvs.width + x) * 4
    }

    function getColor(x, y, imgData) {
        const i = pointIndex(x, y)
        return [
            imgData.data[i],
            imgData.data[i + 1],
            imgData.data[i + 2],
            imgData.data[i + 3],
        ]
    }
4.2.2、改变像素颜色
greenColor变量原本定义的是一个绿色值,这里通过changeColor方法进行递归,以当前点往四周进行分散的效果,再通过diffColor方法,将相邻颜色与点击的颜色进行对比,用来判断是否进行进行像素颜色覆盖,最后通过imgData.data.set(greenColor, i)改变当前像素的颜色,由于前面获取的canvas绘制上下文设置了willReadFrequently,在canvas的像素被改变后,页面也会重新更新
    function diffColor(color1, color2) {
        return (
            Math.abs(color1[0] - color2[0]) +
            Math.abs(color1[1] - color2[1]) +
            Math.abs(color1[2] - color2[2]) +
            Math.abs(color1[3] - color2[3])
        )
    }
4.3、优化
在这里,我们改变四周的像素点颜色的时候是通过递归的方式。但是使用递归的方式,如果递归的次数过多就会导致栈溢出的情况,这这里,由于改变的是像素点,当当前存在一整块相同的颜色时,递归的次数会很大,也就会导致栈溢出的情况,这里优化一下,通过队列的方式来进行“往四周分散改变像素颜色”
        function changeColor(x, y) {
            const queue = [];
            queue.push([x, y]); // 将当前点入队列

            while (queue.length > 0) { // 判断队列是否为空
                const [currX, currY] = queue.shift(); // 取出队首元素

                if (currX < 0 || currX >= cvs.width || currY < 0 || currY >= cvs.height) {
                    continue; // 越界,处理下一个元素
                }

                const i = pointIndex(currX, currY);
                const color = getColor(currX, currY, imgData);

                if (diffColor(color, clickColor) > 100) {
                    continue; // 颜色差异过大,处理下一个元素
                }

                if (diffColor(color, randomColor) === 0) {
                    continue; // 已经是目标颜色了,处理下一个元素
                }

                imgData.data.set(randomColor, i); // 设置为绿色

                // 将上、下、左、右四个方向的点入队列
                queue.push([currX + 1, currY]);
                queue.push([currX - 1, currY]);
                queue.push([currX, currY + 1]);
                queue.push([currX, currY - 1]);
            }
        }
4.4、完整代码
<!DOCTYPE html>
<html lang="en">

<head>
    <meta charset="UTF-8">
    <meta http-equiv="X-UA-Compatible" content="IE=edge">
    <meta name="viewport" content="width=device-width, initial-scale=1.0">
    <title>Document</title>
</head>

<body>
    <canvas></canvas>
</body>
<script>
    const cvs = document.querySelector('canvas')
    const ctx = cvs.getContext('2d', {
        willReadFrequently: true
    })
    let randomColor = [0, 255, 0, 255]

    function init() {
        const img = new Image()
        img.onload = () => {
            cvs.width = img.width
            cvs.height = img.height
            ctx.drawImage(img, 0, 0)
        }
        img.src = './dog.jpg'
    }

    init()

    cvs.addEventListener('click', (e) => {
        const x = e.offsetX, y = e.offsetY;
        const imgData = ctx.getImageData(0, 0, cvs.width, cvs.height)
        const clickColor = getColor(x, y, imgData)
        randomColor = [Math.floor(Math.random() * 250), Math.floor(Math.random() * 250), Math.floor(Math.random() * 250), 255]
        // function changeColor(x, y) {
        //     if (x < 0 || x >= cvs.width || y < 0 || y >= cvs.height) {
        //         return
        //     }
        //     const i = pointIndex(x, y)
        //     const color = getColor(x, y, imgData)
        //     if (diffColor(color, clickColor) > 100) {
        //         return
        //     }
        //     if (diffColor(color, randomColor) === 0) {
        //         return
        //     }
        //     imgData.data.set(randomColor, i)
        //     changeColor(x + 1, y);
        //     changeColor(x - 1, y);
        //     changeColor(x, y + 1);
        //     changeColor(x, y - 1);
        // }
        // 通过队列对递归进行优化
        function changeColor(x, y) {
            const queue = [];
            queue.push([x, y]); // 将当前点入队列

            while (queue.length > 0) { // 判断队列是否为空
                const [currX, currY] = queue.shift(); // 取出队首元素

                if (currX < 0 || currX >= cvs.width || currY < 0 || currY >= cvs.height) {
                    continue; // 越界,处理下一个元素
                }

                const i = pointIndex(currX, currY);
                const color = getColor(currX, currY, imgData);

                if (diffColor(color, clickColor) > 100) {
                    continue; // 颜色差异过大,处理下一个元素
                }

                if (diffColor(color, randomColor) === 0) {
                    continue; // 已经是目标颜色了,处理下一个元素
                }

                imgData.data.set(randomColor, i); // 设置为绿色

                // 将上、下、左、右四个方向的点入队列
                queue.push([currX + 1, currY]);
                queue.push([currX - 1, currY]);
                queue.push([currX, currY + 1]);
                queue.push([currX, currY - 1]);
            }
        }
        changeColor(x, y);
        ctx.putImageData(imgData, 0, 0)
    })

    function pointIndex(x, y) {
        return (y * cvs.width + x) * 4
    }

    function getColor(x, y, imgData) {
        const i = pointIndex(x, y)
        return [
            imgData.data[i],
            imgData.data[i + 1],
            imgData.data[i + 2],
            imgData.data[i + 3],
        ]
    }

    function diffColor(color1, color2) {
        return (
            Math.abs(color1[0] - color2[0]) +
            Math.abs(color1[1] - color2[1]) +
            Math.abs(color1[2] - color2[2]) +
            Math.abs(color1[3] - color2[3])
        )
    }
</script>

</html>
5、元素拖拽效果
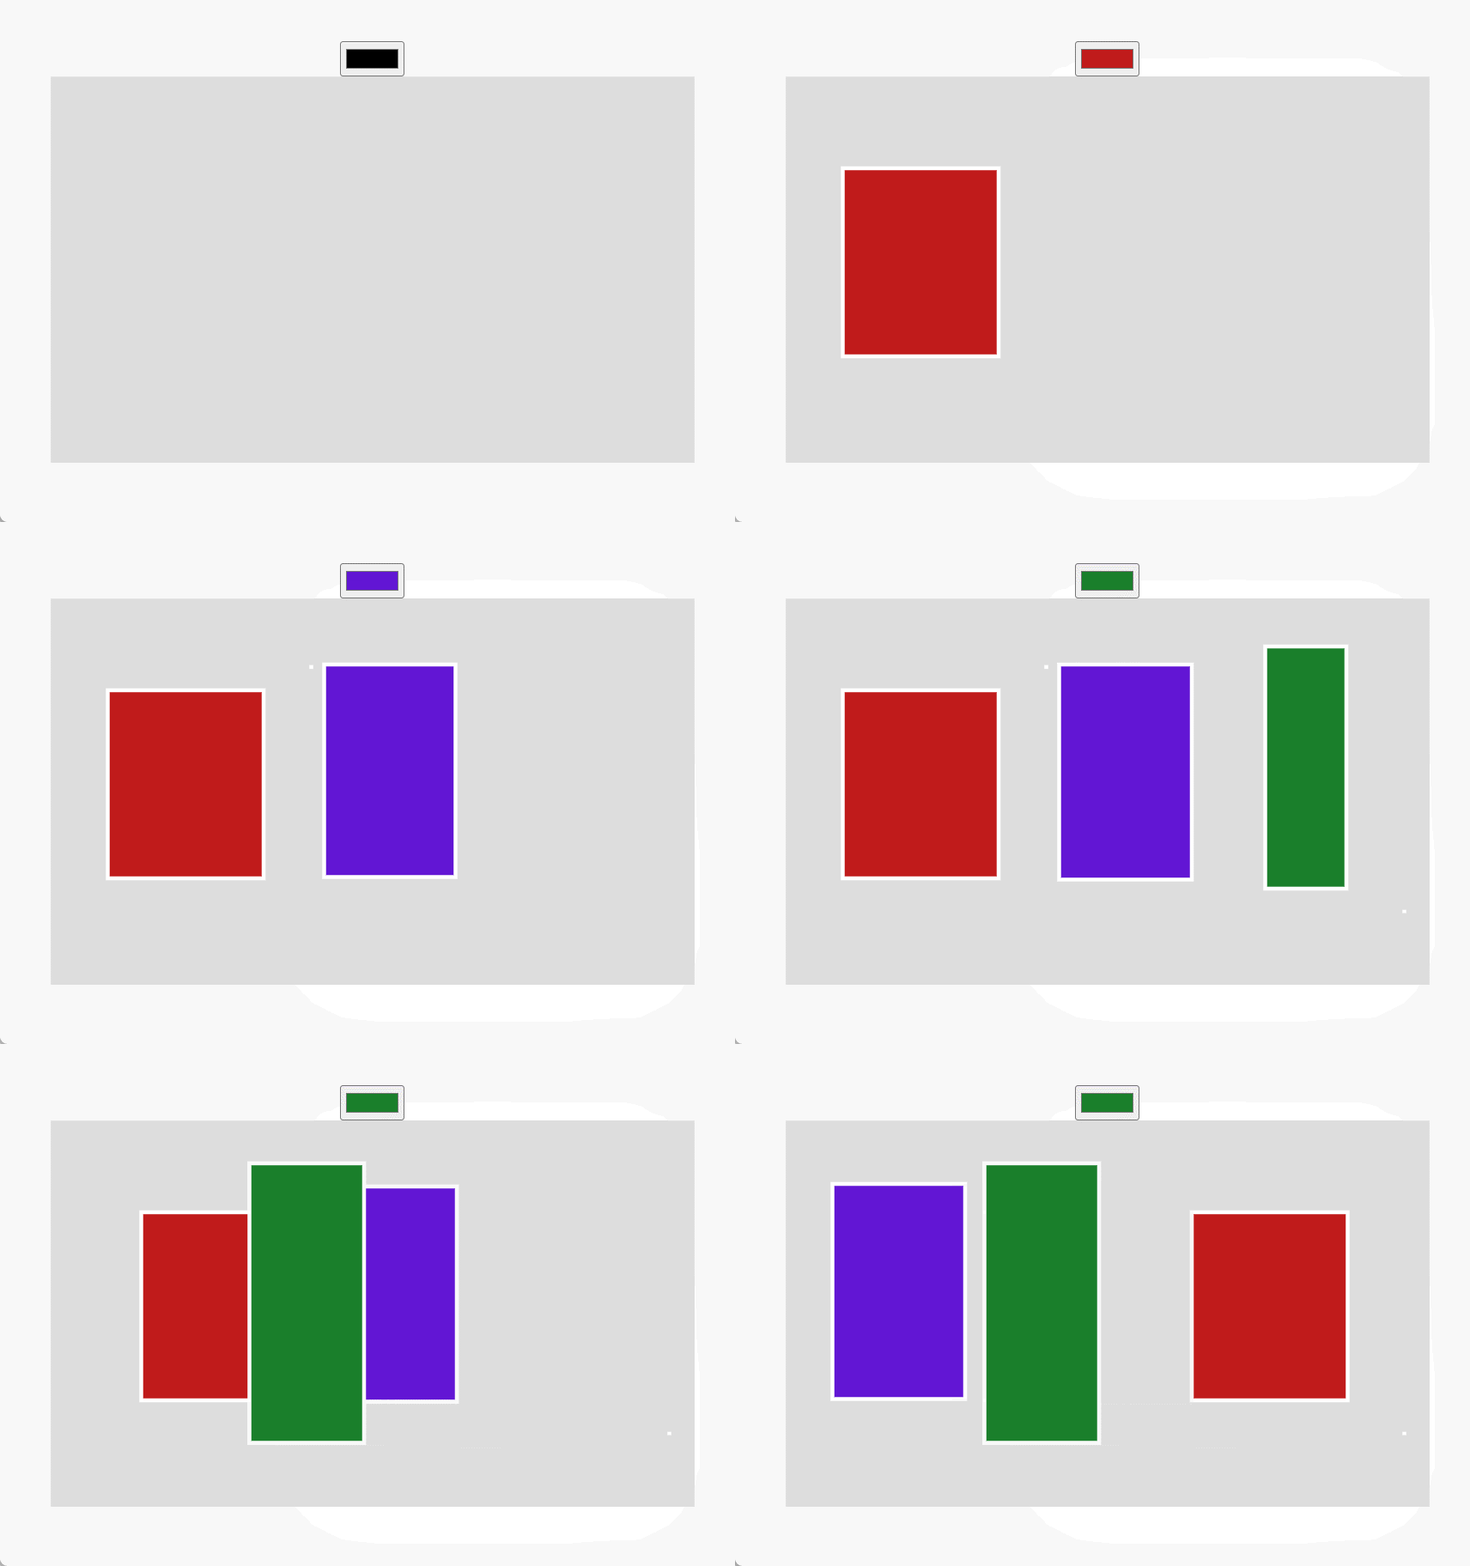
5.1、准备工作
这个效果用来实现,当未选择绘制的图形的时候就重新绘制,而选择了绘制了的图形就会拖动这个图形
    const colorPocker = document.querySelector('input')
    const canvas = document.querySelector('canvas')
    const ctx = canvas.getContext('2d')

    const shapes = []

    function initCanvas() {
        const w = 500, h = 300
        canvas.width = w * devicePixelRatio
        canvas.height = h * devicePixelRatio

        canvas.style.width = w + 'px'
        canvas.style.height = h + 'px'
        canvas.style.color = '#000'
    }
5.2、实例化正方形对象
这里用最简单的长方形进行说明,这里只需要得到开始点的XY坐标,而后再等待鼠标事件之后再获取最后得到的XY坐标就可以得到一个长方形的四个点即可进行绘制了,并且封装了一个方法isInside用来判断传入的XY是否在当前这个长方形当中
    class rectangle {
        constructor(color, startX, startY) {
            this.color = color
            this.startX = startX
            this.startY = startY
            this.endX = startX
            this.endY = startY
        }

        get minX() {
            return Math.min(this.startX, this.endX)
        }

        get maxX() {
            return Math.max(this.startX, this.endX)
        }

        get minY() {
            return Math.min(this.startY, this.endY)
        }

        get maxY() {
            return Math.max(this.startY, this.endY)
        }

        draw() {
            ctx.beginPath()
            ctx.moveTo(this.minX * devicePixelRatio, this.minY * devicePixelRatio)
            ctx.lineTo(this.maxX * devicePixelRatio, this.minY * devicePixelRatio)
            ctx.lineTo(this.maxX * devicePixelRatio, this.maxY * devicePixelRatio)
            ctx.lineTo(this.minX * devicePixelRatio, this.maxY * devicePixelRatio)
            ctx.lineTo(this.minX * devicePixelRatio, this.minY * devicePixelRatio)
            ctx.fillStyle = this.color
            ctx.fill()
            ctx.strokeStyle = '#fff'
            ctx.lineCap = 'square'
            ctx.lineWidth = 3 * devicePixelRatio
            ctx.stroke()
        }

        isInside(x, y) {
            return (x >= this.minX && x <= this.maxX && y >= this.minY && y <= this.maxY)
        }
    }
5.3、鼠标事件
新增canvas对象的监听事件,对当前鼠标按下时的XY坐标,判断这个点是否再已绘制的图形当中存在,如果存在则进行移动这个图形,不存在则绘制这个图形。
    canvas.onmousedown = (e) => {
        const rect = canvas.getBoundingClientRect()
        const clickX = e.clientX - rect.left
        const clickY = e.clientY - rect.top
        const shape = getShape(clickX, clickY)
        if (shape) {
            // 拖动
            const { startX, startY, endX, endY } = shape
            console.log(shape, startX, startY, endX, endY)
            window.onmousemove = (e) => {
                const disX = e.clientX - rect.left - clickX
                const disY = e.clientY - rect.top - clickY
                console.log(disX, disY)
                shape.startX = startX + disX
                shape.endX = endX + disX
                shape.startY = startY + disY
                shape.endY = endY + disY
                console.log(shape)
            }
        } else {
            // 新增
            const shape = new rectangle(colorPocker.value, clickX, clickY)
            shapes.push(shape)
            window.onmousemove = (e) => {
                shape.endX = e.clientX - rect.left
                shape.endY = e.clientY - rect.top
            }

        }

        window.onmouseup = (e) => {
            window.onmousemove = null
            window.onmouseup = null
        }
    }

    // 判断当前鼠标位置是否是选中已存在的图形(从后往前遍历,优先选择后面绘制的)
    function getShape(x, y) {
        for (let i = shapes.length - 1; i >= 0; i--) {
            const shape = shapes[i]
            if (shape.isInside(x, y)) {
                return shape
            }
        }
        return null
    }
5.4、进行绘制与回退
因为这里所有绘制的图形都是一个单独的对象,所有的对象都保存在shapes数组当中,当键盘出发了Ctrl+Z进行触发回退事件,直接删去数组的最后一个元素即可,而绘制其余图形也是相同的道理,只需要创建不同的对象即可
    function draw() {
        ctx.clearRect(0, 0, canvas.width, canvas.height)
        shapes.forEach(item => {
            item.draw()
        })
        requestAnimationFrame(draw)
    }

    document.addEventListener('keydown', function (event) {
        // 判断是否按下了 ctrl+z 组合键
        if (event.ctrlKey && event.keyCode === 90) {
            console.log('执行了 Undo 操作');
            shapes.pop()
        }
    });

    draw()
5.5、完整代码
<!DOCTYPE html>
<html lang="en">

<head>
    <meta charset="UTF-8">
    <meta http-equiv="X-UA-Compatible" content="IE=edge">
    <meta name="viewport" content="width=device-width, initial-scale=1.0">
    <title>drag</title>
</head>
<style>
    body {
        margin-top: 10%;
        text-align: center;
    }

    canvas {
        left: 0;
        top: 0;
        background: #ddd;
    }
</style>

<body>
    <div>
        <input type="color"></input>
    </div>
    <canvas></canvas>
</body>
<script>
    const colorPocker = document.querySelector('input')
    const canvas = document.querySelector('canvas')
    const ctx = canvas.getContext('2d')

    const shapes = []

    function initCanvas() {
        const w = 500, h = 300
        canvas.width = w * devicePixelRatio
        canvas.height = h * devicePixelRatio

        canvas.style.width = w + 'px'
        canvas.style.height = h + 'px'
        canvas.style.color = '#000'
    }

    class rectangle {
        constructor(color, startX, startY) {
            this.color = color
            this.startX = startX
            this.startY = startY
            this.endX = startX
            this.endY = startY
        }

        get minX() {
            return Math.min(this.startX, this.endX)
        }

        get maxX() {
            return Math.max(this.startX, this.endX)
        }

        get minY() {
            return Math.min(this.startY, this.endY)
        }

        get maxY() {
            return Math.max(this.startY, this.endY)
        }

        draw() {
            ctx.beginPath()
            ctx.moveTo(this.minX * devicePixelRatio, this.minY * devicePixelRatio)
            ctx.lineTo(this.maxX * devicePixelRatio, this.minY * devicePixelRatio)
            ctx.lineTo(this.maxX * devicePixelRatio, this.maxY * devicePixelRatio)
            ctx.lineTo(this.minX * devicePixelRatio, this.maxY * devicePixelRatio)
            ctx.lineTo(this.minX * devicePixelRatio, this.minY * devicePixelRatio)
            ctx.fillStyle = this.color
            ctx.fill()
            ctx.strokeStyle = '#fff'
            ctx.lineCap = 'square'
            ctx.lineWidth = 3 * devicePixelRatio
            ctx.stroke()
        }

        isInside(x, y) {
            return (x >= this.minX && x <= this.maxX && y >= this.minY && y <= this.maxY)
        }
    }

    initCanvas()

    // const rect = new rectangle('#a33', 0, 0)
    // rect.endX = 200
    // rect.endY = 300
    // rect.draw()

    canvas.onmousedown = (e) => {
        const rect = canvas.getBoundingClientRect()
        const clickX = e.clientX - rect.left
        const clickY = e.clientY - rect.top
        const shape = getShape(clickX, clickY)
        if (shape) {
            // 拖动
            const { startX, startY, endX, endY } = shape
            console.log(shape, startX, startY, endX, endY)
            window.onmousemove = (e) => {
                const disX = e.clientX - rect.left - clickX
                const disY = e.clientY - rect.top - clickY
                console.log(disX, disY)
                shape.startX = startX + disX
                shape.endX = endX + disX
                shape.startY = startY + disY
                shape.endY = endY + disY
                console.log(shape)
            }
        } else {
            // 新增
            const shape = new rectangle(colorPocker.value, clickX, clickY)
            shapes.push(shape)
            window.onmousemove = (e) => {
                shape.endX = e.clientX - rect.left
                shape.endY = e.clientY - rect.top
            }

        }

        window.onmouseup = (e) => {
            window.onmousemove = null
            window.onmouseup = null
        }
    }

    // 判断当前鼠标位置是否是选中已存在的图形(从后往前遍历,优先选择后面绘制的)
    function getShape(x, y) {
        for (let i = shapes.length - 1; i >= 0; i--) {
            const shape = shapes[i]
            if (shape.isInside(x, y)) {
                return shape
            }
        }
        return null
    }

    // 优化空间:当进行了鼠标操作事件是才调用重绘
    function draw() {
        ctx.clearRect(0, 0, canvas.width, canvas.height)
        shapes.forEach(item => {
            item.draw()
        })
        requestAnimationFrame(draw)
    }

    document.addEventListener('keydown', function (event) {
        // 判断是否按下了 ctrl+z 组合键
        if (event.ctrlKey && event.keyCode === 90) {
            console.log('执行了 Undo 操作');
            shapes.pop()
        }
    });

    draw()
</script>

</html>