环境准备
Linux系统:CentOS 7.x(阿里云服务器)
RabbitMQ安装:直接安装到服务器上
(RabbitMQ安装:通过docker安装,选择其中一种环境安装即可)
集成开发环境:IntelliJ IDEA
端口开放:15672(ui页面通信口)、5672(client端通信口)、25672(server间内部通信口)
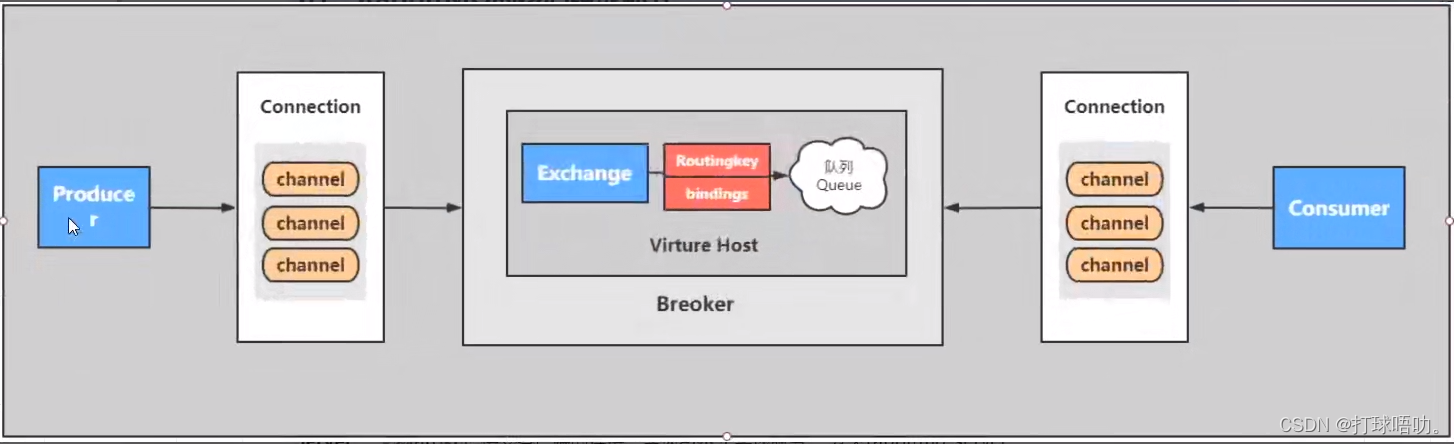
原理
生产者传送消息给消费者。生产者需通过RabbitMQ的交换机(Exchange)进行传递,消费者需要通过队列(Queue)进行接收消息,而交换机与队列在RabbitMQ组件(Broker)中进行关系绑定。
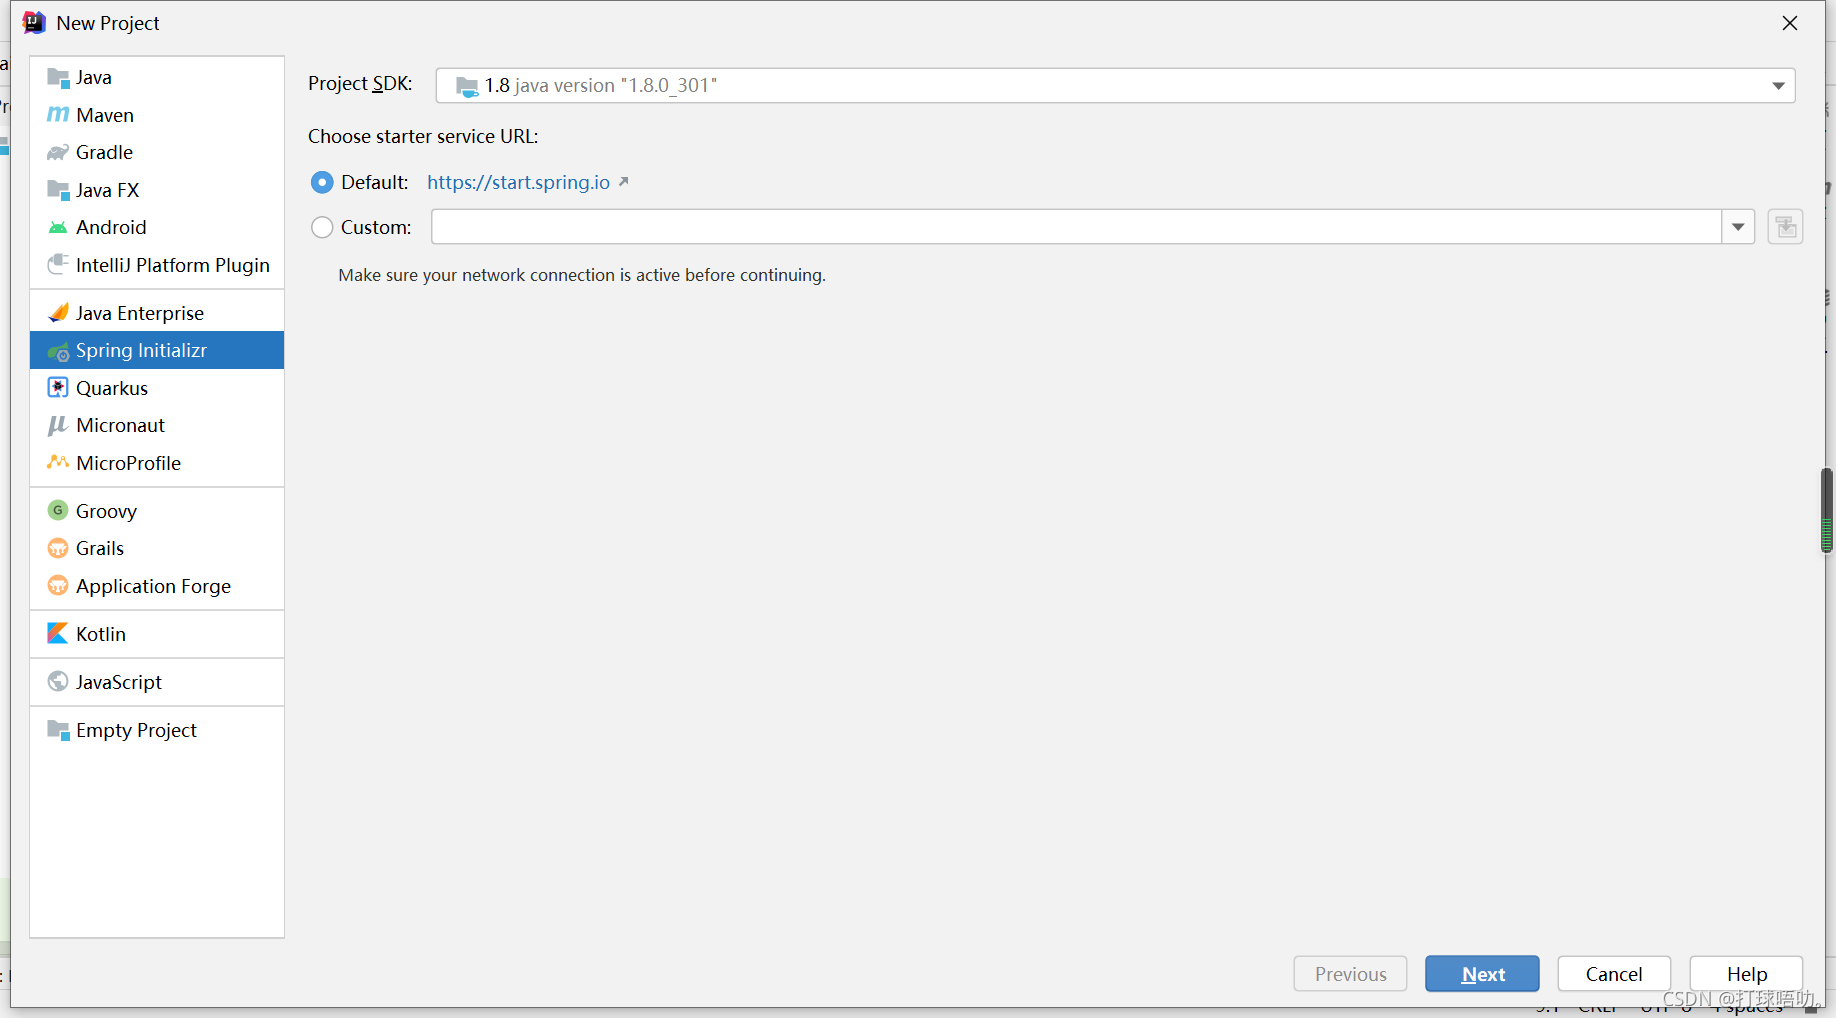
1、新建springboot项目
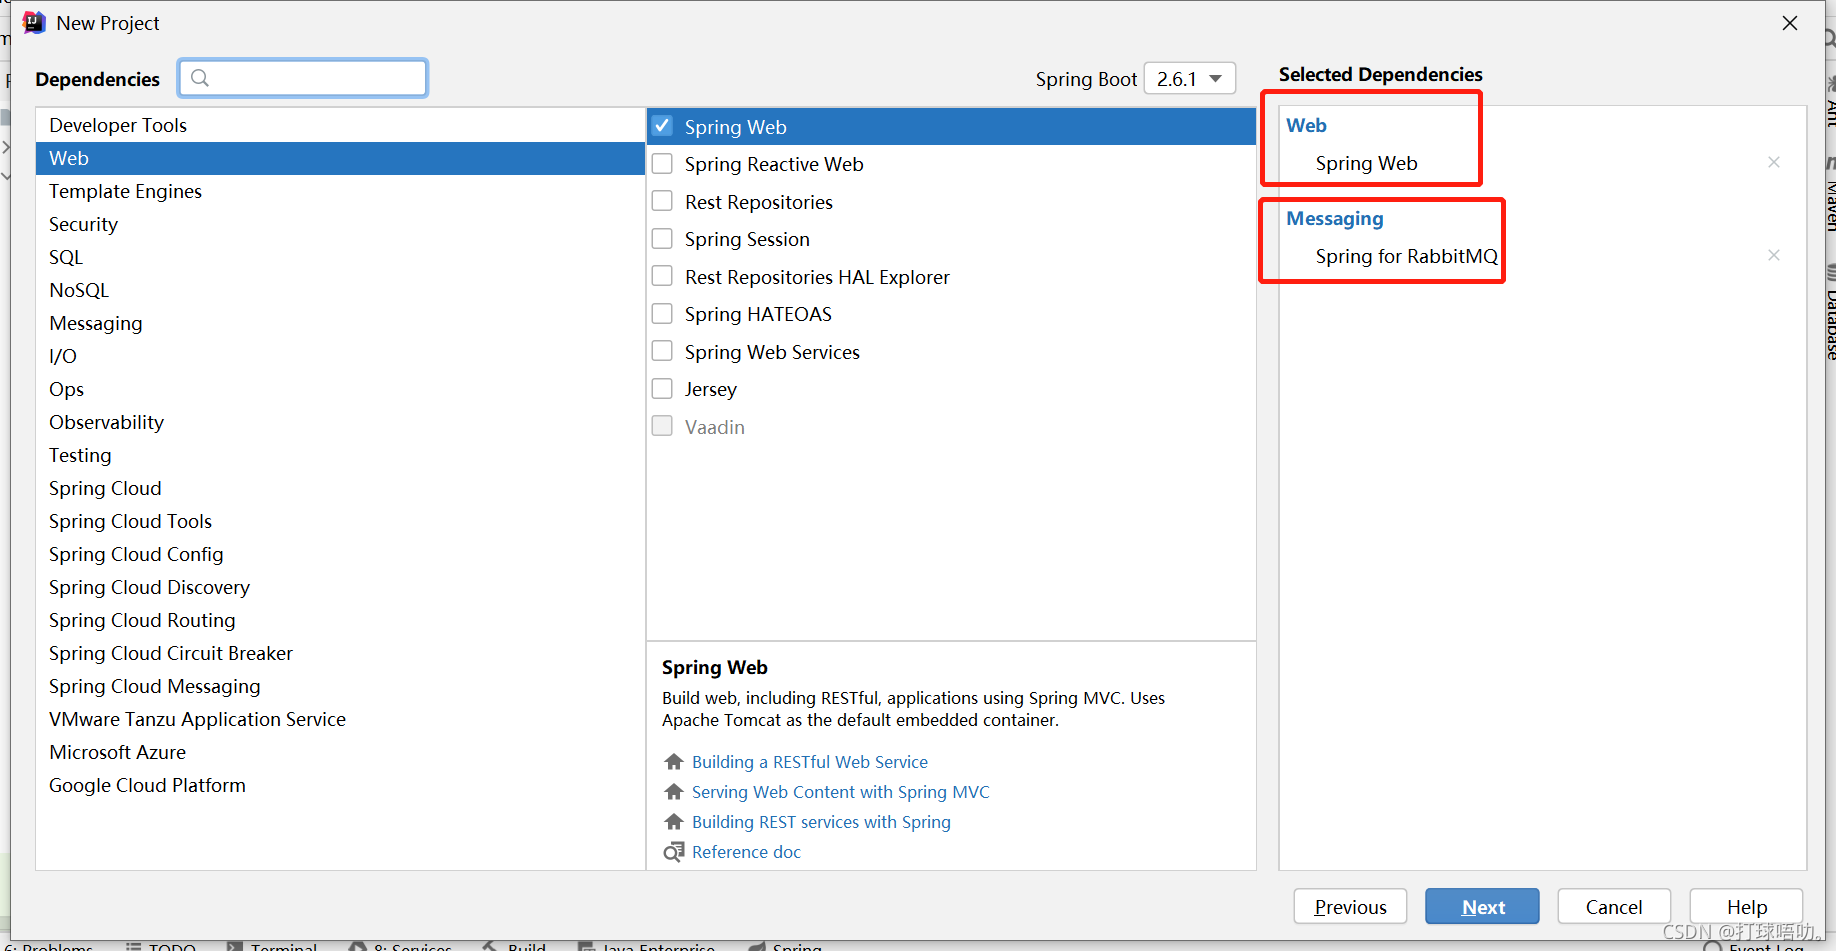
2、导入依赖并建好项目目录
pom.xml中导入以下依赖。
  <!--rabbitmq starter 依赖-->
        <dependency>
            <groupId>org.springframework.boot</groupId>
            <artifactId>spring-boot-starter-amqp</artifactId>
        </dependency>
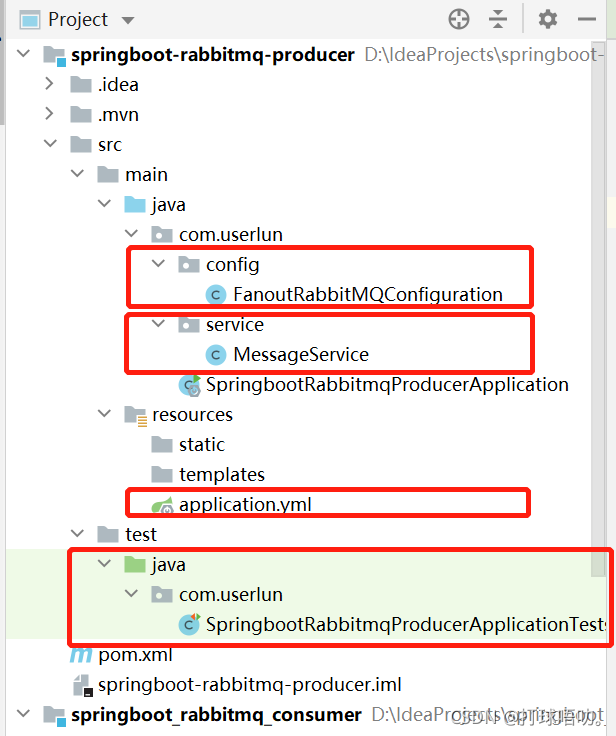
生产者目录结构:
消费者目录结构
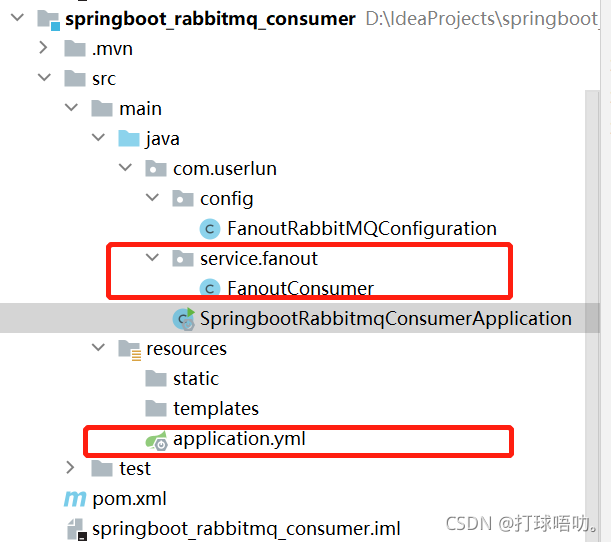
3、逻辑代码
生产者:
将配置文件application. properties删除,并新建application.yml,将文件中的host字段填写自己服务器上的公网IP地址。注意将生产者的端口(8080)和消费者的端口(8081)区分开来。
application.yml:
# 服务端口
server:
  port: 8080
# 配置rabbitmq服务
spring:
	rabbitmq:
		username: admin
		password: admin
		virtual-host: /
		host: 127.0.0.1
		port: 5672
配置类FanoutRabbitMQConfiguration.java放在生产者目录或是消费者目录都是可以,保险些可以两边都存放该配置类文件。该.java文件用作声明交换机、声明队列、并绑定两者关系。
FanoutRabbitMQConfiguration.java:
import org.springframework.amqp.core.Binding;
import org.springframework.amqp.core.BindingBuilder;
import org.springframework.amqp.core.FanoutExchange;
import org.springframework.amqp.core.Queue;
import org.springframework.context.annotation.Bean;
import org.springframework.context.annotation.Configuration;
@Configuration
public class FanoutRabbitMQConfiguration {
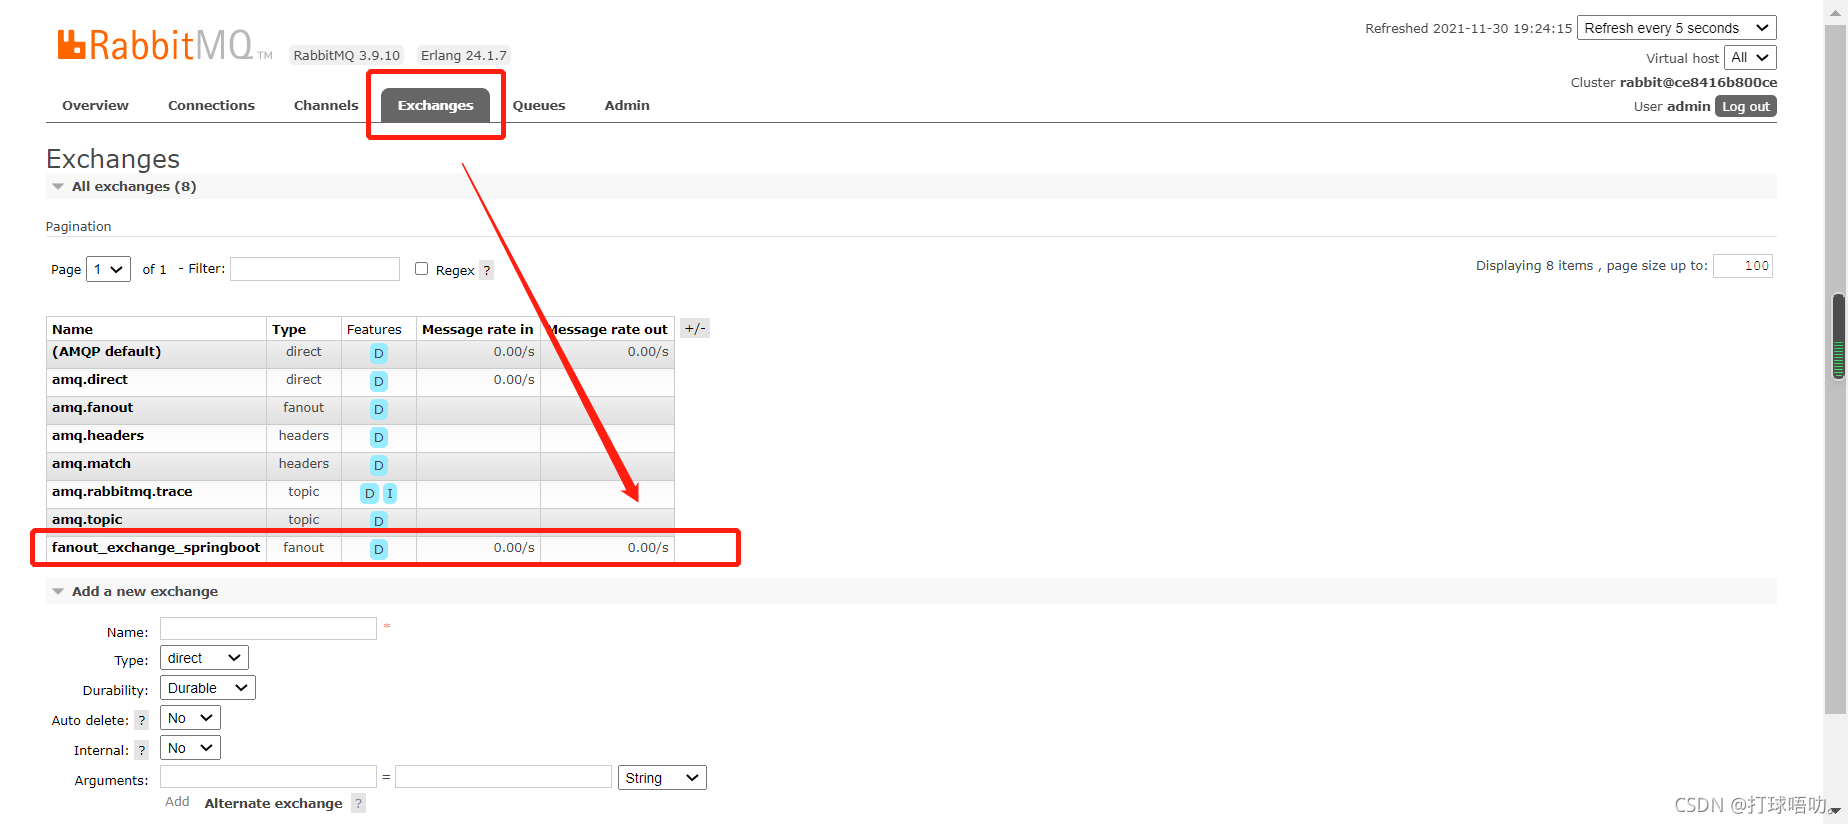
// 1、声明交换机 fanout模式即发布订阅模式
//参数:(交换机名称,是否持久化,是否自动删除)
@Bean
public FanoutExchange fanoutExchange() {
return new FanoutExchange("fanout_exchange_springboot", true, false);
}
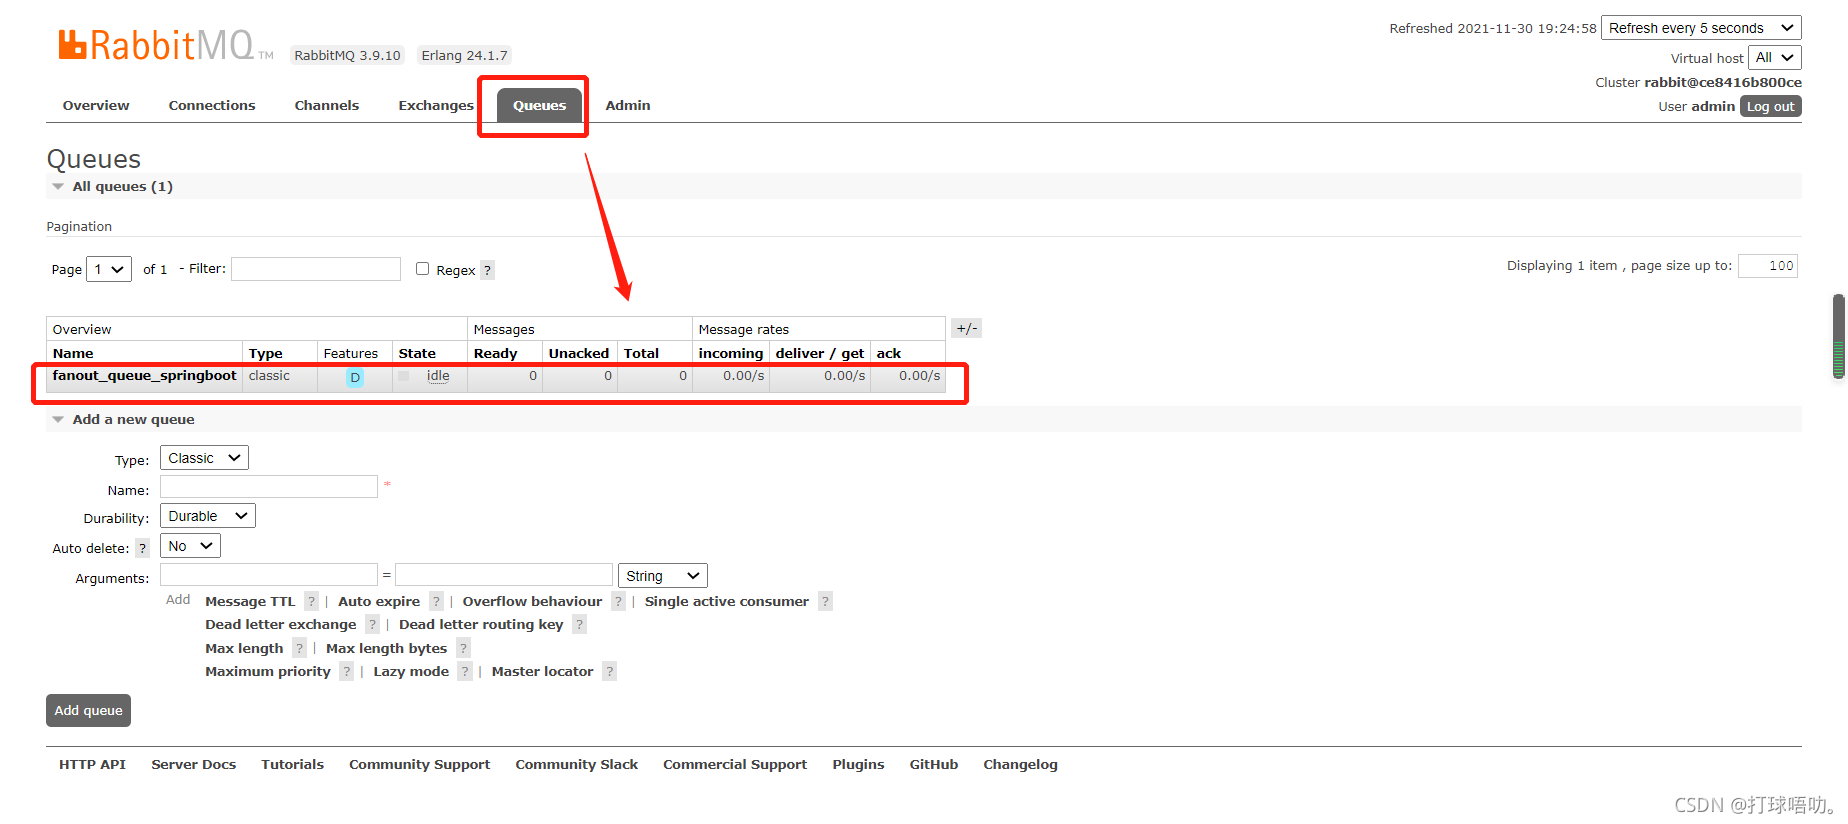
// 2、声明队列 fanout_queue_springbot
//参数:(队列名称,是否持久化)
@Bean
public Queue fanoutQueue() {
return new Queue("fanout_queue_springboot", true);
}
// 3、将交换机与队列进行绑定
@Bean
public Binding bindduanxin(){
return BindingBuilder.bind(fanoutQueue()).to(fanoutExchange());
}
}
MessageService.java用作发送消息。
MessageService.java:
import org.springframework.amqp.AmqpException;
import org.springframework.amqp.core.Message;
import org.springframework.amqp.core.MessagePostProcessor;
import org.springframework.amqp.rabbit.core.RabbitTemplate;
import org.springframework.beans.factory.annotation.Autowired;
import org.springframework.stereotype.Service;

import java.util.UUID;

@Service
public class MessageService {

    @Autowired
    private RabbitTemplate rabbitTemplate;//rabbitmq模板对象

    // 交换机
    private String exchangeName = "fanout_exchange_springboot";
    // 路由key,发布订阅fanout模式下路由为空
    private String routingKey = "";

    public void sendMessage(){
        //随机信息  ranMessage
        String ranMessage = UUID.randomUUID().toString();
        System.out.println("交换机发送的消息为:" + ranMessage);
        // 发送消息
        rabbitTemplate.convertAndSend(exchangeName,routingKey,ranMessage);
    }

}
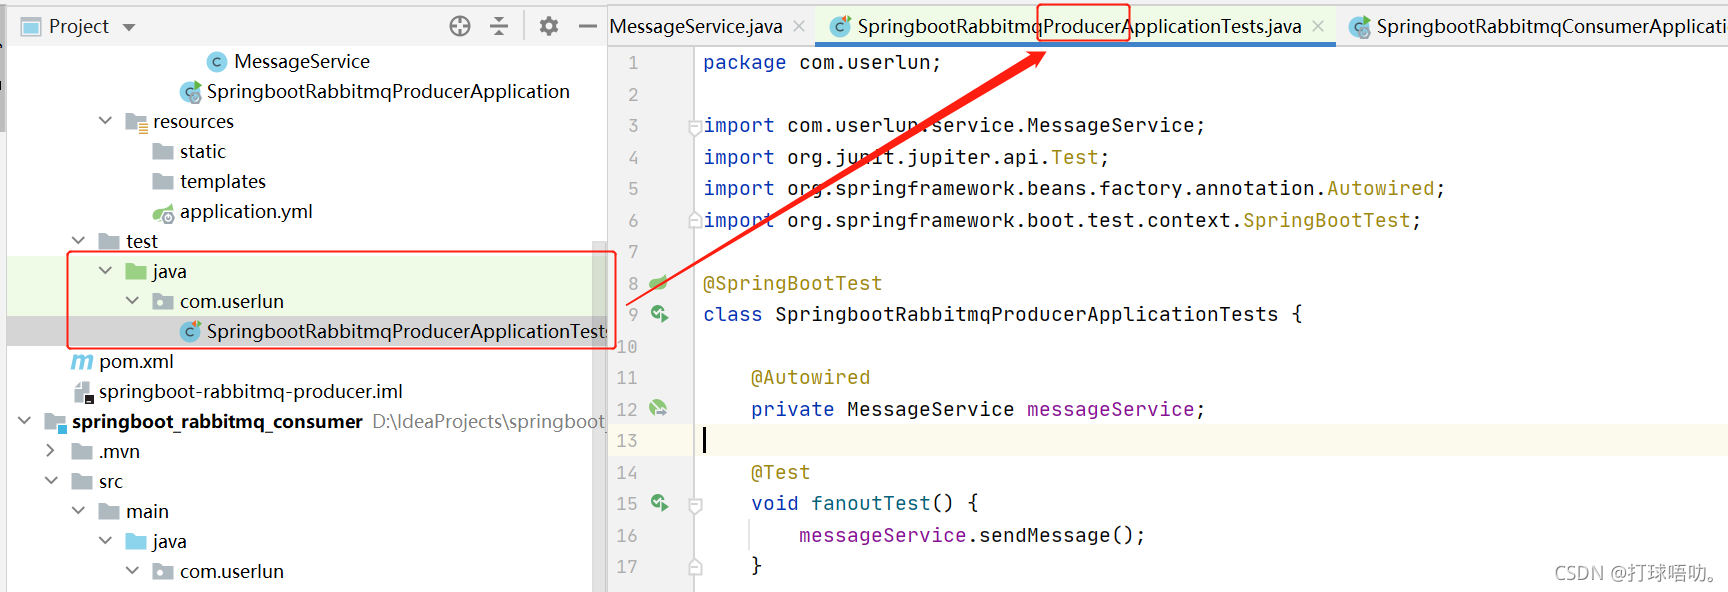
springboot的test目录下的测试类。(生产者需要在测试目录下启动。而消费者直接启动即可。)
import com.userlun.service.MessageService;
import org.junit.jupiter.api.Test;
import org.springframework.beans.factory.annotation.Autowired;
import org.springframework.boot.test.context.SpringBootTest;

@SpringBootTest
class SpringbootRabbitmqProducerApplicationTests {

    @Autowired
    private MessageService messageService;

    @Test
    void fanoutTest() {
        messageService.sendMessage();
    }

}
消费者:
application.yml:(再次强调,端口号与生产者的区分)
# 服务端口
server:
  port: 8081
# 配置rabbitmq服务
spring:
	rabbitmq:
		username: admin
		password: admin
		virtual-host: /
		host: 127.0.0.1
		port: 5672
FanoutConsumer.java文件用作接收消息。
FanoutConsumer.java
import org.springframework.amqp.rabbit.annotation.RabbitHandler;
import org.springframework.amqp.rabbit.annotation.RabbitListener;
import org.springframework.stereotype.Service;

@RabbitListener(queues = {"fanout_queue_springboot"})//消息与队列绑定
@Service
public class FanoutConsumer {

    @RabbitHandler
    public void receiveMessage(String message) {
        System.out.println("Fanout模式--> 队列接收的信息为: "+message);
    }
}
4、分别启动两个springboot项目
生产者启动测试目录test的springboot启动类:
而消费者直接正常运行springboot启动类:

结果如下:
生产者:

消费者:

大功告成。
参考视频:B站学相伴(狂神说)飞哥的RabbitMQ。
本文内容由网友自发贡献,版权归原作者所有,本站不承担相应法律责任。如您发现有涉嫌抄袭侵权的内容,请联系:hwhale#tublm.com(使用前将#替换为@)