1. 事情的起源
全记录事情的起源是为了学习Python强化学习实战,先在自己的windows操作系统的Pycharm+Anaconda+Gym配置下运行成功了CartPole示例和CarRacing示例,接着运行Universe,据说OpenAI Universe需要在Docker的镜像下运行,在安装Docker的时候偶然遇到了WSL 2,既然windows有WSL 2的Linux环境,那么直接在Linux分发上做运行,然而从此事情变得不简单了。
2. 在Win10家庭版上安装Docker
下载安装Docker Desktop,它和以往的Docker运行命令不一致了,Docker需要运行在Windows的WSL 2环境里边,就安装了WSL 2,发现Microsoft新的WSL 2运行起来也比较方便
WSL 2(Windows Subsystem for Linux 2)
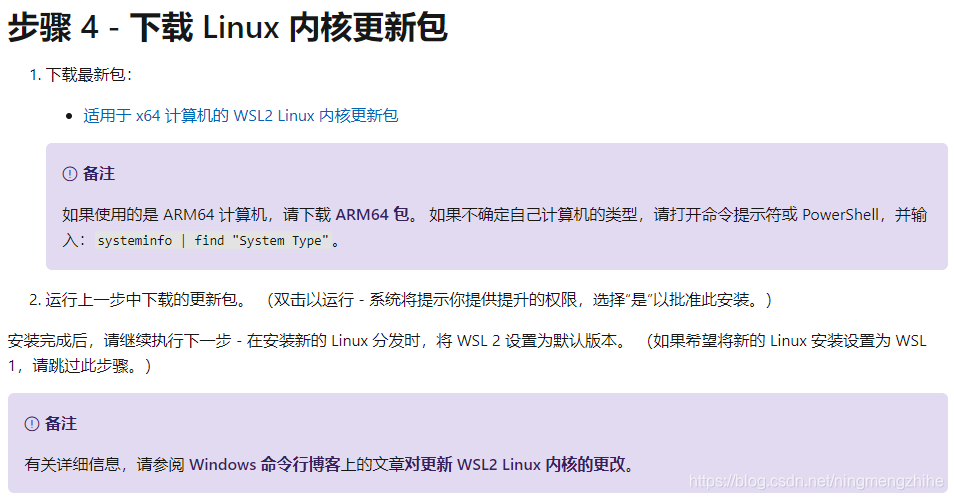
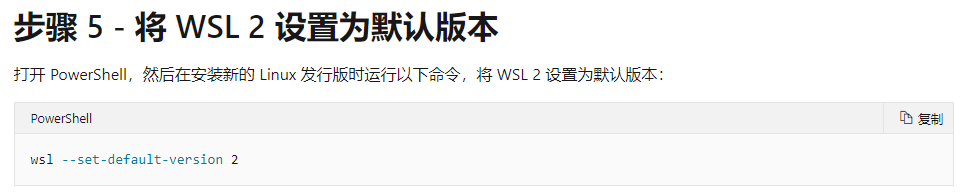
安装WSL 2参考Microsoft的官方文档
https://docs.microsoft.com/zh-cn/windows/wsl/install-win10#set-your-distribution-version-to-wsl-1-or-wsl-2
其中的步骤4、步骤5、步骤6
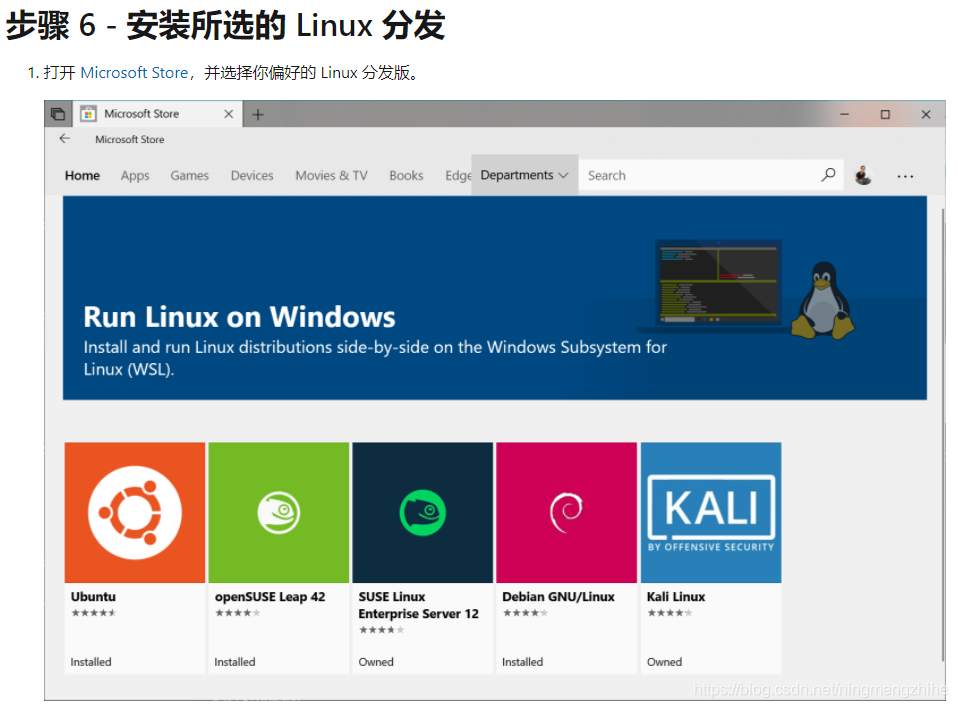
附带安装了Ubuntu 16.0.4 LTS
和Windows Terminal
这两个小程序通过Microsoft App Store的傻瓜安装,使用体验非常不错
截图来展示一下Windows Terminal的界面
说明
安装过程中还遇到了很多其它的问题:Microsoft App Store打不开、电脑没有打开BIOS的CPU的虚拟机、win10系统怎样不用关键就可以打开BIOS系统、怎样打开Hyper-V设置。不是所有的人都会遇到上面的问题。。。
3. 配置Anaconda虚拟环境
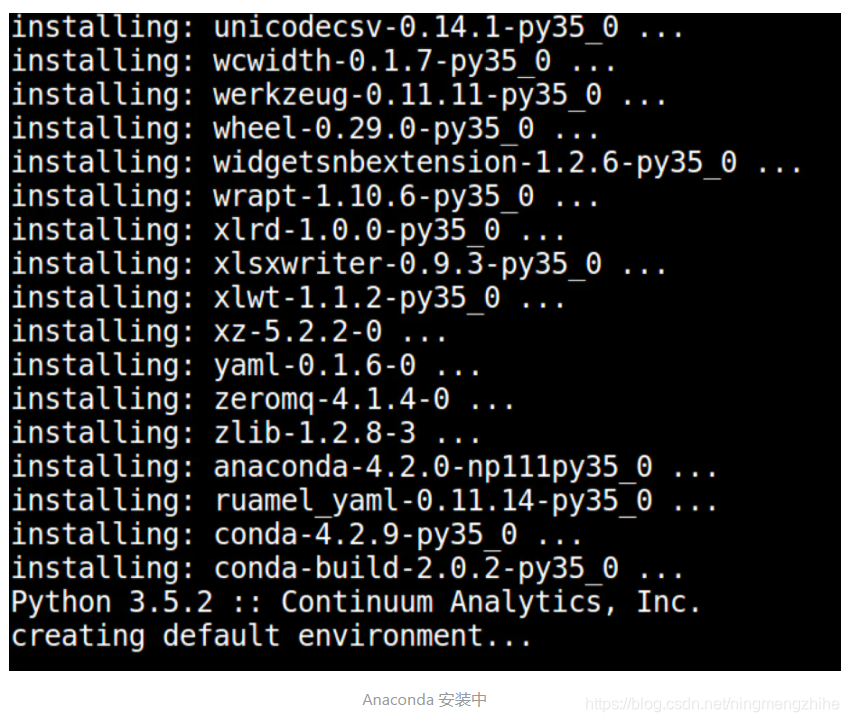
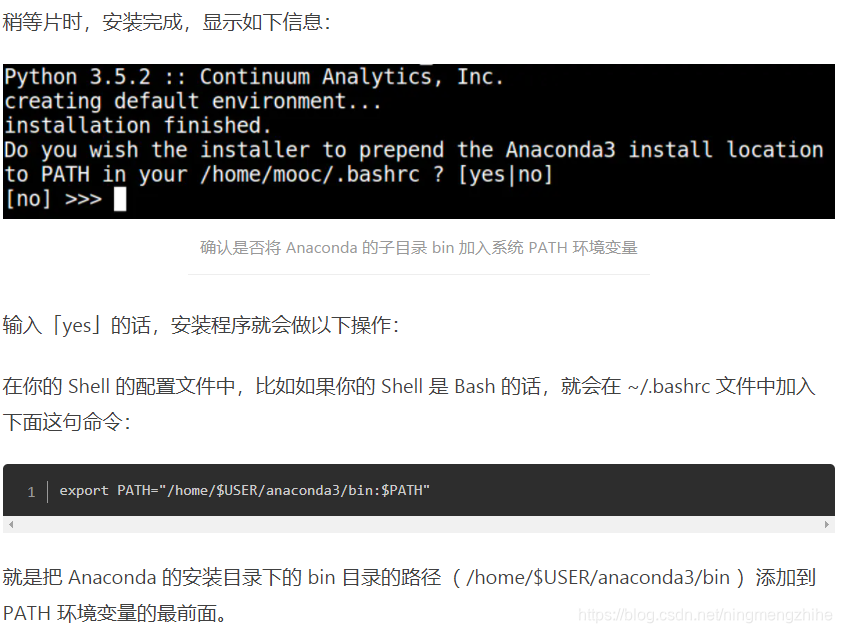
接下里开始配置Anaconda环境,这个部分下载、配置起来都十分友好,没有遇到任何问题,特别给Anaconda手动点赞,配置过程所花费的时间有些漫长,只需要耐心等待就可以了。
安装教程非常参考了《Windows, Linux, macOS三平台安装OpenAI的Gym和Universe》
https://www.jianshu.com/p/536d300a397e这个教程中的第5个章节“5. Linux 安装 Gym 和 Universe”
安装过程
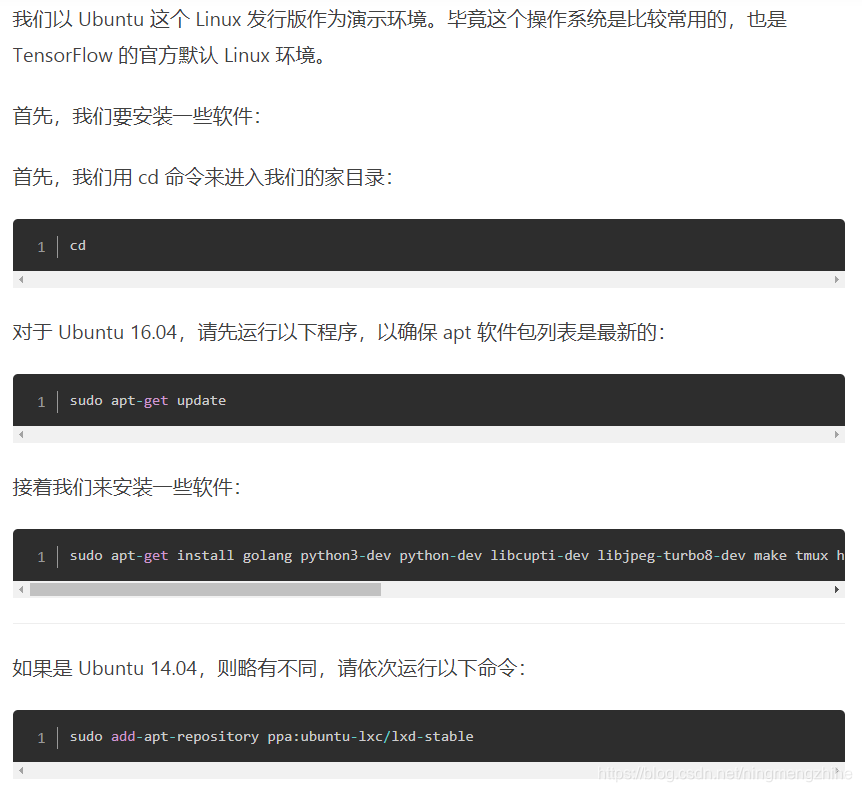
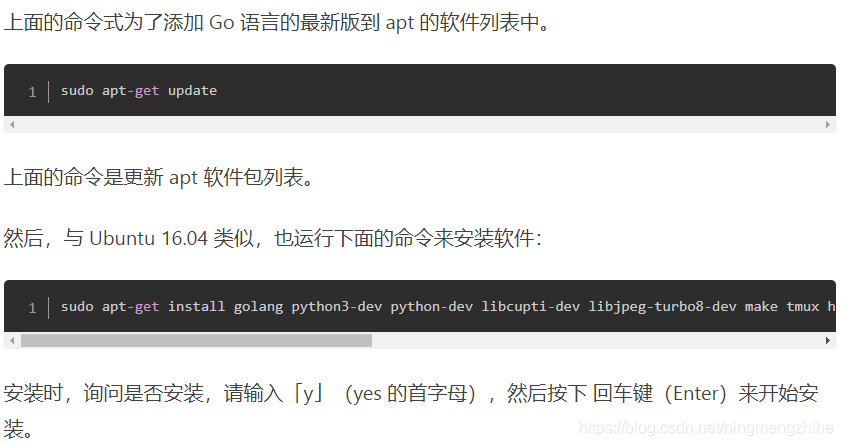
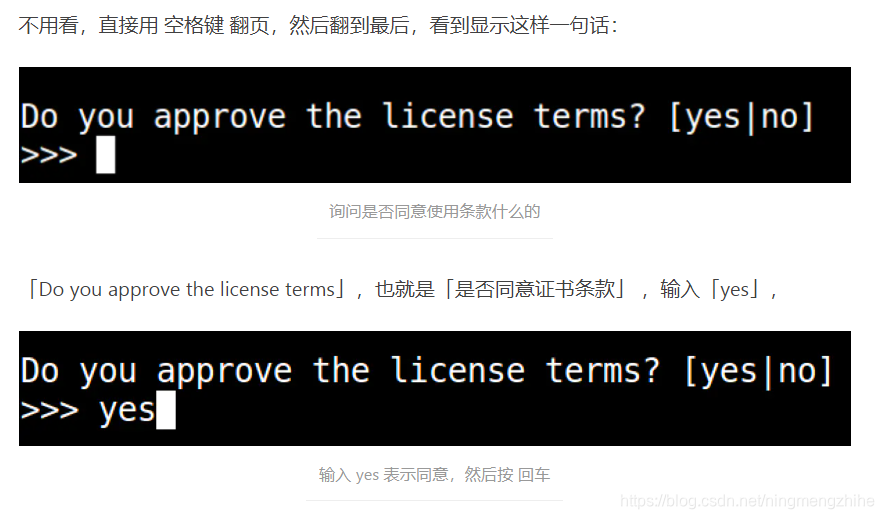
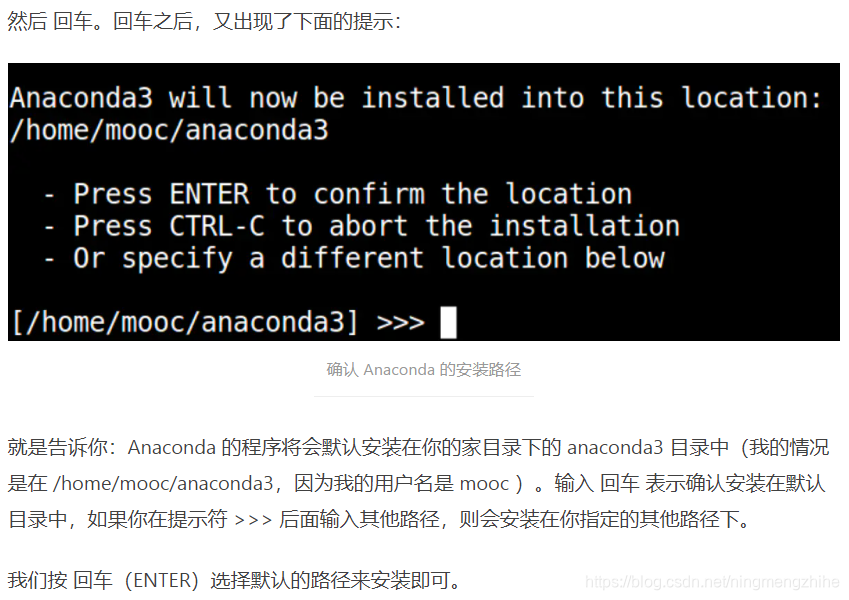
我已经在WSL 2上边开了Ubunut 16.0.4 LTS,在运行命令终端中参考第5章节“进入Linux系统”→“安装配置Anaconda”
(第一次写CSDN博文,不想一行一行复制粘贴写代码,直接把参考地址的图片复制过来,如果有侵犯原文章的权利,可以随时删除啊)
安装Anaconda时候呢,建议不要参考这个链接的教程,我先是安装了下边这个版本的Anaconda,它是匹配Python 3.5的,Python 3.5在2020年12月份的时候已经被废弃了,2021年1月正式废弃,全部转向了Python 3.6

那么匹配Python 3.6的Anaconda版本下载下来再安装
这是一张Anaconda版本和Python版本对应的表格,来源是:https://blog.csdn.net/yuejisuo1948/article/details/81043823
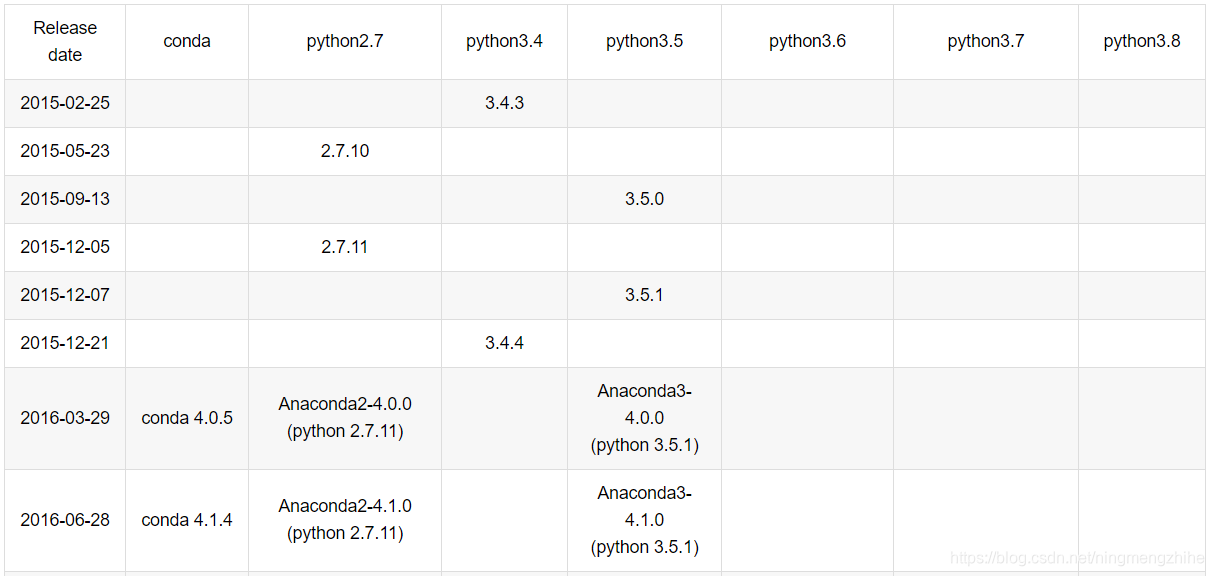
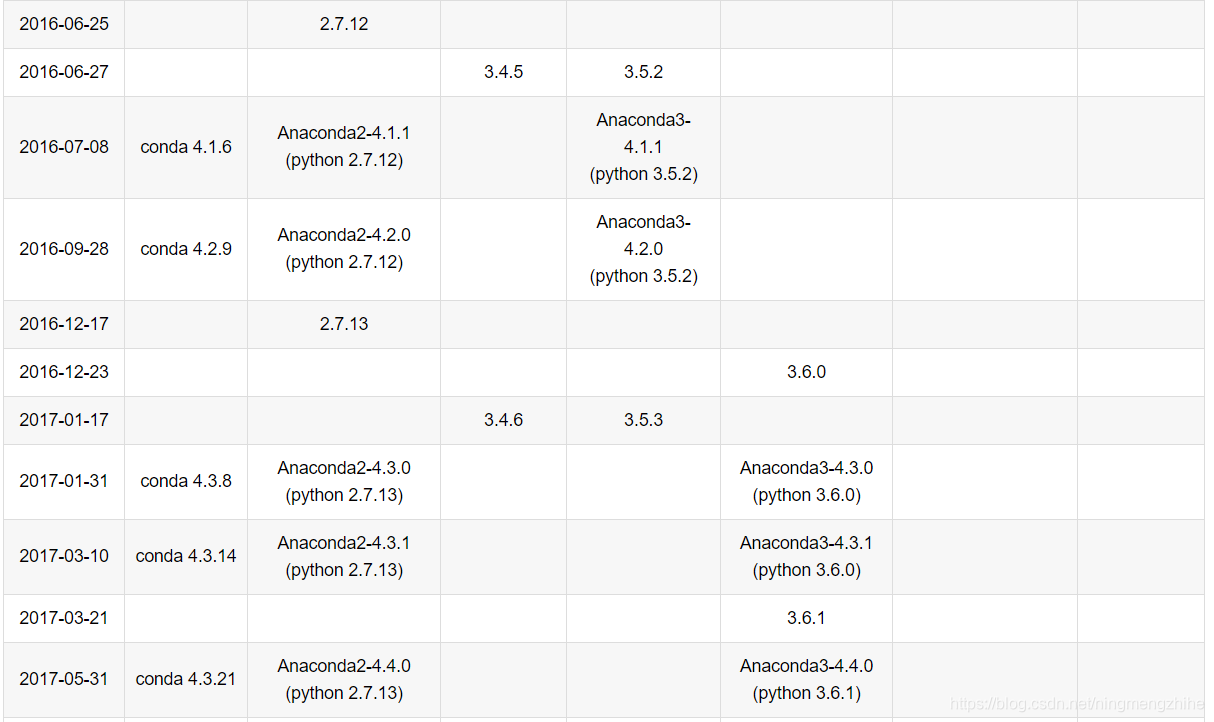
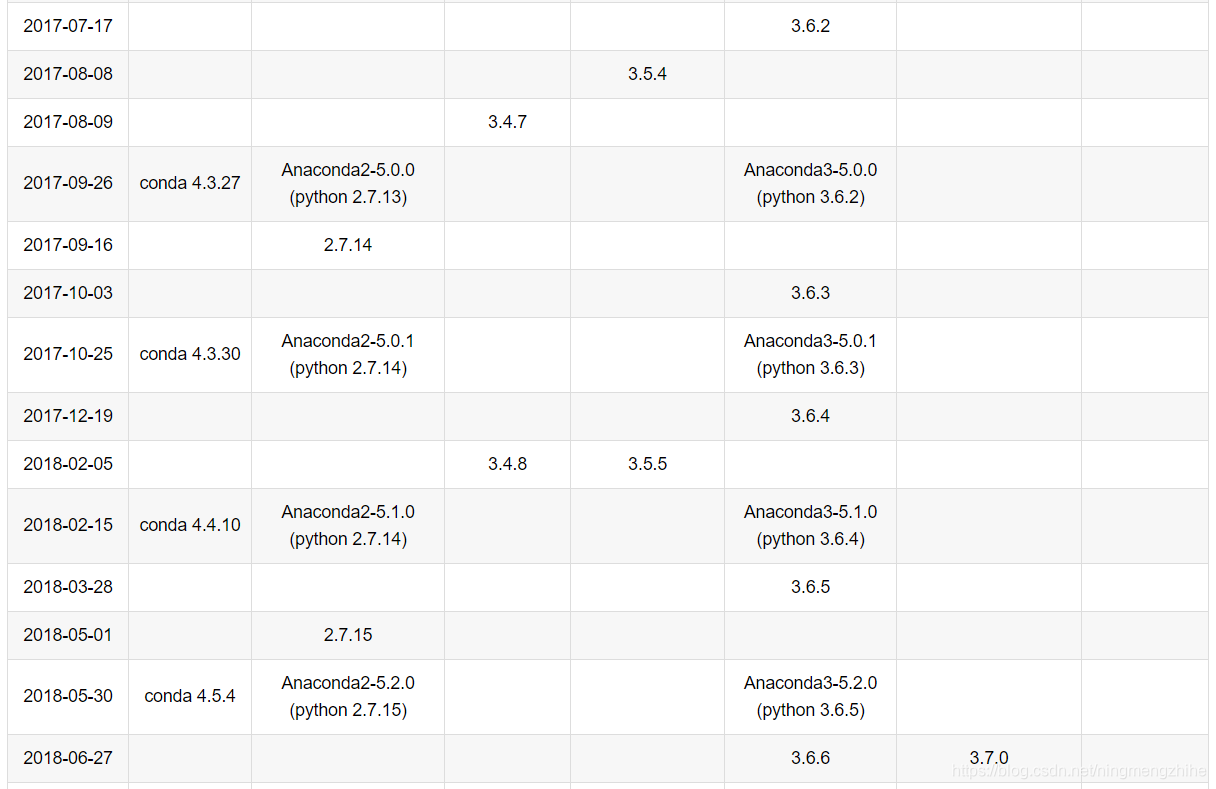
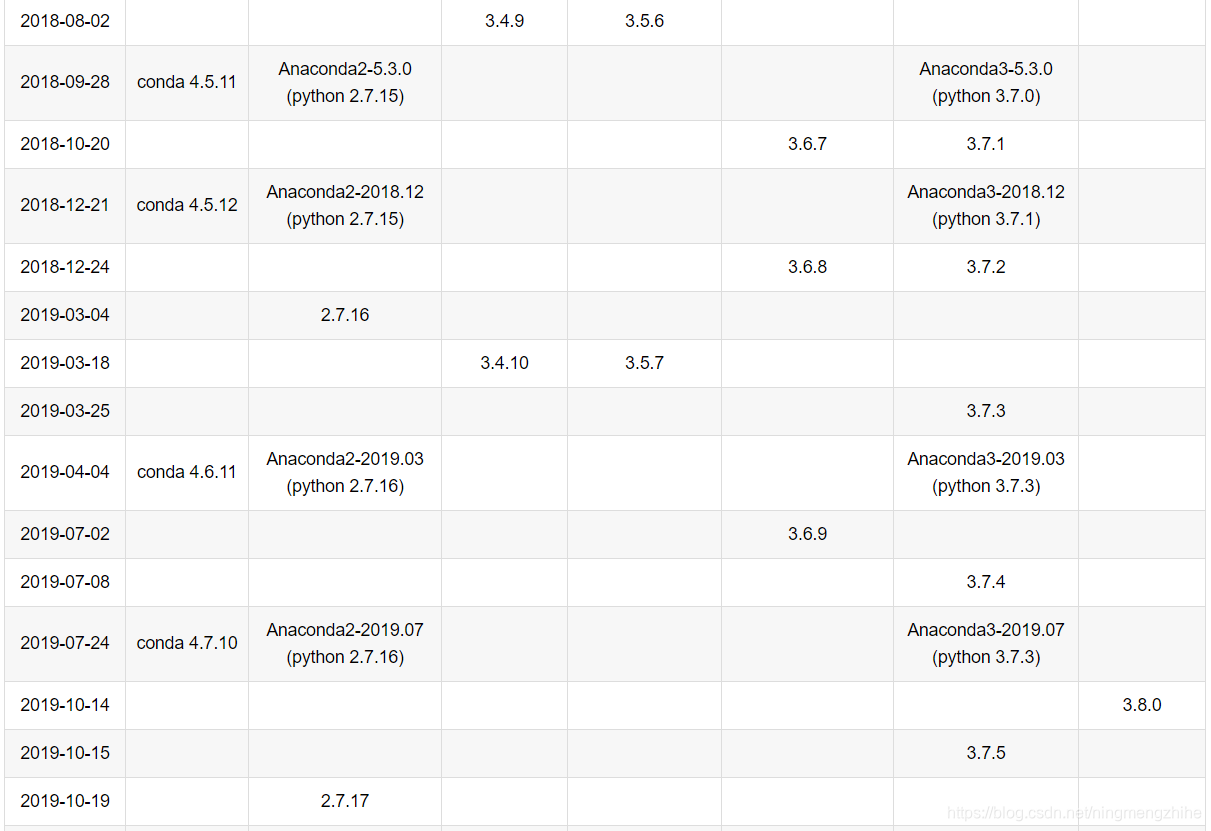

我下载了Anaconda3-5.0.1(它支持的是Python 3.6.3),下载下来的文件格式是.sh,使用wget命令下载,下载网址仍然是https://repo.continum.io/archive/
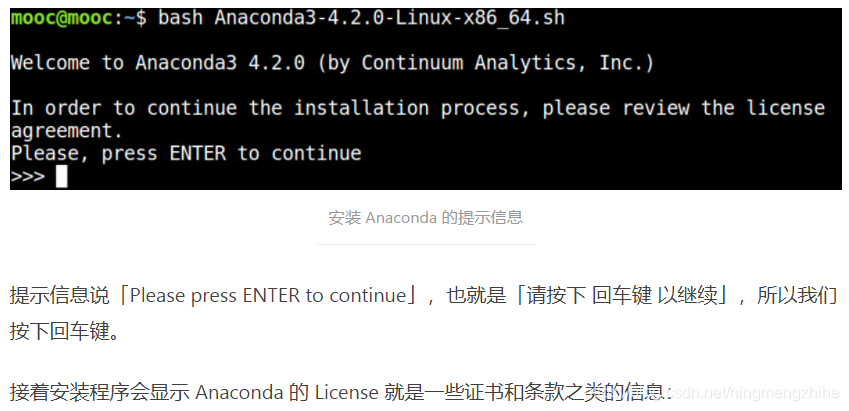
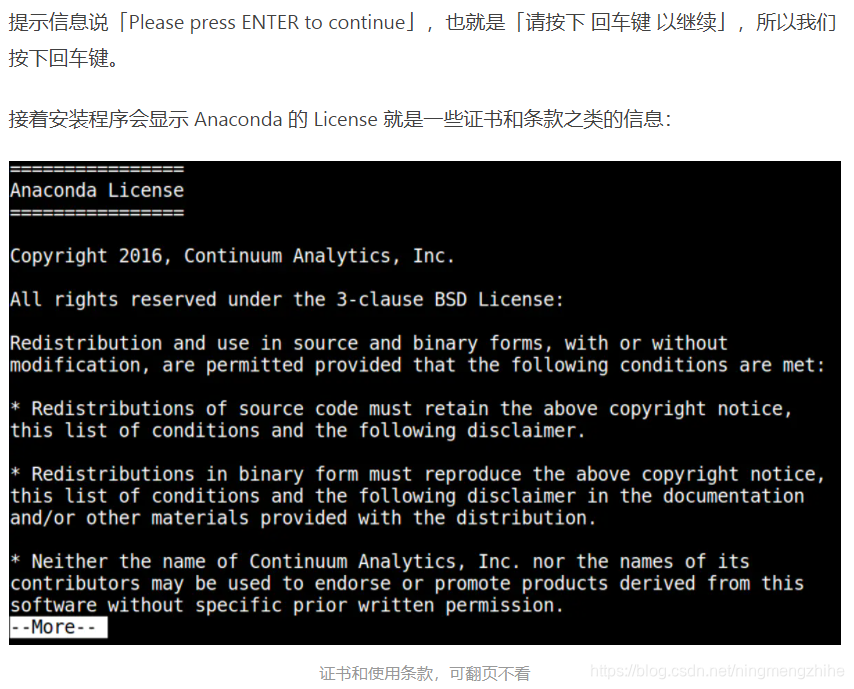
我的系统也是Linux 64位的系统,安装sh格式的安装包使用bash命令
接下来配置的环节和《Windows,Macos,Linux三平台安装Open AI的Gym和Universe》教程一样了
建立一个环境
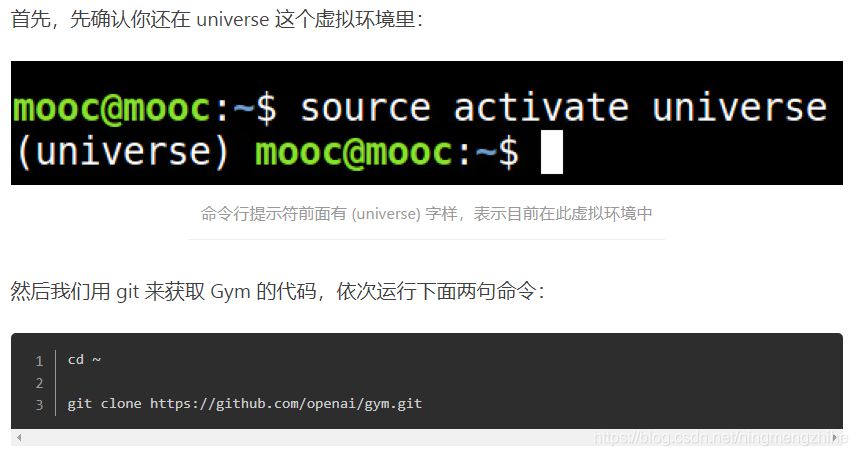
接下来,用 Anaconda 来创建一个虚拟环境,可以起名叫 universe,这个名字和是否安装universe无关,建议也选择一个简单的名字,我用的是python 3.6的版本,所以下面的命令用的是3.6版本
conda create --name universe python=3.6 anaconda
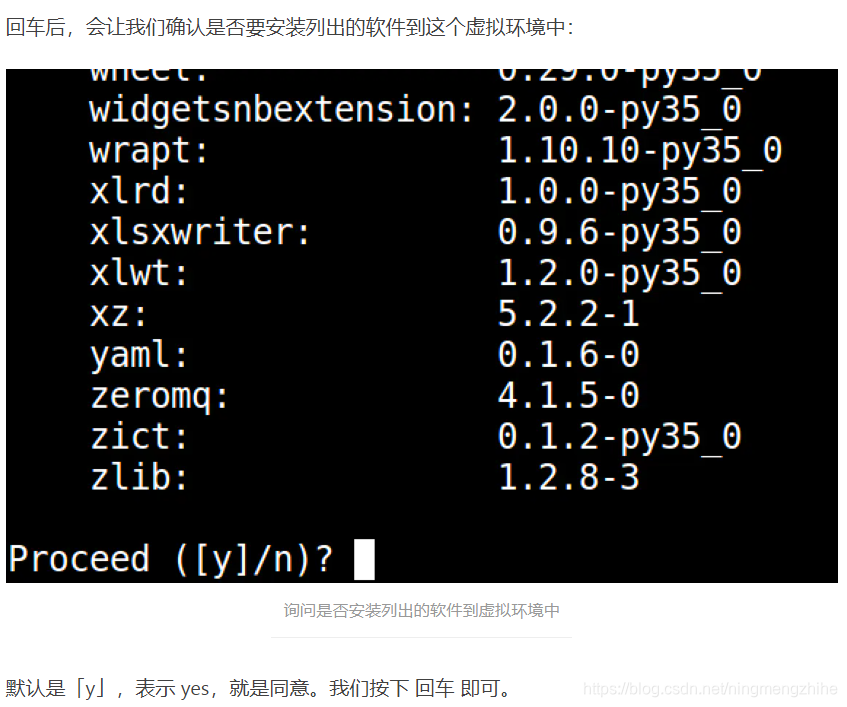
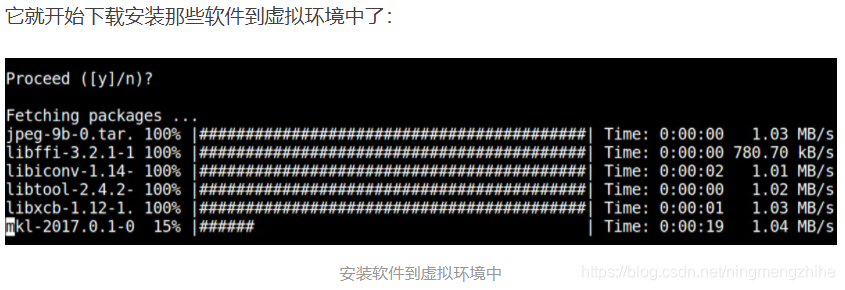
上面安装的过程有些缓慢,只需要耐心等待就可以了
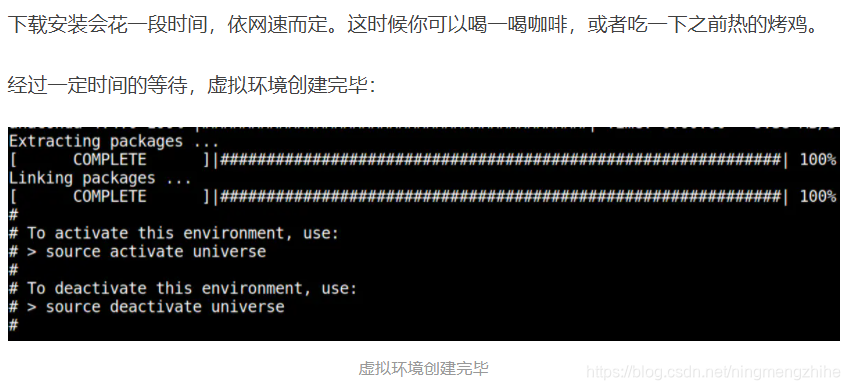
激活环境的命令:source activate universe
灭活环境的命令:source deactivate universe
私自认为创建环境这种操作非常高效,配置同样的路径,但是在不同的环境里边加入不同的软件,不同的项目在不同的环境里执行和开发,省去了切换项目但是配置不同的麻烦。
4. 安装Gym
好了,现在可以安装Gym了,首先进入上面建立的universe环境中。安装Gym的过程非常之曲折,安装了非常多的版本,每个版本都有很多的雷,下面一个一个的踩一踩
最新版本的Gym
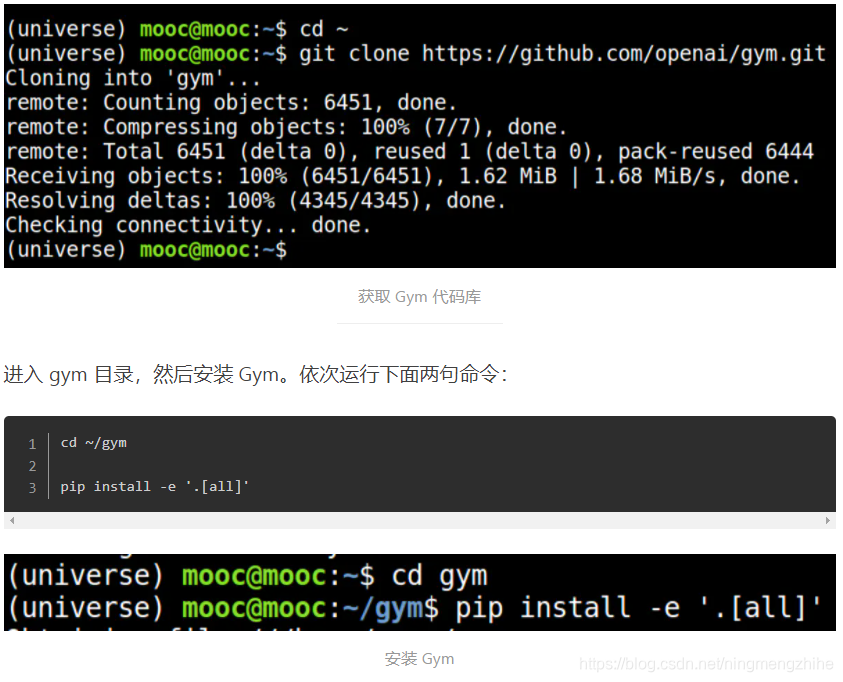
在GitHub上边下载最新版本的Gym,仍然是参考了那片非常强大博文
这个时候问题来了,先是出现了一个错误,大概意思是找不到Mujoco这个包,学习了以下Mujoco是一个和三维运动相关的包,它的安装非常复杂,然而我们后面的项目又不能实际的使用到,所以不安装它就好了,在gym文件夹的setup.py文件中,用vim打开setup.py文件,注释掉下边的两句话,保存退出之后再重新安装,就不会出现Mujoco这个问题了。

然而我试了一试单独安装Mujoco,还发生了安装过程下载imageio安装包下载缓慢的问题,一路找问题,把Mujoco的requirements中安装imageio这个过程注释掉,因为我在配置其它各种环境的时候已经安装成功了imageio,最后安装成功了Mujoco,还是运行报错(这个地方是测试了一个gym的小python程序,具体的程序在后面测试Gym章节中),一路找问题,问题是:Mujoco是一个需要注册才能使用的包,免费试用期是30天,超过30天之后需要付费,于是我只好在它的网站上面注册了一个号码,网站反馈如下:大概意思是我的网址ip已经注册过了,不能再重新注册给我了,如果我并没有注册过,可以和Mujoco的开发注册团队联系,我给它的注册团队发送了邮件,没有收到消息,这个时候我知道不需要安装Mujoco了,踩了一次坑坑.
即使不安装Mujoco,在测试Gym的程序时候还是会报错,错误信息如下,大概是说“找不到gym.benchmarks”这个包
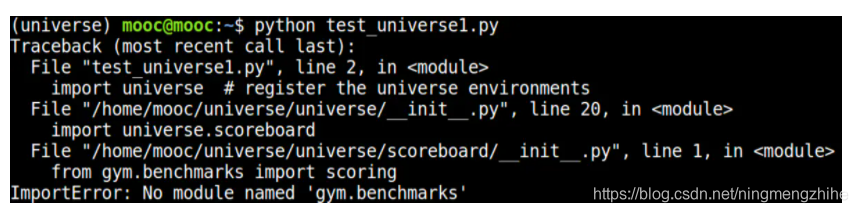
那篇强大文章的解决方案是,安装更低版本的gym,安装方法如下:
天啊,我之前花了好长好长时间下载的最新版本的gym下载和安装就这样失效了

好了,那么究竟0.9.5版本的gym和最新版本的gym有什么区别呢?哪个用着更好些呢,我觉得没有区别,都可以使用。
其实测试Gym遇到的巨大问题还在后面
5. 测试Gym遇到的巨大问题
测试Gym的时候遇到了全过程里边最大的问题!输入下边的示例,大概意思是找不到画布,经过了bing搜索、Google搜索之后,将问题锁定在WSL 2这个虚拟环境没有屏幕,没有屏幕的原因和WSL 2的机制有关系,WSL 2在跑图形化界面的时候是在远程的机器上边跑的,远程的机器上根本没有屏幕,所以显示不出来画面。
再一次一路找问题,采用了以下两个方法
测试用例
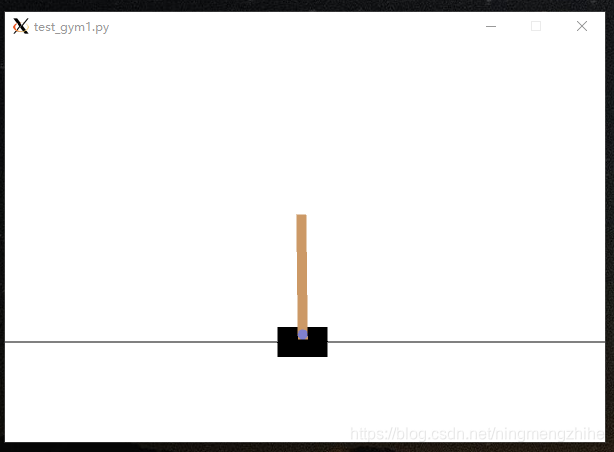
一直用的测试用例是下边的代码,它是一个CarPole小杆,文件的名字是test_gym1.py
# -*- coding: UTF-8 -*-

import gym

env = gym.make('CartPole-v0')

for i_episode in range(100):
    observation = env.reset()
    for t in range(100):
        env.render() # 更新动画
        action = env.action_space.sample()
        observation, reward, done, info = env.step(action) # 推进一步
        if done:
            env.reset()
            continue;
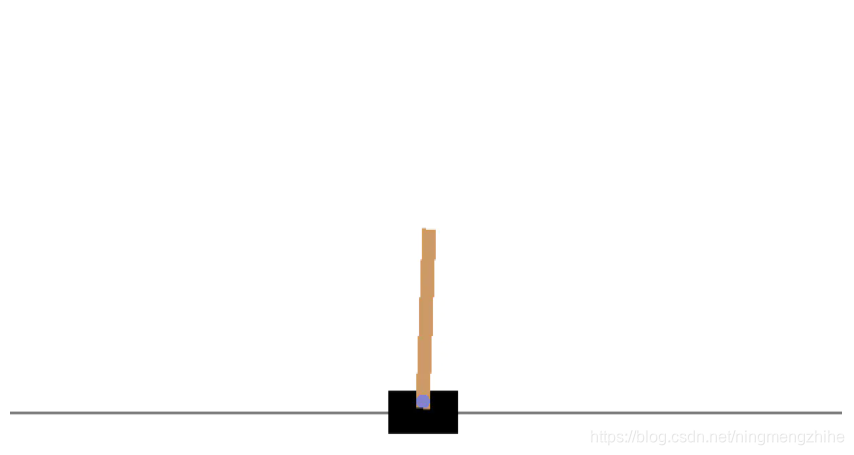
运行的期望结果应该是下边的小游戏
执行python test_gym.py之后的报错:
pyglet.canvas.xlib.NoSuchDisplayException: Cannot connect to “None”
参考这篇链接的问题追溯:https://blog.csdn.net/wudongming_000/article/details/83748300
问题定位在env.render()是远程连接服务器运行了,找不到的合适的画布,其实是没有屏幕,文章建议参考https://github.com/openai/gym/issues/735找到问题的根源,下面就来看看两种解决方法的结果吧~
方法1:xvbf(非常复杂 没有成功 不要使用)
xvfb可以建立一个虚拟的画布,运行起来,执行下边两行代码中的任何一行都没有报错
xvfb-run -a -s "-screen 0 1400x900x24 +extension RANDR" -- python test_gym1.py
xvfb-run -a -s "-screen 0 1024x768x24 +extension RANDR" -- python test_gym1.py
但是还是没有界面显示啊,还是黑乎乎的一片,接着找问题吧,运行之后还需要在vncviewer这个程序打开,于是又研究下载了vncviewer,一直报错,找不到vncviewer,手动下载vncviewer也找不到安装了的vncviewer在哪里。又换了一个思路,
Xvfb :2 -screen 0 1024x768x24 & x11vnc -listen 0.0.0.0 -rfbport 5900 -noipv6 -passwd 123456 -display :2

vncviewer 0.0.0.0:5900
依次执行上边两行代码, 大概的意思是创建了一个虚拟的屏幕,不断地监听网址0.0.0.0,端口号是5900,密码是123456,显示编号是2,然后用vncviewer打开这个网址的端口。问题是执行第一行命令之后,没有报错,程序再次陷入了一个未知的领域,输入第2行命令和python test_gym1.py这样的字样之后仍然没有结果,无奈只能放弃这个方法了。
方法2:给WSL 2安装一个界面
同事看我纠结这个问题纠结了很差时间都看不下去了,强烈推荐我安装vmware跑一个Ubuntu的虚拟机,我觉得很有道理,Ubuntu的虚拟机有界面啊,为什么不能在WSL 2上安装一个界面呢?
参考https://blog.csdn.net/Alisebeast/article/details/106680267的
第5章节“下载和安装VcXsrv”
下载位置:https://sourceforge.net/projects/vcxsrv/
正确安装
第6章配置防火墙视个人情况而定,再运行
第7章节“启动VcXsrv”
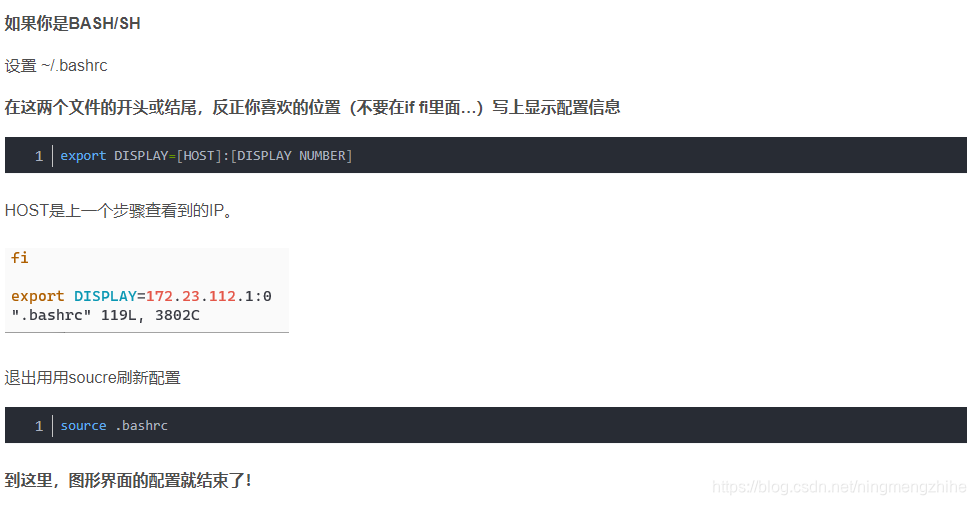
第8章配置Linux子系统
在这里插入图片描述
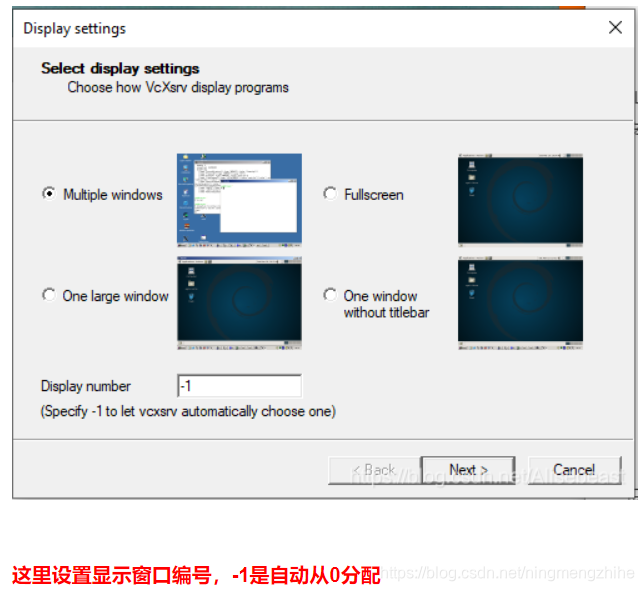
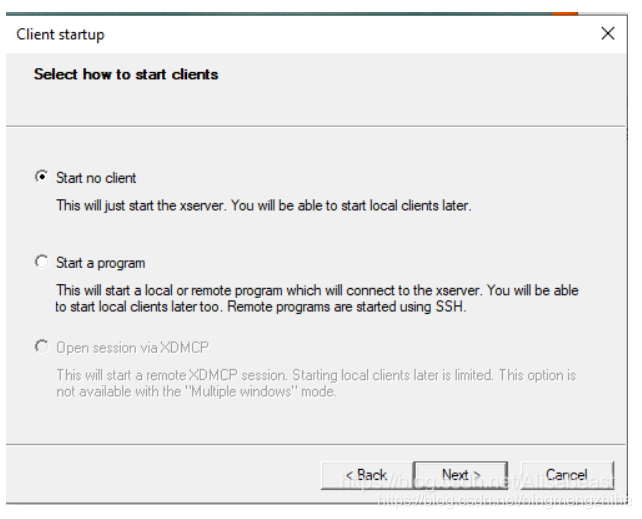
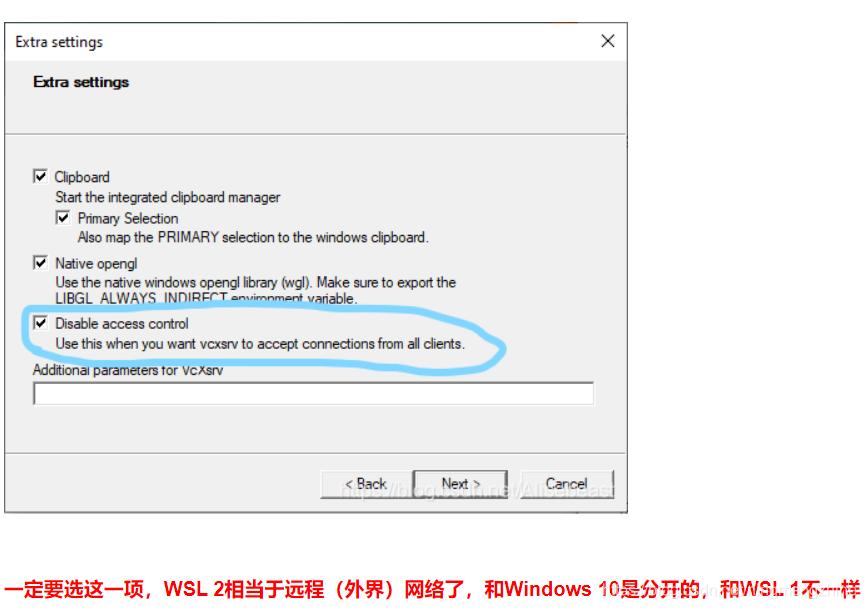
第9章设置WSL 2的X Server显示设置
测试验证test_gym1.py
结果如下。大功告成了!
这里要注意的是,每次第一次运行py脚本之前,都要启动桌面上的XLaunch

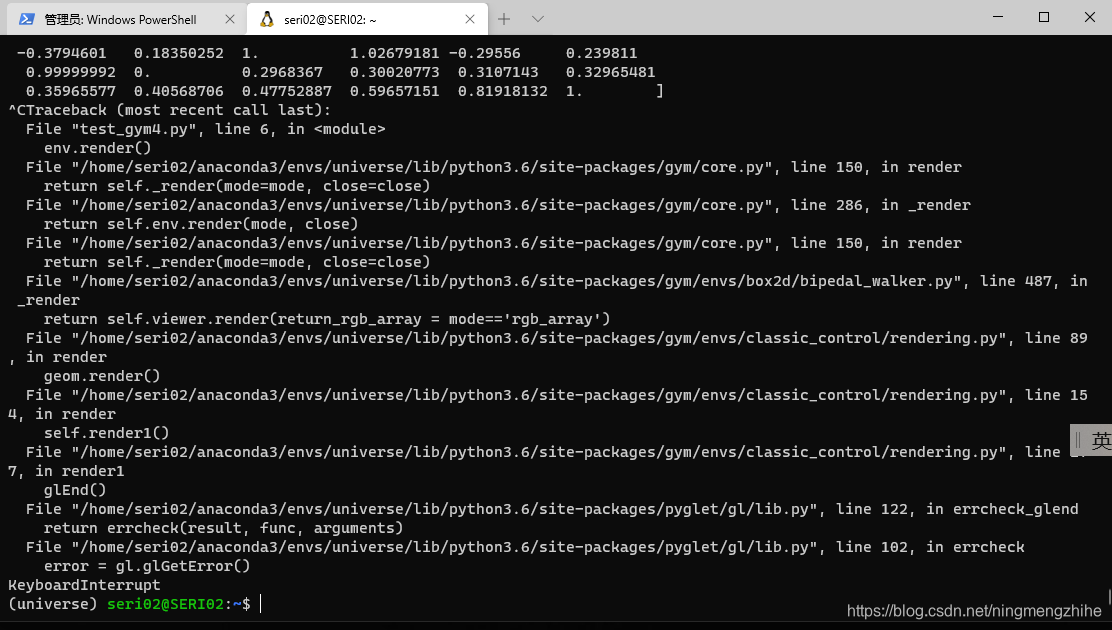
运行之后还是会报错,错误信息如下:

然而我已经无心debug下去了, 下面我会讲到是如何一步一步抛弃了这个WSL 2而种草vmware虚拟机的~~~
6. 安装Docker
按照强大文章https://www.jianshu.com/p/536d300a397e(以下称呼它是强大文章)
的第5个章节,顺利安装Docker,并且能够顺利运行Hello World镜像。Docker最大的问题是吃内存,开启Docker之后,可怜的电脑就卡死了。运行Universe镜像,一直pull不下来,更是忧伤,所以放弃了WSL 2
安装Universe和测试
安装universe
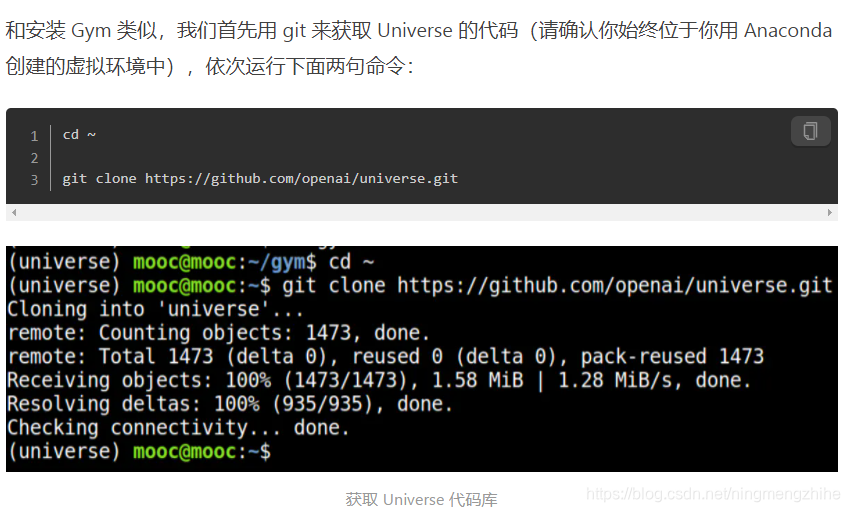
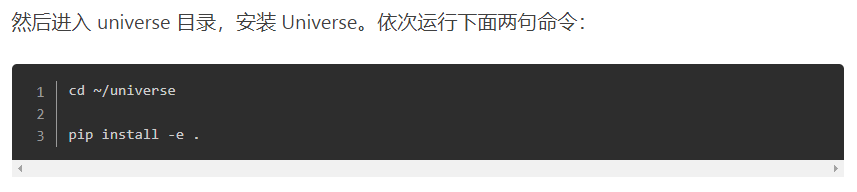
安装Universe非常顺利,参考强大文章的第5章,顺利安装上了Universe
测试Universe
vim打开一个python文件命名为test_universe1.py,里边的代码如下
import gym
import universe  # register the universe environments
from universe import wrappers

env = gym.make('gym-core.PongDeterministic-v0')
env = wrappers.experimental.SafeActionSpace(env)
env.configure(remotes=1)

observation_n = env.reset()

while True:
  action_n =  [env.action_space.sample() for ob in observation_n]
  observation_n, reward_n, done_n, info = env.step(action_n)
  env.render()
执行python test_universe1.py,运行报错
(universe) seri02@SERI02:~$ python test_universe2.py
/home/seri02/universe/universe/runtimes/__init__.py:7: YAMLLoadWarning: calling yaml.load() without Loader=... is deprecated, as the default Loader is unsafe. Please read https://msg.pyyaml.org/load for full details.
  spec = yaml.load(f)
[2021-02-02 10:43:25,421] Making new env: gym-core.PongDeterministic-v0
/home/seri02/anaconda3/envs/universe/lib/python3.6/site-packages/gym/envs/registration.py:17: PkgResourcesDeprecationWarning: Parameters to load are deprecated.  Call .resolve and .require separately.
  result = entry_point.load(False)
[2021-02-02 10:43:25,712] Writing logs to file: /tmp/universe-349.log
[2021-02-02 10:43:25,849] Ports used: dict_keys([])
[2021-02-02 10:43:25,851] [0] Creating container: image=quay.io/openai/universe.gym-core:0.20.6. Run the same thing by hand as: docker run -p 5900:5900 -p 15900:15900 quay.io/openai/universe.gym-core:0.20.6
[2021-02-02 10:43:25,854] Image quay.io/openai/universe.gym-core:0.20.6 not present locally; pulling
Traceback (most recent call last):
  File "/home/seri02/anaconda3/envs/universe/lib/python3.6/site-packages/docker/client.py", line 170, in _raise_for_status
    response.raise_for_status()
  File "/home/seri02/anaconda3/envs/universe/lib/python3.6/site-packages/requests/models.py", line 844, in raise_for_status
    raise HTTPError(http_error_msg, response=self)
requests.exceptions.HTTPError: 404 Client Error: Not Found for url: http+docker://localunixsocket/v1.41/containers/create?name=universe-VA9GsT-0

During handling of the above exception, another exception occurred:

Traceback (most recent call last):
  File "/home/seri02/universe/universe/remotes/docker_remote.py", line 264, in _spawn
    container = self._spawn_container()
  File "/home/seri02/universe/universe/remotes/docker_remote.py", line 314, in _spawn_container
    'com.openai.automanaged': 'true',
  File "/home/seri02/anaconda3/envs/universe/lib/python3.6/site-packages/docker/api/container.py", line 135, in create_container
    return self.create_container_from_config(config, name)
  File "/home/seri02/anaconda3/envs/universe/lib/python3.6/site-packages/docker/api/container.py", line 146, in create_container_from_config
    return self._result(res, True)
  File "/home/seri02/anaconda3/envs/universe/lib/python3.6/site-packages/docker/client.py", line 178, in _result
    self._raise_for_status(response)
  File "/home/seri02/anaconda3/envs/universe/lib/python3.6/site-packages/docker/client.py", line 173, in _raise_for_status
    raise errors.NotFound(e, response, explanation=explanation)
docker.errors.NotFound: 404 Client Error: Not Found ("b'{"message":"No such image: quay.io/openai/universe.gym-core:0.20.6"}'")

During handling of the above exception, another exception occurred:

Traceback (most recent call last):
  File "/home/seri02/anaconda3/envs/universe/lib/python3.6/site-packages/docker/client.py", line 170, in _raise_for_status
    response.raise_for_status()
  File "/home/seri02/anaconda3/envs/universe/lib/python3.6/site-packages/requests/models.py", line 844, in raise_for_status
    raise HTTPError(http_error_msg, response=self)
requests.exceptions.HTTPError: 500 Server Error: Internal Server Error for url: http+docker://localunixsocket/v1.41/images/create?tag=0.20.6&fromImage=quay.io%2Fopenai%2Funiverse.gym-core

During handling of the above exception, another exception occurred:

Traceback (most recent call last):
  File "test_universe2.py", line 7, in <module>
    env.configure(remotes=1)
  File "/home/seri02/universe/universe/vectorized/core.py", line 44, in configure
    self.env.configure(**kwargs)
  File "/home/seri02/universe/universe/wrappers/timer.py", line 14, in configure
    self.env.configure(**kwargs)
  File "/home/seri02/universe/universe/wrappers/render.py", line 21, in configure
    self.env.configure(**kwargs)
  File "/home/seri02/universe/universe/wrappers/throttle.py", line 32, in configure
    self.env.configure(**kwargs)
  File "/home/seri02/universe/universe/envs/vnc_env.py", line 199, in configure
    use_recorder_ports=record,
  File "/home/seri02/universe/universe/remotes/build.py", line 19, in build
    n=n,
  File "/home/seri02/universe/universe/remotes/docker_remote.py", line 55, in __init__
    self._start()
  File "/home/seri02/universe/universe/remotes/docker_remote.py", line 82, in _start
    [instance.start() for instance in self.instances]
  File "/home/seri02/universe/universe/remotes/docker_remote.py", line 82, in <listcomp>
    [instance.start() for instance in self.instances]
  File "/home/seri02/universe/universe/remotes/docker_remote.py", line 236, in start
    self._spawn()
  File "/home/seri02/universe/universe/remotes/docker_remote.py", line 270, in _spawn
    self._pull_image()
  File "/home/seri02/universe/universe/remotes/docker_remote.py", line 288, in _pull_image
    output = self.client.pull(self.runtime.image, stream=True)
  File "/home/seri02/anaconda3/envs/universe/lib/python3.6/site-packages/docker/api/image.py", line 175, in pull
    self._raise_for_status(response)
  File "/home/seri02/anaconda3/envs/universe/lib/python3.6/site-packages/docker/client.py", line 174, in _raise_for_status
    raise errors.APIError(e, response, explanation=explanation)
docker.errors.APIError: 500 Server Error: Internal Server Error ("b'{"message":"unauthorized: access to the requested resource is not authorized"}'")
这个问题没有debug出来,有待于接下来再解决
7. 总结
至此,安装WSL 2、Ubuntu、Docker、Gym、Anaconda、Universe的过程结束了,期待和大家下一次的见面
分享几个小知识点
Linux命令行安装l软件包的命令:sudo apt-get install+包的名字