文章目录
- 1、IdentityServer介绍
- 2、建立IdentityServer
- 2.1 安装IdentityServer4
- 2.2 定义配置中心
- 2.2.1 定义Client
- 2.2.2 定义ApiResource
- 2.2.3定义IdentityResource
- 3、配置IdentityServer到Ocelot中去
-
- 4、总结
- 5 、附录
本篇幅所涉及的内容比较多,请园友有耐心的品味下去。
1、IdentityServer介绍
IdentityServer4 是asp.netcore 的OpenID Connect和OAuth 2.0框架。官方文档:http://docs.identityserver.io/en/latest/
我主要进行对自己所做的进行总结,不会介绍很多的理论类容。
2、建立IdentityServer
2.1 安装IdentityServer4
可以使用PS进行命令安装: Install-Package IdentityServer4。也可以在Nuget管理中心进行搜索安装。
2.2 定义配置中心
网上很多都是使用的TestUser进行的测试,我这个案例中使用sqlserver持久化进行验证,对于用户这块我后面详细介绍。(要是觉得麻烦那么也可以使用TestUser和)
2.2.1 定义Client
可以查看 官方文档–Client 进行了解Client相关知识。
public class InMemoryConfiguration
{
public static IEnumerable<Client> GetAllClients()
{
return new[]
{
new Client
{
ClientId = "api.service1",
ClientSecrets = new [] { new Secret("secret".Sha256()) },
AllowedGrantTypes = GrantTypes.ResourceOwnerPasswordAndClientCredentials,
AllowedScopes = new [] {
"service1",
},
AllowOfflineAccess=true,
},
new Client
{
ClientId = "api.service2",
ClientSecrets = new [] { new Secret("secret".Sha256()) },
AllowedGrantTypes = GrantTypes.ClientCredentials,
AllowedScopes = new [] {
"service2",
},
}
};
}
}
2.2.2 定义ApiResource
可以查看 官方文档–ApiResouce 进行了解ApiResouce相关知识。
public class InMemoryConfiguration
{
public static IEnumerable<ApiResource> GetAllResources()
{
return new[]
{
new ApiResource("service1", "微服务架构设计,Service1",new List<string>{
JwtClaimTypes.Role,
JwtClaimTypes.Email,
}),
new ApiResource("service2", "微服务架构设计,Service2",new List<string>{
JwtClaimTypes.Role,
JwtClaimTypes.Email,
})
};
}
}
2.2.3定义IdentityResource
可以查看 官方文档–IdentityResource 进行了解IdentityResource相关知识。
public class InMemoryConfiguration
{
public static IEnumerable<IdentityResource> GetIdentityResources()
{
return new List<IdentityResource>
{
new IdentityResources.OpenId(),
new IdentityResources.Profile(),
new IdentityResources.Email()
};
}
}
使用UseIdentityServer先考虑几个问题。
1) 那些API可以使用AuthorizationServer
2) 那些Client可以使用AuthorizationServer
3) 那些User可以使用AuthorizationServer
既然定义了这些资源内容那么就要添加到IdentityServer中去。
在ConfigureServices中添加内容:
#region identityserver4
services.AddIdentityServer()
.AddSigningCredential(new X509Certificate2(
Path.Combine(Directory.GetCurrentDirectory(),Configuration["Credential:Path"]),
Configuration["Credential:Password"],
X509KeyStorageFlags.MachineKeySet))
.AddInMemoryClients(InMemoryConfiguration.GetAllClients())
.AddInMemoryApiResources(InMemoryConfiguration.GetAllResources())
.AddResourceOwnerValidator<CustomResourceOwnerPasswordValidator>()
.AddProfileService<CustomProfileService>()
.AddCorsPolicyService<CorsPolicyService>();
#endregion
在Configure中使用IdentityServer
app.UseIdentityServer();
对以上添加的内容进行解释
-
在实际的项目中肯定会使用自己的证书的,在这里使用AddSigningCredential添加证书。IdentityServer也友好的提供了开发者使用证书,使用AddDeveloperSigningCredential进行添加。
使用openssl工具生成证书。
下载地址通过我的百度云盘进行下载,因为本地直接下载可能很慢甚至可能下载不了。
链接:https://pan.baidu.com/s/1-kf3T7iOO3PuzFRag_atZQ
提取码:q79u
1.1. 使用openssl命令进行证书下载
openssl req -newkey rsa:2048 -nodes -keyout auth.center.key -x509 -days 365 -out auth.center.cer
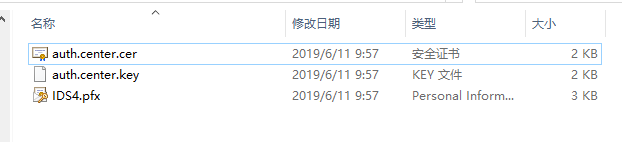
下面将生成的证书和Key封装成一个文件,以便IdentityServer可以使用它们去正确地签名tokens
openssl pkcs12 -export -in auth.center.cer -inkey cas.clientservice.key -out auth.center.pfx
最终生成的目录结构:
1.2 然后将生成的文件拷贝到项目中去,并在appsetting.json文件中配置路径和密码(上面生成证书的时候输入的密码)。
{
  "DBConnStr": "Server=.;DataBase=Study.Microservices.Information;User=sa;Password=123456",
  "Credential": {
    "Path": "cert\\IDS4.pfx",
    "Password": "cy"
  },
  "Logging": {
    "LogLevel": {
      "Default": "Warning"
    }
  },
  "AllowedHosts": "*"
}
最后就将所生成的证书配置到AddSigningCredential中去,详情请看上面贴的配置。
-
使用AddResourceOwnerValidator添加自定义验证。
2.1 继承IResourceOwnerPasswordValidator实现Task ValidateAsync(ResourceOwnerPasswordValidationContext context); 方法进行自定义验证。
public class CustomResourceOwnerPasswordValidator : IResourceOwnerPasswordValidator
{
private readonly ISystemClock _clock;
private readonly IUserApplicationService _users;
public CustomResourceOwnerPasswordValidator(ISystemClock clock,
IUserApplicationService users)
{
_clock = clock;
_users = users;
}
public Task ValidateAsync(ResourceOwnerPasswordValidationContext context)
{
if (_users.ValidateCredentials(context.UserName, context.Password))
{
var user = _users.FindUserByAccount(context.UserName);
context.Result = new GrantValidationResult(
user.Id ?? throw new ArgumentException("Subject ID not set", nameof(user.Id)),
OidcConstants.AuthenticationMethods.Password, _clock.UtcNow.UtcDateTime,
claims: GetClaims(user));
}
else
{
context.Result = new GrantValidationResult(TokenRequestErrors.InvalidGrant, "invalid custom credential");
}
return Task.CompletedTask;
}
private ICollection<Claim> GetClaims(UserInfo user)
{
return new Claim[]{
new Claim(JwtClaimTypes.Id,user.Id),
new Claim(JwtClaimTypes.Name,user.Account)
};
}
}
2.2 用户相关操作接口IUserApplicationService
public interface IUserApplicationService
{
UserInfo FindUserByAccount(string userName);
bool ValidateCredentials(string userName, string password);
UserInfo FindBySubjectId(string id);
}
2.3 用户实体类
[Table("User")]
public class UserInfo
 {
     [Key]
     public string Id { get;  set; }

     public string Account { get;  set; }

     public bool IsActive { get; set; }
     public string Password { get; internal set; }
 }
2.3 用户相关操作实现UserApplicationService
public class UserApplicationService : IUserApplicationService
{
    public UserInfo FindBySubjectId(string id)
    {
        using (var db=new UserDbContext())
        {
            return db.Users.FirstOrDefault(u => u.Id == id & u.IsActive);
        }
    }

    public UserInfo FindUserByAccount(string userName)
    {
        using (var db = new UserDbContext())
        {
            return db.Users.FirstOrDefault(u => u.Account == userName & u.IsActive);
        }
    }

    public bool ValidateCredentials(string userName, string password)
    {
        using (var db = new UserDbContext())
        {
            return db.Users.Where(u => u.Account == userName
            & u.Password==password
            & u.IsActive).Count()>0;
        }
    }
}
2.4 从上面的实现类中可以看出采用的是EF,那么下面我将简单快速的将Migration的使用以及EF Core的使用进行介绍。
1) 安装Microsoft.EntityFrameworkCore.SqlServer包
2)添加UserDbContext
public class UserDbContext : DbContext
  {
      public UserDbContext()
      {

      }
      public DbSet<UserInfo> Users { get; set; }

      protected override void OnConfiguring(DbContextOptionsBuilder optionsBuilder)
      {
          base.OnConfiguring(optionsBuilder);
          var build = new ConfigurationBuilder()
                  .SetBasePath(System.IO.Directory.GetCurrentDirectory())
                  .AddJsonFile("appsettings.json", false, true)
                  .Build();
          optionsBuilder.UseSqlServer(build["DBConnStr"]);
      }
  }
DBConnStr 是配置文件中配置的,配置文件件贴在了证书介绍区域。
3)使用Migration将User添加到数据库中去。
执行 Add-Migration 初始化用户 命令添加相关修改到Migrations中去。

最终会生成一个Migrations目录结构,后面对模型进行调整添加修改等等操作都会记录到这个文件中去。

执行 update-database –verbose 更新数据库
最终生成数据库结构:

为了测试我将User表中添加了一条admin/admin的数据,为了后面进行测试。
-
使用AddProfileService添加自定义Profile装载Claim信息
采用自定义验证都要结合AddProfileService来使用,通过AddProfileService来装载前面定义的CustomResourceOwnerPasswordValidatorClaim信息。然后在使用的时候直接调用User.Claims就能看到配置的自定义Claim信息了。
public class CustomProfileService : IProfileService
{
protected readonly ILogger Logger;
private readonly IUserApplicationService _users;
public CustomProfileService(ILogger<CustomProfileService> logger,IUserApplicationService users)
{
Logger = logger;
_users = users;
}
public virtual Task GetProfileDataAsync(ProfileDataRequestContext context)
{
context.LogProfileRequest(Logger);
if (context.RequestedClaimTypes.Any())
{
var user = _users.FindBySubjectId(context.Subject.GetSubjectId());
if (user != null)
{
context.IssuedClaims = context.Subject.Claims.ToList();
}
}
context.LogIssuedClaims(Logger);
return Task.CompletedTask;
}
public virtual Task IsActiveAsync(IsActiveContext context)
{
Logger.LogDebug("IsActive called from: {caller}", context.Caller);
var user = _users.FindBySubjectId(context.Subject.GetSubjectId());
context.IsActive = user?.IsActive == true;
return Task.CompletedTask;
}
}
-
使用AddCorsPolicyService来配置跨域
IdentityServer提供了DefaultCorsPolicyService默认跨域类。我这里使用自定义的CorsPolicyService来处理跨域,使用自定的跨域处理类只需要实现ICorsPolicyService中的Task IsOriginAllowedAsync(string origin) 即可。
为了测试我这里支架返回true允许所有,在实际中肯定是不行的,需要业务场景去配置相关origin。
private class CorsPolicyService : ICorsPolicyService
{
    public Task<bool> IsOriginAllowedAsync(string origin)
    {
        return Task.FromResult(true);
    }
}
3、配置IdentityServer到Ocelot中去
上面啰里啰嗦的说了那么多,也是怕园友们会学的糊里糊涂,因为我看文章都是这么过来的,学个东西要看很多文章甚至要看很多遍才能够理解清楚。
3.1 添加配置文件
不明白的可以看前面两篇文章
Consul+Ocelot搭建微服务实践–初探路由
Consul+Ocelot搭建微服务实践–负载均衡
{
"ReRoutes": [
{
"DownstreamPathTemplate": "/connect/token",
"DownstreamScheme": "https",
"DownstreamHostAndPorts": [
{
"Host": "localhost",
"Port": "5001"
}
],
"UpstreamPathTemplate": "/auth/token",
"UpstreamHttpMethod": [ "Post" ]
}
]
}
3.2 进行测试
终于可以看到你们心中怀念已久的token了。
设置Body的内容,设置的内容也是前面InMemoryConfiguration所配置的内容。

修改Body 中的值进行测试:
特意将secret的值进行修改进行测试。

IdentiyServer的日志分析:

4、总结
大部分类容都是围绕着IdentityServer的展开的,这里会为下文做一个铺垫,后面使用Ocelot集中授权认证的时候会用到。
真心的发现总结一块内容是多么的花时间,写这点东西不知不觉花了一个多小时,大多数都是记录的我自己的测试中所运用到的东西,还没有很啰里啰嗦。咋一看时间不知不觉已经十二点过了 ,重庆最近的雨水是真心多,从周五晚上到现在一直没有停过,并且还下的很大,敲着代码听着雨滴敲打在我家雨棚上面的声音真好听,至少还有它们陪着我。
慢慢自己将前面学的东西总结下来想想还是蛮有成就感的,心中有那么一丁点的欣慰。能够得到园子里面的园友们支持我会很高兴!
5 、附录
本系列其他文档:
- Consul+Ocelot搭建微服务实践–初探路由
- Consul+Ocelot搭建微服务实践–负载均衡
本文内容由网友自发贡献,版权归原作者所有,本站不承担相应法律责任。如您发现有涉嫌抄袭侵权的内容,请联系:hwhale#tublm.com(使用前将#替换为@)