基于 uni-app 和 uni-cloud 小程序项目开发实战
前言
本文主要介绍 uniapp 和 uniCloud 的基础使用,以及使用小程序在测试开发的过程中的一个详细流程,比较适合第一次使用uniapp和uniCloud开发微信小程序的伙伴,或者没有过实战经验的小伙伴参考;使用 Hbuildx 配合 Uniapp 框架结合uni-ui的UI框架为大家展示Demo!
这是暑假自己做的一个《发现自然周围》的小程序,刚开始自己找不到合适的后端接口于是想着自己配置Java后端打算自己写一个后端服务器,还为此特意买了一个一个月的腾讯云2核2G轻量应用服务器,可惜后面连接到云端Mysql数据库一直失败,因为是菜鸟也一直不知道原因,并且本身是搞前端的就没继续深究了。后来用uniapp做项目时发现unicloud这个云开发平台可以基本上搞定前后台整体业务,于是就打算自己来体验一下。
一、技术栈
二、环境搭建
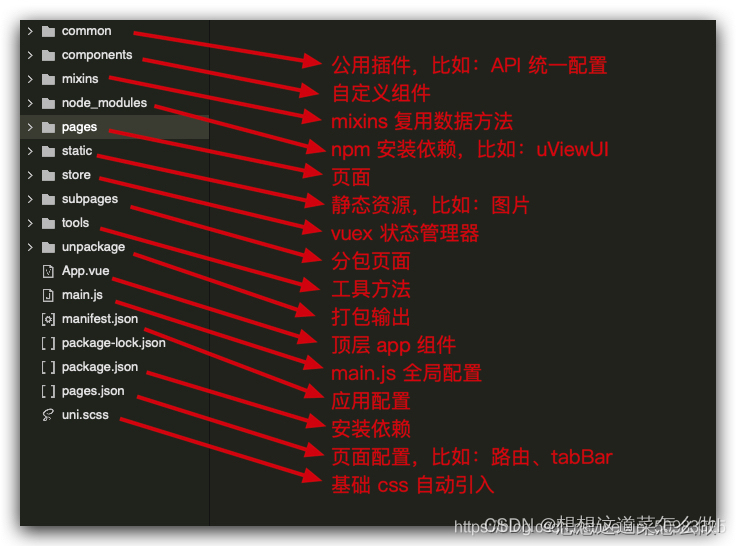
- 使用HBuilder编译器新建uniapp项目(就我个人而言,我会选择新建普通项目,因为uni-app示例项目虽然很香,但是并不是很利于开发,需要删除很多东西,所以我个人选择的是普通项目)
- 在微信开发者工具运行(Tip:如果是第一次使用,需要配置开发工具的相关路径。点击工具栏的运行 -> 运行到小程序模拟器 -> 运行设置,配置相应小程序开发者工具的路径。)
三、项目功能介绍
1.地图地点搜索及路线规划
具体步骤请看腾讯地图开放平台

这里需要注意的点:
- 地点搜索search属性适用于jssdkv1.1和jssdkv1.2,但路线规划direction属性只适用于jssdkv1.2,所以建议直接下载jssdkv1.2
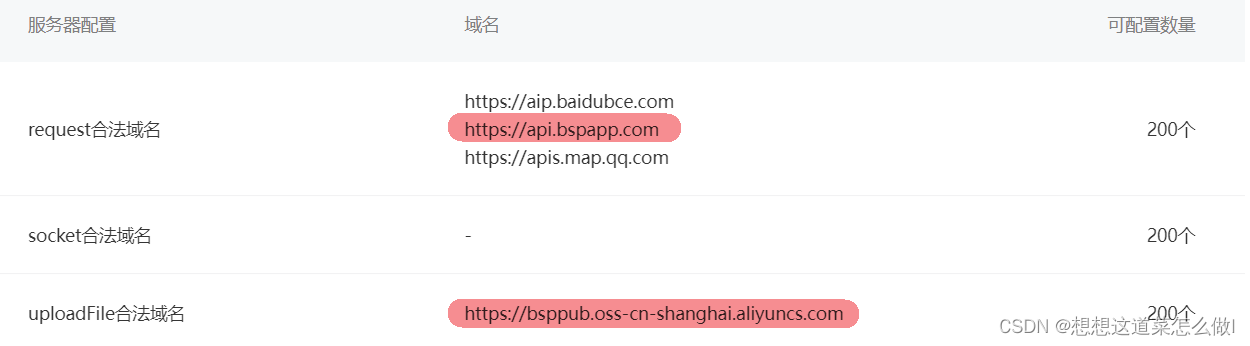
- 在微信公众平台的服务器域名中设置request合法域名(https://apis.map.qq.com),否则真机调试的时候使用不了接口

地点搜索的具体实现代码:
			search() {
				var _this = this;
				const Token = uni.getStorageSync("Token")
				if (!Token) {
					uni.navigateTo({
						url: '../../pages/login/login'
					})
				} else {
					// console.log(Token)
					this.markers = []
					qqmapsdk.search({
						keyword: this.inputValue,
						success: function(res) {
							console.log(res);
							for (var i = 0; i < res.data.length; i++) {
								_this.markers.push({
									id: res.data[i].id - 0,
									latitude: res.data[i].location.lat,
									longitude: res.data[i].location.lng,
									callout: {
										content: res.data[i].title,
										display: 'BYCLICK',
										borderRadius: 8,
										borderWidth: 8
									},
									iconPath: "../../static/images/地点.png",
									alpha: 0.5,
									width: 45,
									height: 45
								})
							}
							_this.$emit('locationMarkers', _this.markers)
						},
						fail: function(res) {
							console.log(res);
						},
					});
				}

			},
路线规划的实现代码:
			route(){
				var _this = this;
				qqmapsdk.direction({
					mode: _this.mode,
					from: {
						latitude: _this.latitude,
						longitude: _this.longitude
					},
					to: {
						latitude: _this.tolatitude,
						longitude: _this.tolongitude
					},
					success: function(res) {
						var ret = res;
						var coors = ret.result.routes[0].polyline,
							pl = [];
						//坐标解压(返回的点串坐标,通过前向差分进行压缩)
						var kr = 1000000;
						for (var i = 2; i < coors.length; i++) {
							coors[i] = Number(coors[i - 2]) + Number(coors[i]) / kr;
						}
						//将解压后的坐标放入点串数组pl中
						for (var i = 0; i < coors.length; i += 2) {
							pl.push({
								latitude: coors[i],
								longitude: coors[i + 1]
							})
						}
						_this.polyline.push({
							points: pl,
							color: '#00ff00',
							width: 4,
							arrowLine:true
						})
					},
				})
			}
2.uniCloud服务空间
- 在使用uniCloud服务空间前,需要在uniCloud Web控制台注册登录,接着创建服务空间建议选择阿里云为服务商,因为阿里云可以创建多个服务空间。
- 我一开始创建的uniapp模板为空白所以需要手动创建uniCloud云开发环境(阿里云),并关联云服务空间。

- 在新创建的服务空间创建云数据库和数据表

- 在创建新的数据表后可以直接在表结构中将permission属性的值都改为true,以便后续相关增删改查的操作

- 在项目目录下的uniCloud->database下载DB schema,便可成功连接云数据库。(之后每次更改表结构都需要进行相关操作)

具体代码实现:
获取数据(注意是异步操作)
			async getImage() {
				const db = uniCloud.database();
				const res = await db.collection('image').get()
				this.ImageURL =res.result.data
			},
上传图片
			upload(){
				const db = uniCloud.database();
				this.getUserData()
				this.imageData.username=this.userdata.nickname
				this.imageData.date=currentDate.getDate()
				db.collection('image').add(this.imageData).then(e=>{
					uni.showToast({
						title:"上传成功"
					})
					setTimeout(function(){
						uni.navigateBack()
					},1500)
				})
				console.log(this.imageData)
			},
3.AI识图
这里使用的是百度智能云的图像识别,具体步骤详见技术文档
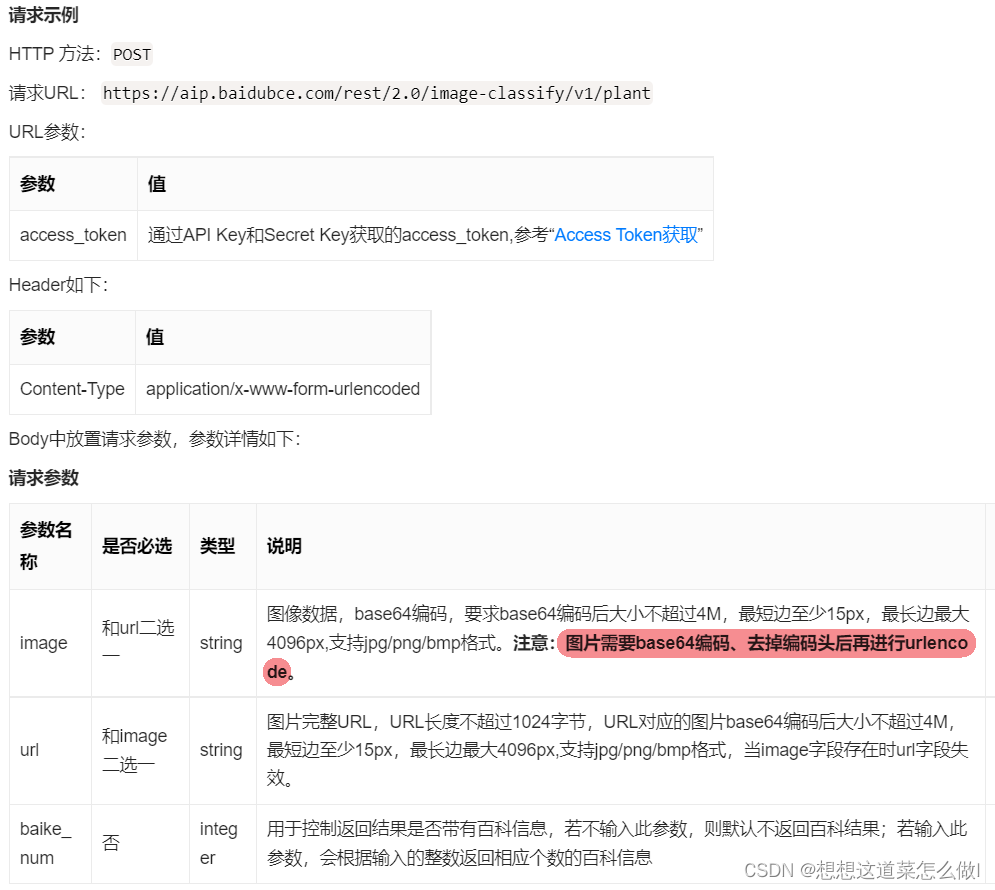
以上步骤跟着文档注册获取Token即可,这里需要注意的是图片不是普通路径而是base64编码,通过wx自带api(wx.getFileSystemManager().readFile())将图片转化成base64格式编码即可
具体实现代码
			getEncoding(){
				let _this=this
				wx.chooseMedia({
					count:1,
					mediaType:['image'],
					sizeType:['compressed'],
					success(res){
						_this.imagePath=res.tempFiles[0].tempFilePath
						wx.showLoading({
							title:'加载中',
							mask:true
						})
						//将图片转化成base64格式编码
						wx.getFileSystemManager().readFile({
							filePath:_this.imagePath,
							encoding:"base64",
							success(res){
								const discoverUrl=`https://aip.baidubce.com/rest/2.0/image-classify/v1/plant?access_token=${_this.accessToken}`
								wx.request({
									url:discoverUrl,
									method:'POST',
									header:{
										'Content-Type':'application/x-www-form-urlencoded'
									},
									data:{
										image:res.data,
										baike_num:6
									},
									dataType:'json',
									success(res) {
										console.log(res)
										wx.hideLoading()
										_this.searchResult=res.data.result
									},
									fail() {
										wx.showToast({
											title:'忙碌,请稍后再试',
											icon:'none',
											mask:true,
											duration:2000
										})
									}
								})
							},
							fail(res) {
								console.log(res)
							}
						})
					}
				})
			},
成功获取数据之后想让百度百科页面铺满整个小程序页面,选择承载网页的容器(web-view),再点击事件跳转之后马上呈现,通过页面周期onLoad监听页面加载,其参数为上个页面传递的数据。
eventChannel这个属性可以和被打开页面进行通信。
具体实现代码:
			//discover.vue
			toWebView(e){
				uni.navigateTo({
					url:'./../baike/baike',
					success(res) {
						res.eventChannel.emit('getbaikeURL',{data:e})
					}
				})
			}
		//baike.vue
		onLoad(option) {
			let _this=this
			// #ifdef APP-NVUE
			const eventChannel = this.$scope.eventChannel; // 兼容APP-NVUE
			// #endif
			// #ifndef APP-NVUE
			const eventChannel = this.getOpenerEventChannel();
			// #endif
			eventChannel.on('getbaikeURL', function(data) {
				_this.baikeURL = data.data
				_this.baikeURL = "https://" + _this.baikeURL.substr(7)
			})
		},
切记使用百度的图像识别API后也要在微信公众平台的服务器域名中设置request合法域名(https://aip.baidubce.com)

4.上拉框组件
实现思路:通过动态绑定高度样式viewTop实现上拉框的滑动渲染,再通过touchstart、touchmove、touchend分别监听手指触摸动作开始、手指触摸后移动、手指触摸动作结束。
具体实现代码:
			//<view class="upframe" :style="{ top: viewTop + 'px' }" @touchstart="touchStart" @touchmove="touchMove"
			//@touchend="touchEnd">XXX</view>
			touchStart(e) {
				this.touchPoint = [e.touches[0].pageX, e.touches[0].pageY]
			},
			touchMove(e) {
				var curPoint = [e.touches[0].pageX, e.touches[0].pageY]
				var addValue = Math.abs(curPoint[1] - this.touchPoint[1]) * 1.05
				//-60在下面,-200在上面
				//向下拖
				if (curPoint[1] >= this.touchPoint[1]) {
					if (this.viewTop >= -60) {
						return
					}
					var resTop = this.viewTop + addValue
					this.viewTop = resTop
				} else {
					//向上拖
					if (this.viewTop <= -200) {
						return
					}
					var resTop = this.viewTop - addValue
					this.viewTop = resTop
				}
				this.touchPoint[1] = curPoint[1]
			},
			touchEnd(e) {
				if (this.viewTop <= -110) {
					while (this.viewTop > -200) {
						this.viewTop = this.viewTop - 1.8
					}
				} else {
					while (this.viewTop < -60) {
						this.viewTop = this.viewTop + 1.8
					}
				}
			},
5.登陆权限
实现思路:登录时输入的用户名在数据库查询是否存在,存在就进行密码验证都成功便可获得一个Token值,用于小程序各个功能的点击使用。Token值可自定利用uni.setStorageSync进行存储,最后在App.vue页面中在生命周期onLaunch利用uni.removeStorageSync中进行销毁。
		async signIn(){
				const db = uniCloud.database();
				const res= await db.collection('users').where({username:this.username}).get()
				// console.log(res.result.data[0].username,res.result.data[0].password)
				if(this.username==res.result.data[0].username&&this.password==res.result.data[0].password){
					uni.setStorageSync('Token','15sda6d1sa5#4d5asa')
					this.$store.commit('getuserData',res.result.data[0])
					uni.showToast({
						title:'登陆成功',
					})
					setTimeout(function(){
						uni.navigateBack()
					},1500)
				}else{
					uni.showToast({
						title:'登陆失败',
						icon:'error'
					})
				}

			}
		}
		onLaunch: function() {
			console.log('App Launch')
			uni.removeStorageSync('Token')
		},
四、遇到问题
- 在不存在语法问题的情况下,动态添加样式老是失败,后来重新运行小程序模拟器才成功。有时候添加CSS样式失败,不妨试试重新运行小程序
- 页面组件的onLoad和onShow如果用不了直接使用Vue的mounted()
- uniapp大量写if else语句会导致代码执行性能低下和管理混乱,所以if判断语句需要加上条件编译
- uniapp新建组件虽然可以不用写入app.json文件里,但需要在父组件里的components属性里注册,否则会有依赖问题出现
- 父组件动态传值不能直接修改应该用watch监听(vue知识没过关hhh)
五、发行
- 代码测试时为了方便uniCloud总是连接本地云函数,当发行时需要更改为连接云端云函数

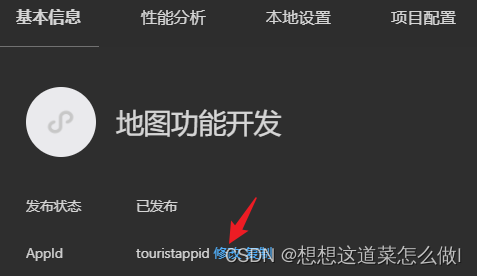
- HBuider运行到微信开发者工具,若出现更改AppID失败tourist appid,自己添加即可
- uniCloud要求在小程序管理后台配置小程序应用的联网服务器域名,否则无法联网。直接将uniCloud的域名填写在小程序管理后台即可。
总结
以上就是项目的主要内容,本文仅仅简单介绍了项目的主要功能,重点熟悉了uniapp的使用和uniCloud云数据库和一些接口的调用与布局.具体可以代码可在我的GitHub(https://github.com/18859985795/Find)下载。