Flask开发实战:个人博客(四)
本篇博客将是《Flask开发实战:个人博客》的最后一篇。本篇文章将会详细介绍博客后台的编写。
为了支持管理员管理文章、分类、评论和链接,我们需要提供后台管理功能。通常来说,程序的这一部分被称为管理后台、控制面板或仪表盘等。这里通常会提供网站的资源信息和运行状态,管理员可以统一查看和管理所有资源。管理员面板通常会使用独立样式的界面,所以你可以为这部分功能的模板创建一个单独的基模板。为了保持简单,Bluelog 的管理后台和前台页面使用相同的样式。
Bluelog 的管理功能比较简单,我们没有提供一个管理后台主页,取而代之的是,我们在导航栏上添加链接作为各个管理功能的入口。

{% from 'bootstrap/nav.html' import render_nav_item %}
...
<ul class="nav navbar-nav navbar-right">
    {% if current_user.is_authenticated %}
        <li class="nav-item dropdown">
            <a href="#" class="nav-link dropdown-toggle" data-toggle="dropdown" role="button"
               aria-haspopup="true"
               aria-expanded="false">
                New <span class="caret"></span>
            </a>
            <div class="dropdown-menu" aria-labelledby="navbarDropdown">
                <a class="dropdown-item" href="{{ url_for('admin.new_post') }}">Post</a>
                <a class="dropdown-item" href="{{ url_for('admin.new_category') }}">Category</a>
                <a class="dropdown-item" href="{{ url_for('admin.new_link') }}">Link</a>
            </div>
        </li>

        <li class="nav-item dropdown">
            <a href="#" class="nav-link dropdown-toggle" data-toggle="dropdown" role="button"
               aria-haspopup="true"
               aria-expanded="false">
                Manage <span class="caret"></span>
                {% if unread_comments %}
                    <span class="badge badge-success">new</span>
                {% endif %}
            </a>
            <div class="dropdown-menu" aria-labelledby="navbarDropdown">
                <a class="dropdown-item" href="{{ url_for('admin.manage_post') }}">Post</a>
                <a class="dropdown-item" href="{{ url_for('admin.manage_category') }}">Category</a>
                <a class="dropdown-item" href="{{ url_for('admin.manage_comment') }}">
                    Comment
                    {% if unread_comments %}
                        <span class="badge badge-success">{{ unread_comments }}</span>
                    {% endif %}
                </a>
                <a class="dropdown-item" href="{{ url_for('admin.manage_link') }}">Link</a>
            </div>
        </li>

        {{ render_nav_item('admin.settings', 'Settings') }}
    {% endif %}
</ul>
通过添加if判断,使这些链接均在 current_user.is_authenticated 为 True,即用户已登入的情况下才会渲染。Manage 下拉按钮中包含管理文章、分类、评论的链接,New 下拉按钮包含创建文章、分类的链接。
当博客中有用户提交了新的评论时,我们需要在导航栏中添加提示。为此,我们在 Manage 按钮的文本中添加了一个 if 判断,如果 unread_comments 变量的值不为 0,就渲染一个 new 标记(badge)。相同的,在下拉列表中的“管理评论”链接文本中,如果 unread_comments 变量不为 0,就渲染出待审核的评论数量标记。
这个 unread_comments 变量存储了待审核评论的数量,为了能够在基模板中使用这个变量,我们需要在 bluelog//init.py 中创建的模板上下文处理函数中查询未审核的评论数量,并传入模板上下文。这个变量只在管理员登录后才可使用,所以通过添加if判断实现根据当前用户的认证状态来决定是否执行查询。
@app.context_processor
def make_template_context():
	...
	if current_user.is_authenticated
		unread_comments = Comment.query.filter_by(reviewed=False).count()
	else:
		unread_comments = None
	return dict(unread_comments=unread_comments)
1.文章管理
我们要分别为分类、文章和评论创建单独的管理页面,这些内容基本相同,因此本节会以文章的管理主页作为介绍的重点。另外,分类的创建、编辑和删除与文章的创建、编辑和删除实现代码基本相同,这里也将以文章相关操作的实现作为介绍重点。
1.1 文章管理主页
我们在渲染文章管理页面的 manage_post 视图时,要查询所有文章记录,并进行分页处理,然后传入模板中。
@admin_bp.route('/post/manage')
@login_required
def manage_post():
    page = request.args.get('page', 1, type=int)
    pagination = Post.query.order_by(Post.timestamp.desc()).paginate(
        page, per_page=current_app.config['BLUELOG_MANAGE_POST_PER_PAGE'])
    posts = pagination.items
    return render_template('admin/manage_post.html', page=page, pagination=pagination, posts=posts)
在这个视图渲染的 manage_category.html 模板中,我们以表格的形式显示文章列表,依次渲染出文章的标题、所属的分类、发表时间、文章字数、包含的评论数量以及相应的操作按钮。
{% extends 'base.html' %}
{% from 'bootstrap/pagination.html' import render_pagination %}

{% block title %}Manage Posts{% endblock %}

{% block content %}
<div class="page-header">
    <h1>Posts
        <small class="text-muted">{{ pagination.total }}</small>
        <span class="float-right"><a class="btn btn-primary btn-sm"
                                     href="{{ url_for('.new_post') }}">New Post</a></span>
    </h1>
</div>
{% if posts %}
<table class="table table-striped">
    <thead>
    <tr>
        <th>No.</th>
        <th>Title</th>
        <th>Category</th>
        <th>Date</th>
        <th>Comments</th>
        <th>Words</th>
        <th>Actions</th>
    </tr>
    </thead>
    {% for post in posts %}
    <tr>
        <td>{{ loop.index + ((page - 1) * config.BLUELOG_MANAGE_POST_PER_PAGE) }}</td>
        <td><a href="{{ url_for('blog.show_post', post_id=post.id) }}">{{ post.title }}</a></td>
        <td><a href="{{ url_for('blog.show_category', category_id=post.category.id) }}">{{ post.category.name }}</a>
        </td>
        <td>{{ moment(post.timestamp).format('LL') }}</td>
        <td><a href="{{ url_for('blog.show_post', post_id=post.id) }}#comments">{{ post.comments|length }}</a></td>
        <td>{{ post.body|striptags|length }}</td>
        <td>
            <form class="inline" method="post"
                  action="{{ url_for('.set_comment', post_id=post.id, next=request.full_path) }}">
                <input type="hidden" name="csrf_token" value="{{ csrf_token() }}"/>
                <button type="submit" class="btn btn-warning btn-sm">
                    {% if post.can_comment %}Disable{% else %}Enable{% endif %} Comment
                </button>
            </form>
            <a class="btn btn-info btn-sm" href="{{ url_for('.edit_post', post_id=post.id) }}">Edit</a>
            <form class="inline" method="post"
                  action="{{ url_for('.delete_post', post_id=post.id, next=request.full_path) }}">
                <input type="hidden" name="csrf_token" value="{{ csrf_token() }}"/>
                <button type="submit" class="btn btn-danger btn-sm" onclick="return confirm('Are you sure?');">Delete
                </button>
            </form>
        </td>
    </tr>
    {% endfor %}
</table>
<div class="page-footer">{{ render_pagination(pagination) }}</div>
{% else %}
<div class="tip"><h5>No posts.</h5></div>
{% endif %}
{% endblock %}
每一个文章记录的左侧都显示一个序号标记。如果单独使用 loop.index 变量渲染数量标记,那么每一页的文章记录都将从 1 到 15 重复(配置变量 BLUELOG_MANAGE_POST_PER_PAGE 的值),因为每一页最多只有 15 条文章记录。正确的评论数量标记可以通过 “当前迭代数 + ((当前页数 - 1) × 每页记录数)” 的形式获取。
删除操作会修改数据库,为了避免 CSRF 攻击,我们需要使用表单 form 元素来提交 POST 请求,表单中必须使用 CSRFProtect 提供的 csrf_token() 函数渲染包含 CSRF 令牌的隐藏字段,字段的 name 值需要设为 csrf_token。另外,用来删除文章的视图也需要设置仅监听 POST 方法。
文章的编辑和删除按钮并排显示,由于两个按钮离得很近,可能会导致误操作。而且一旦单击删除按钮,文章就会立刻被删除,故我们需要添加一个删除确认弹窗。对于我们的程序来说,使用浏览器内置的确认弹窗已经足够,只需要在 button 标签中添加一个 onclick 属性,设置为一行 JavaScript 代码:return confirm(),在 confirm() 中传入提示信息作为参数。运行程序后,当用户单击文章下方的删除按钮,会执行这行代码,跳出包含传入信息的确认弹窗,这会打开浏览器内置的 confirm 弹窗组件。
当用户单击确认后,confirm() 会返回 True,这时才会访问链接中的 URL。除了管理页面,我们还在文章内容页面添加了编辑和删除按钮。文章管理页面和文章正文页面都包含删除按钮,但却存在不同的行为:对于文章管理页面来说,删除文章后我们希望仍然重定向回文章管理页面,所以对应的 URL 中的 next 参数使用 request.full_path 获取当前路径;而对于文章正文页面,删除文章后,原 URL 就不再存在,这时需要重定向到主页,所以将 next 设为主页 URL。
1.2 创建文章
博客最重要的功能就是撰写文章,new_post 视图负责渲染创建文章的模板,并处理页面中表单提交的 POST 请求。
from bluelog.forms import PostForm
from bluelog.models import Post, Category

@admin_bp.route('/post/new', methods=['GET', 'POST'])
@login_required
def new_post():
    form = PostForm()
    if form.validate_on_submit():
        title = form.title.data
        body = form.body.data
        category = Category.query.get(form.category.data)
        post = Post(title=title, body=body, category=category)
        # same with:
        # category_id = form.category.data
        # post = Post(title=title, body=body, category_id=category_id)
        db.session.add(post)
        db.session.commit()
        flash('Post created.', 'success')
        return redirect(url_for('blog.show_post', post_id=post.id))
    return render_template('admin/new_post.html', form=form)
这里也可以直接通过将表单 category 字段的值赋给 Post 模型的外键字段 Post.category_id 来建立关系,即 category_id=form.category.data。在程序中,为了便于理解,均使用将具体对象赋值给关系属性的方式来建立关系。
表单验证失败会重新渲染模板,并显示错误消息。表单验证成功后,我们需要保存文章数据。各个表单字段的数据都通过 data 属性获取,创建一个新的 Post 实例作为文章对象,将表单数据赋值给对应的模型类属性。另外,因为表单分类字段(PostForm.category)的值是分类记录的 id 字段值,所以我们需要从 Category 模型查询对应的分类记录,然后通过 Post 模型的 category 关系属性来建立关系,即 category=Category.query.get(form.category.data)。将新创建的 post 对象添加到新数据库会话并提交后,使用 redirect() 函数重定向到文章页面,将新创建的 post 对象的 id 作为 URL 变量传入 url_for() 函数。
当请求类型为 GET 时,这个视图会实例化用于创建文章的 PostForm 表单,并将其传入模板。在渲染的模板 new_post.html 中,我们使用 Bootstrap-Flask 提供的 render_form() 宏渲染表单。因为 PostForm 表单类中使用了扩展 Flask-CKEditor 提供的 CKEditor 字段,所以在模板中需要加载 CKEditor 资源,并使用 ckeditor.config() 方法加载 CKEditor 配置。
{% extends 'base.html' %}
{% from 'bootstrap/form.html' import render_form %}

{% block title %}New Post{% endblock %}

{% block content %}
    <div class="page-header">
        <h1>New Post</h1>
    </div>
    {{ render_form(form) }}
{% endblock %}

{% block scripts %}
    {{ super() }}
    <script type="text/javascript" src="{{ url_for('static', filename='ckeditor/ckeditor.js') }}"></script>
    {{ ckeditor.config(name='body') }}
{% endblock %}
CKEditor 的资源包我们已经下载并放到 static 目录下,这里只需要加载 ckeditor.js 文件即可。因为 CKEditor 编辑器只在创建或编辑文章的页面使用,所以可以只在这些页面加载对应的资源,而不是在基模板中加载。
1.3 编辑与删除
编辑文章的具体实现和撰写新文章类似,这两个功能使用同一个表单类 PostForm,而且视图函数和模板文件都基本相同,主要的区别是我们需要在用户访问编辑页面时把文章数据预先放置到表单中。
@admin_bp.route('/post/<int:post_id>/edit', methods=['GET', 'POST'])
@login_required
def edit_post(post_id):
    form = PostForm()
    post = Post.query.get_or_404(post_id)
    if form.validate_on_submit():
        post.title = form.title.data
        post.body = form.body.data
        post.category = Category.query.get(form.category.data)
        db.session.commit()
        flash('Post updated.', 'success')
        return redirect(url_for('blog.show_post', post_id=post.id))
    form.title.data = post.title
    form.body.data = post.body
    form.category.data = post.category_id
    return render_template('admin/edit_post.html', form=form)
edit_post 视图的工作可以概括为:首先从数据库中获取指定 id 的文章。如果是 GET 请求,使用文章的数据作为表单数据,然后渲染模板。如果是 POST 请求,即用户单击了提交按钮,则根据表单的数据更新文章记录的数据。
和保存文章时的做法相反,通过把数据库字段的值分别赋给表单字段的数据,在渲染表单时,这些值会被填充到对应的 input 标签的 value 属性中,从而显示在输入框内。需要注意,因为表单中的分类字段是存储分类记录的 id 值,所以这里使用 post.category_id 作为 form.category.data 的值。
通过 delete_post 视图可以删除文章,我们首先从数据库中获取指定 id 的文章记录,然后使 db.session.delete() 方法删除记录并提交数据库。
from bluelog.utils import redirect_back

@admin_bp.route('/post/<int:post_id>/delete', methods=['POST'])
@login_required
def delete_post(post_id):
    post = Post.query.get_or_404(post_id)
    db.session.delete(post)
    db.session.commit()
    flash('Post deleted.', 'success')
    return redirect_back()
这个视图通过设置 methods 参数实现仅允许 POST 方法。因为在文章管理页面和文章内容页面都包含删除按钮,所以这里使用 redirect_back() 函数来重定向回上一个页面。
2.评论管理
在编写评论管理页面前,我们要在文章内容页面的评论列表中添加删除按钮。
<div class="float-right">
    <a class="btn btn-light btn-sm"
       href="{{ url_for('.reply_comment', comment_id=comment.id) }}">Reply</a>
    {% if current_user.is_authenticated %}
        <a class="btn btn-light btn-sm" href="mailto:{{ comment.email }}">Email</a>
        <form class="inline" method="post"
              action="{{ url_for('admin.delete_comment', comment_id=comment.id, next=request.full_path) }}">
            <input type="hidden" name="csrf_token" value="{{ csrf_token() }}"/>
            <button type="submit" class="btn btn-danger btn-sm"
                    onclick="return confirm('Are you sure?');">Delete
            </button>
        </form>
    {% endif %}
</div>
因为删除按钮同时会被添加到评论管理页面的评论列表中,所以我们在删除评论的 URL 后附加了 next 参数,用于重定向回上一个页面。如果当前用户是管理员,我们还会显示除了管理员发表的评论以外的评论者邮箱,渲染成 mailto 链接。
和文章管理页面类似,在评论管理页面我们也会将评论以表格的形式列出,这里不再给出具体代码。和文章管理页面相比,评论管理页面主要有两处不同:添加批准评论的按钮以及在页面上提供评论数据的筛选功能,我们将重点介绍这两个功能的实现。在前台页面,除了评论删除按钮,我们还要向管理员提供关闭评论的功能,我们先来看看评论开关的具体实现。
2.1 关闭评论
尽管交流是社交的基本要素,但有时作者也希望不被评论打扰。为了支持评论开关功能,我们需要在 Post 模型中添加一个类型为 db.Boolean 的 can_comment 字段,用来存储是否可以评论的布尔值,默认值为 True。
class Post(db.Model):
	...
	can_comment = db.Column(db.Boolean, default=True)
然后我们需要在模板中评论区右上方添加一个开关按钮:
{% if current_user.is_authenticated %}
    <form class="float-right" method="post"
          action="{{ url_for('admin.set_comment', post_id=post.id, next=request.full_path) }}">
        <input type="hidden" name="csrf_token" value="{{ csrf_token() }}"/>
        <button type="submit" class="btn btn-warning btn-sm">
            {% if post.can_comment %}Disable{% else %}Enable{% endif %} Comment
        </button>
    </form>
{% endif %}
在管理文章的页面,我们还在每一个文章的操作区添加了关闭和开启评论的按钮,渲染的方式基本相同,具体可以到源码仓库中查看。
<button type="submit" class="btn btn-warning btn-sm">
    {% if post.can_comment %}Disable{% else %}Enable{% endif %} Comment
</button>
另外,在设置回复评论状态的 reply_comment 视图中,我们在开始添加一个 if 判断,如果对应文章不允许评论,那么就直接重定向回文章页面。
@blog_bp.route('/reply/comment/<int:comment_id>')
def reply_comment(comment_id):
    comment = Comment.query.get_or_404(comment_id)
    if not comment.post.can_comment:
        flash('Comment is disabled.', 'warning')
        return redirect(url_for('.show_post', post_id=comment.post.id))
    return redirect(
        url_for('.show_post', post_id=comment.post_id, reply=comment_id, author=comment.author) + '#comment-form')
我们根据 post.can_comment 的值来渲染不同的按钮文本和表单 action 值。因为这个功能很简单,所以两个按钮指向同一个 URL,URL 对应的 set_comment 视图如下所示。
@admin_bp.route('/post/<int:post_id>/set-comment', methods=['POST'])
@login_required
def set_comment(post_id):
    post = Post.query.get_or_404(post_id)
    if post.can_comment:
        post.can_comment = False
        flash('Comment disabled.', 'success')
    else:
        post.can_comment = True
        flash('Comment enabled.', 'success')
    db.session.commit()
    return redirect_back()
我们当然可以分别创建一个 enable_comment() 和 disable_comment() 视图函数来开启和关闭评论,但是因为比较简单,所以我们可以将这两个操作统一在 set_comment() 视图函数中完成。在这个视图函数里,我们首先获取文章对象,然后根据文章的 can_comment 的值来设置相反的布尔值。
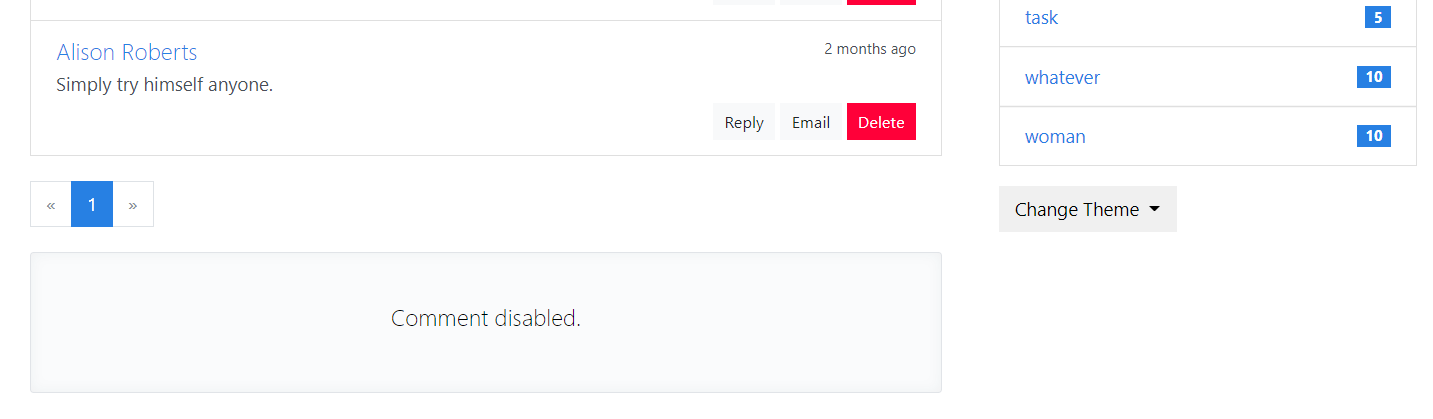
最后,我们还需要在评论表单的渲染代码前添加一个判断语句。如果管理员关闭了当前博客的评论,那么一个相应的提示会取代评论表单,显示在评论区底部。
{% from 'bootstrap/form.html' import render_form %}
...
{% if post.can_comment %}
    <div id="comment-form">
        {{ render_form(form, action=request.full_path) }}
    </div>
{% else %}
    <div class="tip"><h5>Comment disabled.</h5></div>
{% endif %}
为了避免表单提交后因为 URL 中包含 URL 片段而跳转到页面的某个位置(Html 锚点),这里显式地使用 action 属性指定表单提交的目标 URL,使用 request.full_path 获取不包含 URL 片段的当前 URL(但包含我们需要的查询字符串)。
2.2 评论审核
对于没有通过审核的评论,在评论表格的操作列要添加一个批准按钮。如果评论对象的 reviewed 字段值为 False,则显示 “批准” 按钮,并将该行评论以橙色背景显示(添加 table-warning 样式类)。
<td>
    {% if not comment.reviewed %}
        <form class="inline" method="post"
              action="{{ url_for('.approve_comment', comment_id=comment.id, next=request.full_path) }}">
            <input type="hidden" name="csrf_token" value="{{ csrf_token() }}"/>
            <button type="submit" class="btn btn-success btn-sm">Approve</button>
        </form>
    {% endif %}
    ...
</td>
因为这个操作会修改数据,我们同样需要使用表单 form 元素来提交 POST 请求。批准按钮指向的 approve_comment 视图仅监听 POST 方法。
@admin_bp.route('/comment/<int:comment_id>/approve', methods=['POST'])
@login_required
def approve_comment(comment_id):
    comment = Comment.query.get_or_404(comment_id)
    comment.reviewed = True
    db.session.commit()
    flash('Comment published.', 'success')
    return redirect_back()
在 approve_comment 视图中,我们将对应的评论记录的 reviewed 字段设为 Ture,表示通过审核。通过审核后的评论会显示在文章页面下方的评论列表中。虽然评论的批准功能只在管理评论页面提供,我们仍然在这里使用 redirect_back() 函数返回上一个页面,这是因为评论管理页面根据查询参数 filter 的值会显示不同的过滤结果,而在 “全部” 和 “未读” 结果中的未读评论记录都会有 “Approve” 按钮,所以我们需要重定向回正确的过滤分类下。
为了正确返回上一个页面,在表单 action 属性中的 URL 后需要将 next 查询参数的值设为 request.full_path 以获取包含查询字符串的完整路径。
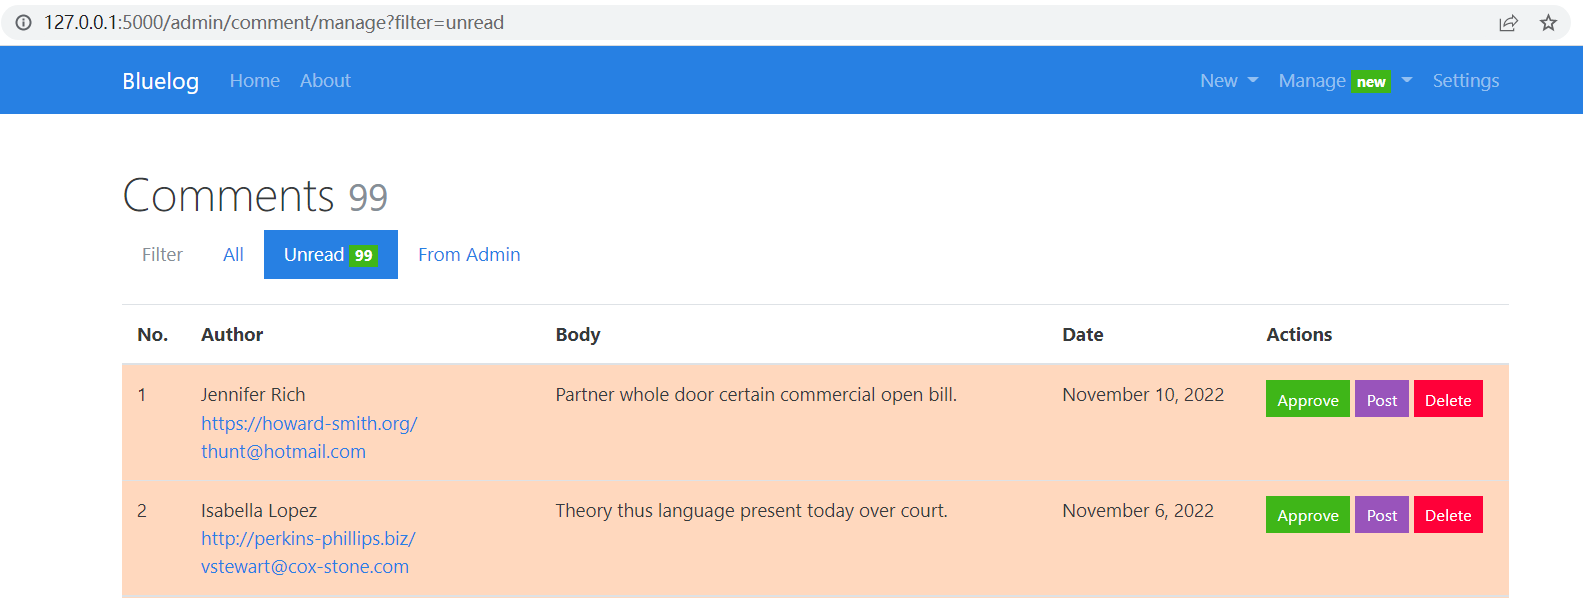
2.3 筛选评论
因为评论的数据比较复杂,我们需要在管理页面提供评论的筛选功能。评论主要分为三类:所有评论、未读评论和管理员发布的评论。我们将使用查询参数 filter 传入筛选的评论类型,这三种类型分别使用 all、unread 和 admin 表示。在渲染评论管理主页的 manage_comment 视图中,我们从请求对象中获取键为 filter 的查询参数值,然后根据这个值获取不同类别的记录。
@admin_bp.route('/comment/manage')
@login_required
def manage_comment():
    filter_rule = request.args.get('filter', 'all')  # 'all', 'unreviewed', 'admin'
    page = request.args.get('page', 1, type=int)
    per_page = current_app.config['BLUELOG_COMMENT_PER_PAGE']
    if filter_rule == 'unread':
        filtered_comments = Comment.query.filter_by(reviewed=False)
    elif filter_rule == 'admin':
        filtered_comments = Comment.query.filter_by(from_admin=True)
    else:
        filtered_comments = Comment.query

    pagination = filtered_comments.order_by(Comment.timestamp.desc()).paginate(page, per_page=per_page)
    comments = pagination.items
    return render_template('admin/manage_comment.html', comments=comments, pagination=pagination)
除了通过查询字符串获取筛选条件,也可以为 manage_comment 视图附加一个路由,比如 @admin_bp.route(‘/comment/manage/<filter>’),通过 URL 变量 filter 获取。另外,在 URL 规则中使用 any 转换器可以指定可选值。
在 manage_comment.html 模板中,我们添加一排导航标签按钮,分别用来获取 “全部” “未读” 和 “管理员” 类别的评论
<ul class="nav nav-pills">
    <li class="nav-item">
        <a class="nav-link disabled" href="#">Filter </a>
    </li>
    <li class="nav-item">
        <a class="nav-link {% if request.args.get('filter', 'all') == 'all' %}active{% endif %}"
           href="{{ url_for('admin.manage_comment', filter='all') }}">All</a>
    </li>
    <li class="nav-item">
        <a class="nav-link {% if request.args.get('filter') == 'unread' %}active{% endif %}"
           href="{{ url_for('admin.manage_comment', filter='unread') }}">Unread {% if unread_comments %}<span
                class="badge badge-success">{{ unread_comments }}</span>{% endif %}</a>
    </li>
    <li class="nav-item">
        <a class="nav-link {% if request.args.get('filter') == 'admin' %}active{% endif %}"
           href="{{ url_for('admin.manage_comment', filter='admin') }}">From Admin</a>
    </li>
</ul>
三个选项的 URL 都指向 manage_comment 视图,但都附加了查询参数 filter 的对应值。
再次提醒一下,当使用 url_for 生成 URL 时,传入的关键字参数如果不是 URL 变量,那么会作为查询参数附加在 URL 后面。
这里的导航链接没有使用 render_nav_item(),为了更大的灵活性而选择手动处理。在模板中,我们通过 request.args.get(‘filter’,‘all’) 获取查询参数 filter 的值来决定是否为某个导航按钮添加 active 类。默认激活 All 按钮,如果用户单击了筛选下拉列表中的 “Unread” 选项,客户端会发出一个请求到 http://localhost:5000/manage/comment?filter=unread,manage_comment 视图就会返回对应的未读记录,而模板中的 Unread 导航按钮也会显示激活状态,这时操作区域也会显示一个 Approve 按钮。
3.分类管理
分类的管理功能比较简单,这里不再完整讲解,具体可以到源码仓库中查看。分类的删除值得一提,实现分类的删除功能有下面两个要注意的地方:
- 禁止删除默认分类。
- 删除某一分类时前,把该分类下的所有文章移动到默认分类中。
为了避免用户删除默认分类,首先在模板中渲染分类列表时需要添加一个 if 判断,避免为默认分类渲染编辑和删除按钮。在删除分类的视图函数中,我们仍然需要再次验证被删除的分类是否是默认分类。在视图函数中使用删除分类时,我们首先判断分类的 id,如果是默认分类(因为默认分类最先创建,id 为 1),则返回错误提示。
@admin_bp.route('/category/<int:category_id>/delete', methods=['POST'])
@login_required
def delete_category(category_id):
    category = Category.query.get_or_404(category_id)
    if category.id == 1:
        flash('You can not delete the default category.', 'warning')
        return redirect(url_for('blog.index'))
    category.delete()
    flash('Category deleted.', 'success')
    return redirect(url_for('.manage_category'))
上面的视图函数中,删除分类使用的 delete() 方法是我们在 Category 类中创建的方法,这个方法实现了第二个功能:将被删除分类的文章的分类设为默认分类,然后删除该分类记录。
class Category(db.Model):
    id = db.Column(db.Integer, primary_key=True)
    name = db.Column(db.String(30), unique=True)

    posts = db.relationship('Post', back_populates='category')

    def delete(self):
        default_category = Category.query.get(1)
        posts = self.posts[:]
        for post in posts:
            post.category = default_category
        db.session.delete(self)
        db.session.commit()
我们使用 Category.query.get(1) 获取默认分类记录。这个方法迭代要删除分类的所有相关文章记录,为这些文章重新指定分类为默认分类,然后 db.session.delete() 方法删除分类记录,最后提交数据库会话。
到目前为止,Bluelog 程序的开发已经基本结束了。谢谢大家的支持!