一、器材
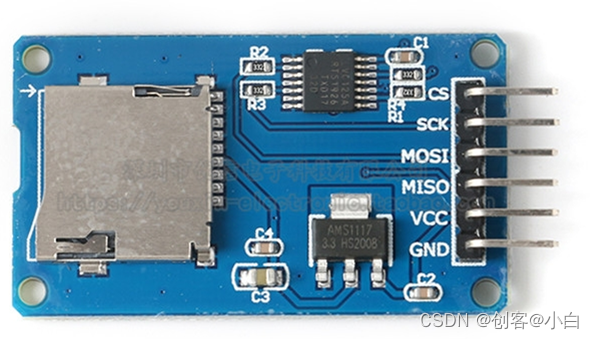
SD卡模块
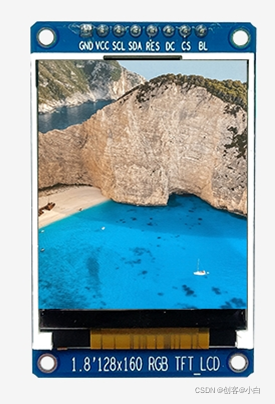
1.8寸TFT屏,ST7735
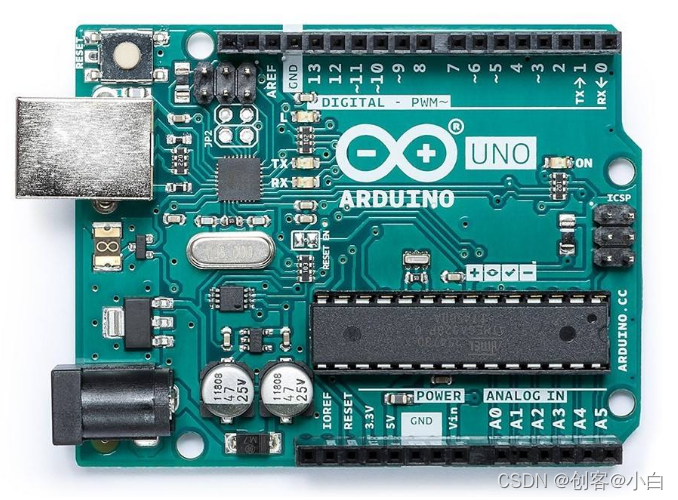
arduino uno开发板
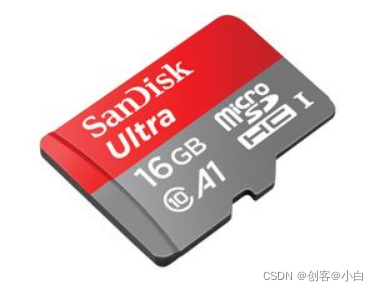
SD卡
二、接线
| TFT屏 |
arduino uno |
| GND |
GND |
| VCC |
5V |
| SCL |
D13 |
| SDA |
D11 |
| RES |
D8 |
| DC |
D10 |
| CS |
D9 |
| BL |
D7 |
|
|
| SD卡模块 |
arduino uno |
| GND |
GND |
| VCC |
5V |
| MISO |
D12 |
| MOSI |
D11 |
| CLK |
D13 |
| CS |
D4 |
|
|
|
|
|
|
三、正式开始
首先我们从网上找到一张想要显示的图片,比如下面这一张

然后我们打开电脑自带的画图工具打开这张图片
然后重新调整像素大小到以下图所示160*128
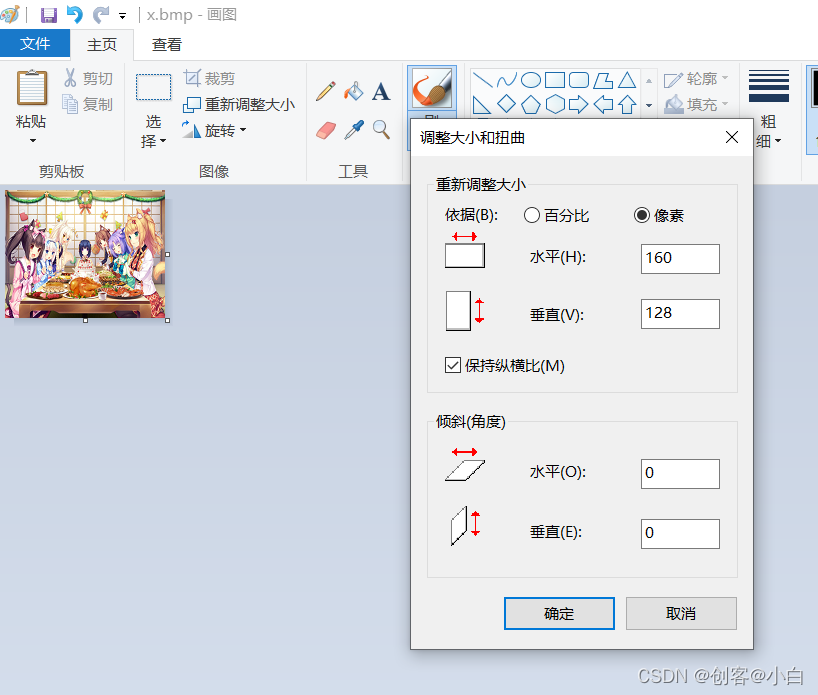
然后保存为。bmp格式的图片,这里我保存为x.bmp然后移动到SD卡中,再把SD卡插到SD卡模块中即可。
再复制以下程序,下载到arduino中
#include <Adafruit_GFX.h>
#include <Adafruit_ST7735.h>
#include <SD.h>
#include <SPI.h>

#if defined(__SAM3X8E__)
    #undef __FlashStringHelper::F(string_literal)
    #define F(string_literal) string_literal
#endif

// TFT display and SD card will share the hardware SPI interface.
// Hardware SPI pins are specific to the Arduino board type and
// cannot be remapped to alternate pins.  For Arduino Uno,
// Duemilanove, etc., pin 11 = MOSI, pin 12 = MISO, pin 13 = SCK.
#define SD_CS    4  // Chip select line for SD card
#define TFT_CS  9  // Chip select line for TFT display
#define TFT_DC   10  // Data/command line for TFT
#define TFT_RST  8  // Reset line for TFT (or connect to +5V)

Adafruit_ST7735 tft = Adafruit_ST7735(TFT_CS, TFT_DC, TFT_RST);

#define BUFFPIXEL 20

void bmpDraw(char *filename, uint8_t x, uint8_t y) {

  File     bmpFile;
  int      bmpWidth, bmpHeight;   // W+H in pixels
  uint8_t  bmpDepth;              // Bit depth (currently must be 24)
  uint32_t bmpImageoffset;        // Start of image data in file
  uint32_t rowSize;               // Not always = bmpWidth; may have padding
  uint8_t  sdbuffer[3*BUFFPIXEL]; // pixel buffer (R+G+B per pixel)
  uint8_t  buffidx = sizeof(sdbuffer); // Current position in sdbuffer
  boolean  goodBmp = false;       // Set to true on valid header parse
  boolean  flip    = true;        // BMP is stored bottom-to-top
  int      w, h, row, col;
  uint8_t  r, g, b;
  uint32_t pos = 0, startTime = millis();

  if((x >= tft.width()) || (y >= tft.height())) return;

  Serial.println();
  Serial.print("Loading image '");
  Serial.print(filename);
  Serial.println('\'');

  // Open requested file on SD card
  if ((bmpFile = SD.open(filename)) == NULL) {
    Serial.print("File not found");
    return;
  }

  // Parse BMP header
  if(read16(bmpFile) == 0x4D42) { // BMP signature
    Serial.print("File size: "); Serial.println(read32(bmpFile));
    (void)read32(bmpFile); // Read & ignore creator bytes
    bmpImageoffset = read32(bmpFile); // Start of image data
    Serial.print("Image Offset: "); Serial.println(bmpImageoffset, DEC);
    // Read DIB header
    Serial.print("Header size: "); Serial.println(read32(bmpFile));
    bmpWidth  = read32(bmpFile);
    bmpHeight = read32(bmpFile);
    if(read16(bmpFile) == 1) { // # planes -- must be '1'
      bmpDepth = read16(bmpFile); // bits per pixel
      Serial.print("Bit Depth: "); Serial.println(bmpDepth);
      if((bmpDepth == 24) && (read32(bmpFile) == 0)) { // 0 = uncompressed

        goodBmp = true; // Supported BMP format -- proceed!
        Serial.print("Image size: ");
        Serial.print(bmpWidth);
        Serial.print('x');
        Serial.println(bmpHeight);

        // BMP rows are padded (if needed) to 4-byte boundary
        rowSize = (bmpWidth * 3 + 3) & ~3;

        // If bmpHeight is negative, image is in top-down order.
        // This is not canon but has been observed in the wild.
        if(bmpHeight < 0) {
          bmpHeight = -bmpHeight;
          flip      = false;
        }

        // Crop area to be loaded
        w = bmpWidth;
        h = bmpHeight;
        if((x+w-1) >= tft.width())  w = tft.width()  - x;
        if((y+h-1) >= tft.height()) h = tft.height() - y;

        // Set TFT address window to clipped image bounds
        tft.startWrite();
        tft.setAddrWindow(x, y, w, h);

        for (row=0; row<h; row++) { // For each scanline...

          // Seek to start of scan line.  It might seem labor-
          // intensive to be doing this on every line, but this
          // method covers a lot of gritty details like cropping
          // and scanline padding.  Also, the seek only takes
          // place if the file position actually needs to change
          // (avoids a lot of cluster math in SD library).
          if(flip) // Bitmap is stored bottom-to-top order (normal BMP)
            pos = bmpImageoffset + (bmpHeight - 1 - row) * rowSize;
          else     // Bitmap is stored top-to-bottom
            pos = bmpImageoffset + row * rowSize;
          if(bmpFile.position() != pos) { // Need seek?
            tft.endWrite();
            bmpFile.seek(pos);
            buffidx = sizeof(sdbuffer); // Force buffer reload
          }

          for (col=0; col<w; col++) { // For each pixel...
            // Time to read more pixel data?
            if (buffidx >= sizeof(sdbuffer)) { // Indeed
              bmpFile.read(sdbuffer, sizeof(sdbuffer));
              buffidx = 0; // Set index to beginning
              tft.startWrite();
            }

            // Convert pixel from BMP to TFT format, push to display
            r = sdbuffer[buffidx++];
            g = sdbuffer[buffidx++];
            b = sdbuffer[buffidx++];
            tft.pushColor(tft.color565(r,g,b));
          } // end pixel
        } // end scanline
        tft.endWrite();
        Serial.print("Loaded in ");
        Serial.print(millis() - startTime);
        Serial.println(" ms");
      } // end goodBmp
    }
  }

  bmpFile.close();
  if(!goodBmp) Serial.println("BMP format not recognized.");
}

// These read 16- and 32-bit types from the SD card file.
// BMP data is stored little-endian, Arduino is little-endian too.
// May need to reverse subscript order if porting elsewhere.

uint16_t read16(File f) {
  uint16_t result;
  ((uint8_t *)&result)[0] = f.read(); // LSB
  ((uint8_t *)&result)[1] = f.read(); // MSB
  return result;
}

uint32_t read32(File f) {
  uint32_t result;
  ((uint8_t *)&result)[0] = f.read(); // LSB
  ((uint8_t *)&result)[1] = f.read();
  ((uint8_t *)&result)[2] = f.read();
  ((uint8_t *)&result)[3] = f.read(); // MSB
  return result;
}

void setup(void) {
  pinMode(12,INPUT); // Set SD's MISO IO State, VERY IMPORTANT!
  Serial.begin(9600);

  // Initialize 1.8" TFT
  tft.initR(INITR_GREENTAB);   // initialize a ST7735S chip, green tab
  tft.setRotation(3);

  Serial.println("OK!");
  tft.fillScreen(ST7735_BLACK);
}

void loop() {
    Serial.print("Initializing SD card...");
    if (!SD.begin(SD_CS)) {
      Serial.println("failed!");
      tft.setTextSize(2);
      tft.fillScreen(ST7735_BLACK);
      tft.setCursor(0, 0);
      tft.setTextColor(ST7735_BLUE);
      tft.print("SD Card init error!");
      return;
    }
 bmpDraw("x.bmp", 0, 0);
}
效果
