很多时候点开一个button的时候或者弹出某个提示的时候,背景都会变成模糊的或者说是虚化的,而今天,我们就来实现一下动态模糊效果。可以通过控制条或者手势来操控模糊程度,之前自己也做了一个,但是发现会有卡顿,在论坛逛了一会儿就发现果然有一个巧妙的方法来解决这个办法,那就是先最大程度的来渲染这张图,然后将这两张图重叠起来,改变上面图层的透明度就可以实现同样的效果,而且还没有了卡顿的效果。图片渲染用了RenderScript。
 下面上代码了
先来看一下布局文件吧
<?xml version="1.0" encoding="utf-8"?>
<LinearLayout xmlns:android="http://schemas.android.com/apk/res/android"
    xmlns:tools="http://schemas.android.com/tools"
    android:layout_width="match_parent"
    android:layout_height="match_parent"
    tools:context="com.sp.vague_view.MainActivity"
    android:orientation="vertical">
    <FrameLayout
        android:layout_width="match_parent"
        android:layout_height="wrap_content"
        android:layout_weight="10">
        <ImageView
            android:layout_width="match_parent"
            android:layout_height="match_parent"
            android:id="@+id/image_original"/>
        <com.sp.vague_view.slipview
            android:layout_width="match_parent"
            android:layout_height="match_parent"
            android:id="@+id/image_vague"/>
    </FrameLayout>
    <LinearLayout
        android:layout_width="match_parent"
        android:layout_height="80dp"
        android:layout_gravity="bottom"
        android:orientation="vertical"
        android:layout_weight="1">
        <SeekBar
            android:layout_width="match_parent"
            android:layout_height="wrap_content"
            android:id="@+id/seek_bar"
            android:indeterminate="false" />
        <TextView
            android:layout_width="match_parent"
            android:layout_height="wrap_content"
            android:gravity="center"
            android:id="@+id/seek_text"/>
    </LinearLayout>
</LinearLayout>
两个Imageview一个显示原图一个显示模糊后的图。seekbar来操控。
package com.sp.vague_view;

import android.content.Context;
import android.graphics.Bitmap;
import android.renderscript.Allocation;
import android.renderscript.Element;
import android.renderscript.RenderScript;
import android.renderscript.ScriptIntrinsicBlur;

/**
 * Created by my on 2016/10/23.
 */
public class BlurBitmap {
    private static final float BITMAP_SCALE = 0.5f;
    //模糊度
    private static final float BLUR_RADIUS = 25f;
    public static Bitmap blur(Context context, Bitmap image) {
        // 计算图片缩小后的长宽
        int width = Math.round(image.getWidth() * BITMAP_SCALE);
        int height = Math.round(image.getHeight() * BITMAP_SCALE);

        // 将缩小后的图片做为预渲染的图片。
        Bitmap inputBitmap = Bitmap.createScaledBitmap(image, width, height, false);
        // 创建一张渲染后的输出图片。
        Bitmap outputBitmap = Bitmap.createBitmap(inputBitmap);

        // 创建RenderScript内核对象
        RenderScript rs = RenderScript.create(context);
        // 创建一个模糊效果的RenderScript的工具对象
        ScriptIntrinsicBlur blurScript = ScriptIntrinsicBlur.create(rs, Element.U8_4(rs));

        // 由于RenderScript并没有使用VM来分配内存,所以需要使用Allocation类来创建和分配内存空间。
        // 创建Allocation对象的时候其实内存是空的,需要使用copyTo()将数据填充进去。
        Allocation tmpIn = Allocation.createFromBitmap(rs, inputBitmap);
        Allocation tmpOut = Allocation.createFromBitmap(rs, outputBitmap);

        // 设置渲染的模糊程度, 25f是最大模糊度
        blurScript.setRadius(BLUR_RADIUS);
        // 设置blurScript对象的输入内存
        blurScript.setInput(tmpIn);
        // 将输出数据保存到输出内存中
        blurScript.forEach(tmpOut);

        // 将数据填充到Allocation中
        tmpOut.copyTo(outputBitmap);

        return outputBitmap;
    }
}
这就是我们的工具了,来实现最大程度的渲染一张图片,一会儿就会在Activity中调用blur这个方法来实现模糊渲染,然后用一个Imageview来显示,另一个Imageview来显示原图,然后来改变透明度即可。然后就是主活动了,直接用seekbar即可实现这个控制条来操控模糊程度。
package com.sp.vague_view;

import android.graphics.Bitmap;
import android.graphics.BitmapFactory;
import android.renderscript.RenderScript;
import android.support.v7.app.AppCompatActivity;
import android.os.Bundle;
import android.widget.ImageView;
import android.widget.SeekBar;
import android.widget.TextView;

public class MainActivity extends AppCompatActivity {
    private ImageView originalImg;
    private slipview mvagueImg;
    private SeekBar mSeekbar;
    private TextView infotext;
    private int Alpha;
    private Bitmap originalbitmap;
    private Bitmap vagueBitmap;

    @Override
    protected void onCreate(Bundle savedInstanceState) {
        super.onCreate(savedInstanceState);
        setContentView(R.layout.activity_main);
        initviews();
        originalbitmap= BitmapFactory.decodeResource(getResources(),R.drawable.test);
        vagueBitmap=BlurBitmap.blur(this,originalbitmap);
        originalImg.setImageBitmap(originalbitmap);
        mvagueImg.setImageBitmap(vagueBitmap);
        setmSeekbar();
    }
    private void initviews(){
        originalImg=(ImageView)findViewById(R.id.image_original);
        mvagueImg=(slipview)findViewById(R.id.image_vague);
        mSeekbar=(SeekBar)findViewById(R.id.seek_bar);
        infotext=(TextView)findViewById(R.id.seek_text);
    }
     private void setmSeekbar(){
         mSeekbar.setMax(100);
         mSeekbar.setOnSeekBarChangeListener(new SeekBar.OnSeekBarChangeListener(){
             @Override
         public void onProgressChanged(SeekBar seekBar,int progress,boolean a){
                 Alpha=progress;
                 mvagueImg.setAlpha((int)(255-Alpha*2.55));
                 infotext.setText(String.valueOf(Alpha));
             }
             @Override
         public void onStartTrackingTouch(SeekBar seekBar){
             }
             @Override
         public void onStopTrackingTouch(SeekBar seekBar){
             }

         });
     }
}
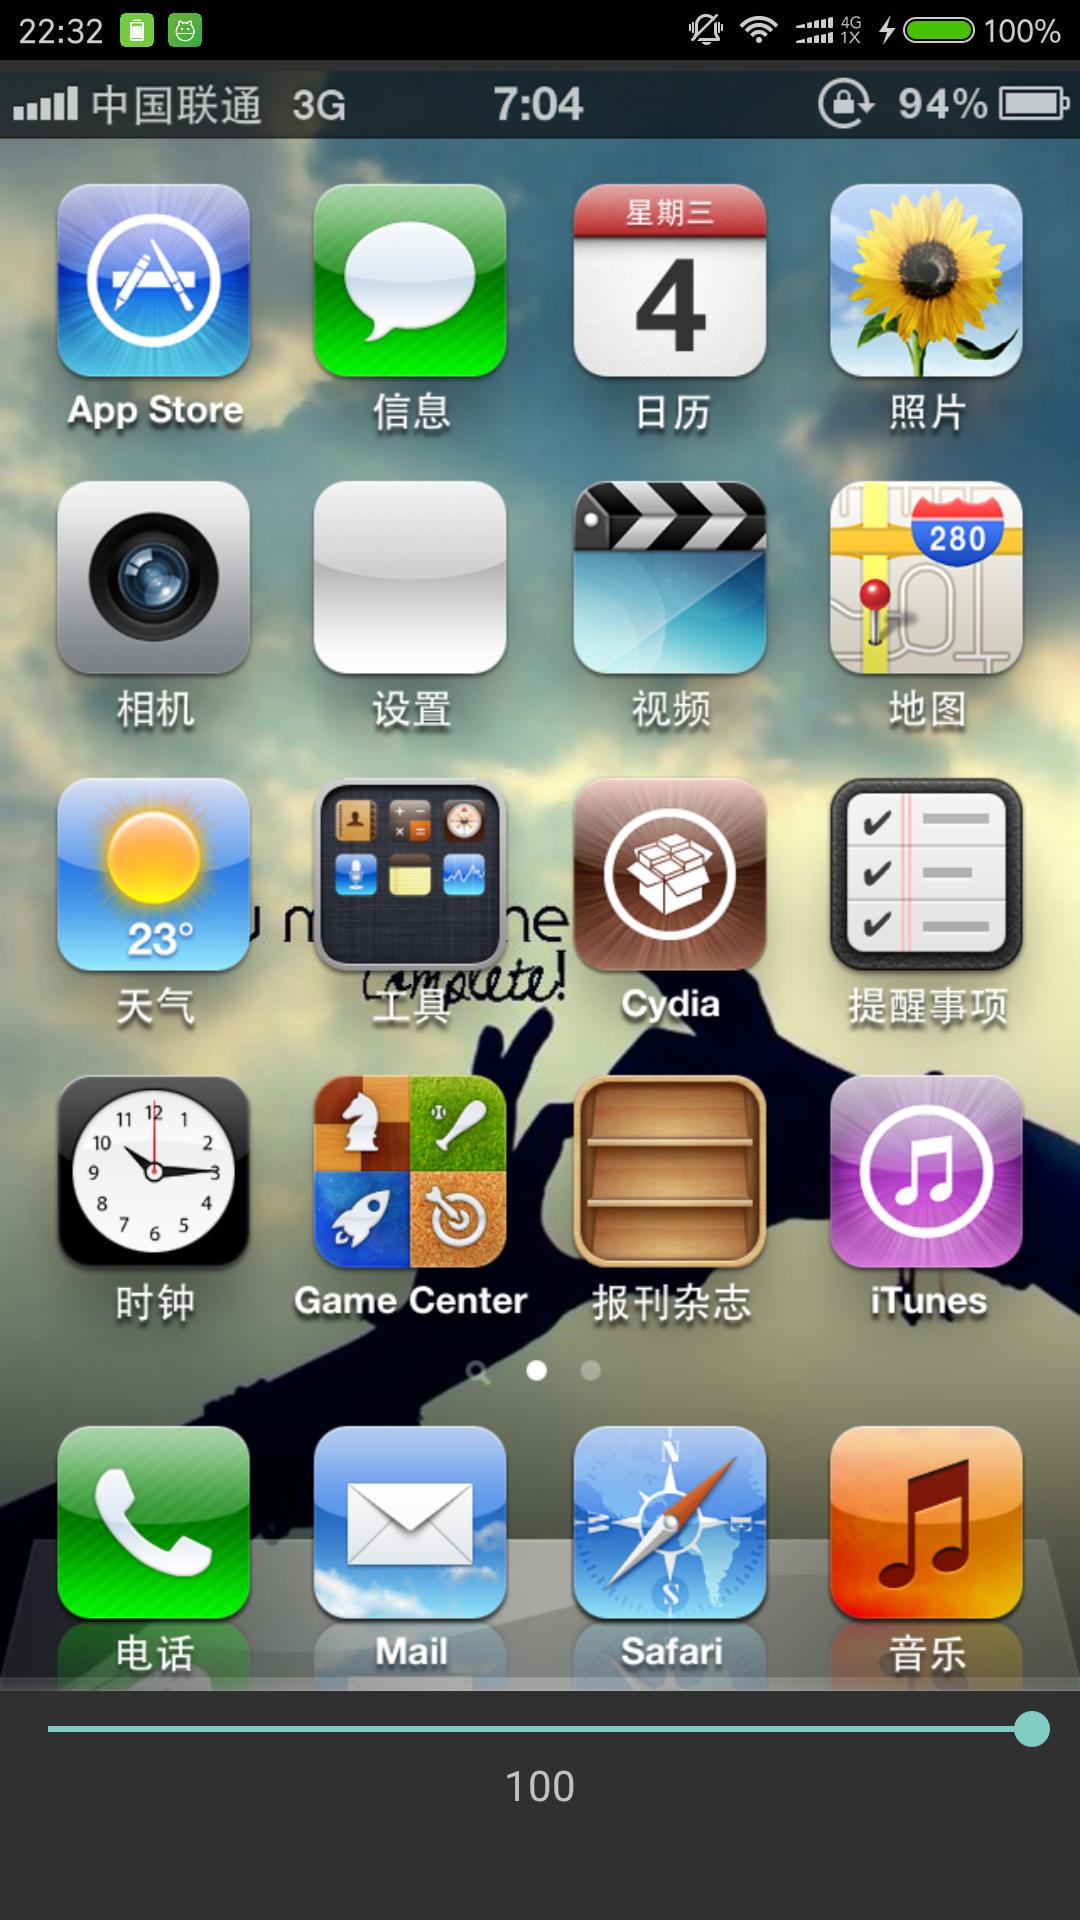
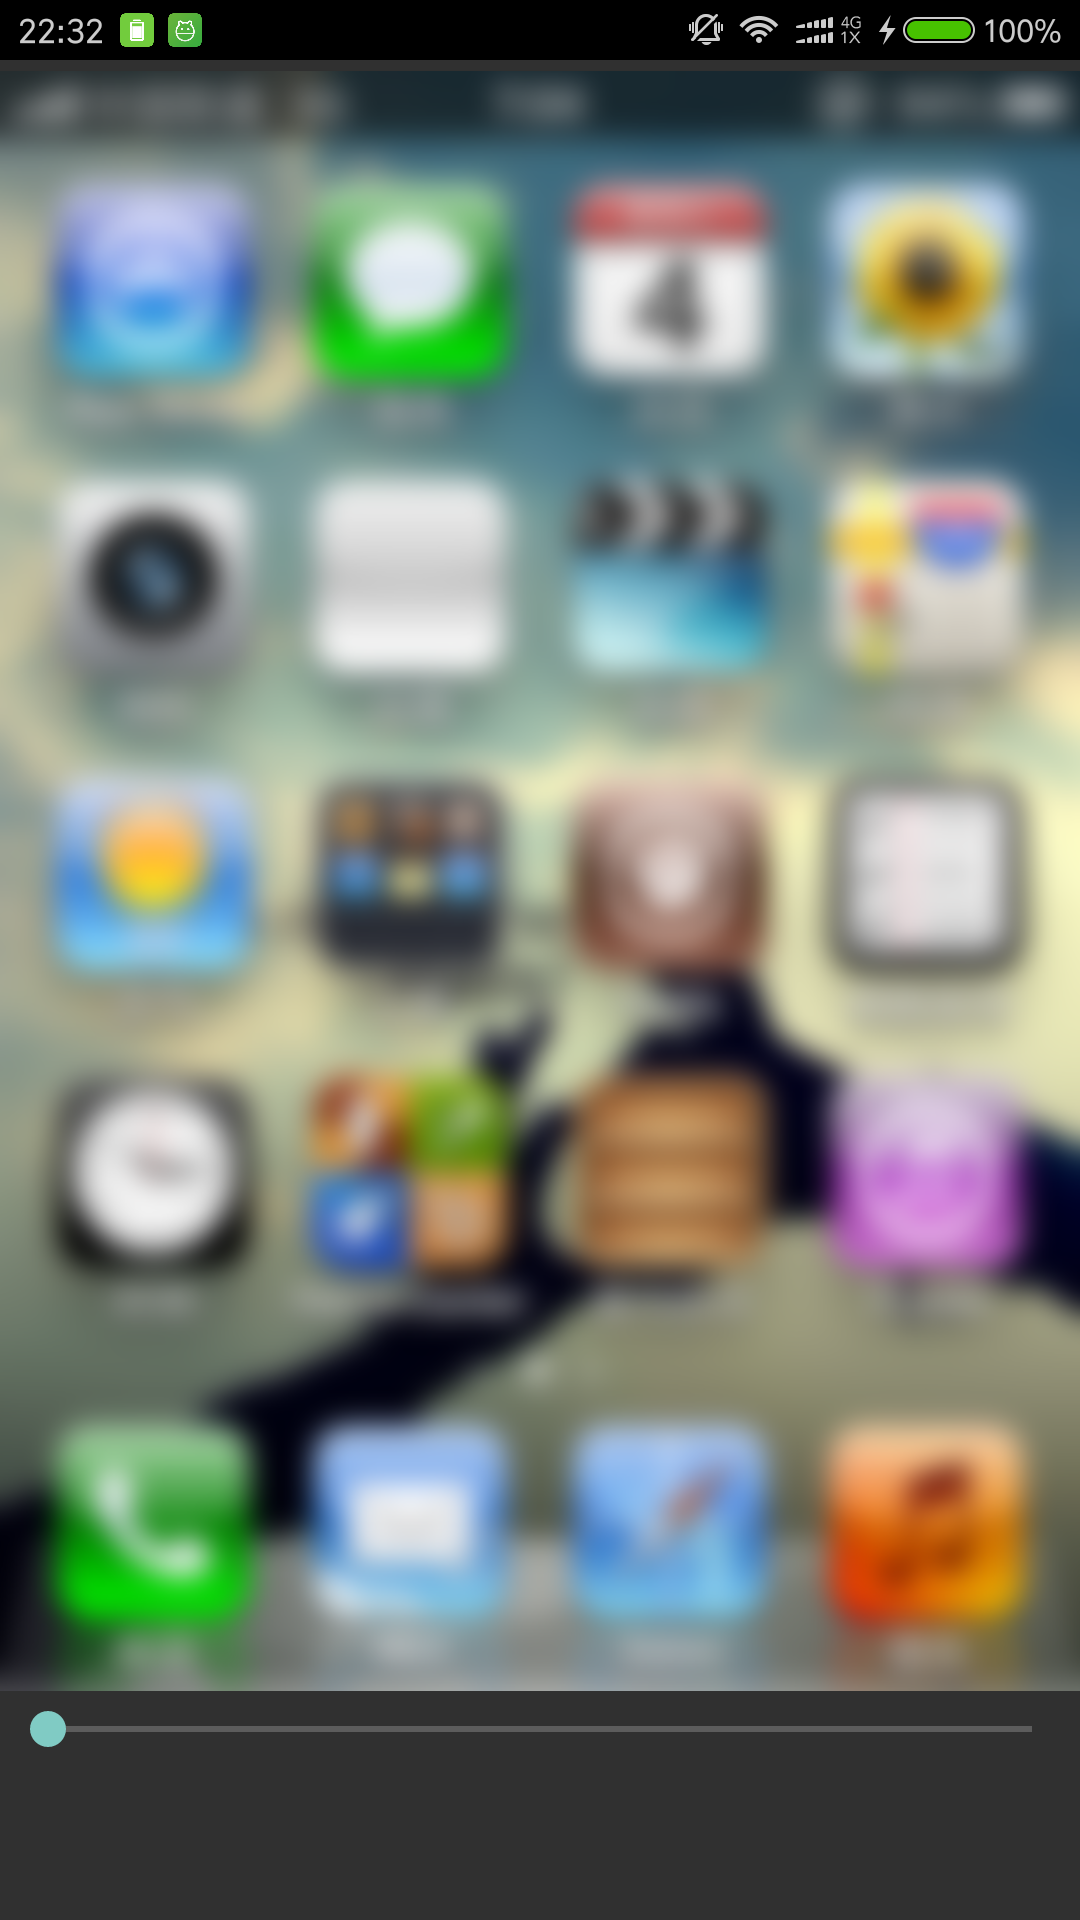 看一下效果图