上一篇【 Spring源码(4)Context篇之AbstractApplicationContext(上)】讲解了Spring的AbstractApplicationContext类refresh()方法, 前六步(其中五步)都是针对BeanFactory的处理…
下面接着讲其七:initMessageSource()
protected void initMessageSource() {
ConfigurableListableBeanFactory beanFactory = getBeanFactory();
if (beanFactory.containsLocalBean(MESSAGE_SOURCE_BEAN_NAME)) {
this.messageSource = beanFactory.getBean(MESSAGE_SOURCE_BEAN_NAME, MessageSource.class);
if (this.parent != null && this.messageSource instanceof HierarchicalMessageSource) {
HierarchicalMessageSource hms = (HierarchicalMessageSource) this.messageSource;
if (hms.getParentMessageSource() == null) {
hms.setParentMessageSource(getInternalParentMessageSource());
}
}
if (logger.isDebugEnabled()) {
logger.debug("Using MessageSource [" + this.messageSource + "]");
}
}
else {
DelegatingMessageSource dms = new DelegatingMessageSource();
dms.setParentMessageSource(getInternalParentMessageSource());
this.messageSource = dms;
beanFactory.registerSingleton(MESSAGE_SOURCE_BEAN_NAME, this.messageSource);
if (logger.isDebugEnabled()) {
logger.debug("Unable to locate MessageSource with name '" + MESSAGE_SOURCE_BEAN_NAME +
"': using default [" + this.messageSource + "]");
}
}
}
该方法主要是关于MessageSource的处理,MessageSource是Spring处理国际化配置的资源类,一般项目会有关于MessageSource的配置:
Boot项目的配置
@Bean
public MessageSource messageSource() {
ResourceBundleMessageSource messageSource = new ResourceBundleMessageSource();
messageSource.setBasename("config.messages.messages");
messageSource.setCacheSeconds(10);
messageSource.setDefaultEncoding("UTF-8");
messageSource.setUseCodeAsDefaultMessage(true);
return messageSource;
}
或传统web项目的配置(xml配置):
<bean id="messageSource" class="org.springframework.context.support.ResourceBundleMessageSource">
  <property name="basenames">
    <list>
      <value>resources/messages</value>
    </list>
  </property>
</bean>
如果工程里有上面的关于messageSource的配置,则工程会走if 代码块,否则走else代码块(意思是即使我们没有配置国际化相关类,spring会采用默认的国际化处理)
其八:initApplicationEventMulticaster();
protected void initApplicationEventMulticaster() {
ConfigurableListableBeanFactory beanFactory = getBeanFactory();
if (beanFactory.containsLocalBean(APPLICATION_EVENT_MULTICASTER_BEAN_NAME)) {
this.applicationEventMulticaster =
beanFactory.getBean(APPLICATION_EVENT_MULTICASTER_BEAN_NAME, ApplicationEventMulticaster.class);
if (logger.isDebugEnabled()) {
logger.debug("Using ApplicationEventMulticaster [" + this.applicationEventMulticaster + "]");
}
}
else {
this.applicationEventMulticaster = new SimpleApplicationEventMulticaster(beanFactory);
beanFactory.registerSingleton(APPLICATION_EVENT_MULTICASTER_BEAN_NAME, this.applicationEventMulticaster);
if (logger.isDebugEnabled()) {
logger.debug("Unable to locate ApplicationEventMulticaster with name '" +
APPLICATION_EVENT_MULTICASTER_BEAN_NAME +
"': using default [" + this.applicationEventMulticaster + "]");
}
}
}
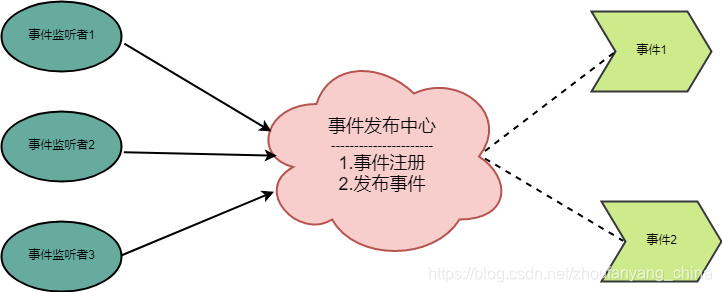
这里是实例化事件传播的类,ApplicationContext容器提供了容器内部事件发布功能,ApplicationContext基于Observer模式,提供了针对Bean的事件传播功能。通过Application. publishEvent方法,我们可以将事件通知系统内所有的
ApplicationListener。
其九:onRefresh()
调用的是AbstractRefreshableWebApplicationContext类的onRefresh()方法
/**
 * Initialize the theme capability.
 */
@Override
protected void onRefresh() {
	this.themeSource = UiApplicationContextUtils.initThemeSource(this);
}
这里实例化的是TimeSource类,解读为主题资源类,一般工程是这样配置主题资源的(工程用不到时,可缺省配置):
<bean id="themeSource" class="org.springframework.ui.context.support.ResourceBundleThemeSource"/>
其十:registerListeners()
下面为registerListeners()方法的源码,这里暂时是该方法分了三个片断,后面针对三个片断的作用进行了解析!
protected void registerListeners() {
for (ApplicationListener<?> listener : getApplicationListeners()) {
getApplicationEventMulticaster().addApplicationListener(listener);
}
String[] listenerBeanNames = getBeanNamesForType(ApplicationListener.class, true, false);
for (String listenerBeanName : listenerBeanNames) {
getApplicationEventMulticaster().addApplicationListenerBean(listenerBeanName);
}
Set<ApplicationEvent> earlyEventsToProcess = this.earlyApplicationEvents;
this.earlyApplicationEvents = null;
if (earlyEventsToProcess != null) {
for (ApplicationEvent earlyEvent : earlyEventsToProcess) {
getApplicationEventMulticaster().multicastEvent(earlyEvent);
}
}
}
方法注释:
- Add beans that implement ApplicationListener as listeners.
- Doesn’t affect other listeners, which can be added without being beans.
意思是说添加bean实例做为监听器(或称侦听器),添加哪些Bean呢? 重点就是:implement ApplicationListener (实现了ApplicationListener 接口的Bean), 这里的操作并不影响那些不是bean实例的监听器;
现在对registerListeners()方法具体分析一下:
registerListeners()片断一:
for (ApplicationListener<?> listener : getApplicationListeners()) {
getApplicationEventMulticaster().addApplicationListener(listener);
}
public Collection<ApplicationListener<?>> getApplicationListeners() {
return this.applicationListeners;
}
首先注册静态指定的监听器,这里注册加载的是xml配置文件里的监听器! 比如项目中如果使用mybtais,xml里经常会有sqlSessionFactory的配置!
<bean id="sqlSessionFactory" class="org.mybatis.spring.SqlSessionFactoryBean">
		<property name="dataSource" ref="dataSource" />
		<property name="mapperLocations" value="classpath*:/**/*Mapper.xml" />
		<property name="plugins">
			<array>
				<bean class="com.zfy.core.interceptor.RequestContextInterceptor" />
				<bean class="com.zfy.core.interceptor.MultiLanguageInterceptor" />
				<bean class="com.zfy.core.interceptor.SecurityTokenInterceptor" />
				<bean class="com.github.pagehelper.PageHelper" />
			</array>
		</property>
		<property name="configLocation" value="classpath:mybatis-configuration.xml" />
	</bean>
其中SqlSessionFactoryBean就是实现了ApplicationListener接口
public class SqlSessionFactoryBean implements FactoryBean<SqlSessionFactory>, InitializingBean, ApplicationListener<ApplicationEvent> {
	....
}
下图就是debug下模式下,返回的applicationListeners的具体内容!

返回的applicationListeners加到哪里呢? 调用的是AbstractApplicationEventMulticaster的addApplicationListener()方法
@Override
public void addApplicationListener(ApplicationListener<?> listener) {
synchronized (this.retrievalMutex) {
Object singletonTarget = AopProxyUtils.getSingletonTarget(listener);
if (singletonTarget instanceof ApplicationListener) {
this.defaultRetriever.applicationListeners.remove(singletonTarget);
}
this.defaultRetriever.applicationListeners.add(listener);
this.retrieverCache.clear();
}
}
重点:这里需要注意的是listener都添加进了ListenerRetriever类的applicationListeners变量中,这是一个LinkedHashSet集合,是有序的,因为这里是有序,所以后续对applicationListeners进行遍历针对每一个listener进行处理时也是有序的!
registerListeners()片断二:
String[] listenerBeanNames = getBeanNamesForType(ApplicationListener.class, true, false);
for (String listenerBeanName : listenerBeanNames) {
getApplicationEventMulticaster().addApplicationListenerBean(listenerBeanName);
}
这里是首先获取BeanFactory中ApplicationListener.class类型的Bean,然后for循环,把每个bean添加到ListenerRetriever类的applicationListeners变量中!
那哪些Bean实例是ApplicationListener.class类型的呢?
其实项目中除了引用的第三方框架会有使用到ApplcationListener(比如上面讲到的org.mybatis.spring.SqlSessionFactoryBean),有时候根据业务需要,常常会自定义ApplicationListener,比如:
@Service
public class ApplicationStartListener implements ApplicationListener<ContextRefreshedEvent>{
@Override
public void onApplicationEvent(ContextRefreshedEvent contextRefreshedEvent) {
System.out.println("初始化时我被调用了。");
}
}
而且往往会定义多个ApplicationListener也是经常有的情况!自定义的ApplicationStartListener类,因为有@Service注解,所以会被Spring的BeanFactory所管理,所以会在registerListeners()片断二里被解析到!
注意:如果是自定义多个ApplicationListener,会根据包、类的顺序先后被BeanFactory所管理,所以自然会先后被添加到ListenerRetriever类的applicationListeners变量中,上面也提到过了applicationListeners是有序的数据结构,当后边解析applicationListeners变量,执行onApplicationEvent()方法时,也是有序的!
简单一句话就是,自定义的ApplicationListener是有序的依次执行,或者说每次项目启动执行的顺序是一样的!
本文内容由网友自发贡献,版权归原作者所有,本站不承担相应法律责任。如您发现有涉嫌抄袭侵权的内容,请联系:hwhale#tublm.com(使用前将#替换为@)