pinia介绍
pinia 是由 vue 团队开发的,适用于 vue2 和 vue3 的状态管理库。与 vue2 和 vue3 配套的状态管理库为 vuex3 和 vuex4,pinia被誉为 vuex5。并且它允许您跨组件/页面共享状态。
1、pinia代码风格上支持选项式api和组合式api写法
2、pinia相对于vuex更好的支持了TypeScript,并且在使用 TypeScript 时它提供了更完善的类型推导
3、pinia相对于vuex更加轻量级:因为它不需要使用 Vuex 的一些复杂的概念,如模块和 getter
4、Pinia 的 API设计更加简单易用,因为它使用了 Vue.js 3 的新特性,如Composition API
5、Pinia 提供了更加灵活的状态管理方式,因为它支持多个 store 实例,而 Vuex 只支持一个 store 实例
一、pinia安装
yarn add pinia
# 或者使用 npm
npm install pinia
二、创建 pinia 实例
在mian.ts中注册pinia
import { createApp } from 'vue'
import App from './App.vue'
import { createPinia } from 'pinia'

const app= createApp(App)
app.use(pinia)
app.mount('#app')
三、创建store文件
在src目录下创建stores/index.ts文件夹
我们在编写store文件的时候可以有option store (选项式)和 setup store(组合式)这两种代码风格。推荐使用setup option 写法,当然如果你还不习惯setup store 这种组合式风格,也可以使用option store这种选项式风格,因为它的代码看上去更直观。 代码如下(示例):
1.options store
import { defineStore } from 'pinia'
// options store
export const useMiniStore = defineStore('mini',{
  state:()=>{
    return {
      age:18,
    }
  },
  getters:{
 	gettersAge(state){
    	return state.age + 2
    }
  },
  actions:{
    addAge(){
      this.age ++
    }
  }
})
2.setup store
export const useMiniStore = defineStore('mini',()=>{
  const age = ref(18)
  const gettersAge = computed(()=>{
    return age.value + 2
  })
  function actionAddAge(){
    age.value ++
  }
  return {
    age,
    gettersAge,
    actionAddAge
  }
})
接下来我们开始用案例讲解pinia三大核心概念,这里我用option store这种选项式写法,便于大家理解
四、state
1.定义state
import { defineStore } from 'pinia'

// useMiniStore 可以是 useUser、useCart 之类的任何东西
// mini 是defineStore()的第一个参数 唯一且必填,Pinia 使用它来将 store 连接到 devtools,返回的函数命名为 use...
export const useMiniStore = defineStore('mini',{
  state:()=>{
    return {
      name:'张三',
      age:18
    }
  }
})
2.使用state
<template>
  <div>
      <h2>姓名:{{ageStore.name}}</h2>
      <h3>年龄:{{ageStore.age}}</h3>
  </div>
</template>

<script setup>
  import { useMiniStore } from "@/store/index"
  const ageStore  = useMiniStore()
  console.log(ageStore.name + '年龄' + ageStore.age)
</script>
最终效果:

3.修改state值
<template>
  <div>
    <h2>姓名:{{ ageStore.name }}</h2>
    <h2>年龄:{{ ageStore.age }}</h2>
    <button @click="editAge">修改state</button>
  </div>
</template>

<script setup>
import { useMiniStore } from "@/store/index"
const ageStore = useMiniStore()
// 修改state
const editAge = () => {
  // 方式一 直接修改
  //   ageStore.age ++
  //   ageStore.name = '李四'
  //   console.log('方式一修改后:'+ageStore.name + '年龄' + ageStore.age)

  // 方式二 批量修改$patch(对象) 建议使用
  // ageStore.$patch({
  //   age: 20,
  //   name: '王五'
  // })
  // console.log('方式二修改后:'+ageStore.name + '年龄' + ageStore.age)

  // 方式三 批量修改$patch(函数) 强烈推荐
  ageStore.$patch((state)=>{
    state.age = '22',
    state.name = "小明"
  })
  console.log('方式三修改后:'+ageStore.name + '年龄' + ageStore.age)
}
</script>
这里我指定以了string和number类型的state数据,我们如果再定义一个数组类型的数据,我们应该如果修改?
1、先在store中定义一个数组
export const useMiniStore = defineStore('mini',{
  state:()=>{
    return {
      arr:[1,2,3,4,5]
    }
  }
})
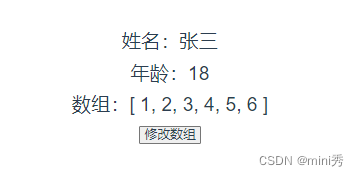
2、修改数组
const editArr = () => {
  // 方式一 直接修改
  // ageStore.arr = [1,2,3,4,5,6]

  // 方式二 $patch(对象)
  // ageStore.$patch({
  // 	arr: [1,2,3,4,5,6]
  // })

  // 方式三 $patch(函数)
  // ageStore.$patch((state) => {
  //   state.arr.push(6)
  // })
  // 另外这三种方式还可以通过es6中结构赋值的方式修改,拿第三种方式举例:
  ageStore.$patch((state) => {
    state.arr = [...state.arr, 6]
  })
}
这三种方式显然只能直接修改元素和添加元素的方式改变数组,但是当我们想在数组中插入或替换某个值,这个使用就要怎么做呢?则用$patch(函数)的方式修改
  ageStore.$patch((state) => {
     state.arr.splice(2,0,8)
  })
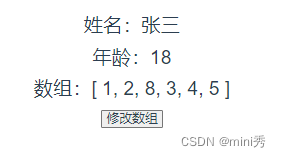
这样数组中间就插入了一个数字8
4.保持响应式
上面案例中我们是直接在模板中使用我们的数据,但是我们如果想要在js代码中使用并保持响应式,则需使用storeToRefs()
export const useMiniStore = defineStore('mini',{
  state:()=>{
    return {
      name:'张三',
      age:18,
      arr:[1,2,3,4,5]
    }
  },
  getters:{
    gettersAge(state){
      return state.age + 1
    }
  }
})
------------------------------------------------------

<script setup>
import { useMiniStore } from "@/store/index"
const ageStore = useMiniStore()
// const { age, gettersAge } = ageStore //这种写法会破坏响应式
const { age, gettersAge } = storeToRefs(ageStore)
}
</script>
5.替换state
const ageStore = useMiniStore()

ageStore.$state = { age: 20, name : '小明',arr:[2,4,6,8] }
6.重置state
const ageStore = useMiniStore()

ageStore.$reset()
五、getters
1.定义getters
import { defineStore } from 'pinia'
export const useMiniStore = defineStore('mini',{
  state:()=>{
    return {
      count:10
    }
  },
  getters:{
    // 方式一使用state 自动将返回类型推断为数字
    gettersAge(state){
      return state.count + 1
    },
    // 方式二使用this 返回类型必须明确设置 this指向store实例,不能对返回值自动推导
    gettersAge1():number{
      return this.count + 2
    },
    // 方式三使用箭头函数
    // 注意:使用箭头函数后不能使用this,因为this指向了getters非store实例
    gettersAge2: (state) =>{
      return state.count + 3
    }
  }
})
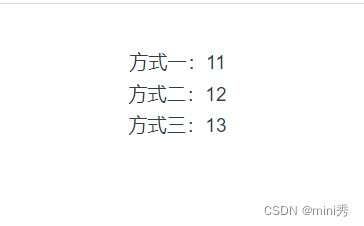
2.使用getters
<template>
  <div>
    <h2>方式一:{{countStore.gettersAge}}</h2>
    <h2>方式二:{{countStore.gettersAge1}}</h2>
    <h2>方式三:{{countStore.gettersAge2}}</h2>
  </div>
</template>

<script setup>
import { useMiniStore } from "@/store/index"
const countStore = useMiniStore()
</script>
结果:
3.传递参数给getters
//store文件
import { defineStore } from 'pinia'
export const useMiniStore = defineStore('mini',{
  state:()=>{
    return {
      age:18,
      name:'小明',
    }
  },
  getters:{
  	// 传递参数给getters
  	// 向getters传递参数,返回函数的方式接收参数,和普通函数一样没有缓存作用
    gettersAge3:(state)=>{
      return (date:number)=> state.name + '两年后' + date + '岁'
    },
  }
})
----------------------------------------------------------------------
//页面
<template>
  <div>
    <h2>参数传递:{{ ageStore.gettersAge3(20) }}</h2>
  </div>
</template>
<script setup>
import { useMiniStore } from "@/store/index"
const ageStore = useMiniStore()
</script>

3.访问其他getters
//store文件
import { defineStore } from 'pinia'
export const useMiniStore = defineStore('mini',{
  state:()=>{
    return {
      age:18,
      name:'小明',
    }
  },
  getters:{
  	gettersAge: (state) =>{
      return state.age
    },
    // 注意:使用this访问其他getters时,不能使用箭头函数
    getterOther(state){
      return state.name + this.gettersAge
    }
  }
})
----------------------------------------------------------------------
//页面
<template>
  <div>
    <h2>访问其他getters:{{ ageStore.getterOther }}</h2>
  </div>
</template>
<script setup>
import { useMiniStore } from "@/store/index"
const ageStore = useMiniStore()
</script>

六、actions
1.定义actions
import { defineStore } from 'pinia'
export const useMiniStore = defineStore('mini',{
  state:()=>{
    return {
      count:10
    }
  },
  actions:{ //可同步可异步
    addCount(){
      this.count ++
    }
  }
})
2.使用actions
<script setup>
import { useMiniStore } from "@/store/index"
const countStore = useMiniStore()
countStore.addCount()
</script>
3.订阅actions
使用 store.$onAction() 订阅 action 及其结果
const countStore = useMiniStore()
const unsubscribe = countStore.$onAction(
  ({
    name, // action 的名字
    store, // store 实例
    args, // 调用这个 action 的参数
    after, // 在这个 action 执行完毕之后,执行这个函数
    onError, // 在这个 action 抛出异常的时候,执行这个函数
  }) => {
    console.log('name: ', name)
    console.log('store: ', store)
    console.log('args: ', args)
    after((result) => {
      console.log('after result: ', result)
    })
    onError((error) => {
      console.log('onError error: ', error)
    })
  }
)
// 手动移除订阅
unsubscribe()

// 组件卸载后保留仍保持订阅
countStore.$onAction(callback, true)