文章目录
- PIL module
- 使用 PIL 打开并展示一个图片
- copy
- save
- `filter()` function
- `crop()` 裁剪
- ImageDraw
- 图像亮度
- 图像整合
- 模块介绍参考
- ImageDraw.text 绘制文字
- Assignment 1: Building a Better Contact Sheet
- Python的PIL库中的thumbnail方法
PIL module
help(Image.open)
open(fp, mode='r')
It looks like Image.open() is a function that loads an image from a file and returns an instance of the Image class.
使用 PIL 打开并展示一个图片
import PIL
from PIL import Image
from IPython.display import display
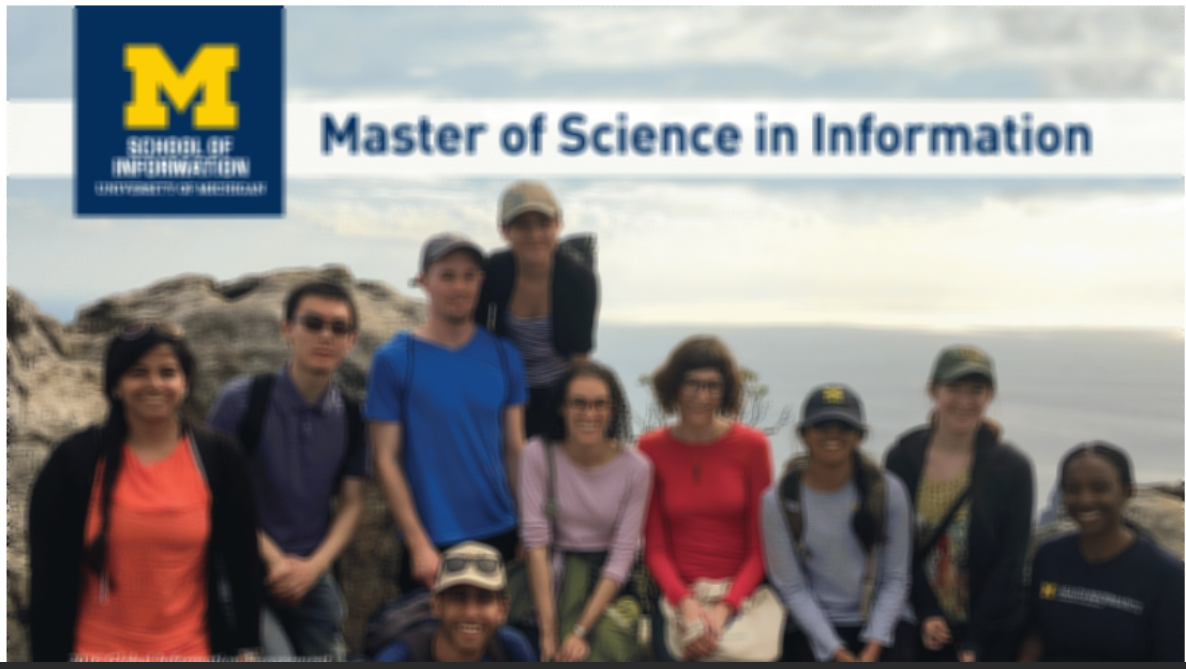
file="readonly/msi_recruitment.gif"
image=Image.open(file)
display(image)
copy
help(image.copy)
save
help(image.save)
filter() function
from PIL import ImageFilter
help(ImageFilter)
CLASSES
    builtins.object
        Filter
            ModeFilter
            MultibandFilter
                BoxBlur
                BuiltinFilter
                    BLUR
                    CONTOUR
                    DETAIL
                    EDGE_ENHANCE
                    EDGE_ENHANCE_MORE
                    EMBOSS
                    FIND_EDGES
                    Kernel
                    SHARPEN
                    SMOOTH
                    SMOOTH_MORE
                Color3DLUT
                GaussianBlur
                UnsharpMask
            RankFilter
                MaxFilter
                MedianFilter
                MinFilter
这里有一堆不同的filter,但让我们试着应用 BLUR filter。在此之前我们必须把图像转换成RGB模式。这有点神奇——像gif这样的图像,根据托盘pallet的大小,一次可以显示多少种颜色是有限制的。这是类似画家的托盘,只有这么大的空间。如果我们把图像转换成更复杂的东西,我们可以应用这些有趣的图像变换。有时候,学习一个新的库意味着要更深入地研究这个库所涉及的领域。
image=image.convert('RGB')
blurred_image = image.filter(PIL.ImageFilter.BLUR)
display(blurred_image)
crop() 裁剪
好的,让我在这节课上再给你们展示一个函数,那就是 crop()。这将删除图像除了你描述的方框外的部分。当你想到图像时,想想组成图像的单个点或像素被排列在一个网格中。你可以看到图像的高像素数和宽度
print("{}x{}".format(image.width, image.height))
---
800x450
如果我们看一下crop()文档,就会发现函数的第一个参数是一个元组,它是X/Y坐标的左、上、右和下标
:param box: The crop rectangle, as a (left, upper, right, lower)-tuple.
通过PIL图像,我们使用左上角和右下角来定义边界框。我们计算出左上角的像素个数(坐标),也就是0,0。如果你习惯了从左下角开始的坐标系统,这可能看起来很奇怪——只要记住我们定义方框的方式与计算图像中的位置是一样的。
display(image.crop((50,0,190,150)))

ImageDraw
from PIL import ImageDraw
drawing_object=ImageDraw.Draw(image)
drawing_object.rectangle((50,0,190,150), fill = None, outline ='red')
display(image)
好了,以上就是如何使用PIL处理单个图片的概述。但是,很多工作可能涉及多个图像,并将图像进行组合。下节课我们会讲到这个
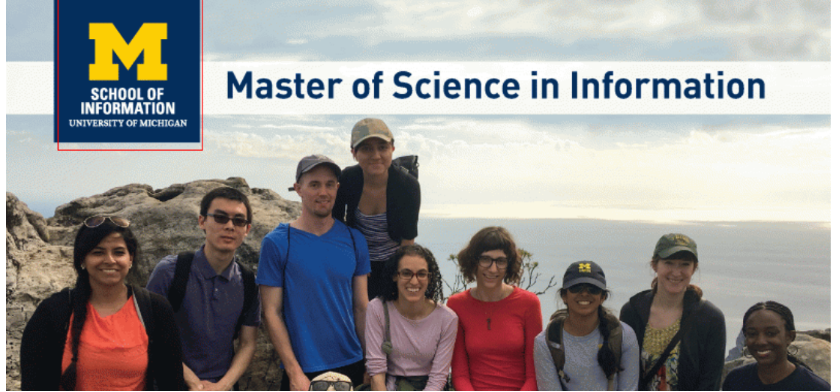
import PIL
from PIL import Image
from IPython.display import display
file="readonly/msi_recruitment.gif"
image=Image.open(file).convert('RGB')
display(image)
在图像和图片操作中一个相当常见的任务是创建图像的联系表 contact sheets of images。联系表是一个实际上包含几个不同的图像的图像。特别地,让我们用十种不同的方式来改变图像的亮度,然后把图像缩小一点,把它们并排放在一起,这样我们就可以知道我们想要使用哪种亮度。
图像亮度
from PIL import ImageEnhance
enhancer = ImageEnhance.Brightness(image)
images=[]
for i in range(0, 10):
images.append(enhancer.enhance(i/10))
print(images)
[<PIL.Image.Image image mode=RGB size=800x450 at 0x7FDA184A9EB8>, <PIL.Image.Image image mode=RGB size=800x450 at 0x7FDA1849E080>, <PIL.Image.Image image mode=RGB size=800x450 at 0x7FDA1849E278>, <PIL.Image.Image image mode=RGB size=800x450 at 0x7FDA1849E2E8>, <PIL.Image.Image image mode=RGB size=800x450 at 0x7FDA1849E390>, <PIL.Image.Image image mode=RGB size=800x450 at 0x7FDA1849E588>, <PIL.Image.Image image mode=RGB size=800x450 at 0x7FDA1849E5F8>, <PIL.Image.Image image mode=RGB size=800x450 at 0x7FDA1849E668>, <PIL.Image.Image image mode=RGB size=800x450 at 0x7FDA1849E6D8>, <PIL.Image.Image image mode=RGB size=800x450 at 0x7FDA1849E748>]
现在让我们把这些图片合成起来,一个在另一个上面,在一个联合的sheet中。有几种不同的方法我们可以使用,但我将简单地创建一个新的图像是这样的
第一张图片,但有十倍高。
图像整合
help(PIL.Image.new)
---
new(mode, size, color=0)
    Creates a new image with the given mode and size
这个新函数要求我们给它一个模式。我们将使用 ‘RGB’ 模式红色,绿色和蓝色,是我们当前的第一张图片的模式。有很多不同的图像模式格式,这是最常见的。
对于大小,我们有一个元组,它是图像的宽度和高度。我们用的是当前的第一张图片,但是对于高度我们将乘以10。这将成为一种 “canvas” for our contact sheet。最后,颜色是可选的,我们将它保留为黑色(背景色)。
first_image=images[0]
from PIL import Image
contact_sheet=PIL.Image.new(first_image.mode, (first_image.width,10*first_image.height))
现在我们有了一个黑色的图像,它的大小是contact_sheet中其他图像的十倍。现在,让我们只是循环通过图像列表 the image list 和 paste() the results in。paste() 函数将在 contact_sheet 对象 上调用,并接收两个参数:要粘贴的新图像,以及该图像的(x,y)偏移量。在我们的例子中,x位置总是0,但是每次循环时y位置都会改变450像素。
current_location = 0
for img in images:
contact_sheet.paste(img, (0, current_location) )
current_location=current_location+450
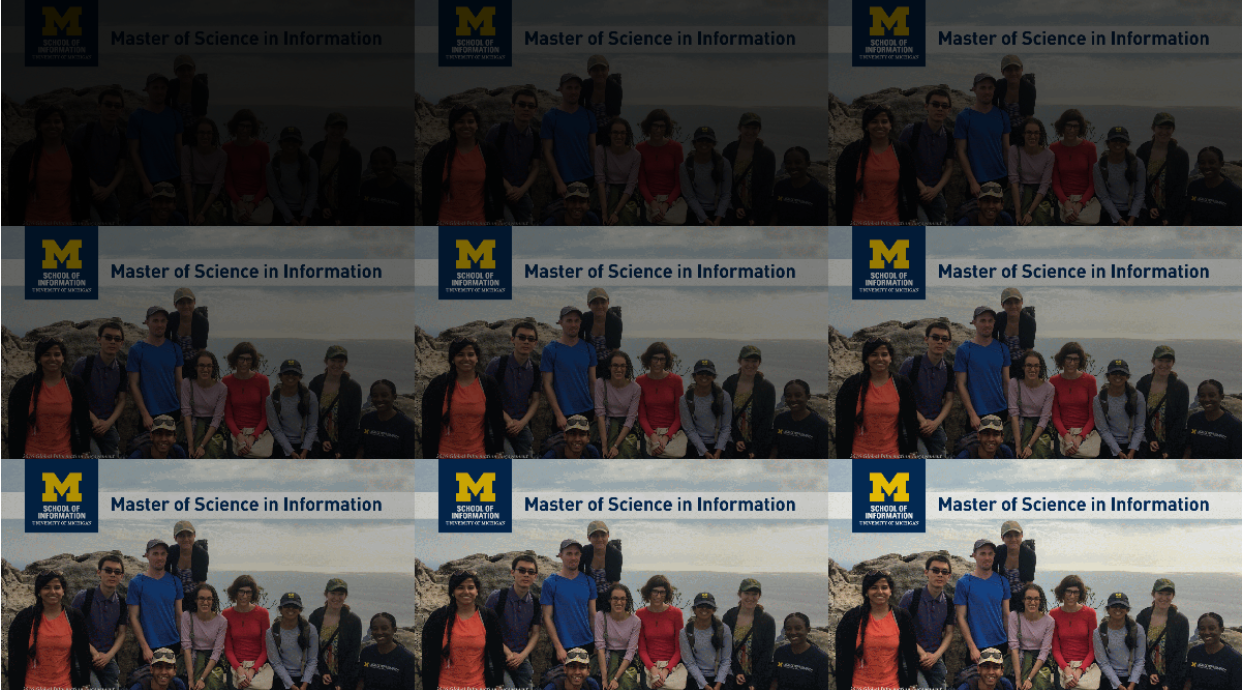
这个contact sheet的高变大了:4500像素! 让我们调整大小这张表显示。我们可以使用resize()函数来实现这一点。这个函数的参数只是a tuple of width and height,我们将把所有东西的大小调整到只有两个单独图像的大小
contact_sheet = contact_sheet.resize((160,900) )
display(contact_sheet)

Ok, that’s a nice proof of concept. But it’s a little tough to see。
让我们改为一个3×3的网格值。首先我们要做的是创建canvas,我们将它的宽度设为图像宽度的3倍,高度设为图像高度的3倍,也就是9个图像的正方形
contact_sheet=PIL.Image.new(first_image.mode, (first_image.width*3,first_image.height*3))
现在我们想要迭代我们的图像并将它们放到这个网格中 iterate over our images and place them into this grid。记住在PIL中我们管理的位置是我们在左上角引用的图像,所以这是0,0。我们用一个变量表示X维度,一个变量表示Y维度。
x=0
y=0
现在,让我们对图像进行迭代。除了,我们不想用第一个,因为它是纯黑色。相反,我们只想处理第一张之后的图像,这是应该的给我们9个
for img in images[1:]:
contace_sheet.paste(img, (x,y))
if x+first_image.width == contact_sheet.width:
x = 0
y = y+first_image.height
else:
x = x + first_image.width
现在让我们调整 contact sheet 的大小。我们只要 把它除以2 就能得到它的一半大小。而且,因为 resize 函数需要取整数,所以我们需要使用int()函数将浮点数的除法转换为整数。
contact_sheet = contact_sheet.resize((int(contact_sheet.width/2),int(contact_sheet.height/2) ))
display(contact_sheet)
这是我们的第一个外部API, Python图像库,或者叫pillow模块。在本系列讲座中,您已经学习了如何读写图像、使用pillow操作它们,以及使用Python的特性(如dir()、help()和getmro())来探索第三方api的功能。还向您介绍了控制台,以及python如何在计算机上存储这些库。虽然这门课的Coursera系统中包含了所有的库,你不需要自己安装,但是如果你想自己安装的话,最好先了解一下它是如何工作的
Finally, while you can explore PILLOW from within python, most good modules also put their documentation up online, and you can read more about PILLOW here: https://pillow.readthedocs.io/en/latest/
模块介绍参考
https://pillow.readthedocs.io/en/latest/
https://zhuanlan.zhihu.com/Python-lib
3. 分离和合并通道
Pillow 允许处理图像的各个通道,例如RGB图像有R、G、B三个通道。 split 方法分离图像通道,如果图像为单通道则返回图像本身。merge 合并函数采用图像的 mode 和 通道元组为参数,将它们合并成新图像。
r, g, b = im.split()
im = Image.merge("RGB", (b, g, r))
3. 处理单独通道
source = im.split()
R, G, B = 0, 1, 2
mask = source[R].point(lambda i: i < 100 and 255)
out = source[G].point(lambda i: i * 0.7)
source[G].paste(out, None, mask)
im = Image.merge(im.mode, source)
ImageDraw 模块也是 Pillow 库的主要模块之一,它能给图像化圆弧,画横线,写上文字等。
ImageDraw.text 绘制文字
PIL.ImageDraw.ImageDraw.text(xy, text, fill=None, font=None, anchor=None, spacing=4, align="left", direction=None, features=None, language=None, stroke_width=0, stroke_fill=None)
给定位置绘制字符串
参数:
- xy – 文字的左上角位置
- text – 文本. 如果包含换行符需将文本传递给 multiline_text()
- fill – 文字颜色
- font – 字体,需要时 ImageFont 实例。
- spacing – 如果文本传递给multiline_text(),则为行之间的像素数。
- align – 对齐方式,如果文本传递给multiline_text(), 值有"left",“center”,“right”。
- direction – 文字方向。‘rtl’(从右到左),‘ltr’(从左到右)或’ttb’(从上到下)
- features – 在文本布局期间使用的OpenType字体功能列表。通常用于打开默认情况下未启用的可选字体功能,如’dlig’或’ss01’;也可用于关闭默认字体功能,例如’-liga’以禁用连字或’-kern’禁用字距调整。参阅:Registered features - Typography
Assignment 1: Building a Better Contact Sheet
在这周的课程中,你们学习了如何制作 digital photographers 的 a contact sheet,以及如何根据一张图片的亮度创建九种不同的样式。在这个作业中,你将改变图像的颜色,创建基于一张照片的变化 variations。有许多复杂的方法可以使用variations来更改照片,例如将黑白图像更改为“冷”变体(其中有淡紫色和蓝色),或“暖”变体(有黄色的接触,可能看起来是深褐色调sepia toned)。在这次作业中,你只需要每次改变一个颜色通道changing the image one color channel at a time
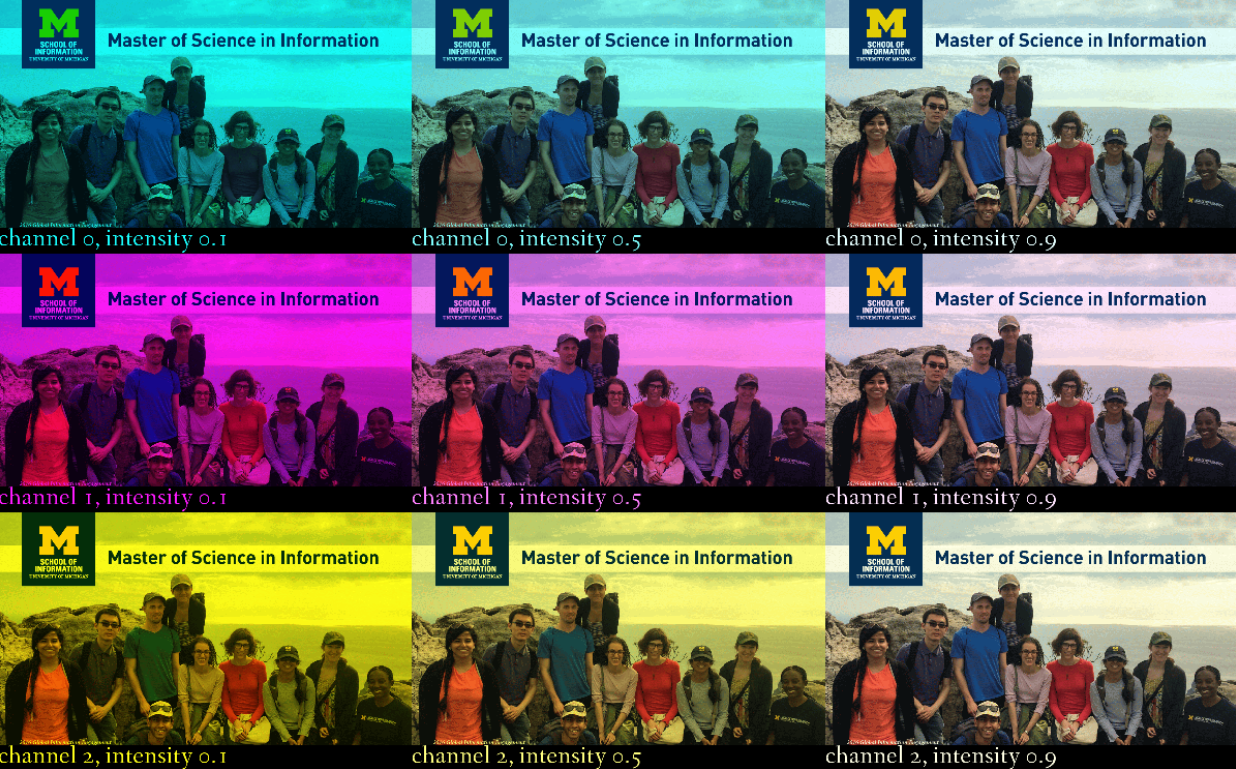
你的任务是学习如何获取讲座中提供的存根代码(整理如下),并生成如下输出图像:
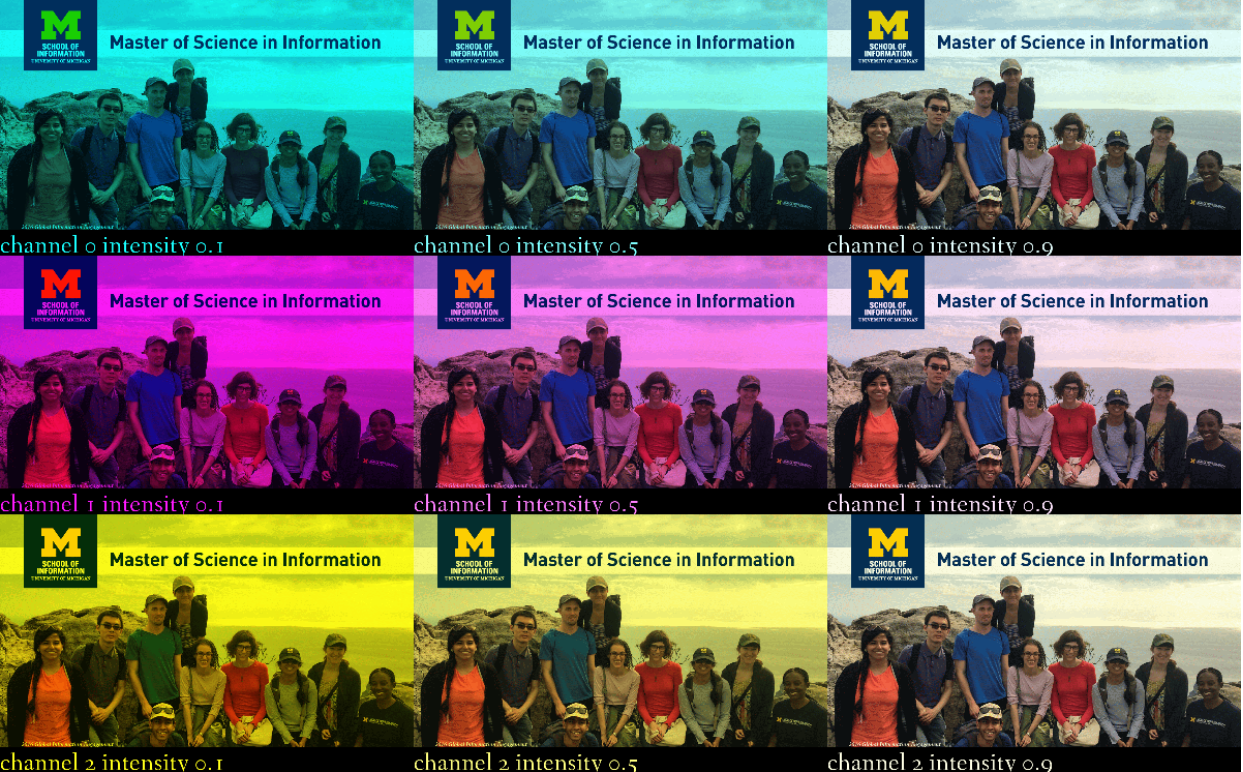
从图像中可以看到,每个子图像有两个不同的参数。首先,通过通过行改变了颜色通道,其中顶部是红色R通道,中间是绿色G通道,底部是蓝色B通道。等等,为什么按这个顺序,颜色看起来不是更红、更绿、更蓝呢? 因为你要做的改变是比例ratio,或者强度intensity,或者通道channel,与其他通道的关系。我们将使用三种不同的强度, 0.1 (reduce the channel a lot), 0.5 (reduce the channel in half), and 0.9 (reduce the channel only a little bit).
例如,对于一个表示为(200,100,50)的像素,是一种燃烧的橙色burnt orange color。第一行的更改将创建三个替代像素,改变第一个通道 (red)。one at (20, 100, 50), one at (100, 100, 50), and one at (180, 100, 50)。下一行将改变第二个通道(g),并创建颜色值(200、10、50)、(200、50、50)和(200、90、50)的像素。
import PIL
from PIL import Image
from PIL import ImageEnhance
from PIL import ImageDraw
from PIL import ImageFont
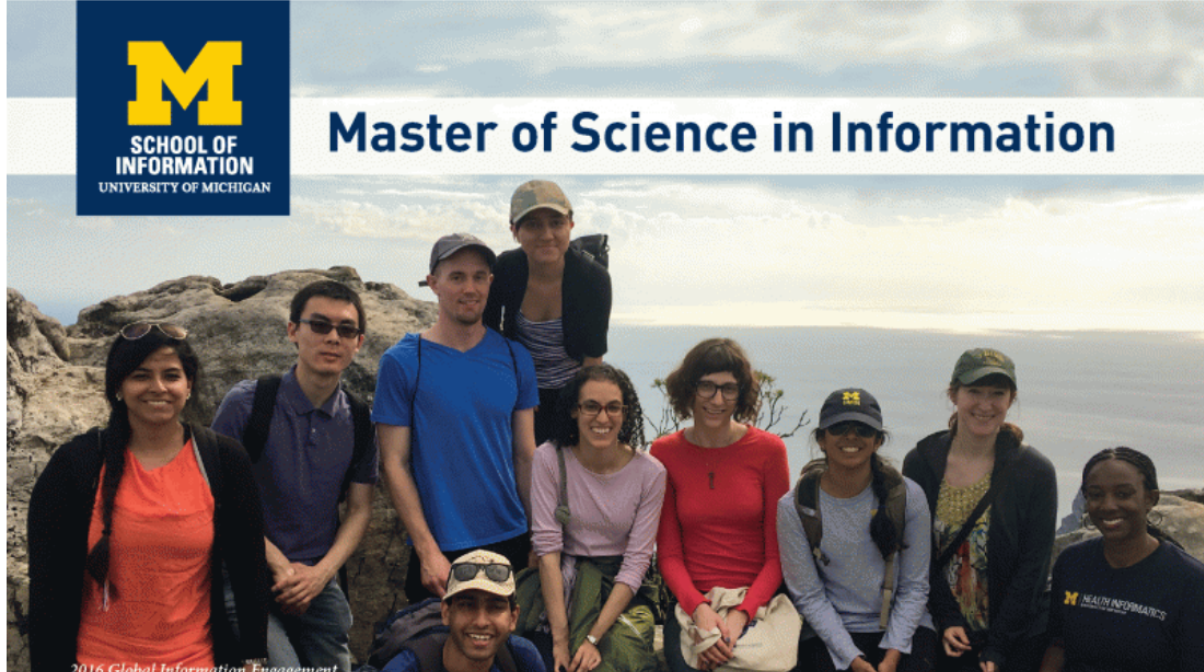
image=Image.open("readonly/msi_recruitment.gif")
image=image.convert('RGB')
images = []
source = image.split()
R, G, B = 0, 1, 2
intensity = [0.1, 0.5, 0.9]
w = image.width
h = image.height
for s in intensity:
var_R = source[R].point(lambda i: i*s)
im_r = Image.merge('RGB',(var_R, source[G], source[B]))
images.append(im_r)
for s in intensity:
var_G = source[G].point(lambda i: i*s)
im_r = Image.merge('RGB',(source[R], var_G, source[B]))
images.append(im_r)
for s in intensity:
var_B = source[B].point(lambda i: i*s)
im_r = Image.merge('RGB',(source[R], source[G], var_B))
images.append(im_r)
for image in images:
drawing_object=ImageDraw.Draw(image)
first_image=images[0]
contact_sheet=PIL.Image.new(first_image.mode, (first_image.width*3,first_image.height*3+150))
x=0
y=0
for img in images:
contact_sheet.paste(img, (x, y) )
if x+first_image.width == contact_sheet.width:
x=0
y=y+first_image.height+50
else:
x=x+first_image.width
font = ImageFont.truetype('readonly/fanwood-webfont.ttf', 60)
x=0
z=first_image.height
m=0
inten=[0.1, 0.5,0.9,0.1,0.5,0.9,0.1,0.5,0.9]
for i in range(9):
img_back = Image.new('RGB', (800, 50), color="black")
write_object = ImageDraw.Draw(img_back)
write_object.text((0,0), "channel {}, intensity {}".format(m,inten[i]), font=font, fill="#FFFFFF")
contact_sheet.paste(img_back, (x,z))
if x+first_image.width == contact_sheet.width:
x=0
z = z+ first_image.height+50
m = m+1
else:
x=x+first_image.width
contact_sheet = contact_sheet.resize((int(contact_sheet.width/2),int(contact_sheet.height/2) ))
display(contact_sheet)

import PIL
from PIL import Image
from PIL import ImageEnhance
from PIL import ImageDraw
from PIL import ImageFont
font = ImageFont.truetype('readonly/fanwood-webfont.ttf', 50)
image=Image.open("readonly/msi_recruitment.gif")
image=image.convert('RGB')
R, G, B = 0, 1, 2
intensity = [0.1, 0.5, 0.9]
images = []
for s in intensity:
txt = Image.new('RGB', (image.width, 50), color="black")
write_object = ImageDraw.Draw(txt)
write_object.text((0,0), "channel 0, intensity {}".format(s), font=font, fill="#FFFFFF")
txt_img = Image.new('RGB', (image.width, image.height+50))
txt_img.paste(image,(0,0))
txt_img.paste(txt,(0, image.height))
source = txt_img.split()
var_R = source[R].point(lambda i: i*s)
im_r = Image.merge('RGB',(var_R, source[G], source[B]))
images.append(im_r)
for s in intensity:
txt = Image.new('RGB', (image.width, 50), color="black")
write_object = ImageDraw.Draw(txt)
write_object.text((0,0), "channel 1, intensity {}".format(s), font=font, fill="#FFFFFF")
txt_img = Image.new('RGB', (image.width, image.height+50))
txt_img.paste(image,(0,0))
txt_img.paste(txt,(0, image.height))
source = txt_img.split()
var_G = source[G].point(lambda i: i*s)
im_r = Image.merge('RGB',(source[R], var_G, source[B]))
images.append(im_r)
for s in intensity:
txt = Image.new('RGB', (image.width, 50), color="black")
write_object = ImageDraw.Draw(txt)
write_object.text((0,0), "channel 2, intensity {}".format(s), font=font, fill="#FFFFFF")
txt_img = Image.new('RGB', (image.width, image.height+50))
txt_img.paste(image,(0,0))
txt_img.paste(txt,(0, image.height))
source = txt_img.split()
var_B = source[B].point(lambda i: i*s)
im_r = Image.merge('RGB',(source[R], source[G], var_B))
images.append(im_r)
first_image=images[0]
contact_sheet=PIL.Image.new(first_image.mode, (first_image.width*3,first_image.height*3))
x=0
y=0
for img in images:
contact_sheet.paste(img, (x, y) )
if x+first_image.width == contact_sheet.width:
x=0
y=y+first_image.height
else:
x=x+first_image.width
contact_sheet = contact_sheet.resize((int(contact_sheet.width/2),int(contact_sheet.height/2) ))
display(contact_sheet)
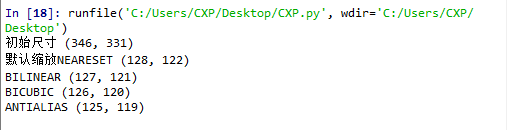
Python的PIL库中的thumbnail方法
from PIL import Image
img = Image.open('D:\\image_for_test\\Spee.jpg')
print("初始尺寸",img.size)
img.thumbnail((128,128))
print("默认缩放NEARESET",img.size)
img.thumbnail((127,127),Image.BILINEAR)
print("BILINEAR",img.size)
img.thumbnail((126,126),Image.BICUBIC)
print("BICUBIC",img.size)
img.thumbnail((125,125),Image.ANTIALIAS)
————————————————
版权声明:本文为CSDN博主「_未闻花名_」的原创文章,遵循CC 4.0 BY-SA版权协议,转载请附上原文出处链接及本声明。
原文链接:https://blog.csdn.net/MiniCatTwo/article/details/80557109
本文内容由网友自发贡献,版权归原作者所有,本站不承担相应法律责任。如您发现有涉嫌抄袭侵权的内容,请联系:hwhale#tublm.com(使用前将#替换为@)