最近在尝试从0开始搭建框架,结果在mybatis这块就踩了很多坑。于是就决定写篇文章记录一下。
要求
尽可能的简单,减少依赖。
实战
新建spring boot项目
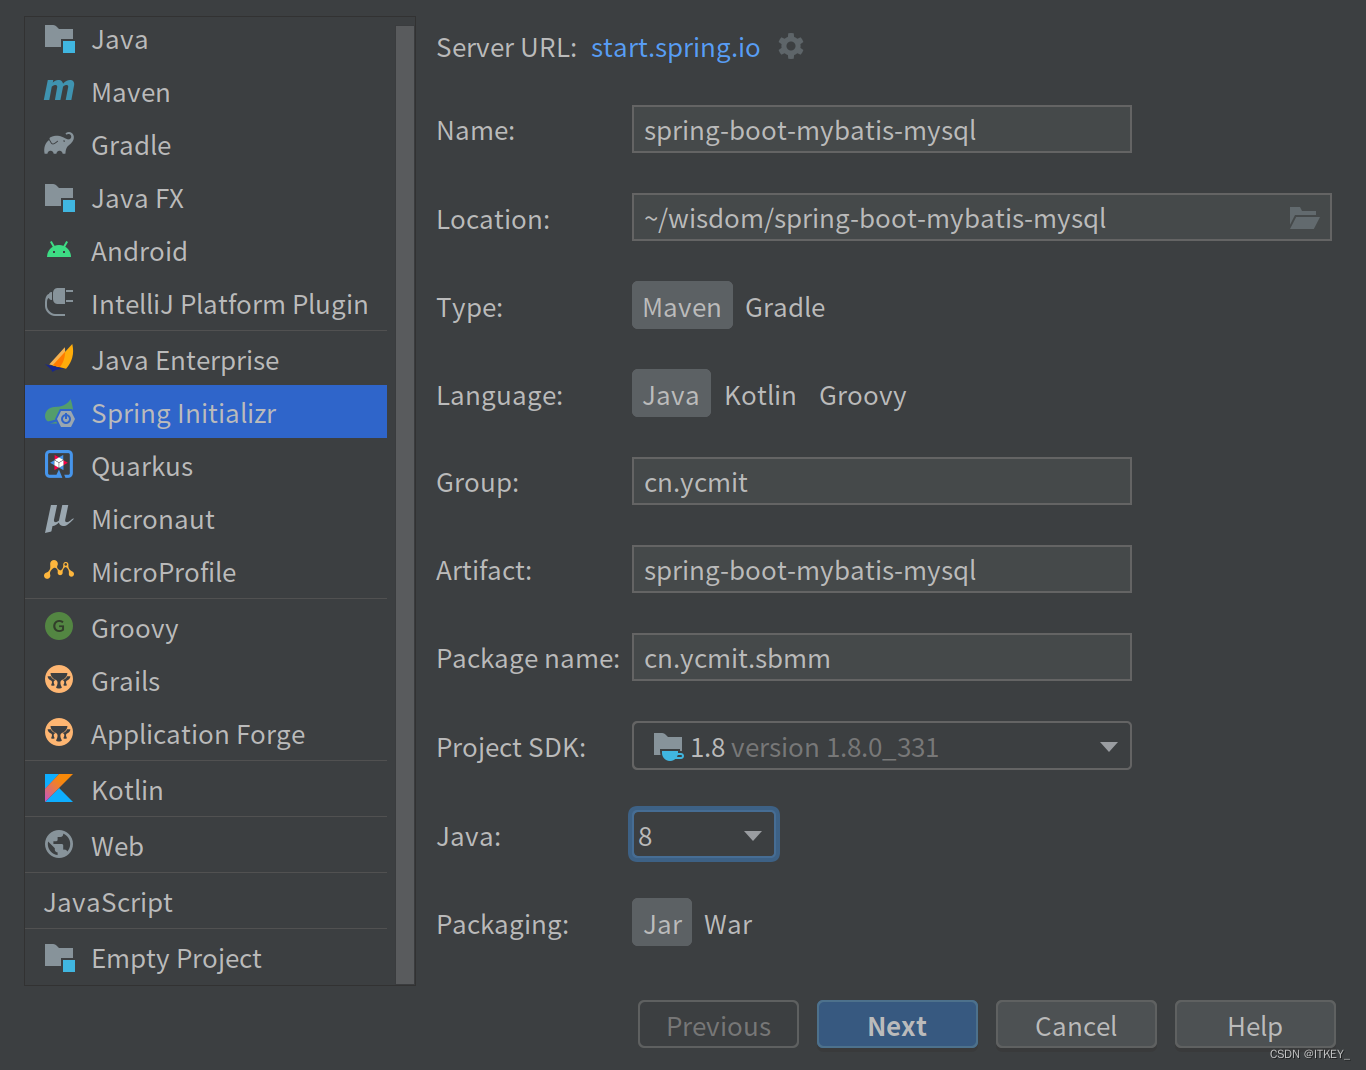
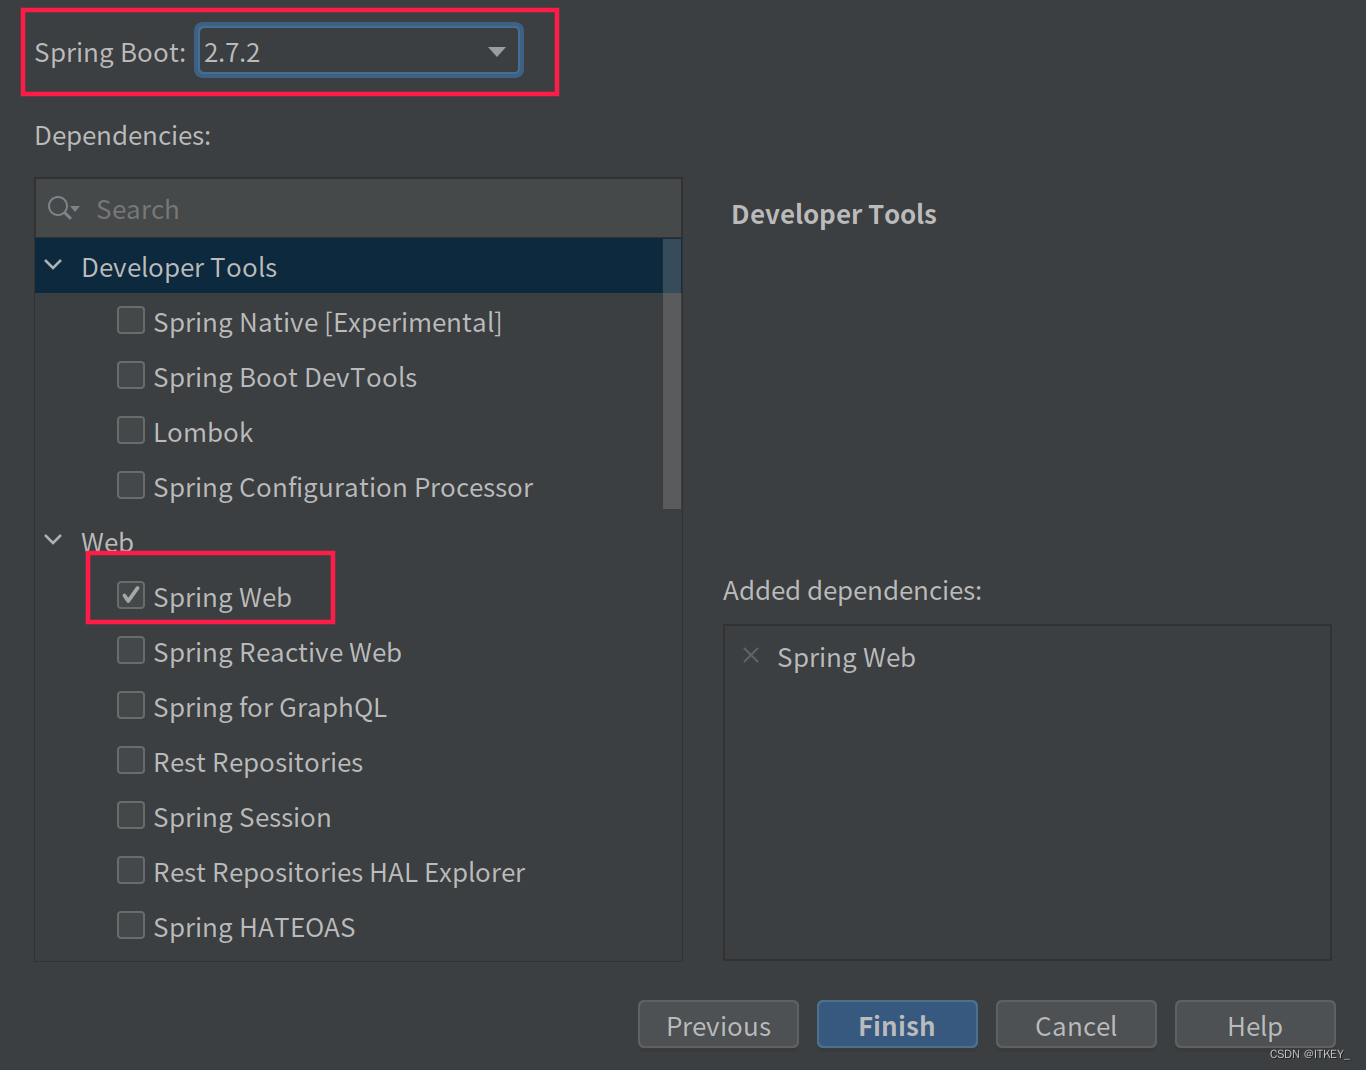
基于spring boot 的,所以第一步要创建一下spring boot的项目。创建过程比较简单,网上相关教程也比较多,我就不重点写了。有需要的朋友可以参考我之前写过的文章:
《2020入门教程macOS 使用Intellj IDEA 创建spring boot项目》
https://blog.csdn.net/lxyoucan/article/details/111128415
我的信息如下,随便写一写,仅供参考:
项目创建完成以后,启动一下测试一下是否可以正常启动。
  .   ____          _            __ _ _
 /\\ / ___'_ __ _ _(_)_ __  __ _ \ \ \ \
( ( )\___ | '_ | '_| | '_ \/ _` | \ \ \ \
 \\/  ___)| |_)| | | | | || (_| |  ) ) ) )
  '  |____| .__|_| |_|_| |_\__, | / / / /
 =========|_|==============|___/=/_/_/_/
 :: Spring Boot ::                (v2.7.2)

2022-08-08 18:15:58.955  INFO 65101 --- [           main] c.y.s.SpringBootMybatisMysqlApplication  : Starting SpringBootMybatisMysqlApplication using Java 1.8.0_331 on vivobook with PID 65101 (/home/itkey/wisdom/spring-boot-mybatis-mysql/target/classes started by itkey in /home/itkey/wisdom/spring-boot-mybatis-mysql)
2022-08-08 18:15:58.956  INFO 65101 --- [           main] c.y.s.SpringBootMybatisMysqlApplication  : No active profile set, falling back to 1 default profile: "default"
2022-08-08 18:15:59.598  INFO 65101 --- [           main] o.s.b.w.embedded.tomcat.TomcatWebServer  : Tomcat initialized with port(s): 8080 (http)
2022-08-08 18:15:59.606  INFO 65101 --- [           main] o.apache.catalina.core.StandardService   : Starting service [Tomcat]
2022-08-08 18:15:59.606  INFO 65101 --- [           main] org.apache.catalina.core.StandardEngine  : Starting Servlet engine: [Apache Tomcat/9.0.65]
2022-08-08 18:15:59.643  INFO 65101 --- [           main] o.a.c.c.C.[Tomcat].[localhost].[/]       : Initializing Spring embedded WebApplicationContext
2022-08-08 18:15:59.643  INFO 65101 --- [           main] w.s.c.ServletWebServerApplicationContext : Root WebApplicationContext: initialization completed in 651 ms
2022-08-08 18:15:59.867  INFO 65101 --- [           main] o.s.b.w.embedded.tomcat.TomcatWebServer  : Tomcat started on port(s): 8080 (http) with context path ''
2022-08-08 18:15:59.874  INFO 65101 --- [           main] c.y.s.SpringBootMybatisMysqlApplication  : Started SpringBootMybatisMysqlApplication in 1.247 seconds (JVM running for 6.184)
我这样子的就说明成功启动了。这样我们的基础就搭建好了。
创建mysql数据库
既然研究mybatis,那么怎么能少的了数据库呢?其他数据库也是类似的,这里以mysql为例。
安装mysql数据库
首先你要先安装一下mysql,安装mysql网上教程也不少,本文就不重点说了。
如果供是学习与开发测试,个人比较推荐在docker中安装mysql,安装非常的简单。
以下内容供参考:
- 《CentOS7安装mysql8笔记》
https://blog.csdn.net/lxyoucan/article/details/116854446 - 《CentOS7使用docker跑mysql8笔记》
https://blog.csdn.net/lxyoucan/article/details/116864619 - 《alpine linux中docker mysql踩坑记录》
https://blog.csdn.net/lxyoucan/article/details/123906102
创建数据库
CREATE DATABASE `ry-vue` CHARACTER SET UTF8;
use ry-vue;
set character_set_client=utf8;
set character_set_connection=utf8;
set character_set_database=utf8;
set character_set_results=utf8;
创建表
create table qa_category
(
    category_id bigint auto_increment comment '分类ID'
        primary key,
    title       varchar(200)           not null comment '标题',
    sort        int(5)                 null comment '排序',
    create_by   varchar(64) default '' null comment '创建者',
    create_time datetime               null comment '创建时间',
    update_by   varchar(64) default '' null comment '更新者',
    update_time datetime               null comment '更新时间'
)
    comment '提问分类';
初始化测试数据
INSERT INTO qa_category (title, sort, create_by, create_time, update_by, update_time) VALUES ('Java', 1, 'itkey', '2022-05-09 17:18:50', '', '2022-05-09 17:27:35');
INSERT INTO qa_category (title, sort, create_by, create_time, update_by, update_time) VALUES ('Vue', 2, 'itkey', '2022-05-09 17:19:09', '', '2022-05-09 17:27:35');
INSERT INTO qa_category (title, sort, create_by, create_time, update_by, update_time) VALUES ('React', 3, 'itkey', '2022-05-10 10:46:28', '', '2022-05-10 11:05:27');
INSERT INTO qa_category (title, sort, create_by, create_time, update_by, update_time) VALUES ('mysql', 4, 'itkey', '2022-05-11 14:51:48', '', '2022-05-11 14:51:59');
INSERT INTO qa_category (title, sort, create_by, create_time, update_by, update_time) VALUES ('MacOS', 5, 'itkey', '2022-05-11 14:53:18', '', '2022-05-11 14:53:24');
导此我们的mysql数据库就准备好了。
src目录文件结构
开始之前,先把目录结构放出来,方便理解。
spring-boot-mybatis-mysql/src 文件结构如下:
├── java
│   └── cn
│       └── ycmit
│           └── sbmm
│               ├── controller
│               │   └── TestController.java  //控制类演示
│               ├── domain
│               │   └── QaCategory.java    //实体类 与 qa_category表映射
│               ├── mapper
│               │   └── QaCategoryMapper.java  //mapper类
│               └── SpringBootMybatisMysqlApplication.java //主程序
└── resources
    ├── application.yml    //配置文件
    ├── mapper
    │   └── itkey
    │       └── QaCategoryMapper.xml   //sql配置文件
    ├── mybatis
    │   └── mybatis-config.xml      //全局配置文件
    ├── static
    └── templates
Maven依赖
在spring-boot-mybatis-mysql/pom.xml中增加以下依赖。
<dependency>
<groupId>org.mybatis.spring.boot</groupId>
<artifactId>mybatis-spring-boot-starter</artifactId>
<version>2.2.2</version>
</dependency>
<dependency>
<groupId>mysql</groupId>
<artifactId>mysql-connector-java</artifactId>
</dependency>
如果是其他的数据库,把mysql驱动包修改成你使用的数据库即可。
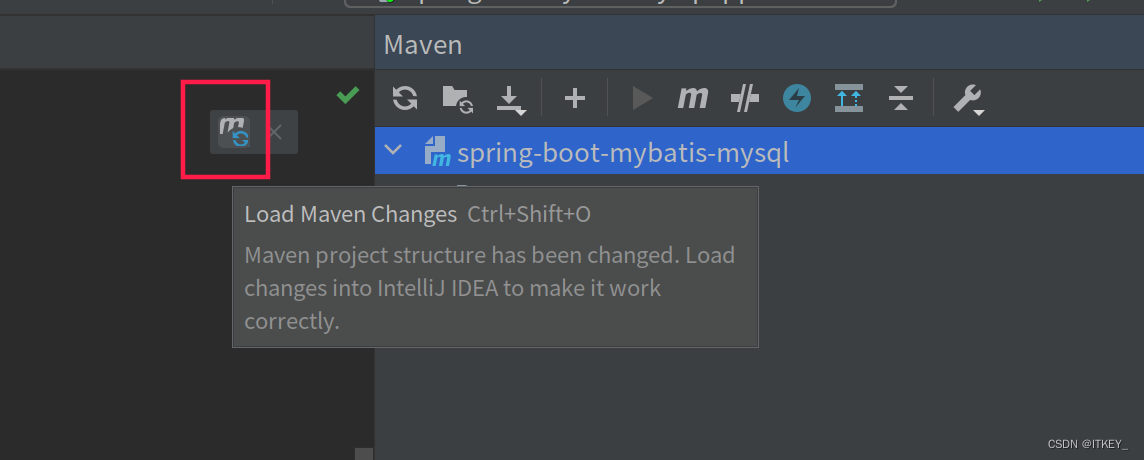
修改完成以后,一定要不忘记刷新一下。
application.yml配置
我更喜欢yml配置文件,所以
spring-boot-mybatis-mysql/src/main/resources/application.properties重命名为application.yml
spring:
datasource:
driverClassName: com.mysql.cj.jdbc.Driver
url: jdbc:mysql://127.0.0.1:3306/ry-vue?useUnicode=true&characterEncoding=utf8&zeroDateTimeBehavior=convertToNull&useSSL=true&serverTimezone=GMT%2B8&allowMultiQueries=true
username: root
password: itkey123456
mybatis:
typeAliasesPackage: cn.ycmit.**.domain
mapperLocations: classpath*:mapper/**/*Mapper.xml
configLocation: classpath:mybatis/mybatis-config.xml
主要就是一个数据源的配置和mybatis的配置。具体意思参考注释的部分。
mybatis-config.xml
创建文件spring-boot-mybatis-mysql/src/main/resources/mybatis/mybatis-config.xml文件的内容如下:
<?xml version="1.0" encoding="UTF-8" ?>
<!DOCTYPE configuration
PUBLIC "-//mybatis.org//DTD Config 3.0//EN"
"http://mybatis.org/dtd/mybatis-3-config.dtd">
<configuration>
<settings>
<setting name="cacheEnabled" value="true" />
<setting name="useGeneratedKeys" value="true" />
<setting name="defaultExecutorType" value="SIMPLE" />
<setting name="logImpl" value="SLF4J" />
</settings>
</configuration>
这个文件就是yml中指定的全局的配置文件。
mybatis:
configLocation: classpath:mybatis/mybatis-config.xml
实体类
这里以上面的qa_category表为例,创建一个实体类:
spring-boot-mybatis-mysql/src/main/java/cn/ycmit/sbmm/domain/QaCategory.java
内容如下:
package cn.ycmit.sbmm.domain;
import java.util.Date;
public class QaCategory
{
private static final long serialVersionUID = 1L;
private Long categoryId;
private String title;
private Integer sort;
private String createBy;
private Date createTime;
private String updateBy;
private Date updateTime;
public void setCategoryId(Long categoryId)
{
this.categoryId = categoryId;
}
public Long getCategoryId()
{
return categoryId;
}
public void setTitle(String title)
{
this.title = title;
}
public String getTitle()
{
return title;
}
public void setSort(Integer sort)
{
this.sort = sort;
}
public Integer getSort()
{
return sort;
}
public String getCreateBy() {
return createBy;
}
public void setCreateBy(String createBy) {
this.createBy = createBy;
}
public Date getCreateTime() {
return createTime;
}
public void setCreateTime(Date createTime) {
this.createTime = createTime;
}
public String getUpdateBy() {
return updateBy;
}
public void setUpdateBy(String updateBy) {
this.updateBy = updateBy;
}
public Date getUpdateTime() {
return updateTime;
}
public void setUpdateTime(Date updateTime) {
this.updateTime = updateTime;
}
@Override
public String toString() {
return "QaCategory{" +
"categoryId=" + categoryId +
", title='" + title + '\'' +
", sort=" + sort +
", createBy='" + createBy + '\'' +
", createTime=" + createTime +
", updateBy='" + updateBy + '\'' +
", updateTime=" + updateTime +
'}';
}
}
mapper类
创建文件spring-boot-mybatis-mysql/src/main/java/cn/ycmit/sbmm/mapper/QaCategoryMapper.java
内容如下:
package cn.ycmit.sbmm.mapper;
import cn.ycmit.sbmm.domain.QaCategory;
import org.apache.ibatis.annotations.Mapper;
import java.util.List;
@Mapper
public interface QaCategoryMapper
{
public QaCategory selectQaCategoryByCategoryId(Long categoryId);
public List<QaCategory> selectQaCategoryList(QaCategory qaCategory);
public int insertQaCategory(QaCategory qaCategory);
public int updateQaCategory(QaCategory qaCategory);
public int deleteQaCategoryByCategoryId(Long categoryId);
public int deleteQaCategoryByCategoryIds(Long[] categoryIds);
}
这里常用的方法都有了。
mapper配置文件xml
创建文件spring-boot-mybatis-mysql/src/main/resources/mapper/itkey/QaCategoryMapper.xml内容如下:
<?xml version="1.0" encoding="UTF-8" ?>
<!DOCTYPE mapper
PUBLIC "-//mybatis.org//DTD Mapper 3.0//EN"
"http://mybatis.org/dtd/mybatis-3-mapper.dtd">
<mapper namespace="cn.ycmit.sbmm.mapper.QaCategoryMapper">

    <resultMap type="cn.ycmit.sbmm.domain.QaCategory" id="QaCategoryResult">
        <result property="categoryId"    column="category_id"    />
        <result property="title"    column="title"    />
        <result property="sort"    column="sort"    />
        <result property="createBy"    column="create_by"    />
        <result property="createTime"    column="create_time"    />
        <result property="updateBy"    column="update_by"    />
        <result property="updateTime"    column="update_time"    />
    </resultMap>

    <sql id="selectQaCategoryVo">
        select category_id, title, sort, create_by, create_time, update_by, update_time from qa_category
    </sql>

    <select id="selectQaCategoryList" parameterType="cn.ycmit.sbmm.domain.QaCategory" resultMap="QaCategoryResult">
        <include refid="selectQaCategoryVo"/>
        <where>
            <if test="title != null  and title != ''"> and title like concat('%', #{title}, '%')</if>
            <if test="sort != null "> and sort = #{sort}</if>
        </where>
    </select>

    <select id="selectQaCategoryByCategoryId" parameterType="Long" resultMap="QaCategoryResult">
        <include refid="selectQaCategoryVo"/>
        where category_id = #{categoryId}
    </select>

    <insert id="insertQaCategory" parameterType="cn.ycmit.sbmm.domain.QaCategory" useGeneratedKeys="true" keyProperty="categoryId">
        insert into qa_category
        <trim prefix="(" suffix=")" suffixOverrides=",">
            <if test="title != null and title != ''">title,</if>
            <if test="sort != null">sort,</if>
            <if test="createBy != null">create_by,</if>
            <if test="createTime != null">create_time,</if>
            <if test="updateBy != null">update_by,</if>
            <if test="updateTime != null">update_time,</if>
         </trim>
        <trim prefix="values (" suffix=")" suffixOverrides=",">
            <if test="title != null and title != ''">#{title},</if>
            <if test="sort != null">#{sort},</if>
            <if test="createBy != null">#{createBy},</if>
            <if test="createTime != null">#{createTime},</if>
            <if test="updateBy != null">#{updateBy},</if>
            <if test="updateTime != null">#{updateTime},</if>
         </trim>
    </insert>

    <update id="updateQaCategory" parameterType="cn.ycmit.sbmm.domain.QaCategory">
        update qa_category
        <trim prefix="SET" suffixOverrides=",">
            <if test="title != null and title != ''">title = #{title},</if>
            <if test="sort != null">sort = #{sort},</if>
            <if test="createBy != null">create_by = #{createBy},</if>
            <if test="createTime != null">create_time = #{createTime},</if>
            <if test="updateBy != null">update_by = #{updateBy},</if>
            <if test="updateTime != null">update_time = #{updateTime},</if>
        </trim>
        where category_id = #{categoryId}
    </update>

    <delete id="deleteQaCategoryByCategoryId" parameterType="Long">
        delete from qa_category where category_id = #{categoryId}
    </delete>

    <delete id="deleteQaCategoryByCategoryIds" parameterType="String">
        delete from qa_category where category_id in
        <foreach item="categoryId" collection="array" open="(" separator="," close=")">
            #{categoryId}
        </foreach>
    </delete>
</mapper>
这样我们的mybatis版本的CRUD就基本做好了。
查询测试
这里我用一个controller做查询测试。
新建文件spring-boot-mybatis-mysql/src/main/java/cn/ycmit/sbmm/controller/TestController.java
内容如下:
package cn.ycmit.sbmm.controller;
import cn.ycmit.sbmm.domain.QaCategory;
import cn.ycmit.sbmm.mapper.QaCategoryMapper;
import org.springframework.beans.factory.annotation.Autowired;
import org.springframework.web.bind.annotation.RequestMapping;
import org.springframework.web.bind.annotation.RestController;
import java.util.List;
@RestController
public class TestController {
@Autowired
QaCategoryMapper qaCategoryMapper;
@RequestMapping("/test")
public List<QaCategory> test()
{
QaCategory query = new QaCategory();
List<QaCategory> result = qaCategoryMapper.selectQaCategoryList(query);
return result;
}
}
访问http://localhost:8080/test
返回结果如下:
[{"categoryId":1,"title":"Java","sort":1,"createBy":"itkey","createTime":"2022-05-09T09:18:50.000+00:00","updateBy":"","updateTime":"2022-05-09T09:27:35.000+00:00"},{"categoryId":2,"title":"Vue","sort":2,"createBy":"itkey","createTime":"2022-05-09T09:19:09.000+00:00","updateBy":"","updateTime":"2022-05-09T09:27:35.000+00:00"},{"categoryId":3,"title":"React","sort":3,"createBy":"itkey","createTime":"2022-05-10T02:46:28.000+00:00","updateBy":"","updateTime":"2022-05-10T03:05:27.000+00:00"},{"categoryId":4,"title":"mysql","sort":4,"createBy":"itkey","createTime":"2022-05-11T06:51:48.000+00:00","updateBy":"","updateTime":"2022-05-11T06:51:59.000+00:00"},{"categoryId":5,"title":"MacOS","sort":5,"createBy":"itkey","createTime":"2022-05-11T06:53:18.000+00:00","updateBy":"","updateTime":"2022-05-11T06:53:24.000+00:00"}]
这里我只做了一个查询的测试,其他的操作update delete insert也很简单,用过mybatis的小伙伴已经很熟悉了,本文就不赘述了。
源代码下载
https://download.csdn.net/download/lxyoucan/86353644
本文内容由网友自发贡献,版权归原作者所有,本站不承担相应法律责任。如您发现有涉嫌抄袭侵权的内容,请联系:hwhale#tublm.com(使用前将#替换为@)