云开发生成短连接h5跳转小程序
**此项目是在之前的非云开发项目中添加云函数–从而达到生成短连接h5跳转小程序的目的。。
前提-先开通云服务:点击左上角云开发按指引开通
**
如想直接通过静态网站html的方式h5跳转可参考我的另一篇文章https://blog.csdn.net/hlc162181/article/details/113502356
-
在自己的uniapp小程序项目,在项目的根目录创建一个cloudfunctions文件夹,(可以是任意名字)
-
manifest.json下定义下云函数的路径
"cloudfunctionRoot": "cloudfunctions/"
-
cloudfunctions文件夹下创建一个名为public的云函数 其中三个文件如下
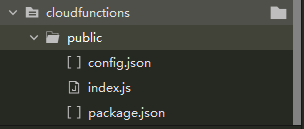
config.json:
{
  "permissions": {
    "openapi": [
    //接口名
   //"security.msgSecCheck" //接口名
    ]
  }
}
index.js:
// 云函数入口文件
const cloud = require('wx-server-sdk')

cloud.init()

// 云函数入口函数
exports.main = async (event, context) => {
  const wxContext = cloud.getWXContext()

  switch (event.action) {  //event接收参数
    case 'getUrlScheme': {
      return getUrlScheme(event.url,event.query)
    }
  }

  return 'action not found'
}
async function getUrlScheme(url,query) {
  return cloud.openapi.urlscheme.generate({
    jumpWxa: {
      path: url, // <!-- replace  --跳转的小程序页面路径 -->
      query:query, //'build_id=810&status=1&batch_id=0'
      //query为传递的参数--用字符串,且不能有中文
    },
    // 如果想不过期则置为 false,并可以存到数据库
    isExpire: false,
    // 一分钟有效期
    expireTime: parseInt(Date.now() / 1000 + 60),
  })
}
package.json:
{
  "name": "public",
  "version": "1.0.0",
  "description": "",
  "main": "index.js",
  "scripts": {
    "test": "echo \"Error: no test specified\" && exit 1"
  },
  "author": "",
  "license": "ISC",
  "dependencies": {
    "wx-server-sdk": "~2.3.2"
  }
}
到这一步就创建完成了,但是此时我们在小程序开发者工具打开,是看不见cloudfunctions文件夹的,因为新建的 /cloudfunctions 并不属于uni-app默认的目录结构,默认不会被打包。这里的解决思路是:通过webpack包管理工具的复制插件将
/cloudfunctions 复制到项目包中
首先在项目根目录创建vue.config.js文件,并做如下配置:
const path = require('path')
const CopyWebpackPlugin = require('copy-webpack-plugin')

module.exports = {
    configureWebpack: {
        plugins: [
            new CopyWebpackPlugin([
                {
                    from: path.join(__dirname, 'cloudfunctions'),
                    to: path.join(__dirname, 'unpackage/dist', process.env.NODE_ENV === 'development' ? 'dev' : 'build', process.env.UNI_PLATFORM, 'cloudfunctions')
                }
            ])
        ]
    }
}
需要先安装 copy-webpack-plugin
npm install -save copy-webpack-plugin
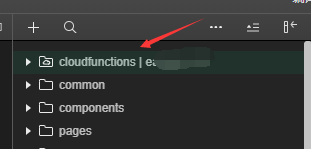
再次运行项目,打包路径下 /cloudfunctions就出现了

将打包好的项目导入微信开发者工具中查看,云文件夹有了而且有云符号和环境ID,表明配置成功:
点击public文件,右键,选择上传并部署
综上我们的项目新增云函数就完成了,,,此时就只需要在项目中需要的位置调用云函数即可
wx.cloud.init()//调用前需先调用init
wx.cloud.callFunction({
	name: 'share',
	data: {
		"action": 'getUrlScheme',
		'url':that.sharedata.url,
		'query':pageQuery,
	}
}).then(res => {
	console.log(res.result.openlink,'=============')
	pageUrl=res.result.openlink
	console.log("开始地址转换----以下是把云函数返回的地址转换成短地址")
	uni.request({
	    url: 'https://api.weixin.qq.com/cgi-bin/token', //仅为示例,并非真实接口地址。
	    data: {
	        grant_type:'client_credential',
			appid: '项目的appid',
			secret: '项目秘钥',
	    },
	    success: (res) => {
	        uni.request({
	            url: 'https://api.weixin.qq.com/cgi-bin/shorturl?access_token='+res.data.access_token, //仅为示例,并非真实接口地址。
	        	method:'post',
	            data: {
	        		action:'long2short',
	        		long_url:pageUrl
	            },
	            success: (res) => {
	                uni.setClipboardData({
	                    data:res.data.short_url,
	                    success: function () {
	                	   that.shareClose()
	                       uni.showToast({
	                       	title:'复制成功--此时为转换后的短地址',
	                       	icon:'none'
	                       })
	                    }
	                });
	            }
	        });
	    }
	});
})