
1.添加读写接口
(1)在应用代码中:

(2)在驱动代码中:

2.应用和驱动之间的数据交换
(1)copy_from_user,用来将数据从用户空间复制到内核空间
(2)copy_to_user,用来将数据从内核空间复制到用户空间

(3)write和read函数实现:
读函数:

写函数:
3.应用程序如何调用驱动源码:
应用层:
#include <stdio.h>
#include <sys/types.h>
#include <sys/stat.h>
#include <fcntl.h>


#define FILE	"/dev/test"			// 刚才mknod创建的设备文件名

char buf[100];

int main(void)
{
	int fd = -1;

	fd = open(FILE, O_RDWR);
	if (fd < 0)
	{
		printf("open %s error.\n", FILE);
		return -1;
	}
	printf("open %s success..\n", FILE);

	// 读写文件
	write(fd, "helloworld2222", 14);
	read(fd, buf, 100);
	printf("读出来的内容是:%s.\n", buf);

	// 关闭文件
	close(fd);

	return 0;
}
驱动层:
#include <linux/module.h> // module_init module_exit
#include <linux/init.h> // __init __exit
#include <linux/fs.h>
#include <asm/uaccess.h>
#define MYMAJOR 200
#define MYNAME "testchar"
int mymajor;
char kbuf[100]; // 内核空间的buf
static int test_chrdev_open(struct inode *inode, struct file *file)
{
// 这个函数中真正应该放置的是打开这个设备的硬件操作代码部分
// 但是现在暂时我们写不了这么多,所以用一个printk打印个信息来做代表。
printk(KERN_INFO "test_chrdev_open\n");
return 0;
}
static int test_chrdev_release(struct inode *inode, struct file *file)
{
printk(KERN_INFO "test_chrdev_release\n");
return 0;
}
ssize_t test_chrdev_read(struct file *file, char __user *ubuf, size_t count, loff_t *ppos)
{
int ret = -1;
printk(KERN_INFO "test_chrdev_read\n");
ret = copy_to_user(ubuf, kbuf, count);
if (ret)
{
printk(KERN_ERR "copy_to_user fail\n");
return -EINVAL;
}
printk(KERN_INFO "copy_to_user success..\n");
return 0;
}
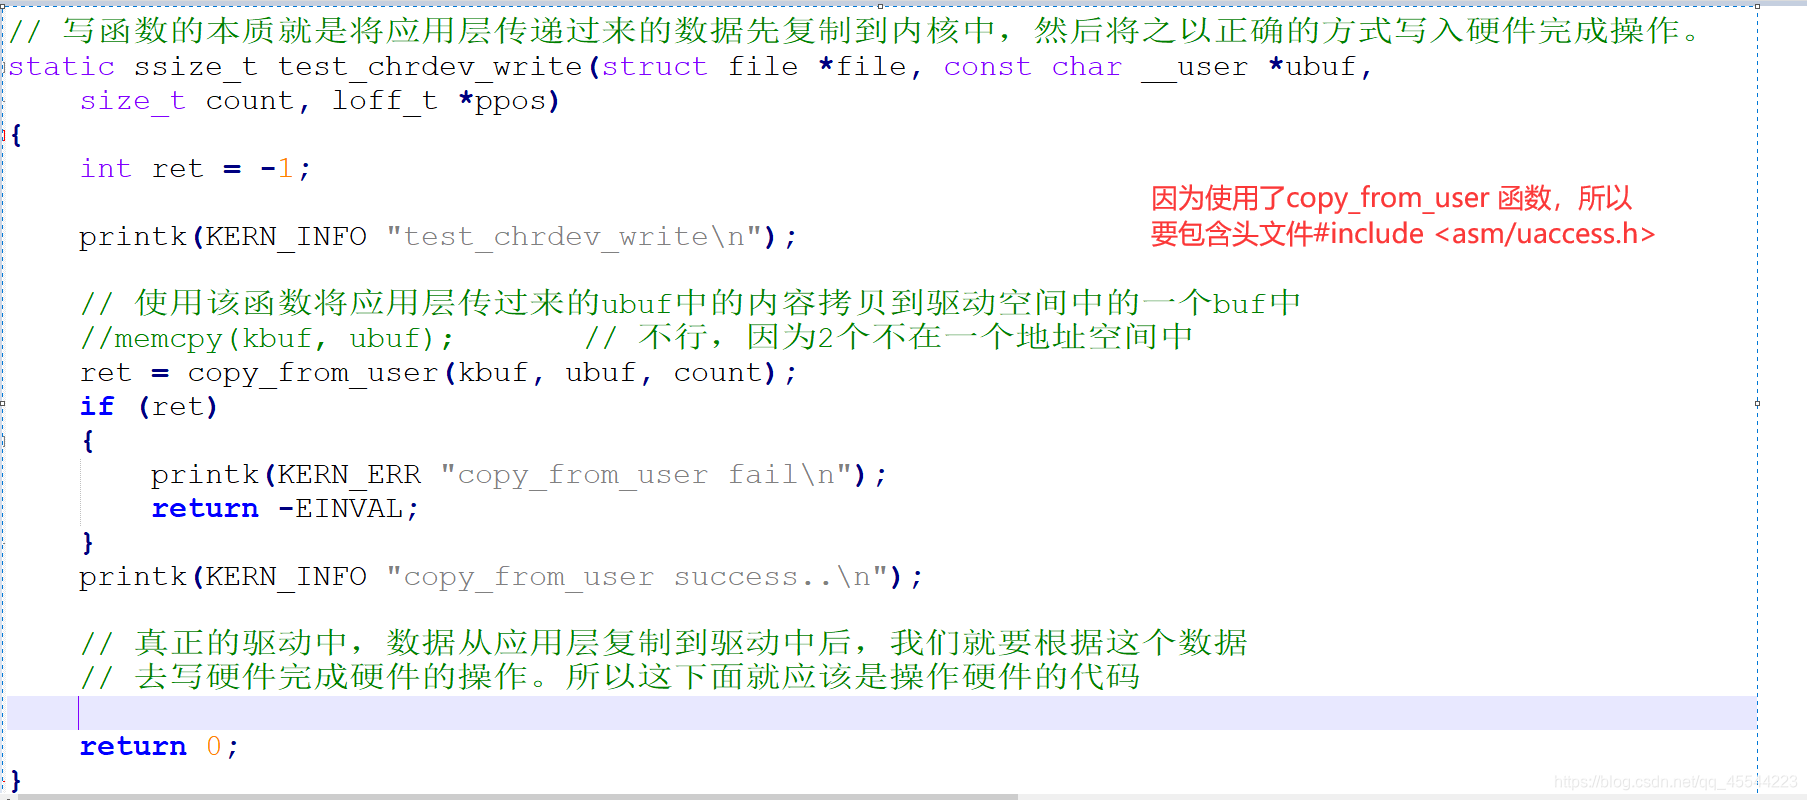
// 写函数的本质就是将应用层传递过来的数据先复制到内核中,然后将之以正确的方式写入硬件完成操作。
static ssize_t test_chrdev_write(struct file *file, const char __user *ubuf,
size_t count, loff_t *ppos)
{
int ret = -1;
printk(KERN_INFO "test_chrdev_write\n");
// 使用该函数将应用层传过来的ubuf中的内容拷贝到驱动空间中的一个buf中
//memcpy(kbuf, ubuf); // 不行,因为2个不在一个地址空间中
ret = copy_from_user(kbuf, ubuf, count);
if (ret)
{
printk(KERN_ERR "copy_from_user fail\n");
return -EINVAL;
}
printk(KERN_INFO "copy_from_user success..\n");
// 真正的驱动中,数据从应用层复制到驱动中后,我们就要根据这个数据
// 去写硬件完成硬件的操作。所以这下面就应该是操作硬件的代码
return 0;
}
// 自定义一个file_operations结构体变量,并且去填充
static const struct file_operations test_fops = {
.owner = THIS_MODULE, // 惯例,直接写即可
.open = test_chrdev_open, // 将来应用open打开这个设备时实际调用的
.release = test_chrdev_release, // 就是这个.open对应的函数
.write = test_chrdev_write,
.read = test_chrdev_read,
};
// 模块安装函数
static int __init chrdev_init(void)
{
printk(KERN_INFO "chrdev_init helloworld init\n");
// 在module_init宏调用的函数中去注册字符设备驱动
// major传0进去表示要让内核帮我们自动分配一个合适的空白的没被使用的主设备号
// 内核如果成功分配就会返回分配的主设备好;如果分配失败会返回负数
mymajor = register_chrdev(0, MYNAME, &test_fops);
if (mymajor < 0)
{
printk(KERN_ERR "register_chrdev fail\n");
return -EINVAL;
}
printk(KERN_INFO "register_chrdev success... mymajor = %d.\n", mymajor);
return 0;
}
// 模块卸载函数
static void __exit chrdev_exit(void)
{
printk(KERN_INFO "chrdev_exit helloworld exit\n");
// 在module_exit宏调用的函数中去注销字符设备驱动
unregister_chrdev(mymajor, MYNAME);
}
module_init(chrdev_init);
module_exit(chrdev_exit);
// MODULE_xxx这种宏作用是用来添加模块描述信息
MODULE_LICENSE("GPL"); // 描述模块的许可证
MODULE_AUTHOR("aston"); // 描述模块的作者
MODULE_DESCRIPTION("module test"); // 描述模块的介绍信息
MODULE_ALIAS("alias xxx"); // 描述模块的别名信息
makefile:
#ubuntu的内核源码树,如果要编译在ubuntu中安装的模块就打开这2个
#KERN_VER = $(shell uname -r)
#KERN_DIR = /lib/modules/$(KERN_VER)/build


# 开发板的linux内核的源码树目录
KERN_DIR = /root/driver/kernel

obj-m	+= module_test.o

all:
	make -C $(KERN_DIR) M=`pwd` modules
	arm-linux-gcc app.c -o app

cp:
	cp *.ko /x210_porting/rootfs/rootfs/driver_test
	cp app /x210_porting/rootfs/rootfs/driver_test


.PHONY: clean
clean:
	make -C $(KERN_DIR) M=`pwd` modules clean
	rm -rf app