上一篇文章,微信小程序开发一个小型商城(三、商品分类设计)
在从上一个界面跳转过来,会看到商品列表这个界面:如下图所示:
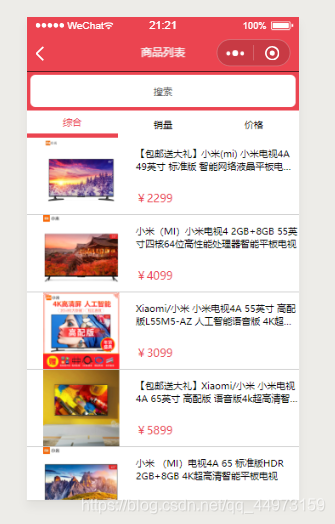
页面分析:从上到下:分别是一个已经定义好的自定义组件,下面的综合,销量,也是一个自定义组件。下面商品的一个个的小框框就是一个个的navigetor。
自定义组件
使用已经定义好了的组件。先在category/index/index.json文件引入组件,随后在wxml文件当中直接调用组件即可。同理定义一个Tabs组件:
最开始我们需要在good_list/index.js文件下的data里面加上一个数组,用于tabs组件渲染:
tabs: [
      {
        id: 0,
        value: "综合",
        isActive: true
      },
      {
        id: 1,
        value: "销量",
        isActive: false
      },
      {
        id: 2,
        value: "价格",
        isActive: false
      }
    ],
随后回到Tabs组件当中定义wxml文件,静态页面以及渲染tabs数组
<view class="tabs">
    <view class="tabs_title">
        <view wx:for="{{tabs}}"
        wx:key="id"
        class="title_item  {{item.isActive?'active':''}}"
        bindtap = "handleItemTap"
        data-index="{{index}}"
        >
            {{item.value}}
        </view>

    </view>
      <view class="tabs-content">
          <slot></slot>
      </view>
</view>
加上些许样式:display使其在同一行显示,active 是否选中,选中后加上下标颜色
.tabs_title{
        display: flex;
       }
        .title_item{
            display: flex;
            justify-content: center;
            align-items: center;
            flex: 1;
            padding: 15rpx 0;
        }
        .active{
            color: var(--themeColor);
            border-bottom: 5px solid currentColor;
        }
在这种需要绑定事件的自定义组件当中,先在properties下声明tabs数组的类型和值
tabs: {
      type: Array,
      value: []
    }
随后编写点击事件,获取index索引改变isActive的值,从而改变下标颜色,在method下面编写
handleItemTap(e){
      //获取点击的索引
      const{index}=e.currentTarget.dataset;
      console.log(index)
      //触发父组件的自定义事件
      this.triggerEvent("tabsItemChange",{index});
    }
在都写完后不要忘记在goods_list/index.json文件当中调用这个组件
商品列表
对不同的tabs所对应不同的商品列表使用block占位符进行隔开,以及获取左侧图标的地方,在部分商品当中可能会缺失图标,使用?:的形式加上一张图片,以及需要绑定一个单击事件使得跳转到商品详情页面和一个标题的自定义事件,
<SearchInput></SearchInput>
<Tabs tabs="{{tabs}}" bindtabsItemChange="handleTabsItemChange">
    <block wx:if="{{tabs[0].isActive}}">
        <view class="frist_tab">
            <navigator class="goods_item" wx:for="{{goodslist}}"  url="../goods_detail/main?goods_id={{item.goods_id}}" wx:key="goods_id">
                <!--左侧图片-->
                <view class="goods_img_wrap">
                    <image
                        src="{{item.goods_small_logo?item.goods_small_logo:'http://image1.suning.cn/uimg/b2c/newcatentries/0000000000-000000000601395527_1_400x400.jpg'}}"
                        mode="widthFix" />
                </view>
                <!--右侧商品-->
                <view class="goods_info_wrap">
                    <view class="goods_name">{{item.goods_name}}</view>
                    <view class="goods_price">¥{{item.goods_price}}</view>
                </view>
            </navigator>
        </view>
    </block>
    <block wx:elif="{{tabs[1].isActive}}">1</block>
    <block wx:elif="{{tabs[2].isActive}}">2</block>
</Tabs>
随后就是给标签加上样式,使得一个商品占据整个宽,高度都一致,左侧图片占据多宽?右侧文字只显示俩行,多余的用...代替,和最后的商品价格为红色字体,一样使用less的方式:代码如下
.frist_tab{
    .goods_item{
        display: flex;
        border-bottom: 1px solid #ccc;
       .goods_img_wrap{
           flex: 2;
           display: flex;
           justify-content: center;
           align-items: center;
           image{
            width: 70%;
           }
       }
       .goods_info_wrap{
           flex: 3;
           display: flex;
           flex-direction: column;
           justify-content: space-around;
           .goods_name{
                display: -webkit-box;
                overflow: hidden;
                -webkit-box-orient:vertical;
                -webkit-line-clamp: 2;
           }
           .goods_price{
            color: var(--themeColor);
            font-size: 32rpx;
           }
       }
    }
}
商品列表事件详情
在这里使用到了es7语法,使用这个语法的时候,首先需要一大段代码,链接地址, (懒得找地址下载的地方了,直接上传到大学城上得了)在与pages同层级目录下新建一个lib文件夹,将代码复制粘贴进去。且勾选es6转es5语法

最后在goods_list下的index.js文件里面导入文件使用代码:
import { request } from "../../request/index.js";
import regeneratorRuntime from '../../lib/runtime/runtime';
在data里面定义变量:商品列表用于渲染,条数用于判断是否还可以翻页。
	//商品列表
    goodslist: [],
    //总页面的条数
    tatal: 0
data同层级下定义参数:接口链接余姚传递的参数:分别是:通过关键字查询的参数query、通过商品id查询的参数cid、初始页码pagesnum为1、一页有多少条数据pagesize为10
 //接口要的参数
  cid:0,
  QueryParams: {
    query:"",
    cid:"",
    pagenum: 1,
    pagesize: 10
  },
标题自定义事件:根据传过来的index判断哪一个小标题标红
  //标题的自定义事件
  handleTabsItemChange(e) {
    //console.log(e)
    //获取索引值
    const { index } = e.detail;
    let { tabs } = this.data;
    tabs.forEach((v, i) => i === index ? v.isActive = true : v.isActive = false);
    this.setData({
      tabs
    })
  },
获取商品列表的函数,并且计算分页,一页10条数据,每一个界面共有多少条数据?在network当中即可查看,如下图;找到这个json文件,点开即可看到total的值为38
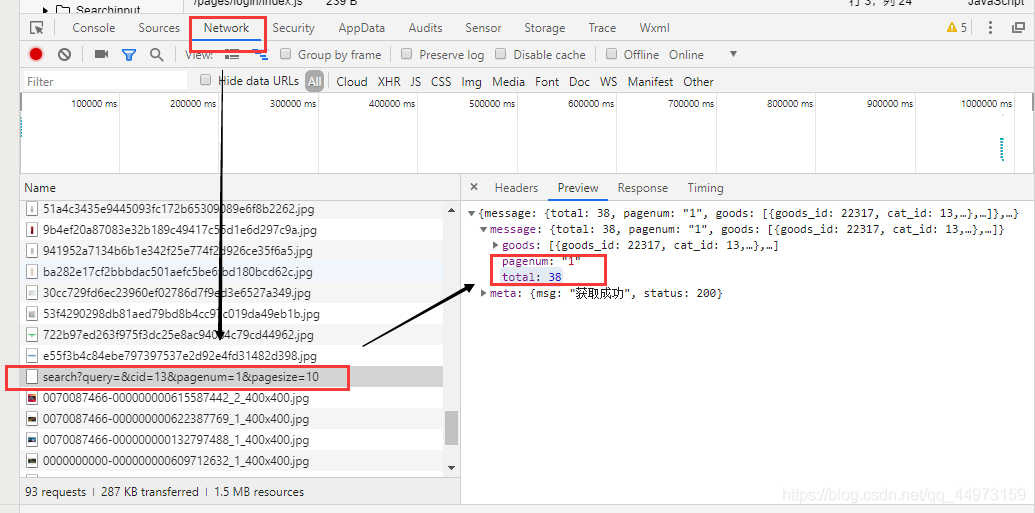
具体代码如下:在最后给goodslist数组赋值:使用拼接的方式。
  async  GetGoodsList() {
    const res = await request({url:"/goods/search",data:this.QueryParams});
    const total = res.total
    this.totalPages=Math.ceil(total/this.QueryParams.pagesize);
    console.log(this.totalPages)
    this.setData({
       goodslist: [...this.data.goodslist, ...res.goods]
     })
    //关闭下拉刷新的窗口
   wx.stopPullDownRefresh();
  },
到最后在onLoad函数里面调用即可:
    this.QueryParams.cid = options.cid||"";
    this.GetGoodsList();
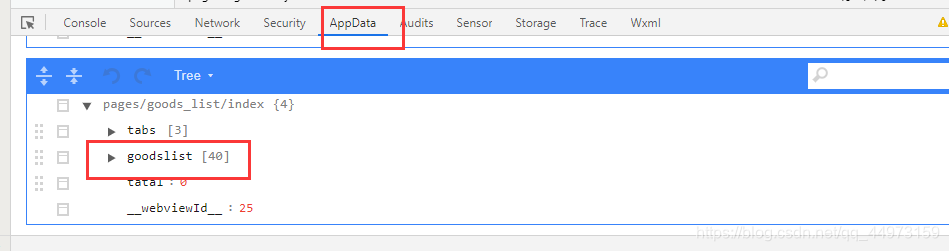
记过这一系列步骤之后,在appdata里面将会看到goodlist的值:并且它的值只有10个,这是因为在我们的设定下最开始只有第一页而第一页嘴都只有10条数据,

翻页效果和下拉刷新效果:查看下一页数据,单击前往和 刷新页面,单击前往
当我们下拉刷新到下一页的时候。我们的goodlist数组的值将会按10进行递增,也就是在前面调用接口的地方对goodlist数组赋值是按拼接的方式来完成的,如下所示:在刷新基础后goodlist的值就是40了
感谢你的阅读:持续更新中…
下一篇文章:微信小程序开发一个小型商城(五、商品详情)