在本文中,将学习如何在您的 Android 应用程序中实现 Excel 自动化功能。阅读本文后,将能够以编程方式在您的 Android 应用程序中从头开始创建 Excel XLSX 或 XLS 文件。此外,本文还将介绍如何更新现有 Excel 文件、生成图表、应用公式以及在 Excel 工作表中添加数据透视表。
- 创建 Excel XLSX 或 XLS 文件
- 编辑现有 Excel 文件
- 在 Excel 文件中创建图表
- 在 XLSX 中创建数据透视表
要将Excel电子表格转换为PDF,我们将使用Aspose.Cells for Android via Java,它是一个强大的电子表格操作 API,让您无需 MS Office 即可创建或修改 Excel 文件。API 支持以编程方式添加图表、图形、公式和执行其他电子表格操作操作。你可以点击下方按钮获取使用。下载Aspose.Cells for Python
在 Android 中创建 Excel XLSX 或 XLS
每个 Excel 工作簿由一个或多个工作表组成,这些工作表进一步包含行和列,以将数据保持在单元格的形式。以下是从头开始创建 Excel XLSX 文件的步骤。
- 创建Workbook 类的实例 。
- 使用Workbook.getWorksheets.get() 方法访问所需的工作表 。
- 使用单元格的标识符将值放入工作表中所需的单元格中,例如 A1、B3 等。
- 使用Workbook.save() 方法将工作簿另存为 Excel 文件。
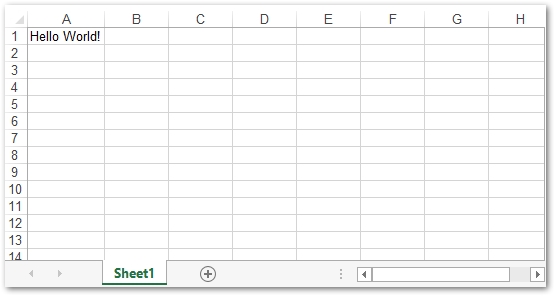
以下代码示例展示了如何在 Android 中创建 Excel XLSX 文件。
// Create a new workbook
Workbook workbook = new Workbook();

// Add value in the cell
workbook.getWorksheets().get(0).getCells().get("A1").putValue("Hello World!");

// Save as Excel XLSX file
workbook.save("Excel.xlsx");
在 Android 中编辑 Excel XLSX 文件
现在让我们看看如何修改或插入数据到现有的 MS Excel 文件中。为此,您只需加载文件,访问所需的工作表并保存更新的文件。以下是修改现有 Excel 文件的步骤。
- 使用Workbook 类打开 Excel 文件 。
- 分别使用Worksheet 和Cell类访问工作 表和 单元格。
- 将更新的工作簿另存为 Excel .xlsx 文件。
以下代码示例展示了如何在 Android 中编辑现有的 MS Excel 文件。
// Create a new workbook
Workbook workbook = new Workbook("workbook.xls");

// Get the reference of "A1" cell from the cells of a worksheet
Cell cell = workbook.getWorksheets().get(0).getCells().get("A1");

// Set the "Hello World!" value into the "A1" cell
cell.setValue("updated cell value.");

// Write the Excel file
workbook.save("Excel.xls", FileFormatType.EXCEL_97_TO_2003);
在 Android 中的 Excel 中创建图表或图形
电子表格中的图表用于直观地表示存储在工作表中的数据。它们使分析大量数据变得更加容易。Aspose.Cells for Android via Java 提供了广泛的图表,可以在 Excel 文件中以编程方式创建这些图表。以下是在 Excel XLSX 文件中创建图表的步骤。
- 使用Workbook 类创建一个新的 Excel 文件或加载现有的 Excel 文件 。
- 将数据添加到工作表(可选)。
- 使用Worksheet.getCharts() 方法获取工作表的图表集合。
- 使用Worksheet.getCharts().add() 方法添加新图表 。
- 从集合中获取新创建的图表。
- 指定单元格的范围以设置图表的 N 系列。
- 将工作簿另存为 Excel .xlsx 文件。
以下代码示例展示了如何在 Android 中的 Excel XLSX 中创建图表。
// Create a new workbook
Workbook workbook = new Workbook("workbook.xlsx");

// Obtaining the reference of the first worksheet
WorksheetCollection worksheets = workbook.getWorksheets();
Worksheet sheet = worksheets.get(0);

// Adding some sample value to cells
Cells cells = sheet.getCells();
Cell cell = cells.get("A1");
cell.setValue(50);
cell = cells.get("A2");
cell.setValue(100);
cell = cells.get("A3");
cell.setValue(150);
cell = cells.get("B1");
cell.setValue(4);
cell = cells.get("B2");
cell.setValue(20);
cell = cells.get("B3");
cell.setValue(50);

// get charts in worksheet
ChartCollection charts = sheet.getCharts();

// Adding a chart to the worksheet
int chartIndex = charts.add(ChartType.PYRAMID, 5, 0, 15, 5);
Chart chart = charts.get(chartIndex);

// Adding NSeries (chart data source) to the chart ranging from "A1"
// cell to "B3"
SeriesCollection serieses = chart.getNSeries();
serieses.add("A1:B3", true);

// Write the Excel file
workbook.save("Excel_with_Chart.xlsx");
在 Android 中的 Excel XLSX 中创建数据透视表
Excel 工作表中的数据透视表具有多种用途,例如向数据添加过滤器、计算总计、汇总数据等。可以使用工作表中的单元格范围创建数据透视表。以下是在 Excel 工作表中创建数据透视表的步骤。
- 创建新 工作簿 或加载现有文件 。
- 将数据插入工作表(可选)。
- 使用Worksheet.getPivotTables() 方法访问数据透视表集合 。
- 使用Worksheet.getPivotTables().add() 方法在工作表中添加一个新的数据透视表 。
- 向数据透视表提供数据。
- 保存工作簿。
以下代码示例展示了如何在 Excel 中创建数据透视表。
// Create a new workbook
Workbook workbook = new Workbook("workbook.xlsx");

// Get the first worksheet.
Worksheet sheet = workbook.getWorksheets().get(0);

// Obtaining Worksheet's cells collection
Cells cells = sheet.getCells();

// Setting the value to the cells
Cell cell = cells.get("A1");
cell.setValue("Sport");
cell = cells.get("B1");
cell.setValue("Quarter");
cell = cells.get("C1");
cell.setValue("Sales");

cell = cells.get("A2");
cell.setValue("Golf");
cell = cells.get("A3");
cell.setValue("Golf");
cell = cells.get("A4");
cell.setValue("Tennis");
cell = cells.get("A5");
cell.setValue("Tennis");
cell = cells.get("A6");
cell.setValue("Tennis");
cell = cells.get("A7");
cell.setValue("Tennis");
cell = cells.get("A8");
cell.setValue("Golf");

cell = cells.get("B2");
cell.setValue("Qtr3");
cell = cells.get("B3");
cell.setValue("Qtr4");
cell = cells.get("B4");
cell.setValue("Qtr3");
cell = cells.get("B5");
cell.setValue("Qtr4");
cell = cells.get("B6");
cell.setValue("Qtr3");
cell = cells.get("B7");
cell.setValue("Qtr4");
cell = cells.get("B8");
cell.setValue("Qtr3");

cell = cells.get("C2");
cell.setValue(1500);
cell = cells.get("C3");
cell.setValue(2000);
cell = cells.get("C4");
cell.setValue(600);
cell = cells.get("C5");
cell.setValue(1500);
cell = cells.get("C6");
cell.setValue(4070);
cell = cells.get("C7");
cell.setValue(5000);
cell = cells.get("C8");
cell.setValue(6430);


PivotTableCollection pivotTables = sheet.getPivotTables();

// Adding a PivotTable to the worksheet
int index = pivotTables.add("=A1:C8", "E3", "PivotTable2");

// Accessing the instance of the newly added PivotTable
PivotTable pivotTable = pivotTables.get(index);

// Unshowing grand totals for rows.
pivotTable.setRowGrand(false);

// Dragging the first field to the row area.
pivotTable.addFieldToArea(PivotFieldType.ROW, 0);

// Dragging the second field to the column area.
pivotTable.addFieldToArea(PivotFieldType.COLUMN, 1);

// Dragging the third field to the data area.
pivotTable.addFieldToArea(PivotFieldType.DATA, 2);

// Write the Excel file
workbook.save("Excel_with_Chart.xlsx");
如果您有任何疑问或需求,请随时加入Aspose技术交流群(761297826),我们很高兴为您提供查询和咨询。