万维网 (WORLD WIDE WEB,WWW)服务器,也称之为 WEB 服务器,主要功能
是提供网上信息浏览服务。WWW 是 Internet 的多媒体信息查询工具,是 Internet 上
飞快发展的服务,也是目前用的最广泛的服务。正是因为有了 WWW 软件,才使得近年
来 Internet 迅速发展。
目前主流的 WEB 服务器软件包括:Apache、Nginx、Lighttpd、IIS、Resin、Tomcat、
WebLogic、Jetty 等。
本章向读者介绍 Apache WEB 服务器发展历史、Apache 工作模式深入剖析、
Apache 虚拟主机、配置文件详解及 Apache Rewrite 企业实战等。
Apache WEB 服务器入门简介
1)Prefork MPM:
2)Worker MPM:
3)Event MPM:
Apache HTTP Server 是 Apache 软件基金会的一个开源的网页服务器,是世界使
用排名第一的 Web 服务器软件,可以运行在几乎所有广泛使用的计算机平台上,由于其
跨平台和安全性被广泛使用,是目前最流行的 Web 服务器端软件之一。
Apache 服务器是一个多模块化的服务器,经过多次修改,成为目前世界使用排名第
一的 Web 服务器软件。Apache 取自“A Patchy Server”的读音,即充满补丁的服
务器,因为 Apache 基于 GPL 发布,大量开发者不断为 Apache 贡献新的代码、功能、
新的特性、修改原来的缺陷。
Apache 服务器的特点是使用简单、速度快、性能稳定,可以做负载均衡及代理服务
器来使用。
Prefork MPM 工作原理
每辆汽车都有发动机引擎,不同的引擎,对车子运行效率也不一样,同样 Apache
也有类似工作引擎或者处理请求的模块,亦可称之为多路处理模块(Multi-Processing
Modules,MPM),Apache WEB 服务器有三种处理模块:Prefork MPM、Worker
MPM、Event MPM。
在企业中最常用的处理模块为 Prefork MPM 和 Worker MPM,Event MPM 不支
持 HTTPS 方式,官网也给出
“This MPM is experimental, so it may or may not work as expected”提示,所以
很少被使用。
默认 Apache 处理模块为 Prefork MPM 方式,Prefork 采用的预派生子进程方式,
Prefork 用单独的子进程来处理不同的请求,进程之间是彼此独立的,所以比较稳定。
Prefork 的工作原理:控制进程 Master 在最初建立“StartServers”个进程后,为了
满足 MinSpareServers 设置的最小空闲进程,所以需创建第一个空闲进程,等待一秒钟,
继续创建两个,再等待一秒钟,继续创建四个,依次按照递增指数级创建进程数,最多
每秒同时创建 32 个空闲进程,直到满足至少有 MinSpareServers 设置的值为止。
Apache 的预派生模式(Prefork),基于预派生模式,不必在请求到来时再产生新
的进程,从而减小了系统开销以增加性能,不过由于 Prefork MPM 引擎是基于多进程方
式提供对外服务,每个进程占内存也相对较高。
Worker MPM 工作原理
相对于 Prefork MPM,Worker 方式是 2.0 版中全新的支持多线程和多进程混合模型
的 MPM,由于使用线程来处理,所以可以处理海量的 HTTP 请求,而系统资源的开销
要小于基于 Prefork 多进程的方式。Worker 也是基于多进程,但每个进程又生成多个线
程,这样可以保证多线程可以获得进程的稳定性。
Worker MPM 工作原理:控制进程 Master 在最初建立“StartServers”个进程,
每个进程会创建 ThreadsPerChild 设置的线程数,多个线程共享该进程内存空间,同时
每个线程独立地处理用户的 HTTP 请求。为了不在请求到来时再生成线程,Worker MPM
也可以设置最大最小空闲线程。
Worker MPM 模式下同时处理的请求总数=进程总数 xThreadsPerChild,也即等
于 MaxClients。如果服务器负载很高,当前进程数不满足需求,Master 控制进程会 fork
新的进程,最大进程数不能超过 ServerLimit 数,如果需调整的 StartServers 进程数,
需同时调整 ServerLimit 值。
Prefork MPM 与 Worker MPM 引擎区别小结如下:
Prefork MPM 模式:使用多个进程,每个进程只有一个线程,每个进程在某个
确定的时间只能维持一个连接,稳定,内存开销较高;
Worker MPM 模式:使用多个进程,每个子进程包含多个线程,每个线程在某
个确定的时间只能维持一个连接,内存占用量比较小,适合大并发、高流量的
WEB 服务器。Worker MPM 缺点是一个线程崩溃,整个进程就会连同其任何
线程一起挂掉。
Apache WEB 服务器安装
从 Apache 官方分站点下载目前稳定版本 httpd-2.2.32 版本,目前最新版本为 2.4
版本,下载地址如下:
https://mirrors.tuna.tsinghua.edu.cn/apache//httpd/httpd-2.4.46.tar.gz
Apache WEB 服务器安装步骤如下:
tar -xjvf httpd-2.2.32.tar.bz2
tar 工具解压 httpd 包;
cd httpd-2.2.32/
进入解压后目录;
yum install apr apr-devel apr-util apr-util-devel pcre-devel openssl-devel gcc gcc-c++ -y
安装 APR 相关优化模块;
./configure --prefix=/usr/local/apache2/ --enable-rewrite --enable-so
--enable-mpms-shared=all --with-mpm=event --enable-echo --enable-info --enable-ssl
预编译 Apache,启用 rewrite 规则、启用动态加载库、开启 Apache 三种工作引擎,如
果开启模块支持,需要添加配置:
#LoadModule mpm_prefork_module modules/mod_mpm_prefork.so
#LoadModule mpm_event_module modules/mod_mpm_event.so
#LoadModule mpm_worker_module modules/mod_mpm_worker.so

查看是否编译成功
# echo $?
0

make
编译
make install
安装
Apache2.2.32 安装完毕,如图 10-1 所示


启动 Apache 服务,临时关闭 selinux、firewalld 防火墙
/usr/local/apache2/bin/apachectl start
setenforce 0
systemctl stop firewalld.servic
查看 Apache 服务进程,通过客户端浏览器访问 http://192.168.111.131/,如图
10-2(a)、10-2(b)所示

Apache 虚拟主机企业应用
企业真实环境中,一台 WEB 服务器发布单个网站会非常浪费资源,所以一台
WEB 服务器上会发布多个网站,少则 3-5 个,多则 2-30 个网站。
在一台服务器上发布多网站,也称之为部署多个虚拟主机,WEB 虚拟主机配置方法
有三种:
基于单 IP 多个 Socket 端口;
基于多 IP 地址一个端口;
基于单 IP 一个端口不同域名。
其中基于同一端口不同域名的方式在企业中得到广泛的使用和应用,如下为基于一
个端口不同域名,在一台 Apache WEB 服务器上部署多个网站,步骤如下:
(1) 创建虚拟主机配置文件 httpd-vhosts.conf,该文件默认已存在,只需去掉
httpd.conf 配置文件中#号即可,如图 10-3 所示
#vi /usr/local/apache2/conf/httpd.conf
# Virtual hosts
Include conf/extra/httpd-vhosts.conf

(2) 配置文件/usr/local/apache2/conf/extra/httpd-vhosts.conf 中代码设置为
如下:
NameVirtualHost *:80
<VirtualHost *:80>
    ServerAdmin  jfedu@jfedu.net
    DocumentRoot "/usr/local/apache2/htdocs/www.jfedu1.com"
    ServerName   www.jfedu1.com
    ErrorLog "logs/www.jfedu1.com/error_log"
    CustomLog "logs/www.jfedu1.com/access_log" common
</VirtualHost>
<VirtualHost *:80>
    ServerAdmin  jfedu@jfedu.net
    DocumentRoot "/usr/local/apache2/htdocs/www.jfedu2.com"
    ServerName   www.jfedu2.com
    ErrorLog "logs/www.jfedu2.com/error_log"
    CustomLog "logs/www.jfedu2.com/access_log" common
</VirtualHost>
Httpd-vhosts.conf 参数详解:
NameVirtualHost *:80 开启虚拟主机,并且监
听本地所有网卡接口的 80 端口;
<VirtualHost *:80> 虚拟主机配置起始;
ServerAdmin support@jfedu.net 管理员邮箱;
DocumentRoot "/usr/local/apache2/htdocs/jf1" 该虚拟主机发布目录;
ServerName www.jf1.com 虚拟主机完整域名;
ErrorLog "logs/www.jf1.com_error_log" 错误日志路径及文件
名;
CustomLog "logs/www.jf1.com_access_log" common 访问日志路径及文件
名;
</VirtualHost> 虚拟主机配置结束。

(3) 创建 www.jf1.com 及 www.jf2.com 发布目录,重启 apache 服务,并分别创
建 index.html 页面
#mkdir -p /usr/local/apache2/htdocs/{jf1,jf2}/
#/usr/local/apache2/bin/apachectl restart
echo "<h1> www.jf1.com
Pages</h1>" >/usr/local/apache2/htdocs/jf1/index.html
echo "<h1> www.jf2.com
Pages</h1>" >/usr/local/apache2/htdocs/jf2/index.htm
或者

创建虚拟主机里面对应项目的日志文件
#mkdir -p /usr/local/apache2/logs/www.jfedu.com
#mkdir -p /usr/local/apache2/logs/www.jfedu1.com
#mkdir -p /usr/local/apache2/logs/www.jfedu2.com

#cp index.html /www.jfedu.com/
#cp index.html /www.jfedu1.com/
#cp index.html /www.jfedu2.com/

www.jfedu.com# vi index.html
<html><body><h1>www.jfedu.com</h1></body></html>

www.jfedu1.com# vi index.html
<html><body><h1>www.jfedu1.com</h1></body></html>

www.jfedu2.com# vi index.html
<html><body><h1>www.jfedu2.com</h1></body></html>

检测配置是否有误
# /usr/local/apache2/bin/apachectl -t
# /usr/local/apache2/bin/apachectl graceful
## /usr/local/apache2/bin/apachectl start
#netstat -lantp |grep 80


提示 : httpd.conf配置文件里面ServerName没有www.jfedu.com、www.jfedu.com1、www.jfedu.com2对应的主机名
ServerName localhost


(4) Windows 客户端设置 Hosts 映射,将 www.jf1.com、www.jf2.com 与
192.168.111.131 IP 进行映射绑定,映射的目的将域名跟 IP 进行绑定,在浏览器可以输入域名,不需要输入 IP 地址,绑定方法是在
“C:\Windows\System32\drivers\etc”文件夹中,使用记事本编辑 hosts 文件,
加入如下代码,如图 10-4 所示
192.168.111.131 www.jfedu.com
192.168.111.131 www.jfedu1.com
192.168.111.131 www.jfedu2.com


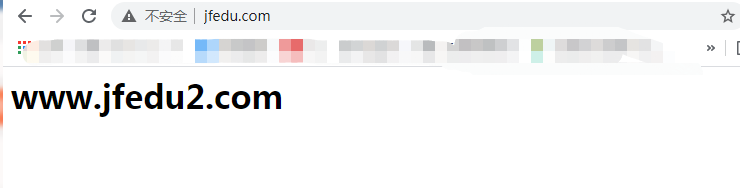
(5) 浏览器访问 www.jf1.com、www.jf2.com 如图 10-5(a)、10-5(b)所示,
至此 Apache 基于多域名虚拟主机配置完毕,如果还需添加虚拟主机,直接拷贝其
中一个虚拟主机配置、修改 WEB 发布目录即可:


Apache 常用目录学习
Apache 可以基于源码安装、YUM 安装,不同的安装方法,所属的路径特不同,如下为
Apache 常用路径的功能用途:
/usr/lib64/httpd/modules/ Apache 模块存放路径;
/var/www/html/ YUM 安装 Apache 网站发布目录;

/var/www/error/ 服务器设置错误信息,浏览器显示;
var/www/icons/ Apache 小图标文件存放目录;
var/www/cgi-bin/ 可执行的 CGI 程序存放目录。
/var/log/httpd/ Apache 日志目录;
/usr/sbin/apachectl Apache 启动脚本;
/usr/sbin/httpd Apache 二进制执行文件;
/usr/bin/htpasswd 设置 Apache 目录密码访问;
/usr/local/apache2/bin Apache 命令目录;
/usr/local/apache2/build Apache 构建编译目录;
/usr/local/apache2/htdocs/ 源码安装 Apache 网站发布目录;
/usr/local/apache2/cgi-bin 可执行的 CGI 程序存放目录;
/usr/local/apache2/include Apache 引用配置文件目录;
/usr/local/apache2/logs Apache 日志目录;
/usr/local/apache2/man Apache 帮助文档目录;
/usr/local/apache2/manual Apache 手册;
/usr/local/apache2/modules Apache 模块路径。
Apache 配置文件详解
Apache 的配置文件是 Apache WEB 难点,读者需要掌握配置文件中每个参数的含义,才能理解并在日常运维中去解决 Apache 遇到的故障,如下为 Apache 配置文件详
解
ServerTokens OS 显示服务器的版本和操作系统内核版本;
ServerRoot "/usr/local/apache2/" Apache 主配置目录;
PidFile run/httpd.pid PidFile 进程文件;
Timeout 60 不论接收或发送,当持续连接等待超过 60 秒则
该次连接就中断;
KeepAlive Off 关闭持续性的连接;
MaxKeepAliveRequests 100 当 KeepAlive 设置为 On 的时候,该数值
可以决定此次连接能够传输的最大传输数量;
KeepAliveTimeout 65 当 KeepAlive 设置为 On 的时候,该连接
在最后一次传输后等待延迟的秒数;
<IfModule prefork.c> Prefork MPM 引擎配置段;
StartServers 8 默认启动 Apache 工作进程数;
MinSpareServers 5 最小空闲进程数;
MaxSpareServers 20 最大空闲进程数;
ServerLimit 4096 Apache 服务器最多进程数;
MaxClients 4096 每秒支持的最大客户端并发;

MaxRequestsPerChild 4000 每个进程能处理的最大请求数;
</IfModule>
<IfModule worker.c> Worker MPM 引擎配置段;
StartServers 8 默认启动 Apache 工作进程数;
MaxClients 4000 每秒支持的最大客户端并发;
MinSpareThreads 25 最小空闲线程数;
MaxSpareThreads 75 最小空闲线程数;
ThreadsPerChild 75 每个进程启动的线程数;
MaxRequestsPerChild 0 每个进程能处理的最大请求数,0 表示无限制;
</IfModule>
LoadModule mod_version.so 静态加载 apache 相关模块;
ServerAdmin support@jfedu.net 管理员邮箱,网站异常,错误信息会发生
至该邮箱;
DocumentRoot "/usr/local/apache2/htdocs/" Apache 网站默认发布目录;
<Directory "/data/webapps/www1"> 设置/data/webapps/www1 目录权限;
AllowOverride All
Options -Indexes FollowSymLinks
Order allow,deny
Allow from all
</Directory>
AllowOverride 设置为 None 时,目录中.htaccess 文件将被
完全忽略,当指令设置为 All 时,.htaccess 文件生效;
Options -Indexes FollowSymLinks 禁止浏览目录,去掉”-“,表示浏览目录,
常用于下载站点;
Order allow,deny 默认情况下禁止所有客户机访问;
Order deny,allow 默认情况下允许所有客户机访问;
Allow from all 允许所有客户机访问
常见报错
执行脚本编译报错信息如下:
mod_proxy_balancer.c:25:24: fatal error: apr_escape.h: No such file or directory
#include "apr_escape.h"
解决方法:
禁止掉proxy参数,–disable-proxy!
执行脚本预编译报错信息一如下:
configure: error: APR-util not found. Please read the documentation.
解决方法:
yum install apr-util-devel -y
执行脚本预编译报错信息二如下:
configure: error: in `/data/sh/20180416/httpd-2.4.33':
configure: error: C compiler cannot create executables
解决方法:
yum install gcc gcc-c++ -y

Apache虚拟主机配置方法:
<VirtualHost *:80>
    ServerAdmin  jfedu@jfedu.net
    DocumentRoot "/usr/local/apache2/htdocs/www.jfedu1.com"
    ServerName   www.jfedu1.com
    ErrorLog "logs/www.jfedu1.com/error_log"
    CustomLog "logs/www.jfedu1.com/access_log" common
</VirtualHost>
<VirtualHost *:80>
    ServerAdmin  jfedu@jfedu.net
    DocumentRoot "/usr/local/apache2/htdocs/www.jfedu2.com"
    ServerName   www.jfedu2.com
    ErrorLog "logs/www.jfedu2.com/error_log"
    CustomLog "logs/www.jfedu2.com/access_log" common
</VirtualHost>
Apache虚拟主机脚本
#!/bin/bash
#2017年9月25日10:41:45
#auto install apache and config virtual host
#by author www.jfedu.net 2018
################
APACHE_SOFT="httpd-2.4.27.tar.bz2"
APACHE_URL="https://mirrors.tuna.tsinghua.edu.cn/apache/httpd"
APACHE_DEST="/usr/local/apache2"
APACHE_SRC=`echo $APACHE_SOFT|sed 's/.tar.*//g'`
APACHE_ARGS="--enable-so --enable-rewrite --enable-echo --enable-info --enable-ssl"
APACHE_DOMAIN="v1.jfedu.net"
#Install Apache WEB Service
wget -c $APACHE_URL/$APACHE_SOFT
rm -rf $APACHE_SRC
tar -jxvf  $APACHE_SOFT
cd $APACHE_SRC
./configure --prefix=$APACHE_DEST/ $APACHE_ARGS
make -j8
make -j8 install
pkill httpd
$APACHE_DEST/bin/apachect start

#Config Apache virtual hosts
cd $APACHE_DEST/conf/
sed -i '/vhosts/s/#//g' httpd.conf
sed 's/^#ServerName/ServerName/g' httpd.conf
cat>>extra/httpd-vhosts.conf<<EOF
# Virtual Hosts
<VirtualHost *:80>
    ServerAdmin support@jfedu.net
    DocumentRoot "$APACHE_DEST/htdocs/$APACHE_DOMAIN"
    ServerName $APACHE_DOMAIN
    ErrorLog "logs/$APACHE_DOMAIN/error_log"
    CustomLog "logs/$APACHE_DOMAIN/access_log" common
</VirtualHost>
EOF

#Create Apache virtual Dir
mkdir -p $APACHE_DEST/htdocs/$APACHE_DOMAIN
mkdir -p $APACHE_DEST/logs/$APACHE_DOMAIN
touch $APACHE_DEST/htdocs/$APACHE_DOMAIN/index.html
cat>$APACHE_DEST/htdocs/$APACHE_DOMAIN/index.html<<EOF
<html><body>
<h1>The Test Page $APACHE_DOMAIN 京峰教育</h1>
<hr color=red>
<h1>It works!</h1>
</body></html>
EOF
$APACHE_DEST/bin/apachectl restart
SHELL实战Apache2.4源码
#!/bin/bash
#2017年10月17日15:04:10
#auto install httpd service
#by author www.jfeud.net
#####################
#Download Apache and apr soft
wget -c http://mirror.bit.edu.cn/apache/apr/apr-1.6.2.tar.bz2
wget -c http://mirror.bit.edu.cn/apache/apr/apr-util-1.6.0.tar.bz2
wget -c http://mirror.bit.edu.cn/apache/httpd/httpd-2.4.28.tar.bz2
#Install Apr Software
tar -jxvf apr-1.6.2.tar.bz2
cd apr-1.6.2
./configure --prefix=/usr/local/apr
make -j4
make -j4 install
#Install Apr-util Software
cd ../
tar -jxvf apr-util-1.6.0.tar.bz2
cd apr-util-1.6.0
./configure --prefix=/usr/local/apr-util --with-apr=/usr/local/apr/
make -j4
make -j4 install
#Install Apache Software
cd ../
tar -jxvf httpd-2.4.28.tar.bz2
cd httpd-2.4.28
./configure --prefix=/usr/local/apache2 --enable-so --enable-rewrite --enable-ssl --enable-echo --enable-proxy --enable-info --with-apr=/usr/loca/apr --with-apr-util=/usr/local/apr-util/
make -j4
make -j4 install
#Start Apache WEB service
pkill httpd
/usr/local/apache2/bin/apachectl restart

SHELL实战Apache2.4源码虚拟主机(思路)
1)开启apache虚拟主机配置文件;
2)在配置文件中添加域名配置即可;
3)创建虚拟主机对应发布目录WEB网页;
4)重启apache,在客户端配置hosts,浏览器访问不同的域名;
SHELL编程开发Apache源码编译脚本(脚本v2)
#2018年3月19日15:08:20
#auto install apache soft
#by author www.jfedu.net
#########################
APACHE_VER="$1"
APACHE_SOFT="httpd-${APACHE_VER}.tar.bz2"
APACHE_URL="http://mirrors.hust.edu.cn/apache/httpd"
APACHE_DIR="/usr/local/apache2"
APACHE_ARG="--enable-so --enable-rewrite --enable-ssl --enable-proxy --enable-info"
APACHE_SRC=$(echo $APACHE_SOFT|sed 's/.tar.*//g')
APACHE_YUM="yum install -y"
if [ $# -eq 0 ];then
        echo -e "\033[32m-----------------------\033[0m"
        echo -e "\033[32mUsage:{/bin/bash $0 2.4.29|2.4.32|help}\033[0m"
        exit 0
fi
if [ $1 == "help" ];then
        echo -e "\033[32m-----------------------\033[0m"
        echo -e "\033[32mUsage:{/bin/bash $0 2.4.29|2.4.32|help}\033[0m"
        exit 0
fi
$APACHE_YUM wget make gcc gcc-c++ glibc openssl-devel openssl
$APACHE_YUM pcre pcre-devel apr apr-devel apr-util-devel apr-util
wget -c $APACHE_URL/$APACHE_SOFT
tar -jxf $APACHE_SOFT
cd $APACHE_SRC
./configure --prefix=$APACHE_DIR/ $APACHE_ARG
make -j4
make -j4 install
$APACHE_DIR/bin/apachectl start
ps -ef|grep httpd
netstat -tnlp|grep 80
SHELL编程开发Apache源码编译脚本(脚本v3)
#!/bin/bash
#2018年3月19日15:08:20
#auto install apache soft
#by author www.jfedu.net
#########################
APACHE_VER="$1"
APACHE_SOFT="httpd-${APACHE_VER}.tar.bz2"
APACHE_URL="http://mirrors.hust.edu.cn/apache/httpd"
APACHE_DIR="/usr/local/apache2"
APACHE_ARG="--enable-so --enable-rewrite --enable-ssl --enable-proxy --enable-info"
APACHE_SRC=$(echo $APACHE_SOFT|sed 's/.tar.*//g')
APACHE_YUM="yum install -y"
if [ $# -eq 0 ];then
	echo -e "\033[32m-----------------------\033[0m"
	echo -e "\033[32mUsage:{/bin/bash $0 2.4.29|2.4.32|help}\033[0m"
	exit 0
fi
if [ $1 == "help" ];then
	echo -e "\033[32m-----------------------\033[0m"
	echo -e "\033[32mUsage:{/bin/bash $0 2.4.29|2.4.32|help}\033[0m"
	exit 0
fi
if [ ! -f $APACHE_DIR/bin/apachectl ];then
	$APACHE_YUM wget make gcc gcc-c++ glibc openssl-devel openssl
	$APACHE_YUM pcre pcre-devel apr apr-devel apr-util-devel apr-util
	wget -c $APACHE_URL/$APACHE_SOFT
	tar -jxf $APACHE_SOFT
	cd $APACHE_SRC
	./configure --prefix=$APACHE_DIR/ $APACHE_ARG
	make -j4
	make -j4 install
	$APACHE_DIR/bin/apachectl restart
	ps -ef|grep httpd
	netstat -tnlp|grep 80
else
	echo -e "\033[32mThe $APACHE_DIR Already Esxit,Please Conintue Install or exit.\033[0m"
	read INPUT
	if [ $INPUT == "yes" -o $INPUT == "y" -O $INPUT == "Y" ];then
		$APACHE_YUM wget make gcc gcc-c++ glibc openssl-devel openssl
		$APACHE_YUM pcre pcre-devel apr apr-devel apr-util-devel apr-util
		wget -c $APACHE_URL/$APACHE_SOFT
		tar -jxf $APACHE_SOFT
		cd $APACHE_SRC
		./configure --prefix=$APACHE_DIR/ $APACHE_ARG
		make -j4
		make -j4 install
		$APACHE_DIR/bin/apachectl restart
		ps -ef|grep httpd
		netstat -tnlp|grep 80
	else
		exit 1
	fi
fi
Apache虚拟主机脚本
#!/bin/bash
#2017年9月25日10:41:45
#auto install apache and config virtual host
#by author www.jfedu.net 2018
################
APACHE_SOFT="httpd-2.4.27.tar.bz2"
APACHE_URL="https://mirrors.tuna.tsinghua.edu.cn/apache/httpd"
APACHE_DEST="/usr/local/apache2"
APACHE_SRC=`echo $APACHE_SOFT|sed 's/.tar.*//g'`
APACHE_ARGS="--enable-so --enable-rewrite --enable-echo --enable-info --enable-ssl"
APACHE_DOMAIN="v1.jfedu.net"
#Install Apache WEB Service
wget -c $APACHE_URL/$APACHE_SOFT
rm -rf $APACHE_SRC
tar -jxvf  $APACHE_SOFT
cd $APACHE_SRC
./configure --prefix=$APACHE_DEST/ $APACHE_ARGS
make -j8
make -j8 install
pkill httpd
$APACHE_DEST/bin/apachect start

#Config Apache virtual hosts
cd $APACHE_DEST/conf/
sed -i '/vhosts/s/#//g' httpd.conf
sed 's/^#ServerName/ServerName/g' httpd.conf
cat>>extra/httpd-vhosts.conf<<EOF
# Virtual Hosts
<VirtualHost *:80>
    ServerAdmin support@jfedu.net
    DocumentRoot "$APACHE_DEST/htdocs/$APACHE_DOMAIN"
    ServerName $APACHE_DOMAIN
    ErrorLog "logs/$APACHE_DOMAIN/error_log"
    CustomLog "logs/$APACHE_DOMAIN/access_log" common
</VirtualHost>
EOF

#Create Apache virtual Dir
mkdir -p $APACHE_DEST/htdocs/$APACHE_DOMAIN
mkdir -p $APACHE_DEST/logs/$APACHE_DOMAIN
touch $APACHE_DEST/htdocs/$APACHE_DOMAIN/index.html
cat>$APACHE_DEST/htdocs/$APACHE_DOMAIN/index.html<<EOF
<html><body>
<h1>The Test Page $APACHE_DOMAIN 京峰教育</h1>
<hr color=red>
<h1>It works!</h1>
</body></html>
EOF
$APACHE_DEST/bin/apachectl restart

SHELL实战Apache2.4源码(思路)
1)官网下载HTTP 2.4版本;
2)下载apr依赖包,编译安装apr、apr-util;
3)解压源码软件,源码安装三个步骤;
4)./configure预编译;
5)make编译;
6)make install安装;
7)启动Apache服务即可;
#!/bin/bash
#2017年10月17日15:04:10
#auto install httpd service
#by author www.jfeud.net
#####################
#Download Apache and apr soft
wget -c http://mirror.bit.edu.cn/apache/apr/apr-1.6.2.tar.bz2
wget -c http://mirror.bit.edu.cn/apache/apr/apr-util-1.6.0.tar.bz2
wget -c http://mirror.bit.edu.cn/apache/httpd/httpd-2.4.28.tar.bz2
#Install Apr Software
tar -jxvf apr-1.6.2.tar.bz2
cd apr-1.6.2
./configure --prefix=/usr/local/apr
make -j4
make -j4 install
#Install Apr-util Software
cd ../
tar -jxvf apr-util-1.6.0.tar.bz2
cd apr-util-1.6.0
./configure --prefix=/usr/local/apr-util --with-apr=/usr/local/apr/
make -j4
make -j4 install
#Install Apache Software
cd ../
tar -jxvf httpd-2.4.28.tar.bz2
cd httpd-2.4.28
./configure --prefix=/usr/local/apache2 --enable-so --enable-rewrite --enable-ssl --enable-echo --enable-proxy --enable-info --with-apr=/usr/loca/apr --with-apr-util=/usr/local/apr-util/
make -j4
make -j4 install
#Start Apache WEB service
pkill httpd
/usr/local/apache2/bin/apachectl restart
SHELL实战Apache2.4源码虚拟主机(思路)
1)开启apache虚拟主机配置文件;
2)在配置文件中添加域名配置即可;
3)创建虚拟主机对应发布目录WEB网页;
4)重启apache,在客户端配置hosts,浏览器访问不同的域名;