一. 基础解释
github sentinel
中文版
- SpringCloud Alibaba Sentinel 分布式系统的流量防卫兵,实现了比 Hystrix 更强大的服务降级,服务熔断,流量监控,限流速率等
- Sentinel 分为两部分: 核心库与控制后台,对dubbo,SpringCloud有较好的支持,基于SpringBoot开发,打包后可以直接运行
- Sentinel 与 Hystrix 不同
Hystrix 需要手动搭建服务,在该服务中引入 Hystrix 依赖,通过代码的方式设置对整个项目服务保护,流量控制等,当请求实际服务时,首先请求到这个 Hystrix 服务,通过该服务去调用实际服务
Hystrix 没有 web 界面
不能实时的根据生产场景动态的控制访问流量,速率,服务熔断,降级等
Sentinel 独立成功一个组件,不在需要搭建服务,运行组件即可
提供 web 界面,支持细粒度统一配置

Sentinel 下载启动
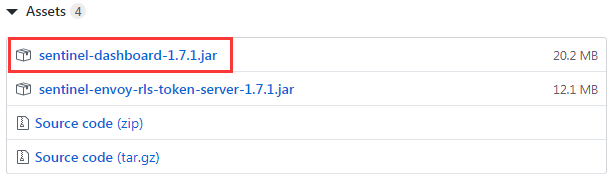
- Sentinel 需要下载运行,下载地址
- 将下载后的jar包放入非中文路径下,cmd 进入命令行,切换到该路径下进行启动: “java -jar 下载的sentinel包名”
- 注意点运行 Sentinel 要有 jdk8 环境,并且不能占用 8080 端口
- 浏览器访问 Sentinel “http://localhost:8080”,输入用户名密码登入,默认"sentinel"

二. Sentinel 使用示例
- Sentinel 保护服务使用示例步骤
- 创建需要 Sentinel 的微服务项目
- pom 文件中增加 Sentinel 依赖
- yml 文件中增加将当前服务注入到 Sentinel 中被,Sentinel监控配置
- 创建启动类
- 服务接口调用
- 注意点 Sentinel 是懒加载机制,被Sentinel监管的服务要启动成功后并且执行一次调用后,访问 Sentinel 才会看到,Sentinel默认使用8080端口,该端口不可以被其它服务占用
创建被 Sentinel 监管的服务
- pom 文件中增加 Sentinel 依赖 SpringCloud ailibaba sentinel
 		<!-- SpringCloud ailibaba nacos-->
        <dependency>
            <groupId>com.alibaba.cloud</groupId>
            <artifactId>spring-cloud-starter-alibaba-nacos-discovery</artifactId>
        </dependency>
        <!-- SpringCloud ailibaba sentinel-datasource-nacos 持久化需要用到-->
        <dependency>
            <groupId>com.alibaba.csp</groupId>
            <artifactId>sentinel-datasource-nacos</artifactId>
        </dependency>
        <!-- SpringCloud ailibaba sentinel-->
        <dependency>
            <groupId>com.alibaba.cloud</groupId>
            <artifactId>spring-cloud-starter-alibaba-sentinel</artifactId>
        </dependency>
        <dependency>
            <groupId>org.springframework.cloud</groupId>
            <artifactId>spring-cloud-starter-openfeign</artifactId>
        </dependency>
        <dependency>
            <groupId>org.springframework.boot</groupId>
            <artifactId>spring-boot-starter-web</artifactId>
        </dependency>
        <dependency>
            <groupId>org.springframework.boot</groupId>
            <artifactId>spring-boot-starter-actuator</artifactId>
        </dependency>
- yml 文件中增加 Sentinel 相关配置,将当前服务注入到指定的 Sentinel 上
server:
  port: 8401 #当前服务端口号

spring:
  application:
    name: cloudalibaba-sentinal-service #当前服务名称

  cloud:
    nacos:
      discovery:
        server-addr: localhost:8848  #Nacos服务注册中心地址,将当前服务注册到Nacos

	#===============sentinel 相关配置================================
    sentinel:
      transport:
        dashboard: localhost:8080 #配置Sentinel dashboard地址,当前服务被指定的 Sentinel 监管
        # 默认8719端口,假如被占用了会自动从8719端口+1进行扫描,直到找到未被占用的 端口
        port: 8719
     #===============sentinel 相关配置end================================

#配置暴露当前服务端点
management:
  endpoints:
    web:
      exposure:
        include: '*'
- 启动类
import org.springframework.boot.SpringApplication;
import org.springframework.boot.autoconfigure.SpringBootApplication;
import org.springframework.cloud.client.discovery.EnableDiscoveryClient;

@SpringBootApplication
@EnableDiscoveryClient
public class SentinelMain8401 {
    public static void main(String[] args) {
        SpringApplication.run(SentinelMain8401.class, args);
    }
}
- 提供测试接口,访问服务中的接口后,当前服务才会在 Sentinel 中显示(Sentinel 懒加载机制)
import org.springframework.web.bind.annotation.GetMapping;
import org.springframework.web.bind.annotation.RestController;

@RestController
public class TestController {

    @GetMapping("/test1")
    public String getVal(){
        return "测试接口";
    }

    @GetMapping("/test2")
    public String getVal2(){
        return "测试接口2";
    }
}
- 浏览器访问 Sentinel web 页面
