工作之余,把工作中需要用的一个小工具封装成uniapp插件分享给大家!!!
图片裁剪
使用场景:
实现思路:
- 布局: 做上下两层展示,下层展示一张亮度低一点全图,充当遮住部分(效果可以自定义比如说高斯模糊等);上层展示裁剪部分图片,这里显示原图高亮部分;
- 拖拽控制裁剪区域:通过手指拖动来控制裁剪框移动,并动态改变框里的背景图显示位置来做到跟底图同步的效果,放大/缩小框也是同样道理;
- 利用canvas绘图功能把需要裁剪的图片绘制到画布上;
- 最后保存图片完成裁剪,so easy
 插件截图1
插件截图1
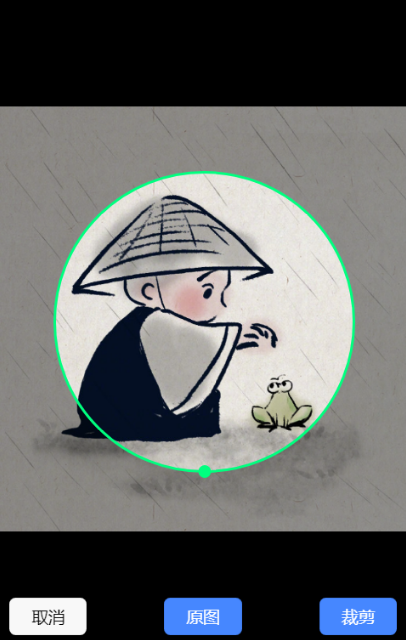 插件截图2
插件截图2
实现过程:
1、首先,把要裁剪的图片渲染到组件里作为底图,并根据视图大小来确定底图的大小和裁剪框可移动的区域范围;
<view class="image-box"
    :style="{
        backgroundImage: 'url('+ src +')',
        width: imageBoxWidth + 'px',
        height: imageBoxHeight + 'px',
    }">
        <view class="mask"></view>
    </view>
</view>
windowInfo = uni.getWindowInfo();
uni.getImageInfo({
    src: this.src,
    success: (res) => {
        imageOriginalWidth = res.width;
        imageOriginalHeight = res.height;

        let widthZoomRatio = imageOriginalWidth / windowInfo.windowWidth;
        let heightZoomRatio = imageOriginalHeight / windowInfo.windowHeight;
        imageZoomRatio = widthZoomRatio > heightZoomRatio ? widthZoomRatio : heightZoomRatio;

        this.imageBoxWidth = imageOriginalWidth / imageZoomRatio;
        this.imageBoxHeight = imageOriginalHeight / imageZoomRatio;
        this.setRatio('1:1');
    }
})
2、在底图上方绘制裁剪框(蓝色框),并绑定事件可控制大小和位置,这里为了裁剪框的区域图是高亮的,也需要给裁剪框加一个底图背景;
<view
    class="cropping-box"
    @touchstart.stop="touchstart"
    @touchmove.stop="touchmove"
    :style="{
        top: cropBoxY + 'px',
        left: cropBoxX + 'px',
        width: cropBoxWidth  + 'px',
        height: cropBoxHeight + 'px',
        backgroundImage: 'url('+ src +')',
        backgroundSize: imageBoxWidth + 'px' + ' ' + imageBoxHeight + 'px',
        backgroundPositionX: (-cropBoxX - 2) + 'px',
        backgroundPositionY: (-cropBoxY - 2) + 'px',
        borderRadius: cropShape == 'rect' ? '' : '50%'
    }"
    >
常规的通过拖动来调整位置和大小实现:
touchstart(event){
            startX = event.touches[0].clientX;
            startY = event.touches[0].clientY;

            if(event.target.dataset.body == "handle"){
                this.mode = 'zoom';
                boxWidth = this.cropBoxWidth;
                boxHeight = this.cropBoxHeight;
            }else {
                this.mode = 'move';
                boxX = this.cropBoxX;
                boxY = this.cropBoxY;
            }
        },
        touchmove(event){
            let distanceX = event.touches[0].clientX - startX;
            let distanceY = event.touches[0].clientY - startY;

            let x = boxX + distanceX;
            let y = boxY + distanceY;
            let width = boxWidth + distanceX;
            let height = boxHeight + distanceY;

            let maxX = this.imageBoxWidth-this.cropBoxWidth;
            let maxY = this.imageBoxHeight-this.cropBoxHeight;
            let maxWidth = this.imageBoxWidth-this.cropBoxX;
            let maxHeight = this.imageBoxHeight-this.cropBoxY;

            switch (this.mode) {
                case 'move':
                    this.cropBoxX = x < 0 ? 0 : (x > maxX ? maxX : x);
                    this.cropBoxY = y < 0 ? 0 : (y > maxY ? maxY : y);
                    break;
                case 'zoom':
                    if(this.cropShape == 'rect'){
                        this.cropBoxWidth = width > maxWidth ? maxWidth : width;
                        this.cropBoxHeight = height > maxHeight ? maxHeight : height;
                    }else{
                        this.cropBoxHeight = height > maxHeight ? maxHeight : height;
                        this.cropBoxWidth = height > maxHeight ? maxHeight : height;
                    }
                    break;
            }
        },
3、再通过用户在界面上操作裁剪框的位置和大小,来确定要裁剪图片的哪个部分;
4、再利用canvas绘制图像并生成base64格式图片;
async cropping(){
            let x = this.cropBoxX * imageZoomRatio;
            let y = this.cropBoxY * imageZoomRatio;
            let w = this.cropBoxWidth * imageZoomRatio;
            let h = this.cropBoxHeight * imageZoomRatio;

            // 方式2:
            const canvas = uni.createOffscreenCanvas({type: '2d',width: w, height: h});
            const context = canvas.getContext('2d');
            const image = canvas.createImage();
            await new Promise((resolve,reject) => {
                image.onload = resolve
                image.onerror = reject
                image.src = this.src;
                // image.src = "https://pic4.ntimg.cn/file/20191225/30544261_221404258307_1.jpg";
            })
            context.clearRect(0, 0, w, h);
            if(this.cropShape == 'circular'){
                context.beginPath();
                context.arc(w/2,h/2,w/2,0,Math.PI * 2);
                context.fill();
                context.clip();
            }
            context.drawImage(image,x,y,w,h,0, 0, w, h);
            const DataURL = canvas.toDataURL();
            return DataURL;
}
5、最后看一下该插件支持的属性,如果大家有需要可以到uniapp插件库下载使用
