前言
本系列是从头开始进行学习Nacos的相关知识,从相关概念到业务开发等等。本篇是第三篇,主要知道为什么需要注册中心、为什么选择Nacos作为注册中心和Nacos作为注册中心的快速搭建。
入门篇:阿里Nacos系列——为什么要选择Nacos和Nacos的基础概念
入门篇:阿里Nacos系列——Nacos的核心概念
搭建篇:阿里Nacos系列——Nacos安装教程(带图–手把手教学)
搭建篇:阿里Nacos系列——(超详细、带图带源码)Nacos注册中心的搭建与测试
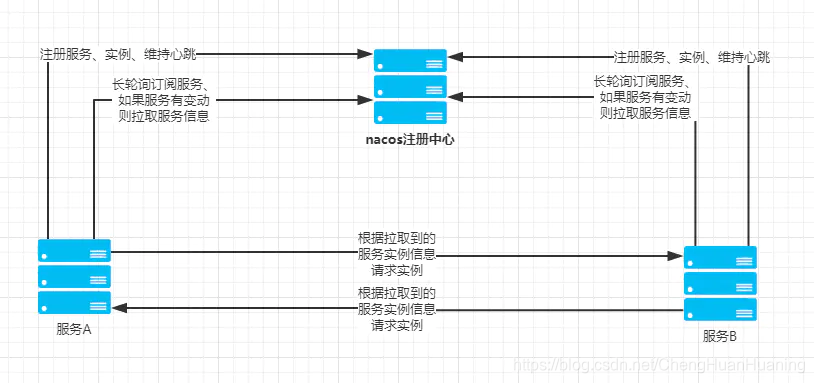
1 注册中心
1.1 为什么需要注册中心?
在分布式系统中,在微服务架构中会存在以下常见的问题:
- 服务和服务地址如何进行映射和管理
- 服务注册后,如何被及时发现
- 服务异常时,如何进行降级
- 服务宕机后,如何及时下线
- 服务如何有效的水平扩展
- 服务发现时,如何进行路由
- 注册中心如何实现自身的高可用
1.2 什么是注册中心?
注册中心可以说是微服务架构中的”通讯录“,它记录了服务和服务地址的映射关系。在分布式架构中,服务会注册到这里,当服务需要调用其它服务时,就到这里找到服务的地址,进行调用。

1.3 注册中心的作用
1.解决url地址硬编码问题
2.自动注册和发现
3.实现了动态路由
4.解决负载均衡
2 为什么选择Nacos作为注册中心
这篇文章中有更为详细的介绍入门篇:阿里Nacos系列——为什么要选择Nacos和Nacos的基础概念
Nacos与各种注册中心产品对比图
| 功能特点 |
Nacos |
Eureka |
Consul |
CoreDNS |
Zookeeper |
| 一致性协议 |
CP+AP |
AP |
CP |
— |
CP |
| 健康检查 |
TCP/HTTP/MYSQL/Client Beat |
Client Beat |
TCP/HTTP/gRPC/Cmd |
— |
Keep Alive |
| 负载均衡策略 |
权重/ metadata/Selector |
Ribbon |
Fabio |
RoundRobin |
— |
| 雪崩保护 |
有 |
有 |
无 |
无 |
无 |
| 自动注销实例 |
支持 |
支持 |
不支持 |
不支持 |
支持 |
| 访问协议 |
HTTP/DNS |
HTTP |
HTTP/DNS |
DNS |
TCP |
| 监听支持 |
支持 |
支持 |
支持 |
不支持 |
支持 |
| 多数据中心 |
支持 |
支持 |
支持 |
不支持 |
不支持 |
| 跨注册中心同步 |
支持 |
不支持 |
支持 |
不支持 |
不支持 |
| SpringCloud集成 |
支持 |
支持 |
支持 |
不支持 |
不支持 |
| Dubbo集成 |
支持 |
不支持 |
不支持 |
不支持 |
支持 |
| K8S集成 |
支持 |
不支持 |
支持 |
支持 |
不支持 |
3 Nacos作为注册中心的快速搭建
Nacos的快速安装:阿里Nacos系列—Nacos安装教程(带图–手把手教学)
3.1 版本对应
官方说明:版本 2.1.x.RELEASE 对应的是 Spring Boot 2.1.x 版本。版本 2.0.x.RELEASE 对应的是 Spring Boot 2.0.x 版本,版本 1.5.x.RELEASE 对应的是 Spring Boot 1.5.x 版本。
| Spring Cloud Version |
Spring Cloud Alibaba Version |
Spring Boot Version |
| Spring Cloud 2020.0 |
2021.1 |
2.4.2.RELEASE |
| Spring Cloud Hoxton.SR8 |
2.2.5.RELEASE |
2.3.2.RELEASE |
| Spring Cloud Greenwich.SR6 |
2.1.4.RELEASE |
2.1.13.RELEASE |
| Spring Cloud Hoxton.SR3 |
2.2.1.RELEASE |
2.2.5.RELEASE |
| Spring Cloud Hoxton.RELEASE |
2.2.0.RELEASE |
2.2.X.RELEASE |
| Spring Cloud Greenwich |
2.1.2.RELEASE |
2.1.X.RELEASE |
| Spring Cloud Finchley |
2.0.4.RELEASE(停止维护,建议升级) |
2.0.X.RELEASE |
| Spring Cloud Edgware |
1.5.1.RELEASE(停止维护,建议升级) |
1.5.X.RELEASE |
3.2 Maven相关引入
	<parent>
        <groupId>org.springframework.boot</groupId>
        <artifactId>spring-boot-starter-parent</artifactId>
        <version>2.2.4.RELEASE</version>
        <relativePath/>
    </parent>


    <groupId>com.shuai</groupId>
    <artifactId>nacos</artifactId>
    <version>1.0-SNAPSHOT</version>
    <properties>
        <spring-cloud-alibaba.version>2.2.4.RELEASE</spring-cloud-alibaba.version>
        <spring-boot.version>2.2.4.RELEASE</spring-boot.version>
        <org-springframework-cloud>2.2.5.RELEASE</org-springframework-cloud>
        <org-springframework-boot>2.2.9.RELEASE</org-springframework-boot>
    </properties>

    <dependencies>
        <dependency>
            <groupId>org.springframework.cloud</groupId>
            <artifactId>spring-cloud-commons</artifactId>
            <version>${org-springframework-cloud}</version>
        </dependency>
        <dependency>
            <groupId>org.springframework.boot</groupId>
            <artifactId>spring-boot-actuator</artifactId>
            <version>${org-springframework-boot}</version>
        </dependency>
        <dependency>
            <groupId>org.springframework.boot</groupId>
            <artifactId>spring-boot-starter-web</artifactId>
        </dependency>
        <!--引入Nacos注册中心客户端依赖-->
        <dependency>
            <groupId>com.alibaba.cloud</groupId>
            <artifactId>spring-cloud-starter-alibaba-nacos-discovery</artifactId>
        </dependency>
    </dependencies>
    <!--使用dependencyManagement指定spring-cloud-alibaba版本-->
    <dependencyManagement>
        <dependencies>
            <dependency>
                <groupId>com.alibaba.cloud</groupId>
                <artifactId>spring-cloud-alibaba-dependencies</artifactId>
                <version>${spring-cloud-alibaba.version}</version>
                <type>pom</type>
                <scope>import</scope>
            </dependency>
        </dependencies>
    </dependencyManagement>
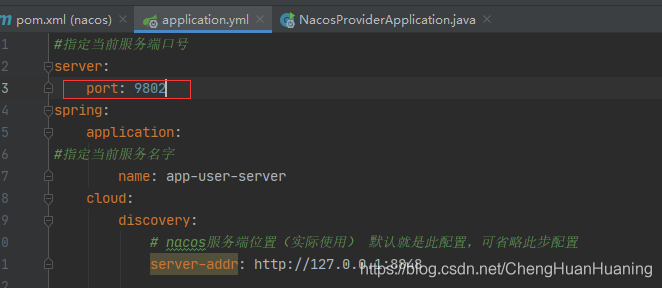
3.3 yml配置文件
#指定当前服务端口号
server:
    port: 9801
spring:
    application:
#指定当前服务名字,
        name: app-user-server
    # nacos服务端位置(实际使用) 默认就是此配置,可省略此步配置
    cloud:
        discovery:
            server-addr: http://127.0.0.1:8848
配置说明
配置 spring.application.name ,是因为它是构成 Nacos 配置管理 dataId字段的一部分。
在 Nacos Spring Cloud 中,dataId 的完整格式如下:
${prefix}-${spring.profiles.active}.${file-extension}
-
prefix 默认为 spring.application.name 的值,也可以通过配置项 spring.cloud.nacos.config.prefix来配置。
-
spring.profiles.active 即为当前环境对应的 profile,详情可以参考 Spring Boot文档。 注意:当 spring.profiles.active 为空时,对应的连接符 - 也将不存在,dataId 的拼接格式变成 ${prefix}.${file-extension}
-
file-exetension 为配置内容的数据格式,可以通过配置项 spring.cloud.nacos.config.file-extension 来配置。目前只支持 properties 和 yaml 类型。
3.4 测试代码
import org.springframework.beans.factory.annotation.Value;
import org.springframework.boot.SpringApplication;
import org.springframework.boot.autoconfigure.SpringBootApplication;
import org.springframework.cloud.client.discovery.EnableDiscoveryClient;
import org.springframework.web.bind.annotation.PathVariable;
import org.springframework.web.bind.annotation.RequestMapping;
import org.springframework.web.bind.annotation.RequestMethod;
import org.springframework.web.bind.annotation.RestController;

@SpringBootApplication
// 开启服务注册发现功能
@EnableDiscoveryClient
public class NacosProviderApplication {
    public static void main(String[] args) {
        SpringApplication.run(NacosProviderApplication.class, args);
    }

    @Value("${server.port}")
    private String port;

    @RestController
    class EchoController {
        @RequestMapping(value = "/echo/{string}", method = RequestMethod.GET)
        public String echo(@PathVariable String string) {
            System.out.println(port);
            return "Hello Nacos Discovery " + string +" port:"+ port;
        }
    }
}
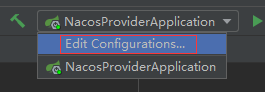
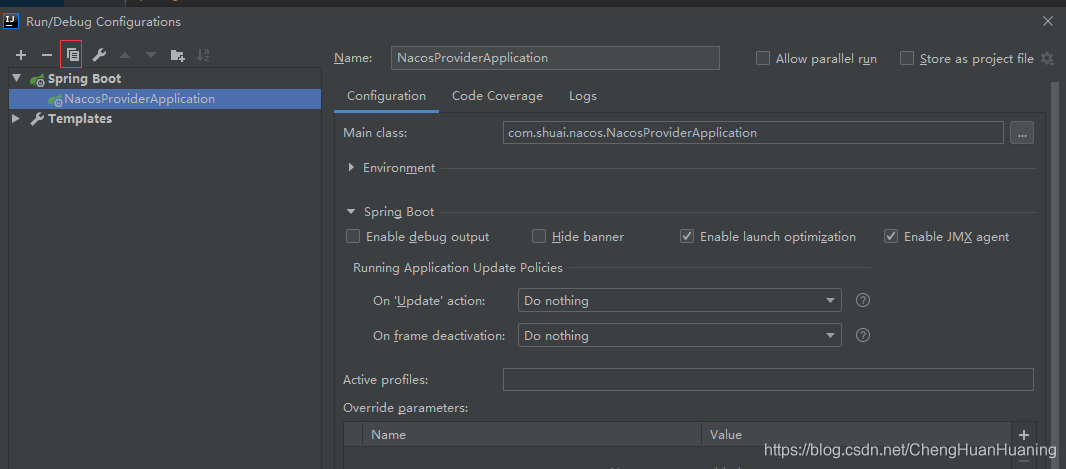
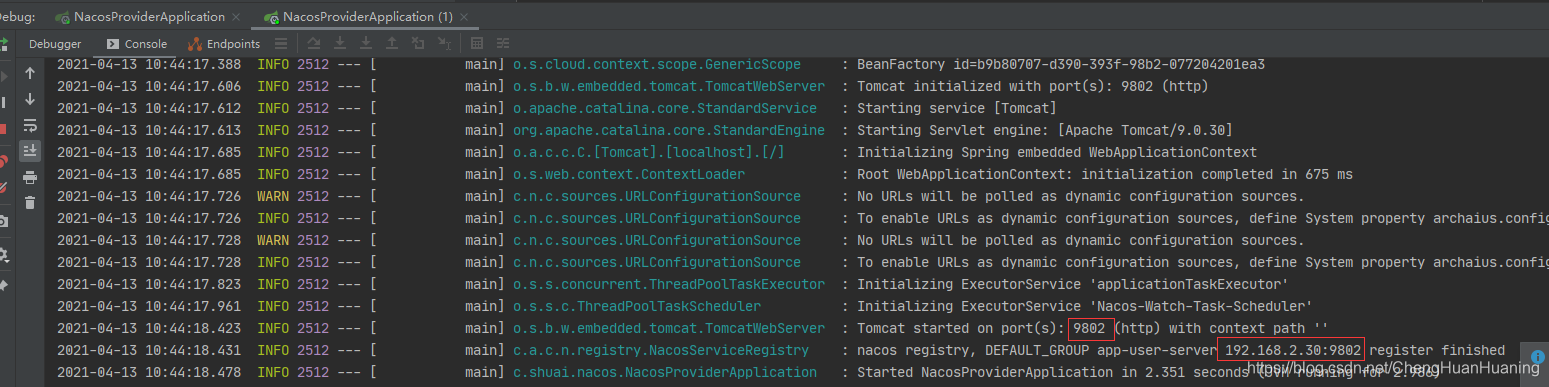
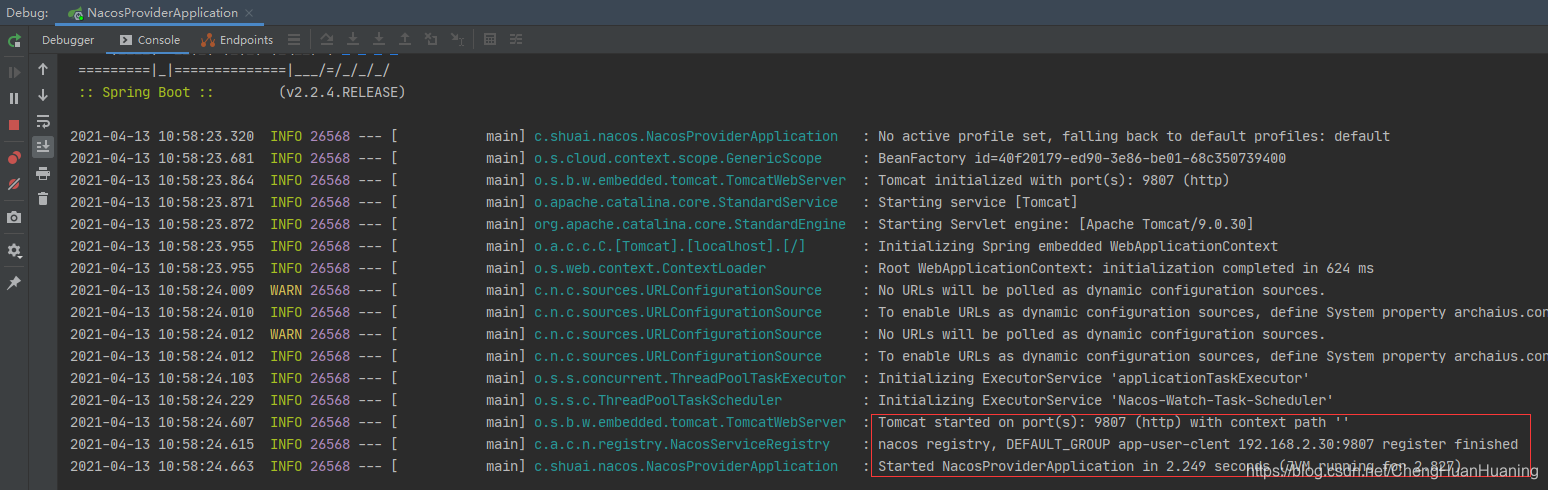
3.5 启动测试
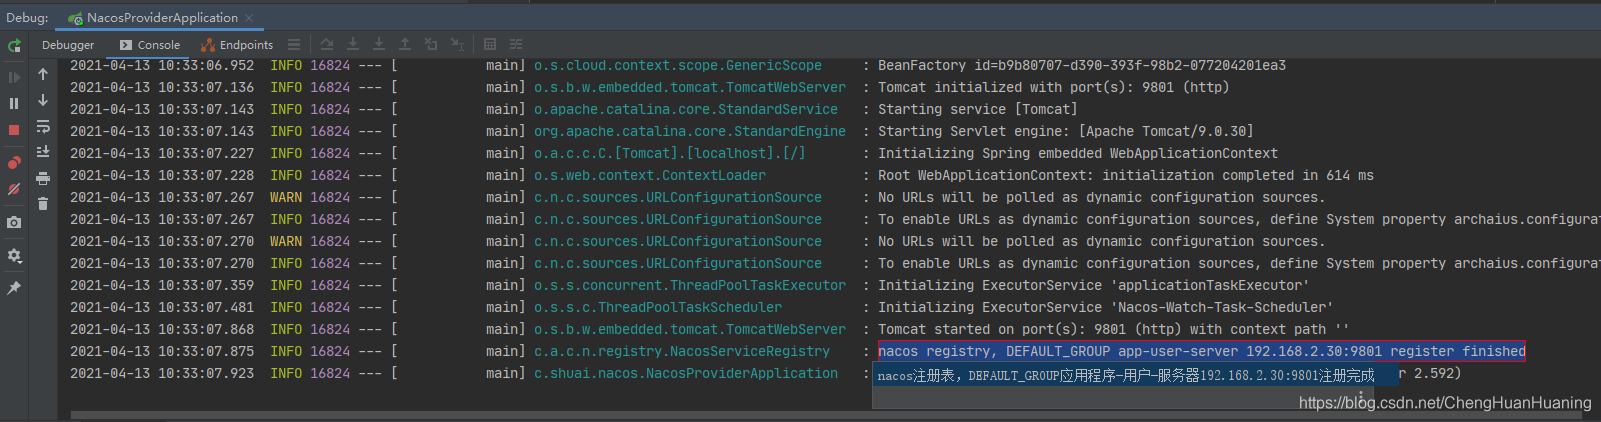
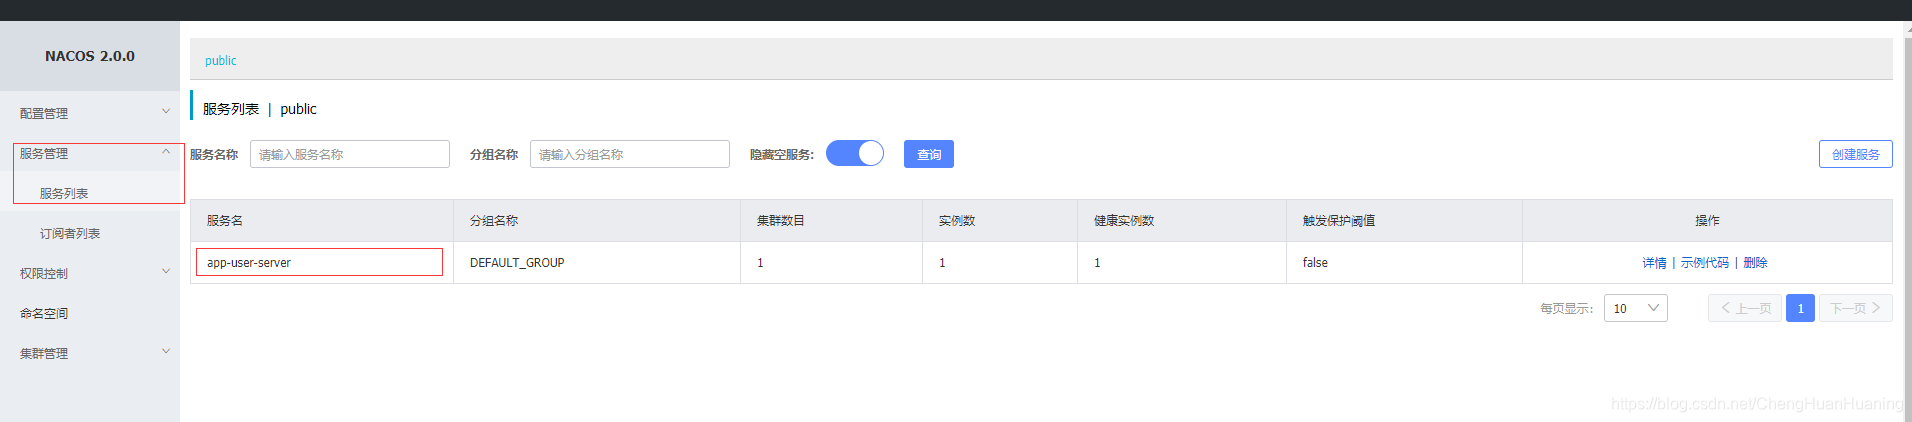
启动完成,我们查看下Nacos页面信息是否发生变化
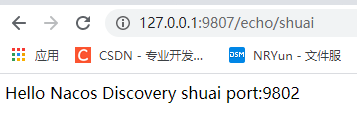
我们进入这个链接,进行服务测试:http://localhost:9801/echo/shuai
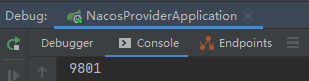
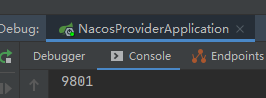
控制台打印结果
这个时候简单的注册就完成了
3.6 简单的多实例测试
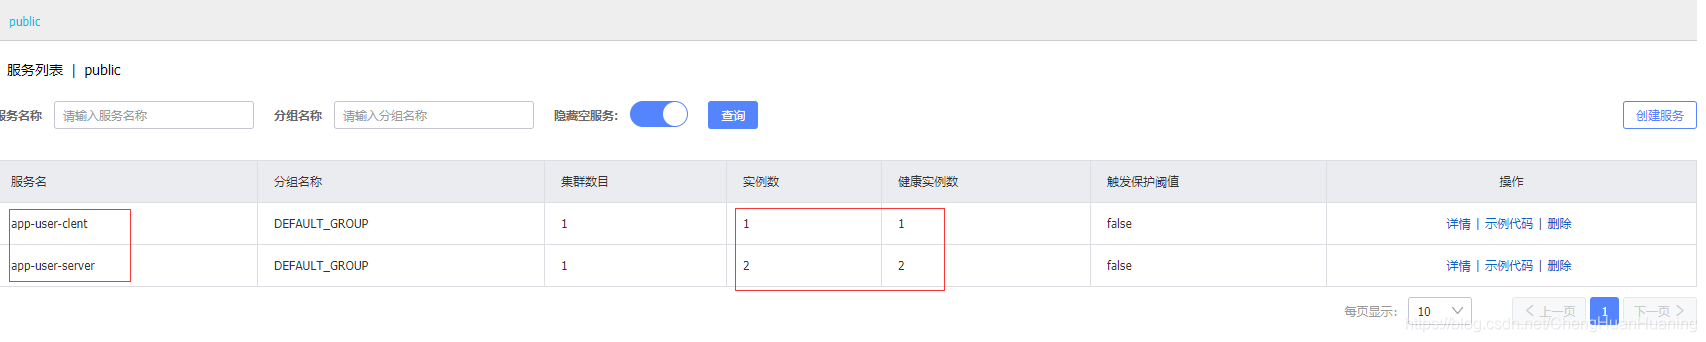
在之前我们可以正常的检测到我们app-user-server服务,这个时候我们使用修改下端口,再次启动新的一个实例,来搭建一个简单的集群。

启动第二个实例
查看Nacos页面信息,这个时候实例数信息就变成了2.

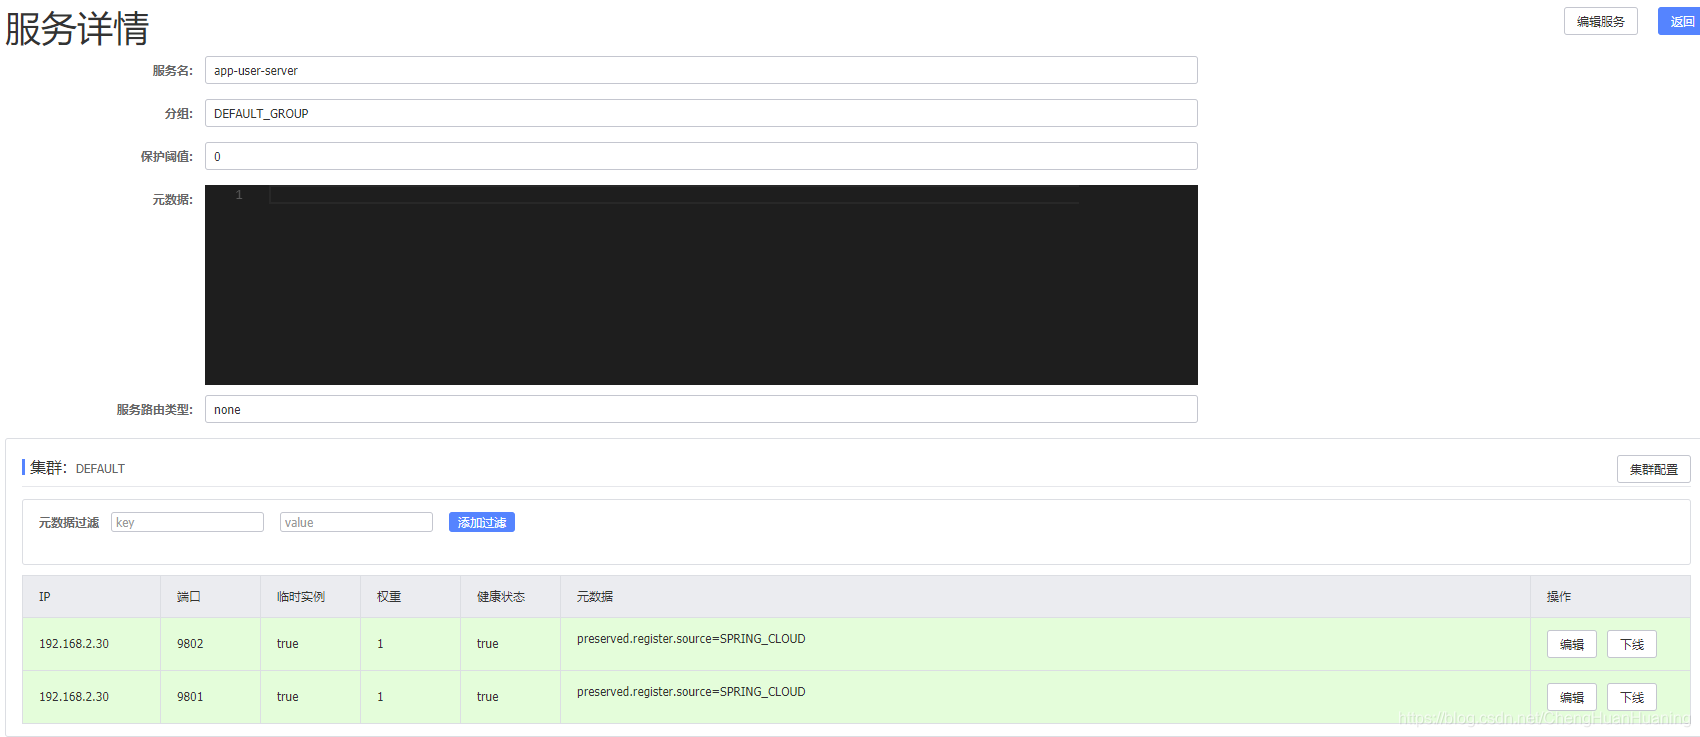
点击列表后面的-详情内容后,可以查看到所有实例数据的相关信息
4 基于Nacos进行多服务之间通信(重点)
4.1 搭建Nacos测试客户端
4.1.1 Maven相关引入
与3.2中的Maven大致相同,这里就不进行单独说明
4.1.2 yml配置文件
#指定当前服务端口号
server:
    port: 9807
spring:
    application:
#指定当前服务名字
        name: app-user-clent
#nacos服务端位置(实际使用) 默认就是此配置,可省略此步配置
# 这里我们就直接注释掉进行测试
#    cloud:
#        discovery:
#            server-addr: http://127.0.0.1:8848
4.1.3 Client-测试代码
import org.springframework.beans.factory.annotation.Autowired;
import org.springframework.boot.SpringApplication;
import org.springframework.boot.autoconfigure.SpringBootApplication;
import org.springframework.cloud.client.discovery.EnableDiscoveryClient;
import org.springframework.cloud.client.loadbalancer.LoadBalanced;
import org.springframework.context.annotation.Bean;
import org.springframework.web.bind.annotation.PathVariable;
import org.springframework.web.bind.annotation.RequestMapping;
import org.springframework.web.bind.annotation.RequestMethod;
import org.springframework.web.bind.annotation.RestController;
import org.springframework.web.client.RestTemplate;

@SpringBootApplication
@EnableDiscoveryClient
public class NacosProviderApplication {
	//RestTemplate 实例添加 @LoadBalanced 注解,开启 @LoadBalanced 与 Ribbon 的集成
    @LoadBalanced
    @Bean
    public RestTemplate restTemplate() {
        return new RestTemplate();
    }

    public static void main(String[] args) {
        SpringApplication.run(NacosProviderApplication.class, args);
    }

    @RestController
    public class TestController {

        private final RestTemplate restTemplate;

        @Autowired
        public TestController(RestTemplate restTemplate) {this.restTemplate = restTemplate;}

        @RequestMapping(value = "/echo/{str}", method = RequestMethod.GET)
        public String echo(@PathVariable String str) {
            return restTemplate.getForObject("http://app-user-server/echo/" + str, String.class);
        }
    }
}
4.1.4 启动测试

4.2 服务通信测试
4.2.1 启动Nacos服务端与服务端
详情见3.5模块

4.2.2 通信测试
访问:http://127.0.0.1:9807/echo/shuai,可以看到客户端直接成功访问到服务端的业务接口

4.3 Nacos的负载均衡测试
我们像3.6中启动多个服务端实例
这个时候我们多次访问 http://127.0.0.1:9807/echo/shuai该地址


说明Nacos是帮我们完成了简单的负载均衡。
4.2.1 负责均衡配置
我们进入Nacos中服务的详情中

我们可以看到,在里面可以配置Nacos的权重、上下线这些和部署相关的内容,我们就可以根据实际的业务情况进行相关配置

参考文章:https://blog.csdn.net/leilei1366615/article/details/111144769