Swiper在PC端和移动端都适用
官方网站:Swiper中文网首页-官方
vue2 配合 swiper5或6版本
vue3 可以使用 swiper8最新版本
一、Swiper插件(Vue、React、Angular框架都可以使用)
1、使用方法
Swiper使用方法(一个简单轮播的实现)-官方
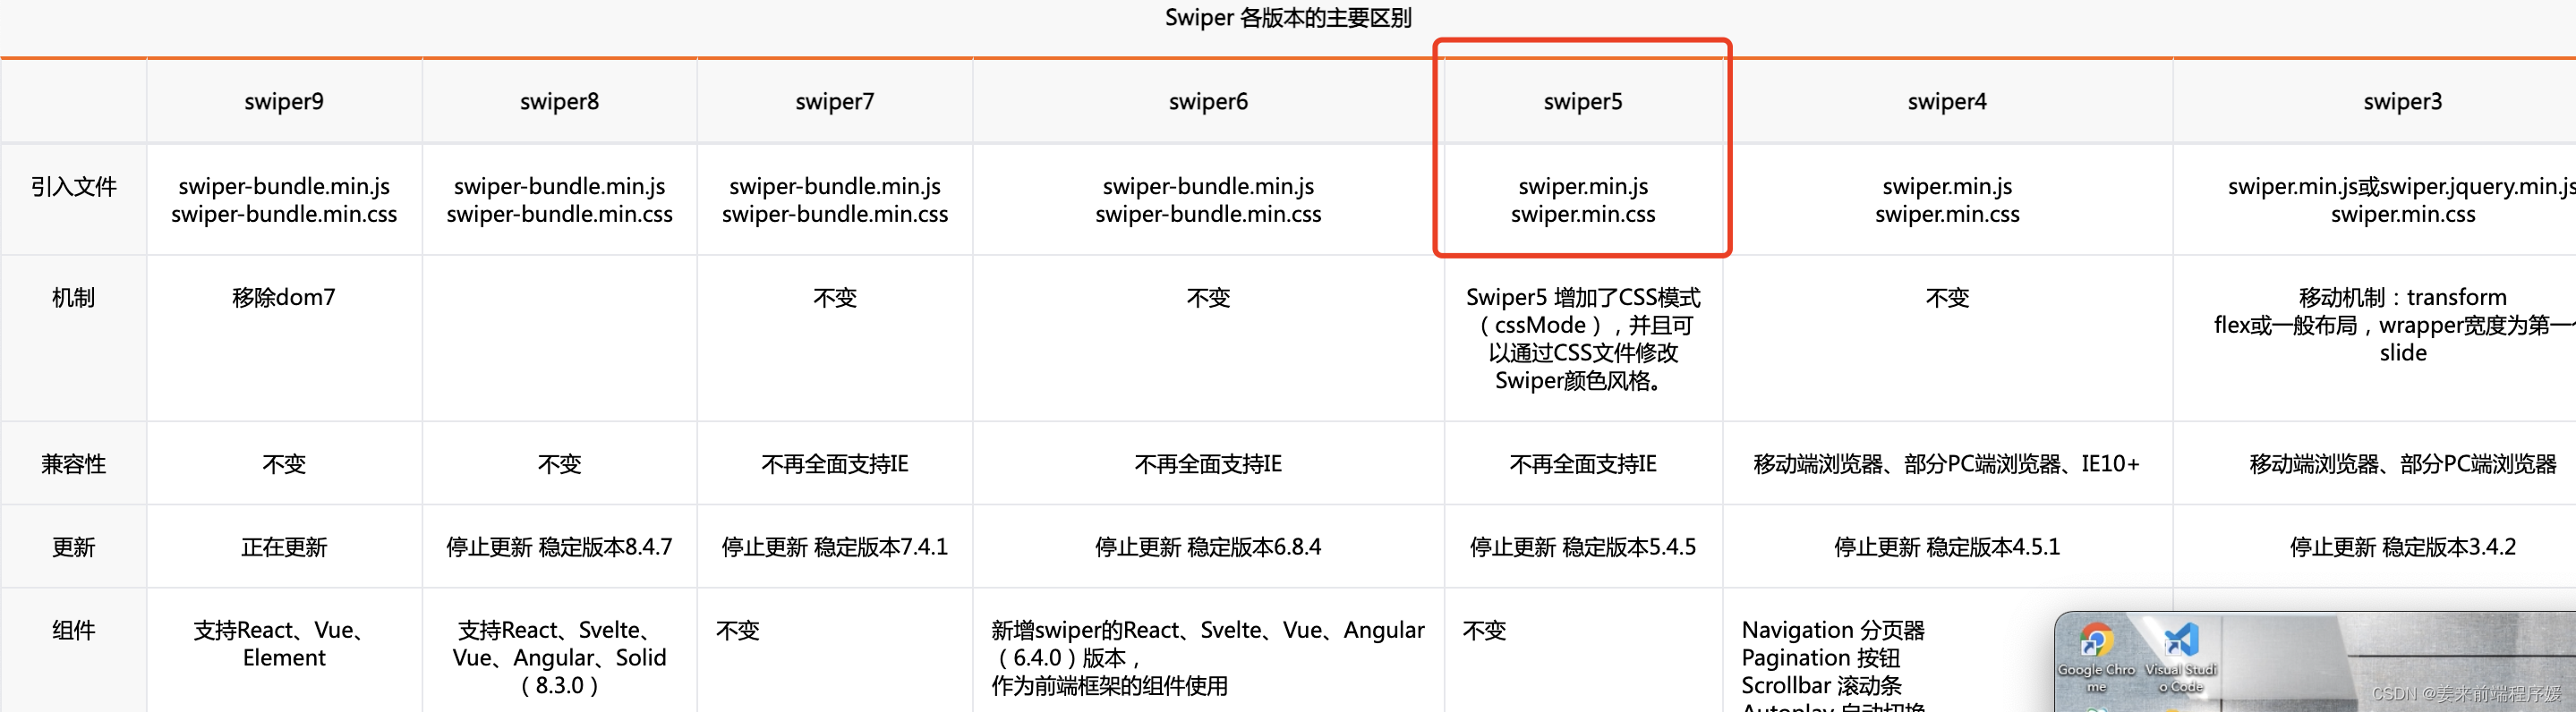
2、版本简介
swiper简介和swiper各版本兼容性-官方
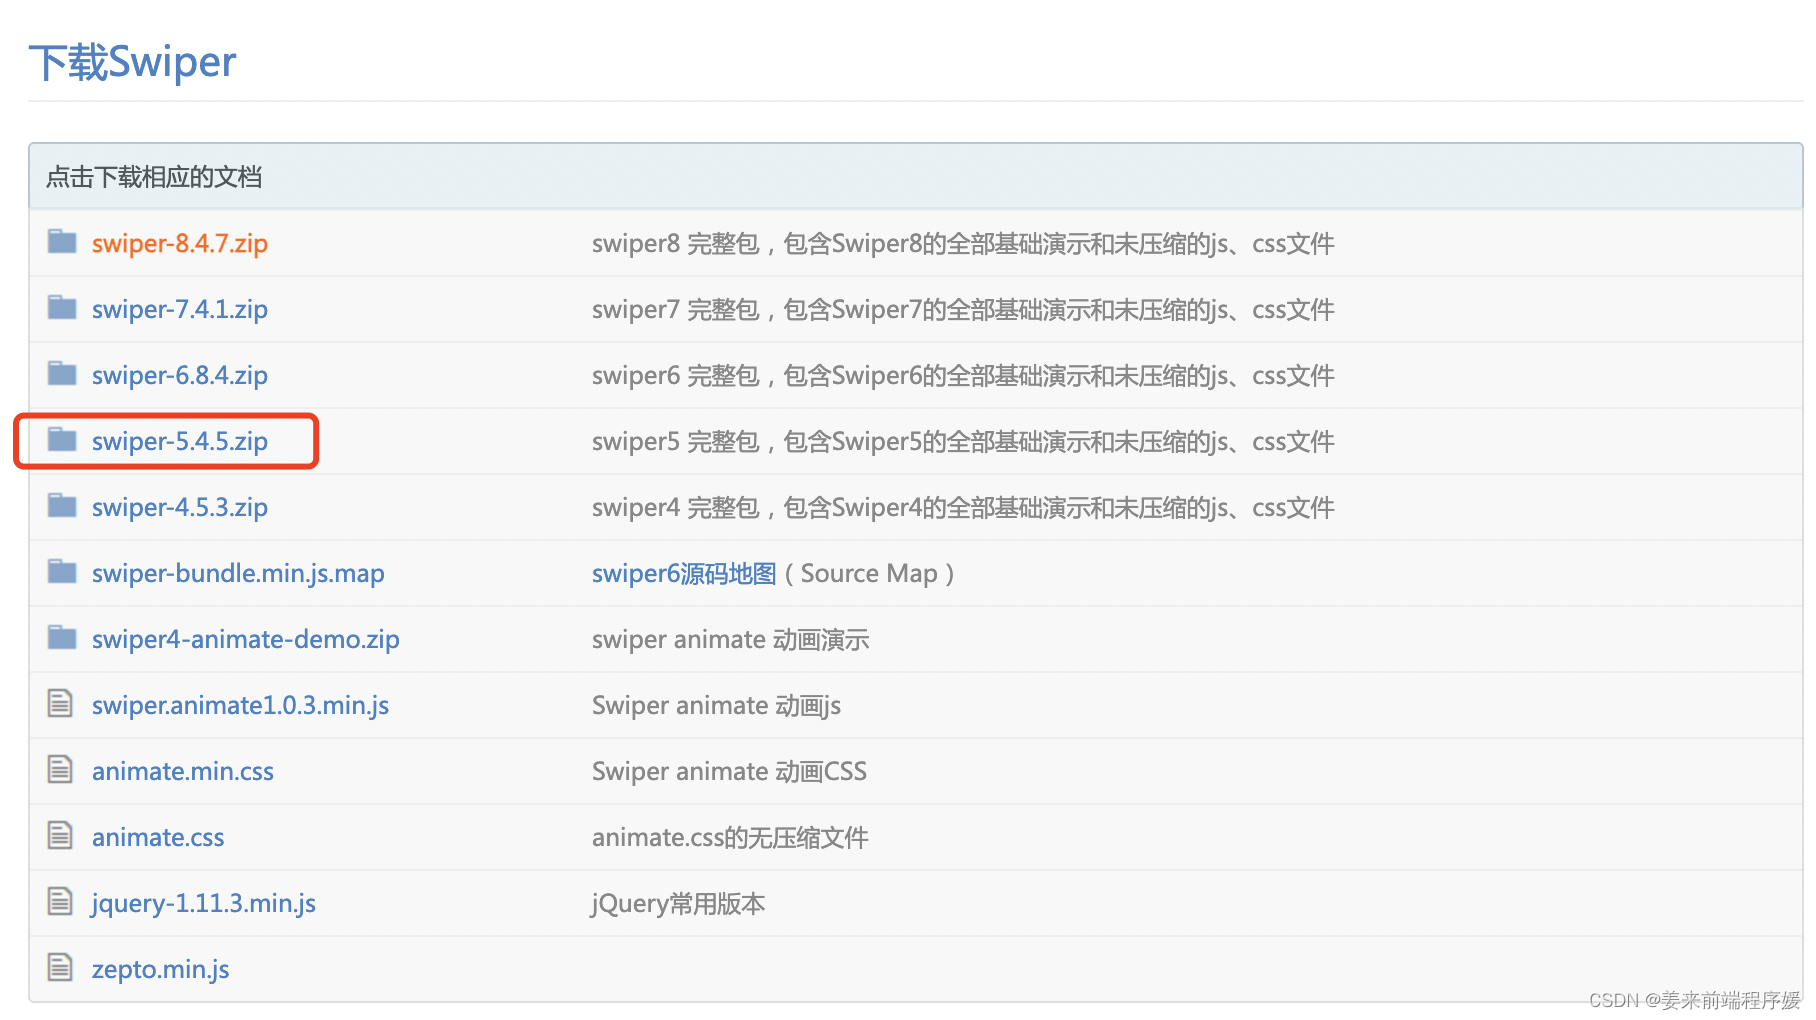
下载Swiper包-官方
4、具体实现
4-1、下载至本地之后,根据 swiper5 版本需要,保留swiper.min.js和swiper.min.css文件
4-2、根据下方链接进行配置
Swiper使用方法-官方
<!DOCTYPE html>
<html lang="en">

<head>
  <meta charset="UTF-8">
  <meta name="viewport" content="width=device-width, initial-scale=1.0">
  <title>Swiper使用方法里的官方代码</title>
  <link rel="stylesheet" href="./css/swiper.min.css">
  <script src="./js/swiper.min.js"></script>
  <style>
    .swiper-container {
      width: 600px;
      height: 300px;
      border: 1px solid red;
    }
  </style>
</head>

<body>
  <div class="swiper-container">
    <div class="swiper-wrapper">
      <div class="swiper-slide">Slide 1</div>
      <div class="swiper-slide">Slide 2</div>
      <div class="swiper-slide">Slide 3</div>
    </div>
    <!-- 如果需要分页器 -->
    <div class="swiper-pagination"></div>

    <!-- 如果需要导航按钮 -->
    <div class="swiper-button-prev"></div>
    <div class="swiper-button-next"></div>

    <!-- 如果需要滚动条 -->
    <div class="swiper-scrollbar"></div>
  </div>
  <script>
    var mySwiper = new Swiper('.swiper', {
      direction: 'vertical', // 垂直切换选项
      loop: true, // 循环模式选项

      // 如果需要分页器
      pagination: {
        el: '.swiper-pagination',
      },

      // 如果需要前进后退按钮
      navigation: {
        nextEl: '.swiper-button-next',
        prevEl: '.swiper-button-prev',
      },

      // 如果需要滚动条
      scrollbar: {
        el: '.swiper-scrollbar',
      },
    })
  </script>
</body>

</html>
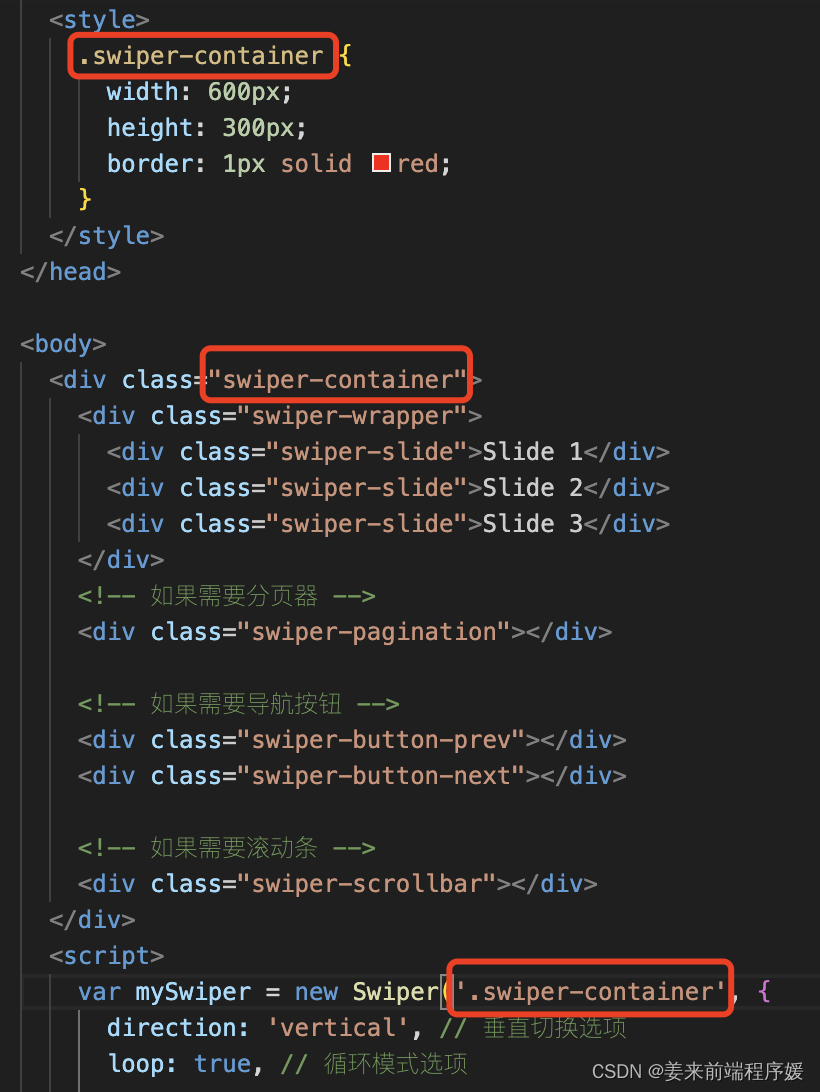
要注意:Swiper7的默认容器是'.swiper',Swiper6之前是'.swiper-container'
操作完以上步骤,此时swiper轮播已经是能正常切换了。其他功能可以结合API文档完成。
Swiper参数选项API文档-官方
5、个人优化
在上面轮播基础上添加了鼠标移入,轮播切换停止;鼠标移出,轮播切换继续效果。
鼠标移入移出效果-官方
<!DOCTYPE html>
<html lang="en">

<head>
    <meta charset="UTF-8">
    <meta http-equiv="X-UA-Compatible" content="IE=edge">
    <meta name="viewport" content="width=device-width, initial-scale=1.0">
    <title>Document</title>
    <!-- 引包 -->
    <script src="./js/swiper.min.js"></script>
    <link rel="stylesheet" href="./css/swiper.min.css">
    <style>
        .swiper-container {
            width: 600px;
            height: 400px;
            margin: 100px auto;
            border: 1px solid red;
        }
    </style>
</head>

<body>
    <div class="swiper-container">
        <div class="swiper-wrapper">
            <div class="swiper-slide">Slide 1</div>
            <div class="swiper-slide">Slide 2</div>
            <div class="swiper-slide">Slide 3</div>
        </div>
        <!-- 如果需要分页器 -->
        <div class="swiper-pagination"></div>

        <!-- 如果需要导航按钮 -->
        <div class="swiper-button-prev"></div>
        <div class="swiper-button-next"></div>
    </div>
</body>

</html>
<script>
    //swiper:对外暴露Swiper构造函数
        //第一个参数:模板根节点是CSS选择器或真实DOM节点
        //第二个参数:轮播图配置对象
    let myswiper = new Swiper(".swiper-container", {
        //前进后退按钮的配置项
        navigation: {
            nextEl: '.swiper-button-next',
            prevEl: '.swiper-button-prev',
        },
        //自动切换
        autoplay: {
            delay: 1000,//延迟时间
            stopOnLastSlide: false, //是否到最后一张轮播就停止循环
            disableOnInteraction: true,
        },
        //无缝衔接 无限循环
        loop: true,
        //分页器
        pagination: {
            el: '.swiper-pagination',
            clickable: true,//点击分页器切换图片
        },
    });

    //鼠标进入
    myswiper.el.onmouseover = function () {
        myswiper.autoplay.stop();
    }
    myswiper.el.onmouseout = function () {
        myswiper.autoplay.start();
    }
</script>
二、vue-awesome-swiper插件(仅供Vue框架使用)
vue-awesome-swiper插件在swiper插件基础上进行的封装,封装成了vue组件。
所以在使用vue-awesome-swiper插件前,要先安装swiper。
vue3 + vue-awesome-swiper 文档
vue2 + vue-awesome-swiper 文档
1、Vue2项目使用swiper、vue-awesome-swiper插件,具体实现:
1-1、安装swiper、vue-awesome-swiper
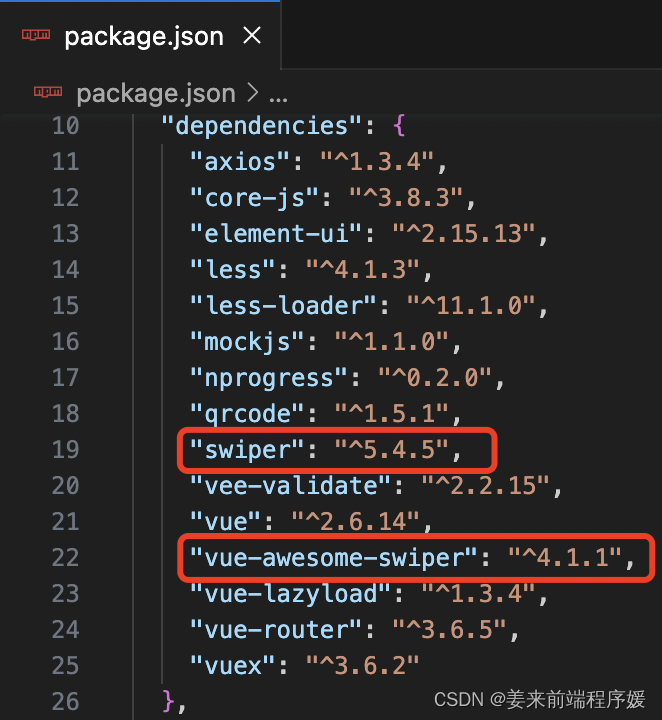
npm i swiper@5 vue-awesome-swiper@4
安装完成后在package.json文件中,如下图:
1-2、代码配置 main.js入口文件中
import "swiper/css/swiper.min.css"
import { Swiper, SwiperSlide } from 'vue-awesome-swiper';
Vue.component('Swiper', Swiper);
Vue.component('SwiperSlide', SwiperSlide);
// Swiper 代表最外侧容器
// SwiperSlide 代表每一张轮播图
1-3、代码配置 pages/test/index.vue
<template>
  <Swiper class="box" :options="options" ref="swiper">
    <SwiperSlide v-for="item in 10">
      <p>{{ item }}</p>
    </SwiperSlide>
    <!-- 左箭头 -->
    <div slot="button-prev" class="swiper-button-prev"></div>
    <!-- 右箭头 -->
    <div slot="button-next" class="swiper-button-next"></div>
    <!-- 分页器 -->
    <div slot="pagination" class="swiper-pagination"></div>
  </Swiper>
</template>

<script>
export default {
  name: "",
  data() {
    return {
      // options配置项: 使用swiper官网的配置项即可
      options: {
        //导航前进后退按钮
        navigation: {
          nextEl: ".swiper-button-next",
          prevEl: ".swiper-button-prev",
        },
        //自动轮播图
        autoplay: {
          delay: 1000,
          stopOnLastSlide: false,
          disableOnInteraction: true,
        },
        //无缝衔接
        loop: true,
        //分页器配置项
        pagination: {
          el: ".swiper-pagination",
          clickable: true, // 点击分页器小球进行轮播图切换
        },
        //切换效果
        effect: "cube",
      },
    };
  },
  mounted() {
    //鼠标进入-暂停
    this.$refs.swiper.$el.onmouseenter = () => {
      this.$refs.swiper.$swiper.autoplay.stop();
    };
    //鼠标离开-开始
    this.$refs.swiper.$el.onmouseleave = () => {
      this.$refs.swiper.$swiper.autoplay.start();
    };
  },
};
</script>

<style scoped>
.box {
  width: 600px;
  height: 400px;
  border: 1px solid red;
  margin: 10px auto;
}
p {
  width: 100%;
  height: 100%;
  background: cyan;
}
</style>
操作完以上步骤,此时vue-awesome-swiper轮播已经是能正常切换了。其他功能可以结合swiper的API文档完成(是的,没有看错,swiper的api文档)。
vue-awesome-swiper API文档