 <%
@ taglib uri
=
"
http://struts.apache.org/tags-bean
"
prefix
=
"
bean
"
%>
<%
@ taglib uri
=
"
http://struts.apache.org/tags-bean
"
prefix
=
"
bean
"
%>
<%
@ taglib uri
=
"
http://struts.apache.org/tags-html
"
prefix
=
"
html
"
%>
<%
@ taglib uri
=
"
http://struts.apache.org/tags-logic
"
prefix
=
"
logic
"
%>
<%
@ taglib uri
=
"
http://struts.apache.org/tags-tiles
"
prefix
=
"
tiles
"
%>
<
HTML
>
<
HEAD
>
<
TITLE
>
test
<
TITLE
>
<
HEAD
>
<
BODY
>
<
html:form action
=
"
/login
"
method
=
"
post
"
>
用户名:
<
html:text property
=
"
username
"
size
=
"
15
"
/>
<
br
>
密 码:
<
html:password property
=
"
password
"
size
=
"
15
"
/><
br
>
<
html:submit property
=
"
submit1
"
style
=
"
FONT-WEIGHT:bold;COLOR:red
"
>
登 录
<
html:submit
>
<
html:form
>
<
BODY
>
<
HTML
>
3、配置struts-config.xml文件;建立action、formbean;
改配置可以自动生成,使用eclipse进行自动生成,在建立时,如下图,可直接生成对应的action类和formbean类。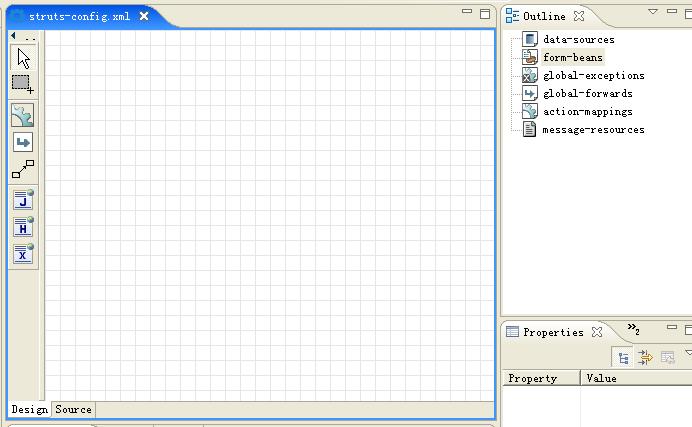
1
<?
xml version
=
"
1.0
"
encoding
=
"
UTF-8
"
?>
2
<!
DOCTYPE struts
-
config PUBLIC
"
-//Apache Software Foundation//DTD Struts Configuration 1.1//EN
"
"
http://jakarta.apache.org/struts/dtds/struts-config_1_1.dtd
"
>
3
4
<
struts
-
config
>
5
<
data
-
sources
/>
6
<
form
-
beans
>
7
<
form
-
bean name
=
"
LoginForm
"
type
=
"
com.test.web.form.LoginForm
"
/>
8
9
</
form
-
beans
>
10
11
<
global
-
exceptions
/>
12
<
global
-
forwards
/>
13
<
action
-
mappings
>
14
<
action attribute
=
"
LoginForm
"
input
=
"
/login.jsp
"
name
=
"
LoginForm
"
path
=
"
LoginAction
"
scope
=
"
request
"
type
=
"
com.test.web.action.LoginAction
" validate="true"
>
15
<
forward name
=
"
faile
"
path
=
"
faile.jsp
"
/>
16
<
forward name
=
"
success
"
path
=
"
success.jsp
"
/>
17
</
action
>
18
19
</
action
-
mappings
>
20
21
<
message
-
resources parameter
=
"
ApplicationResources
"
/>
22
</
struts
-
config
>
对应生成的formbean如下代码所示:
1
import
javax.servlet.http.HttpServletRequest;
2
import
org.apache.struts.action.ActionErrors;
3
import
org.apache.struts.action.ActionForm;
4
import
org.apache.struts.action.ActionMapping;
5
6
/**
7
* MyEclipse Struts
8
* Creation date: 11-10-2005
9
*
10
* XDoclet definition:
11
* @struts.form name="LoginForm"
12
*/
13
public
class
LoginForm
extends
ActionForm {
14
15
/**
password property
*/
16
private
String password;
17
18
/**
username property
*/
19
private
String username;
20
21
22
/**
23
* Method validate
24
*
@param
mapping
25
*
@param
request
26
*
@return
ActionErrors
27
*/
28
public
ActionErrors validate(
29
ActionMapping mapping,
30
HttpServletRequest request) {
31
32
/**对页面提交的元素进行验证,根据需要进行验证:在struts-config.xml中的 action-mapping配置设置validate="true"
33
* 以下验证才会在页面加载时生效.
34
*/
35
ActionErrors errors
=
new
ActionErrors();
36
if
(username
==
null
||
username.equals(
""
))
37
{
38
errors.add(
"
username
"
,
new
ActionMessage(
"
username.errors
"
));
39
return
errors;
40
}
41
if
(password
==
null
||
password.equals(
""
))
42
{
43
errors.add(
"
password
"
,
new
ActionMessage(
"
password.errors
"
));
44
return
errors;
45
}
46
return
errors;
47
}
48
49
/**
50
* Method reset
51
*
@param
mapping
52
*
@param
request
53
*/
54
public
void
reset(ActionMapping mapping, HttpServletRequest request) {
55
56
57
}
58
59
/**
60
* Returns the password.
61
*
@return
String
62
*/
63
public
String getPassword() {
64
return
password;
65
}
66
67
/**
68
* Set the password.
69
*
@param
password The password to set
70
*/
71
public
void
setPassword(String password) {
72
this
.password
=
password;
73
}
74
75
/**
76
* Returns the username.
77
*
@return
String
78
*/
79
public
String getUsername() {
80
return
username;
81
}
82
83
/**
84
* Set the username.
85
*
@param
username The username to set
86
*/
87
public
void
setUsername(String username) {
88
this
.username
=
username;
89
}
90
91
}
FormBean中验证后的提示需要在ApplicationResources_zh_CN.properties中配置提示错误信息.
1
username.
null
.error
=
/u5462/u79f0/u4e0d/u80fd/u4e3a/u7a7a
2
password.
null
.error
=
/u5bc6/u7801/u4e0d/u80fd/u4e3a/u7a7a
下面我们需要对WEB展现中对Action进行配置;我们在这里主要是针对登录进行开发.因此在action中需要完成以下步骤:
1、登录验证;验证用户名是否存在。验证该用户的密码是否正确。
2、增加cookie
3、提示登录成功。
在进行Action类的编写过程中,首先我们需要考虑到对数据的操作有如下步骤。
1、验证用户名是否存在,我们在service层需要提供一个接口:
1
Public
boolean
isExist(String user);
来判断用户名是否存在,同时要考虑该用户名对应的密码是否正确,需要提供接口:
1
Public UserBasicInfo findByUser(String user);
通过用户名来查找相关数据。
在Action中,我们同时要判断根据用户查找的用户密码是否正确。如果正确,增加cookie。并返回正常登录页面。如果用户不存在、该用户输入的密码与数据库中的密码不相符合。则在配置文件ApplicationResources_zh_CN.properties中,进行设置提示报错内容。并在页面中显示。
具体Action代码如下:
1
public
ActionForward execute(
2
ActionMapping mapping,
3
ActionForm form,
4
HttpServletRequest request,
5
HttpServletResponse response) {
6
ActionMessages errors
=
new
ActionMessages();
7
/**
8
* 取得登录用户名与密码
9
*/
10
LoginForm lf
=
(LoginForm)form;
11
UserBasicInfoMgr uu
=
(UserBasicInfoMgr)getBean(
"
userBasicInfoManager
"
);
12
/**
13
* 验证用户名是否存在
14
*/
15
if
(uu.isExists(lf.getUsername()))
16
{
17
/**
18
* 验证该用户密码是否正确
19
*/
20
if
(uu.getBasicInfoByName(lf.getUsername()).getUserpwd().equals(StringUtil.encodePassword(lf.getPassword().trim(),
"
MD5
"
)))
21
{
22
/**
23
* 用户状态为新增未激活,返回登录页面。不允许登录。
24
*/
25
if
(uu.getBasicInfoByName(lf.getUsername()).getUserstatus().toString().equals(
"
1
"
))
26
{
27
errors.add(
"
useract
"
,
new
ActionMessage(
"
user.activate.error
"
));
28
saveErrors(request,errors);
29
return
mapping.findForward(
"
relogin
"
);
30
}
31
/**
32
* 用户状态为新增待核,返回登录页面。不允许登录。
33
*/
34
if
(uu.getBasicInfoByName(lf.getUsername()).getUserstatus().toString().equals(
"
3
"
))
35
{
36
errors.add(
"
usercheck
"
,
new
ActionMessage(
"
user.check.error
"
));
37
saveErrors(request,errors);
38
return
mapping.findForward(
"
relogin
"
);
39
}
40
/**
41
* 用户状态为暂时锁定,返回登录页面。不允许登录。
42
*/
43
if
(uu.getBasicInfoByName(lf.getUsername()).getUserstatus().toString().equals(
"
5
"
))
44
{
45
errors.add(
"
userlock
"
,
new
ActionMessage(
"
user.lock.error
"
));
46
saveErrors(request,errors);
47
return
mapping.findForward(
"
relogin
"
);
48
}
49
/**
50
* 用户状态为已删除,返回登录页面。不允许登录。
51
*/
52
if
(uu.getBasicInfoByName(lf.getUsername()).getUserstatus().toString().equals(
"
6
"
))
53
{
54
errors.add(
"
userdel
"
,
new
ActionMessage(
"
user.del.error
"
));
55
saveErrors(request,errors);
56
return
mapping.findForward(
"
relogin
"
);
57
}
58
/**
59
* 判断cookie时间。并保存cookie
60
*/
61
Cookie cookies
=
new
Cookie(
"
username
"
, lf.getUsername());
62
cookies.setPath(
"
/
"
);
63
if
(lf.getCookieDate()
!=
null
)
64
{
65
if
(lf.getCookieDate().equals(
"
0
"
))
66
cookies.setMaxAge(
-
1
);
67
if
(lf.getCookieDate().equals(
"
1
"
))
68
cookies.setMaxAge(
0x15180
);
69
if
(lf.getCookieDate().equals(
"
2
"
))
70
cookies.setMaxAge(
0x278d00
);
71
if
(lf.getCookieDate().equals(
"
3
"
))
72
cookies.setMaxAge(
0x1e13380
);
73
}
74
response.addCookie(cookies);
75
if
(
!
cookies.getValue().equals(uu.getBasicInfoByName(lf.getUsername()).getUseremail()))
76
return
mapping.findForward(
"
relogin
"
);
77
CoreUserbasicinfo cub
=
uu.getBasicInfoByName(lf.getUsername());
78
cub.setLastipaddress(request.getRemoteAddr());
79
cub.setLastlogindate(
new
Date());
80
uu.regUserBasicInfo(cub);
81
String username
=
cookies.getValue();
82
HttpSession session
=
request.getSession(
false
);
83
if
(session
==
null
)
84
session
=
request.getSession(
true
);
85
if
(username
!=
null
&&
!
username.equals(
""
))
86
{
87
onLineUser on
=
onLineUser.getInstance();
88
if
(
!
on.existUser(username))
89
session.setAttribute(username, on);
90
}
91
/**
92
* 传递参数用户id
93
*/
94
request.setAttribute(
"
uid
"
,cub.getUserid());
95
/**
96
* 登录成功,第一次登录,需要填写详细资料。
97
*/
98
if
(cub.getActsetting()
==
null
||
cub.getActsetting().equals(
""
))
99
{
100
return
mapping.findForward(
"
login
"
);
101
}
102
return
mapping.findForward(
"
index
"
);
103
}
else
{
104
errors.add(
"
userpwderror
"
,
new
ActionMessage(
"
password.error
"
));
105
saveErrors(request, errors);
106
return
mapping.findForward(
"
relogin
"
);
107
}
108
}
else
{
109
errors.add(
"
usernoterror
"
,
new
ActionMessage(
"
username.not.error
"
));
110
saveErrors(request, errors);
111
return
mapping.findForward(
"
relogin
"
);
112
}
113
114
}
首先谢谢各位的关注,因最近项目比较紧张,一直没有更新该文章,有点对不住了。
下面我将service层的实现与Dao层的实现与配置写上。各位自己参考吧。
service接口实现
1
public
boolean
isExists(String userEmail) {
2
3
if
(userBasicInfoDao.findByUserEmail(userEmail).size()
==
0
)
4
return
false
;
5
else
6
return
true
;
7
}
通过service层调用Dao层接口,进行判断用户是否存在。
Dao接口实现:
1
public
List findByUserEmail(String userEmail) {
2
3
return
getHibernateTemplate().find(
4
"
from CoreUserbasicinfo cc where cc.useremail=?
"
, userEmail);
5
6
}
接下来,我们就需要配置spring的配置文件
applicationContext-service.xml
1
<
bean id
=
"
userBasicInfoManager
"
parent
=
"
txProxyTemplate
"
>
2
<
property name
=
"
target
"
>
3
4
<
bean
5
class
=
"包路径.service.Impl.
UserBasicInfoMgrImpl
"
>
6
<
property name
=
"
userBasicInfoDao
"
>
7
<
ref bean
=
"
UserBasicInfoDao
"
/>
8
</
property
>
9
<
property name
=
"
mailsender
"
>
10
<
ref bean
=
"
mailSender
"
/>
11
</
property
>
12
<
property name
=
"
message
"
>
13
<
ref bean
=
"
mailMessage
"
/>
14
</
property
>
15
</
bean
>
16
</
property
>
17
</
bean
>
