前言:项目用到了导出文档,综合考虑使用python-docx模块
python-docx
安装
pip install python-docx
docx文档布局词汇
三个部分
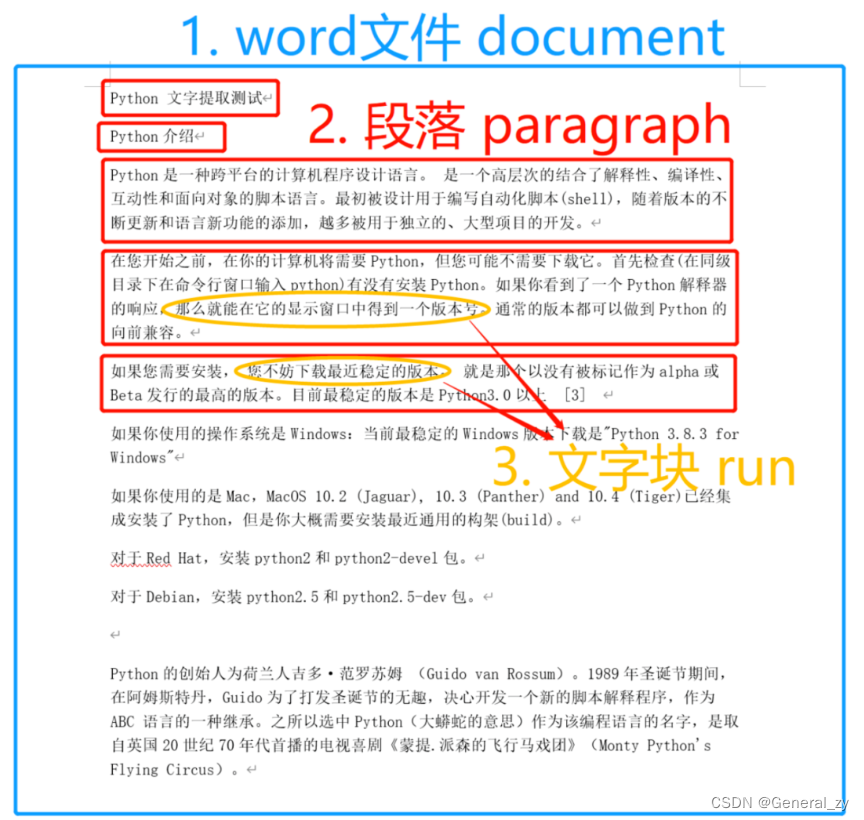
文档Document 段落Paragraph 文字块Run
文档
就是docx文档
段落
就是寻常段落
文字块
如下,短句子中有多种不同的样式,则会被划分成多个文字块。
如果所示,这个paragraph一共四个run。

四级结构(表格)
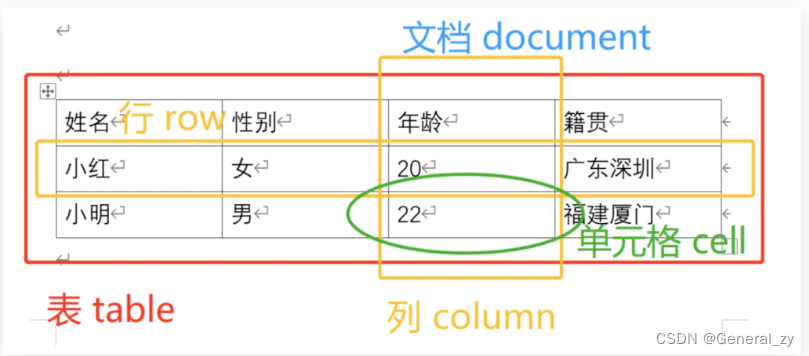
Document - Table - Row/Column - Cell四级结构
使用
导入word
from docx import Document
# 只要不指定路径,就默认为创建新Word文件
wordfile = Document(path)
读操作
获取段落
三个部分:一个doc由多个paragraph组成
paragraphs = wordfile.paragraphs
# 得到一个段落对象列表
# [ p1,p2,p3...]
print(paragraphs)
获取段落文本内容
for paragraph in wordfile.paragraphs:
    print(paragraph.text)
获取文字块文本内容
一个paragraph段落由一个或者多个run文字块组成
for paragraph in wordfile.paragraphs:
    for run in paragraph.runs:
        print(run.text)
遍历表格
# 按行遍历
for table in wordfile.tables:
    for row in table.rows:
        for cell in row.cells:
            print(cell.text)

# 按列遍历
for table in wordfile.tables:
    for column in table.columns:
        for cell in column.cells:
            print(cell.text)
表格设置字体样式
表格中文字样式修改,与在段落中的样式修改一样,只是在添加文本时调用的方法不同。

run=table.cell(row,col).paragraphs[0].add_run(str) #添加文本的方法

run.font.name = u'宋体'

run._element.rPr.rFonts.set(qn('w:eastAsia'), u'宋体')

run.font.bold=True
写操作
保存文件
wordfile.save(...)
... 放需要保存的路径
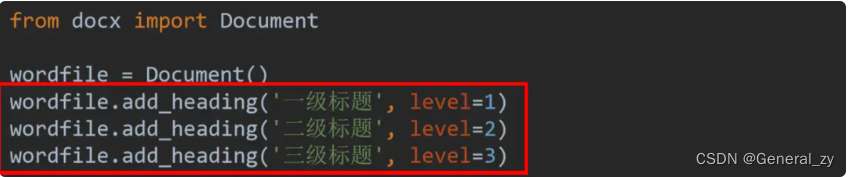
添加标题
wordfile.add_heading(…, level=…)
添加段落
wordfile.add_paragraph(...)
--------------------------------------------------
wordfile = Document()
wordfile.add_heading('一级标题', level=1)
wordfile.add_paragraph('新的段落')
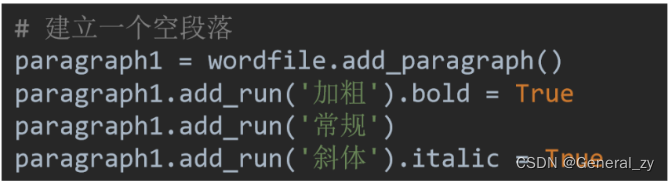
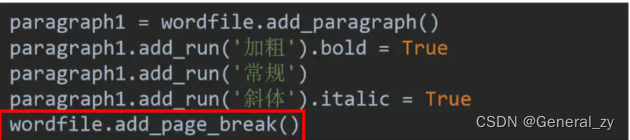
添加文字块
wordfile.add_run(...)
添加空白页
wordfile.add_page_break(...)
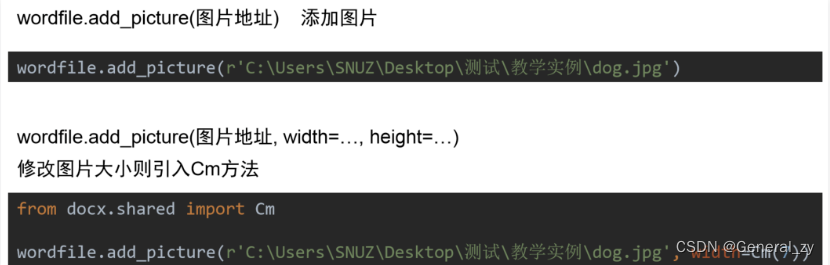
添加图片
wordfile.add_picture(..., width=…, height=…)
设置样式
-
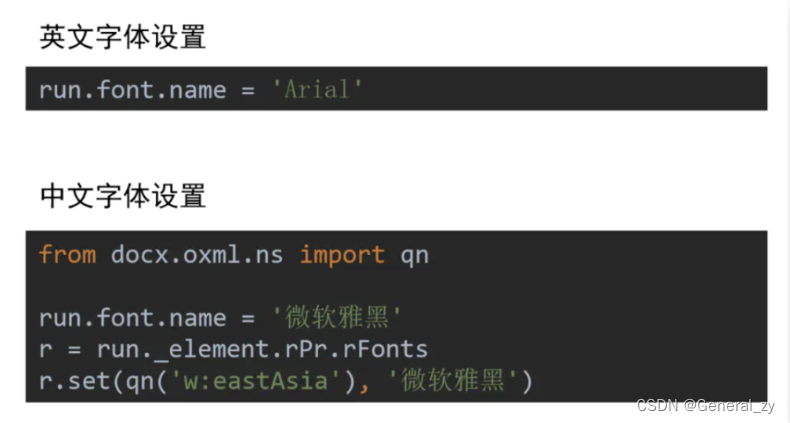
字体设置
-
文字其他样式设置
from docx import Document
from docx.shared import RGBColor, Pt

wordfile = Document(file)
for paragraph in wordfile.paragraphs:
    for run in paragraph.runs:

        run.font.bold = True  # 加粗
        run.font.italic = True # 斜体
        run.font.underline = True # 下划线
        run.font.strike = True # 删除线
        run.font.shadow = True # 阴影
        run.font.size = Pt(20) # 字号
        run.font.color.rgb = RGBColor(255, 0, 0) # 字体颜色
-
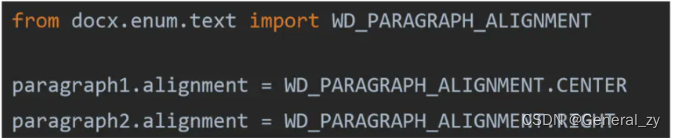
段落样式设置
默认左对齐
word转pdf,html
word---->html
pip install pydocx
from pydocx import PyDocX

// 传入docx文件路径 或 文件content
html = PyDocX.to_html("./test.docx")

// 返回html:string
f = open("test.html", 'w', encoding="utf-8")
f.write(html)
f.close()
word---->pdf
pip install pdfkit
依赖软件:
https://wkhtmltopdf.org/downloads.html
# 将wkhtmltopdf.exe程序绝对路径
path_wkthmltopdf = r'E:\wkhtmltopdf\bin\wkhtmltopdf.exe'
config = pdfkit.configuration(wkhtmltopdf=path_wkthmltopdf)
# 生成pdf文件,to_file为文件路径
pdfkit.from_file(html, to_file, configuration=config)
实例
输入文件:
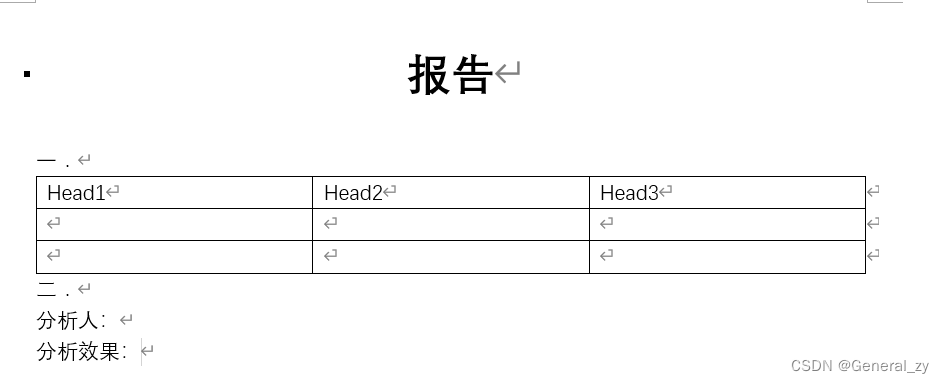
输出文件:
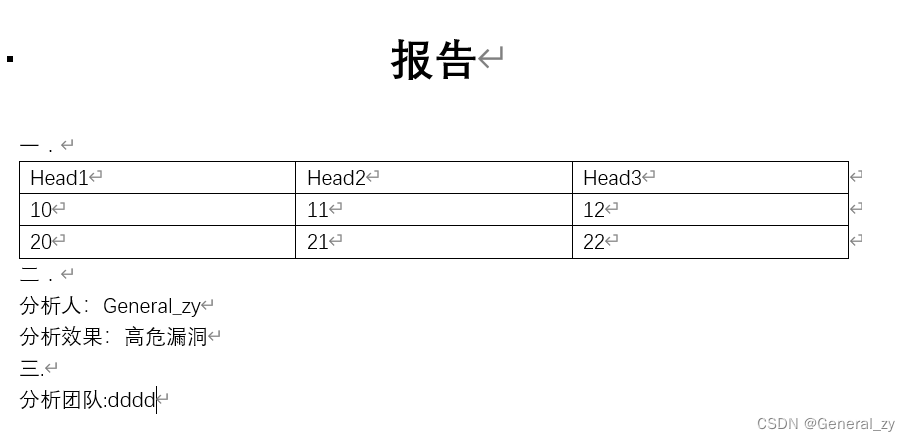
demo代码:
from docx import Document

doc = Document("./templates.docx")
# 查看所有属性
# 'add_heading', 'add_page_break', 'add_paragraph', 'add_picture','add_section', 'add_table',
# 'core_properties', 'element', 'inline_shapes', 'paragraphs', 'part', 'save', 'sections', 'settings', 'styles',
# 'tables'
# print(dir(doc))

ps = doc.paragraphs
# print(ps)
for p in ps:
    text = p.text
    if "分析人" in text:
        p.text = text + "General_zy"
    elif "分析效果" in text:
        p.text = text + "高危漏洞"

tables = doc.tables
# 获取模板docx中的唯一一个表
table = tables[0]

for i in range(1, 3):
    for j in range(3):
        table.cell(i, j).text = str(i) + str(j)

p3 = doc.add_paragraph("三.")
# 'add_run', 'alignment', 'clear', 'insert_paragraph_before', 'paragraph_format', 'part', 'runs', 'style', 'text'
p4 = doc.add_paragraph("分析团队:")
p4.add_run("dddd")

doc.save("./xxx.docx")
实际案例
-
python-docx库给我的直观感受就是难!难!难!
- 一大堆的私有属性,连pycharm都没有属性方法提示
- 连chatgpt都频繁写出错误代码
- 以下是我的一些总结,希望可以帮到你们
按顺序读取word文档中的所有信息(文本,图片,表格)
- 鬼知道
CT_P,CT_Tbl是什么意思
- 鬼知道还有这么一些神奇的xpath
//a:blip/@r:embed
- 磕磕巴巴的一个函数写了4天,完成了。
def read_from_word(self, src_filepath: str):
    """
    读取输入的word附件文件
    """
    fp = Document(src_filepath)

    # 遍历整个文档的所有元素(段落和表格),并记录它们在文档中出现的顺序
    elements = []
    for block in fp.element.body:
        if block.__class__.__name__ == 'CT_P':
            elements.append(('paragraph', block))
        elif block.__class__.__name__ == 'CT_Tbl':
            elements.append(('table', block))

    # 根据元素出现的顺序构建读取出的内容
    content = []
    for index, type_el in enumerate(elements):
        el_type, el = type_el[0], type_el[-1]
        if el_type == 'paragraph':
            paragraph = Paragraph(parse_xml(el.xml), parent=None)
            img = paragraph._element.xpath('.//pic:pic')
            if not img:
                txt = paragraph.text.strip()
                if txt != "":
                    content.append(txt)
            else:
                picture = img[0]
                embed = picture.xpath('.//a:blip/@r:embed')[0]
                related_part = fp.part.related_parts[embed]
                image = related_part.image
				# 图片下载下来然后把文件位置保存到content记录顺序
                filepath = os.path.join(self.tmp_folder, str(index) + ".png")
                with open(filepath, "wb") as f:
                    f.write(image.blob)
                    content.append(filepath)
		# table将存于一个二维列表中
        elif el_type == 'table':
            table = Table(el, parent=None)
            tables = []
            for row in table.rows:
                row_content = []
                for cell in row.cells:
                    for p in cell.paragraphs:
                        row_content.append(p.text.strip())
                tables.append(row_content)
            content.append(tables)
写入表格并增加边框
- 写入表格样式需要自己设置
- 边框也成了一个难点
def add_other_text(self, word, text: str):
    # 设置附件字体
    if not text.isascii():
        p = add_text_with_style(word, text, False, u"仿宋_GB2312", 14)
        p.paragraph_format.line_spacing_rule = WD_LINE_SPACING.SINGLE
    else:
        p = add_text_with_style(word, text, False, u"Times New Roman", 14)
        p.paragraph_format.line_spacing_rule = WD_LINE_SPACING.SINGLE

def merge_from_word(self, doc, data):
    style = doc.styles.add_style('Table Grid', WD_STYLE_TYPE.TABLE)
    style.paragraph_format.alignment = WD_TABLE_ALIGNMENT.CENTER  # 居中对齐
    style.font.name = '仿宋_GB2312'
    style.font.size = Pt(16)
    style._element.rPr.rFonts.set(qn('w:eastAsia'), '仿宋_GB2312')  # 设置中文字体
    style._element.rPr.rFonts.set(qn('w:ascii'), 'Times New Roman')  # 设置英文字体

    for text in data:
        if isinstance(text, list):
            table = doc.add_table(len(text), len(text[0]))
            # 设置表格样式
            table.autofit = False
            table.style = 'Table Grid'
            table.width = Cm(15)

            for index, row in enumerate(table.rows):
                line = text[index]
                for i, cell in enumerate(row.cells):
                    cell.text = line[i]
                    # 设置表格边框
                    set_cell_border(
                        cell,
                        top={"sz": 1, "val": "single", "color": "#000000", "space": "0"},
                        bottom={"sz": 1, "val": "single", "color": "#000000", "space": "0"},
                        left={"sz": 1, "val": "single", "color": "#000000", "space": "0"},
                        right={"sz": 1, "val": "single", "color": "#000000", "space": "0"},
                        insideH={"sz": 1, "val": "single", "color": "#000000", "space": "0"},
                        end={"sz": 1, "val": "single", "color": "#000000", "space": "0"}
                    )
            # 设置表头加粗
            header_cells = table.rows[0].cells
            for cell in header_cells:
                cell.paragraphs[0].runs[0].font.bold = True
        else:
            if text.endswith("png"):
                doc.add_picture(text, height=Cm(7.31), width=Cm(14.63))
                os.remove(text)
            else:
                self.add_other_text(doc, text)
    return doc

# 设置表格的边框
def set_cell_border(cell, **kwargs):
    """
    Set cell`s border
    Usage:
    set_cell_border(
        cell,
        top={"sz": 12, "val": "single", "color": "#FF0000", "space": "0"},
        bottom={"sz": 12, "color": "#00FF00", "val": "single"},
        left={"sz": 24, "val": "dashed", "shadow": "true"},
        right={"sz": 12, "val": "dashed"},
    )
    """
    tc = cell._tc
    tcPr = tc.get_or_add_tcPr()

    # check for tag existnace, if none found, then create one
    tcBorders = tcPr.first_child_found_in("w:tcBorders")
    if tcBorders is None:
        tcBorders = OxmlElement('w:tcBorders')
        tcPr.append(tcBorders)

    # list over all available tags
    for edge in ('left', 'top', 'right', 'bottom', 'insideH', 'insideV'):
        edge_data = kwargs.get(edge)
        if edge_data:
            tag = 'w:{}'.format(edge)

            # check for tag existnace, if none found, then create one
            element = tcBorders.find(qn(tag))
            if element is None:
                element = OxmlElement(tag)
                tcBorders.append(element)

            # looks like order of attributes is important
            for key in ["sz", "val", "color", "space", "shadow"]:
                if key in edge_data:
                    element.set(qn('w:{}'.format(key)), str(edge_data[key]))
最后是用到的包
import os
import re
import xlrd
from docx.shared import Cm
from docx.oxml.ns import qn
from docx import Document
from docx.oxml import parse_xml
from docx.shared import Pt
from docx.table import Table
from docx.text.paragraph import Paragraph
from xlrd import xldate_as_datetime
from docx.enum.text import WD_LINE_SPACING
from docx.enum.style import WD_STYLE_TYPE
from docx.enum.table import WD_TABLE_ALIGNMENT
python-docx-template
python-docx-template 模块主要依赖两个库, python-docx用于读取,编写和创建子文档 , jinja2用于管理插入到模板docx中的标签 。 其基本思路是利用jinja2制作Word模板,并动态向模板中插入文字、图片、表格等内容。
安装
pip install docxtpl
模板语法
由于使用的jinjia2模板,所以模板语法基本如下:
## 迭代列表
{% for var in list %}
    {{ var }}
    循环逻辑
	{{loop.index}}表示当前是第几次循环,从1开始
{% endfor %}

## 迭代字典
{% for key, value in dict.items() %}
    {{ key }} {{ value }}
{% endfor %}

## 另一种迭代字典的方法,这种用的比较多
{% for var in dict %}
    {{ var.key }} #key为字典的键
{% endfor %}


{% if score>=90 %} <p>优秀</p>
{% elif score>=80 %} <p>良好</p>
{% elif score>=60 %} <p>及格</p>
{% else %} </p>不及格</p>
{% endif %}

{% if val.isascii() %}
	{{ val }}
{% else %}
	fuck off
{% endif %}
插入图片
- 准备word,写入如下模板
这是一个模板:{{ template }}

这是一个Word文件

这里插入一个图片:{{ myimage }}
- 利用python渲染
from docxtpl import InlineImage, DocxTemplate
from docx.shared import Mm
import jinja2

# 打开docx文件
tpl = DocxTemplate('test.docx')

# 要装入的数据信息
context = {
    'template': 'Hello World!',
    'myimage': InlineImage(tpl, 'happy.jpg', width=Mm(20)),
}

jinja_env = jinja2.Environment(autoescape=True)

# 填充数据
tpl.render(context, jinja_env)

# 保存文件操作
tpl.save('test_temp.docx')
操作表格

from docxtpl import DocxTemplate, RichText

tpl = DocxTemplate('templates/cellbg_tpl.docx')

context = {
    'alerts': [
        {
            'date': '2015-03-10',
            'desc': RichText('Very critical alert', color='FF0000', bold=True),
            'type': 'CRITICAL',
            'bg': 'FF0000',
        },
        {
            'date': '2015-03-11',
            'desc': RichText('Just a warning'),
            'type': 'WARNING',
            'bg': 'FFDD00',
        },
        {
            'date': '2015-03-12',
            'desc': RichText('Information'),
            'type': 'INFO',
            'bg': '8888FF',
        },
        {
            'date': '2015-03-13',
            'desc': RichText('Debug trace'),
            'type': 'DEBUG',
            'bg': 'FF00FF',
        },
    ],
}

tpl.render(context)
tpl.save('output/cellbg.docx')

合并word文档docxcompose
安装
pip install docxcompose
使用
import docx
import os
from glob import glob

from docxcompose.composer import Composer

base_dir  = "C:\\Users\\KK.JustDoIT\\Downloads\\汇总\\报修单\\日常维修-报修单-2月"
save_path  = "C:\\Users\\KK.JustDoIT\\Downloads\\汇总\\报修单"


def combine_all_docx(files_list):
    number_of_sections=len(files_list)
    master = docx.Document()
    composer = Composer(master)

    for i in range(0, number_of_sections):
        doc_temp = docx.Document((files_list[i]))
        composer.append(doc_temp)
    composer.save(os.path.join(save_path, 'merge.docx'))


# 执行
path_list = glob(os.path.join(base_dir, '*.docx'))
combine_all_docx(path_list)
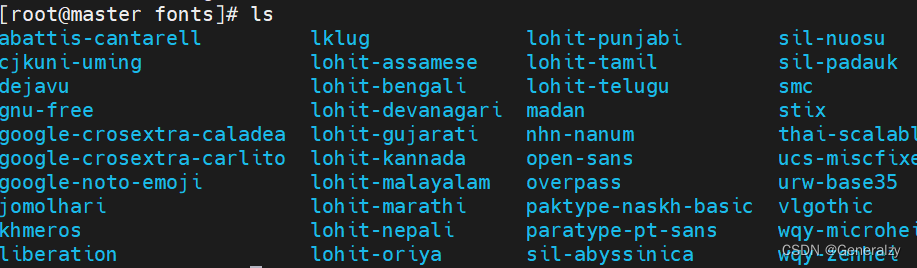
字体文件ttf
docx设置字体失败,那么可能是因为没有找到字体文件。
linux中存放位置
/usr/share/fonts
安装字体:
-
mkdir chinese
-
将下载的字体拷贝到chinese目录下

-
执行:
1、mkfontscale
2、mkfontdir
3、fc-cache
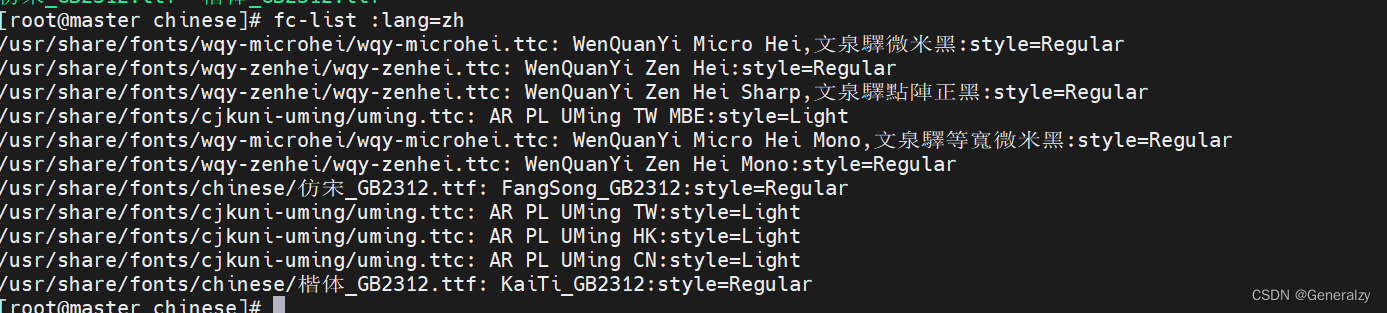
-
查看:fc-list :lang=zh
windows中存放位置
将字体文件拖入即可。