欢迎来到 Java 中的 Restful Web 服务教程。REST是缩写代表性状态转移。休息是一个建筑风格用于开发可通过网络访问的应用程序。 Roy Fielding 在 2000 年的博士论文中提出了 REST 架构风格。
Restful Web 服务是无状态客户端-服务器Web 服务是资源并且可以通过其 URI 进行识别的架构。 REST 客户端应用程序可以使用 HTTP GET/POST 方法来调用 Restful Web 服务。 REST 没有指定要使用的任何特定协议,但在几乎所有情况下它都是通过 HTTP/HTTPS 使用的。与 SOAP Web 服务相比,它们是轻量级的并且不遵循任何标准。我们可以使用 XML、JSON、文本或任何其他类型的数据进行请求和响应。
Java API for RESTful Web Services (JAX-RS) 是用于创建 REST Web 服务的 Java API。 JAX-RS 使用注释来简化 Web 服务的开发和部署。 JAX-RS 是 JDK 的一部分,因此您无需包含任何内容即可使用它的注释。
一些重要的 JAX-RS 注释是:
-
@Path:用于指定类和方法的相对路径。我们可以通过扫描 Path 注释值来获取 Web 服务的 URI。
-
@GET, @PUT, @POST, @DELETE and @HEAD:用于指定方法的HTTP请求类型。
-
@Produces, @Consumes:用于指定请求和响应类型。
-
@PathParam:用于通过解析将方法参数绑定到路径值。
- SOAP 是一种协议,而 REST 是一种架构风格。
- SOAP 服务器和客户端应用程序紧密耦合并与 WSDL 契约绑定,而 REST Web 服务和客户端中没有契约。
- 与 SOAP Web 服务相比,REST 的学习曲线很容易。
- REST Web 服务请求和响应类型可以是 XML、JSON、文本等,而 SOAP 仅适用于 XML。
- JAX-RS 是用于 REST Web 服务的 Java API,而 JAX-WS 是用于 SOAP Web 服务的 Java API。
JAX-RS API 有两种主要实现。
-
Jersey: Jersey是Sun提供的参考实现。为了使用 Jersey 作为我们的 JAX-RS 实现,我们需要在 web.xml 中配置它的 servlet 并添加所需的依赖项。请注意,JAX-RS API 是 JDK 的一部分,而不是 Jersey,因此我们必须在应用程序中添加其依赖项 jar。
-
RESTEasy: RESTEasy是提供JAX-RS实现的JBoss项目。
让我们看看使用 Jersey 和 RESTEasy 创建 Restful Web 服务是多么容易。我们将通过 HTTP 公开以下方法并使用 Chrome Postman 扩展来测试这些方法。
| URI |
HTTP Method |
Description |
| /person/{id}/getDummy |
GET |
Returns a dummy person object |
| /person/add |
POST |
Adds a person |
| /person/{id}/delete |
GET |
Delete the person with ‘id’ in the URI |
| /person/getAll |
GET |
Get all persons |
| /person/{id}/get |
GET |
Get the person with ‘id’ in the URI |
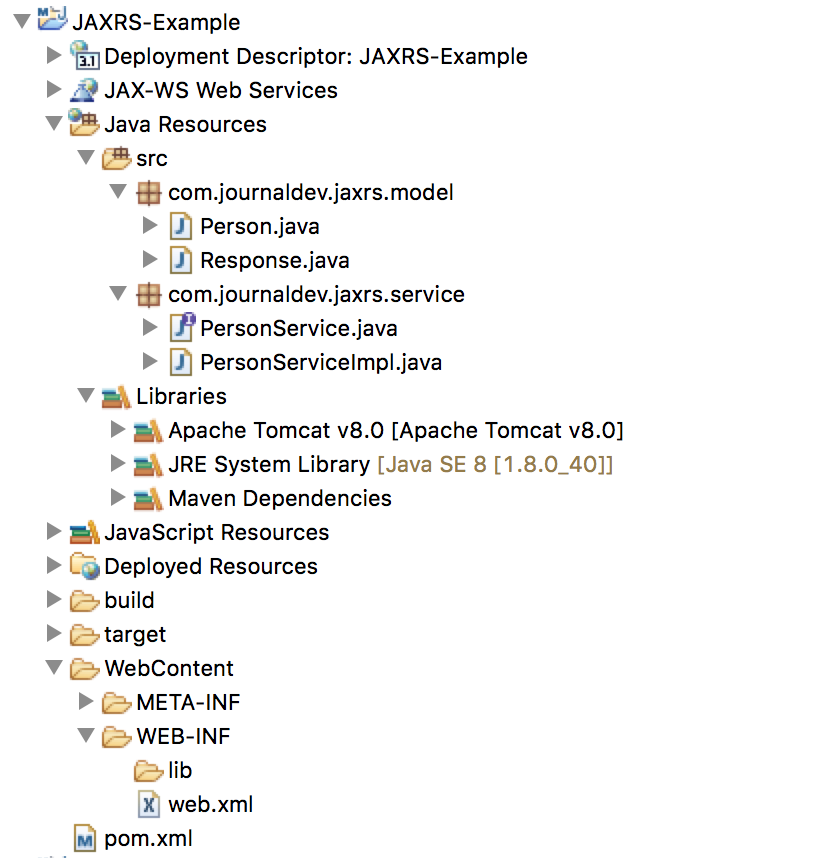
Create a dynamic web project and then convert it to Maven to get the skeleton of your web services project. Below image shows the project structure of the final project.  Let’s look at the Jersey dependencies we have in pom.xml file.
<project xmlns="https://maven.apache.org/POM/4.0.0" xmlns:xsi="https://www.w3.org/2001/XMLSchema-instance" xsi:schemaLocation="https://maven.apache.org/POM/4.0.0 https://maven.apache.org/xsd/maven-4.0.0.xsd">
  <modelVersion>4.0.0</modelVersion>
  <groupId>JAXRS-Example</groupId>
  <artifactId>JAXRS-Example</artifactId>
  <version>0.0.1-SNAPSHOT</version>
  <packaging>war</packaging>

  <dependencies>
        <dependency>
            <groupId>com.sun.jersey</groupId>
            <artifactId>jersey-server</artifactId>
            <version>1.19</version>
        </dependency>
        <dependency>
            <groupId>com.sun.jersey</groupId>
            <artifactId>jersey-servlet</artifactId>
            <version>1.19</version>
        </dependency>
        <dependency>
            <groupId>com.sun.jersey</groupId>
            <artifactId>jersey-client</artifactId>
            <version>1.19</version>
        </dependency>
  </dependencies>

  <build>
    <sourceDirectory>src</sourceDirectory>
    <plugins>
      <plugin>
        <artifactId>maven-war-plugin</artifactId>
        <version>2.6</version>
        <configuration>
          <warSourceDirectory>WebContent</warSourceDirectory>
          <failOnMissingWebXml>false</failOnMissingWebXml>
        </configuration>
      </plugin>
      <plugin>
        <artifactId>maven-compiler-plugin</artifactId>
        <version>3.3</version>
        <configuration>
          <source>1.7</source>
          <target>1.7</target>
        </configuration>
      </plugin>
    </plugins>
  </build>
</project>
我们不需要添加泽西岛客户但如果您正在编写 java 程序来使用 Jersey 调用 REST Web 服务,那么它是必需的。现在让我们看看部署描述符,了解如何配置 Jersey 来创建我们的 Web 应用程序。
<?xml version="1.0" encoding="UTF-8"?>
<web-app xmlns:xsi="https://www.w3.org/2001/XMLSchema-instance" xmlns="https://xmlns.jcp.org/xml/ns/javaee" xsi:schemaLocation="https://xmlns.jcp.org/xml/ns/javaee https://xmlns.jcp.org/xml/ns/javaee/web-app_3_1.xsd" id="WebApp_ID" version="3.1">
  <display-name>JAXRS-Example</display-name>

<!-- Jersey Servlet configurations -->
    <servlet>
    <servlet-name>Jersey REST Service</servlet-name>
    <servlet-class>com.sun.jersey.spi.container.servlet.ServletContainer</servlet-class>
    <init-param>
      <param-name>com.sun.jersey.config.property.packages</param-name>
      <param-value>com.journaldev</param-value>
    </init-param>
    <load-on-startup>1</load-on-startup>
  </servlet>
  <servlet-mapping>
    <servlet-name>Jersey REST Service</servlet-name>
    <url-pattern>/*</url-pattern>
  </servlet-mapping>
  <!-- Jersey Servlet configurations -->

</web-app>
这就是将 Jersey 插入我们的 Web 应用程序所需的全部内容,在我们的 java 代码中,我们将使用 JAX-RS 注释。注意初始化参数的值com.sun.jersey.config.property.packages提供将扫描 Web 服务资源和方法的包。
首先我们将创建两个模型 bean -Person对于我们的应用程序数据和Response用于向客户端系统发送响应。由于我们将发送 XML 响应,因此 bean 应该用以下注释@XmlRootElement,因此我们有这个类。
package com.journaldev.jaxrs.model;

import javax.xml.bind.annotation.XmlRootElement;

@XmlRootElement (name="person")
public class Person {
	private String name;
	private int age;
	private int id;

	public String getName() {
		return name;
	}

	public void setName(String name) {
		this.name = name;
	}

	public int getAge() {
		return age;
	}

	public void setAge(int age) {
		this.age = age;
	}

	public int getId() {
		return id;
	}

	public void setId(int id) {
		this.id = id;
	}

	@Override
	public String toString(){
		return id+"::"+name+"::"+age;
	}

}
package com.journaldev.jaxrs.model;

import javax.xml.bind.annotation.XmlRootElement;

@XmlRootElement
public class Response {

	private boolean status;
	private String message;

	public boolean isStatus() {
		return status;
	}

	public void setStatus(boolean status) {
		this.status = status;
	}

	public String getMessage() {
		return message;
	}

	public void setMessage(String message) {
		this.message = message;
	}
}
根据我们的 URI 结构,下面是服务接口及其实现代码。
package com.journaldev.jaxrs.service;

import com.journaldev.jaxrs.model.Person;
import com.journaldev.jaxrs.model.Response;

public interface PersonService {

	public Response addPerson(Person p);

	public Response deletePerson(int id);

	public Person getPerson(int id);

	public Person[] getAllPersons();

}
package com.journaldev.jaxrs.service;


import java.util.HashMap;
import java.util.Map;
import java.util.Set;

import javax.ws.rs.Consumes;
import javax.ws.rs.GET;
import javax.ws.rs.POST;
import javax.ws.rs.Path;
import javax.ws.rs.PathParam;
import javax.ws.rs.Produces;
import javax.ws.rs.core.MediaType;

import com.journaldev.jaxrs.model.Person;
import com.journaldev.jaxrs.model.Response;

@Path("/person")
@Consumes(MediaType.APPLICATION_XML)
@Produces(MediaType.APPLICATION_XML)
public class PersonServiceImpl implements PersonService {

	private static Map<Integer,Person> persons = new HashMap<Integer,Person>();

	@Override
	@POST
    @Path("/add")
	public Response addPerson(Person p) {
		Response response = new Response();
		if(persons.get(p.getId()) != null){
			response.setStatus(false);
			response.setMessage("Person Already Exists");
			return response;
		}
		persons.put(p.getId(), p);
		response.setStatus(true);
		response.setMessage("Person created successfully");
		return response;
	}

	@Override
	@GET
    @Path("/{id}/delete")
	public Response deletePerson(@PathParam("id") int id) {
		Response response = new Response();
		if(persons.get(id) == null){
			response.setStatus(false);
			response.setMessage("Person Doesn't Exists");
			return response;
		}
		persons.remove(id);
		response.setStatus(true);
		response.setMessage("Person deleted successfully");
		return response;
	}

	@Override
	@GET
	@Path("/{id}/get")
	public Person getPerson(@PathParam("id") int id) {
		return persons.get(id);
	}

	@GET
	@Path("/{id}/getDummy")
	public Person getDummyPerson(@PathParam("id") int id) {
		Person p = new Person();
		p.setAge(99);
		p.setName("Dummy");
		p.setId(id);
		return p;
	}

	@Override
	@GET
	@Path("/getAll")
	public Person[] getAllPersons() {
		Set<Integer> ids = persons.keySet();
		Person[] p = new Person[ids.size()];
		int i=0;
		for(Integer id : ids){
			p[i] = persons.get(id);
			i++;
		}
		return p;
	}

}
大部分代码都是不言自明的,花一些时间熟悉 JAX-RS 注释@Path, @PathParam, @POST, @GET, @Consumes and @Produces.
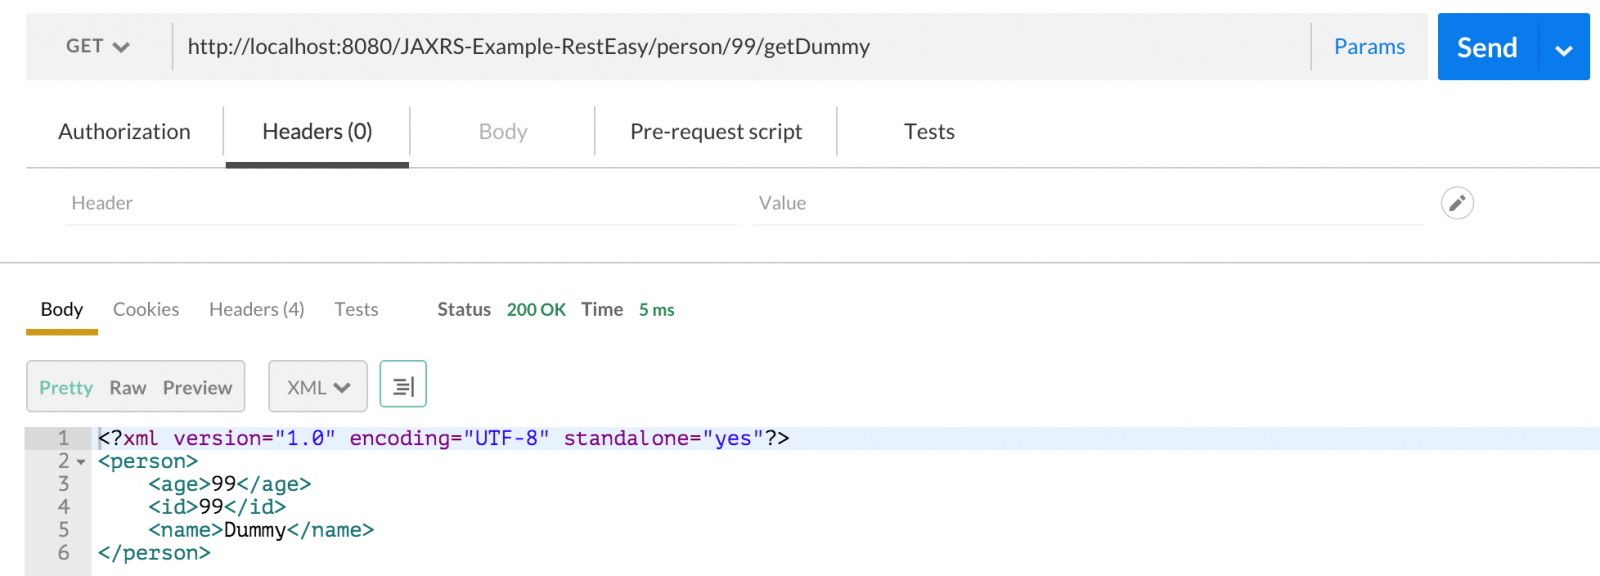
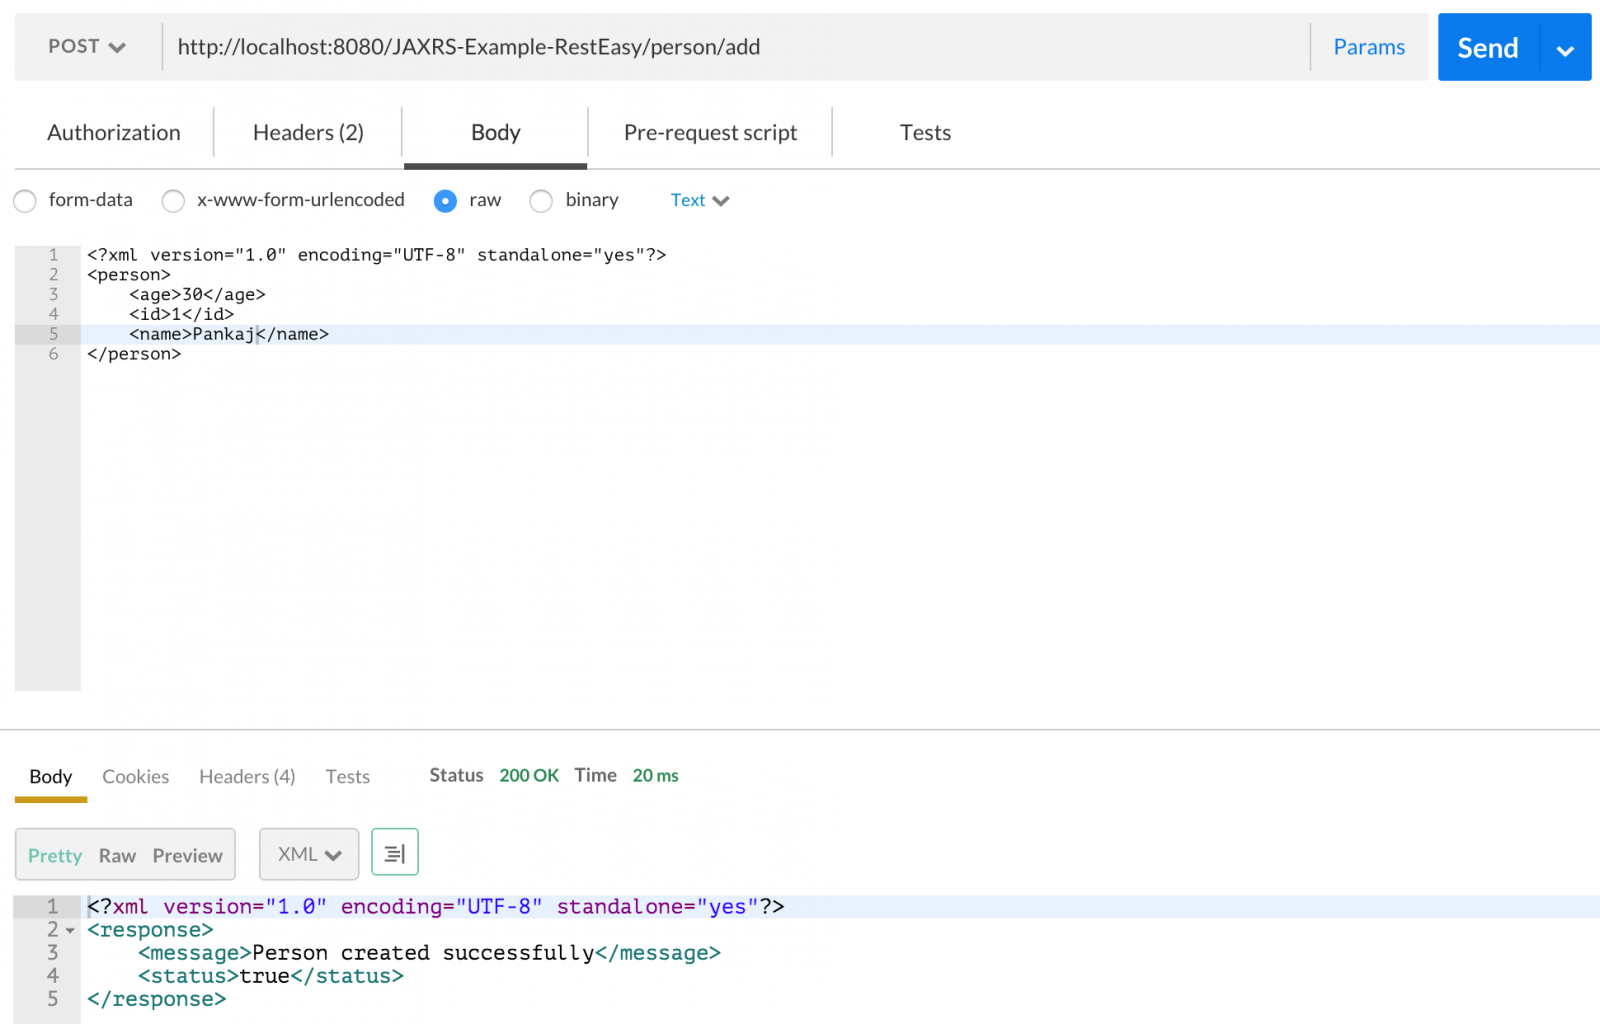
That’s it. Our web service is ready, just export it as WAR file and put it inside Tomcat webapps directory or deploy into any other container of your choice. Below are some of the tests performed using Postman chrome extension for this web service. Note that we have to provide Accept and Content-Type values as “application/xml” in request header as shown in below image. 
-
getDummy

-
add

-
get

-
getAll

-
delete

这就是使用 Jersey JAX-RS 实现创建 Web 服务的全部内容。正如您所看到的,大部分代码都使用 JAX-RS 注释,并且 Jersey 是通过部署描述符和依赖项插入的。
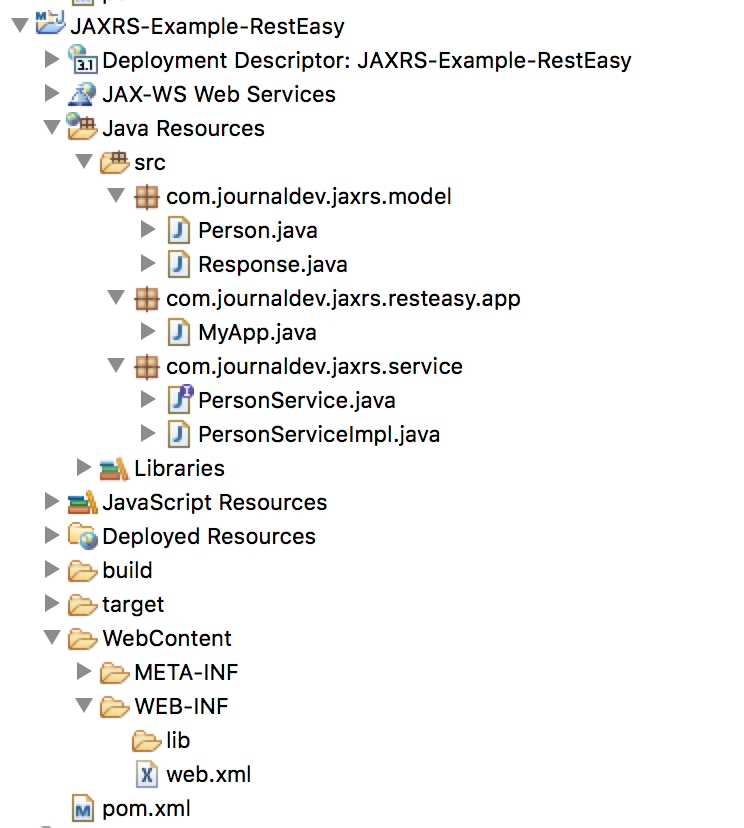
We will use all the business logic developed in Jersey project, but rather than making changes to the same project, I have created a new project. Create a dynamic web project and convert it to Maven project. Then copy all the java classes - Person, Response, PersonService and PersonServiceImpl. Below is the final project after we are done with all the changes.  Add below RESTEasy dependencies in pom.xml file.
<dependency>
	<groupId>org.jboss.resteasy</groupId>
	<artifactId>resteasy-jaxrs</artifactId>
	<version>3.0.13.Final</version>
</dependency>
<dependency>
	<groupId>org.jboss.resteasy</groupId>
	<artifactId>resteasy-jaxb-provider</artifactId>
	<version>3.0.13.Final</version>
</dependency>
下面是我们在其中配置 Resteasy servlet 的 web.xml 文件。
<?xml version="1.0" encoding="UTF-8"?>
<web-app xmlns:xsi="https://www.w3.org/2001/XMLSchema-instance" xmlns="https://xmlns.jcp.org/xml/ns/javaee" xsi:schemaLocation="https://xmlns.jcp.org/xml/ns/javaee https://xmlns.jcp.org/xml/ns/javaee/web-app_3_1.xsd" id="WebApp_ID" version="3.1">
  <display-name>JAXRS-Example-RestEasy</display-name>

    <listener>
      <listener-class>
         org.jboss.resteasy.plugins.server.servlet.ResteasyBootstrap
      </listener-class>
   	</listener>

    <servlet>
        <servlet-name>resteasy-servlet</servlet-name>
        <servlet-class>
            org.jboss.resteasy.plugins.server.servlet.HttpServletDispatcher
        </servlet-class>
        <init-param>
        <param-name>javax.ws.rs.Application</param-name>
        <param-value>com.journaldev.jaxrs.resteasy.app.MyApp</param-value>
    </init-param>
    </servlet>

    <servlet-mapping>
        <servlet-name>resteasy-servlet</servlet-name>
        <url-pattern>/*</url-pattern>
    </servlet-mapping>

</web-app>
注意提供的 init-paramMyApp类作为值,这里我们扩展javax.ws.rs.core.Application类如下图所示。
package com.journaldev.jaxrs.resteasy.app;

import java.util.HashSet;
import java.util.Set;

import javax.ws.rs.core.Application;

import com.journaldev.jaxrs.service.PersonServiceImpl;

public class MyApp extends Application {

	private Set<Object> singletons = new HashSet<Object>();

	public MyApp() {
		singletons.add(new PersonServiceImpl());
	}

	@Override
	public Set<Object> getSingletons() {
		return singletons;
	}

}
就是这样。我们的 Web 服务已准备好实施 RESTEasy JAX-RS。以下是 Postman chrome 扩展测试的一些输出。
这就是全部Restful Web 服务教程,我希望您了解 JAX-RS 注释并了解标准 API 的好处,它可以帮助我们轻松重用代码并从 Jersey 迁移到 RESTEasy。