一,安装cunit
1.1下载cunit
https:// sourceforge .NET / projects / cunit
下载最新安装包
1.2解压缩安装包
root@Ubuntu1610:/# tar jxvf CUnit-2.1-3.tar.bz2
1.3进入解压后的文件夹
/*修改名称*/
Mv CUnit-2.1-3 CUnit
/*进入文件夹*/
cd CUnit
1.4执行make,分别执行以下命令
root@Ubuntu1610:/usr/local/include/CUnit# aclocal

root@Ubuntu1610:/usr/local/include/CUnit# autoheader

root@Ubuntu1610:/usr/local/include/CUnit# autoconf

root@Ubuntu1610:/usr/local/include/CUnit# automake
如果在automake的过程中有文件丢失,则执行下面命令:
root@Ubuntu1610:/usr/local/include/CUnit# automake --add-missing
再次执行的automake
如果出现错误:configure.in:161:找不到所需文件'./ltmain.sh',则执行下面的命令:
root@Ubuntu1610:/usr/local/include/CUnit# libtoolize --automake --copy --debug --force
执行完上述步骤以后,查看是否生成了配置,如果有,则执行:
root@Ubuntu1610:/usr/local/include/CUnit# ./configure
执行完上述步骤以后,查看是否生成了Makefile文件,如果有,则执行:
root@Ubuntu1610:/usr/local/include/CUnit# make
安装编译出的库:
root@Ubuntu1610:/usr/local/include/CUnit# sudo make install
查看是否已经安装成功:
root@Ubuntu1610:/usr/local/include/CUnit# ls /usr/local/lib/libcunit.so

二,cunit测试实例
2.1设置cunit 的头文件和库文件

这个需要根据个人安装地址进行配置,等会需要放到Makefile文件里
2.2配置测试文件
文件架构
root@Ubuntu1610:~/.jenkins/workspace/14sDemo-Cunit/cunit-test# tree

.

├── cal.c    --被测文件

├── cal.h    --被测文件头文件

├── Makefile

├── test.c   --测试文件

└── testcal.c –测试运行文件


0 directories, 5 files
代码:
cal.h
root@Ubuntu1610:~/.jenkins/workspace/14sDemo-Cunit/cunit-test# cat cal.h


int add(int a, int b );

int minus( int a, int b);
cal.c
root@Ubuntu1610:~/.jenkins/workspace/14sDemo-Cunit/cunit-test# cat cal.c

#include"cal.h"


int add(int a, int b ){

        return a + b;

}


int minus( int a, int b){

        return a - b;

}
testcal.c
root@Ubuntu1610:~/.jenkins/workspace/14sDemo-Cunit/cunit-test# cat testcal.c

#include <stdio.h>

#include <assert.h>

#include <CUnit/Console.h>

#include "cal.h"


int InitSuite()

{

        return 0;

}


int EndSuite()

{

        return 0;

}


void TestAdd()

{

//      CU_ASSERT(test_add(3, 4, 7));

  int result = add(3, 5);

  int real = 7;

        CU_ASSERT_EQUAL(result,real);

}


void TestMinus()

{

  //    CU_ASSERT(test_minus(4, 5, -1));

  int result = minus(3, 4);

  int real = -1;

        CU_ASSERT_EQUAL(result,real);

}


/*0 表示成功,1表示失败*/

int AddTestCalModule()

{

        CU_pSuite pSuite = NULL;


        /***************

        * 1. CU_add_suite 增加一个Suite

        * 2. Suite名字 : testSuite

        * 3. InitSuite EndSuite:分别是测试单元初始和释放函数,如不需要则NULL传递

        ****************/

        pSuite = CU_add_suite("cal模块", InitSuite, EndSuite);


        //检测注册Suite情况

        if(NULL == pSuite)

        {

                //return 1;

        }


        /***************

        * 1. 注册当前Suite下的测试用例

        * 2. pSuite:用例指针

        * 3. "Test1": 测试单元名称

        * 4. Test1:测试函数

        ***************/

        if( NULL == CU_add_test(pSuite, "testadd()", TestAdd) ||

                NULL == CU_add_test(pSuite, "testminus()", TestMinus))

        {

                return 1;

        }


        /***另外一种测试方式***************/

        /*

        CU_TestInfo testcases[] = {

        {"Test1:", Test1},

        {"Test2:", Test2},

        CU_TEST_INFO_NULL

        };


        CU_SuiteInfo suites[] = {

                {"Testing the function cal_num:", InitSuite, EndSuite, testcases},

        CU_SUITE_INFO_NULL

        };


        if(CUE_SUCCESS != CU_register_suites(suites))

        {

                return 1;

        }

        */

        /************************************/


        return 0;

}
test.c的
root@Ubuntu1610:~/.jenkins/workspace/14sDemo-Cunit/cunit-test# cat test.c
#include <stdio.h>
#include <assert.h>
#include <CUnit/Console.h>
#include "CUnit/Basic.h"
extern int AddTestCalModule();
int main()
{
//CU_initialize_registry עE_ϵ
if( CUE_SUCCESS != CU_initialize_registry())
{
return CU_get_error();
}
//CU_get_registry עָ
assert(NULL != CU_get_registry());
//
assert(!CU_is_test_running());
//ģ
printf("%d",AddTestCalModule());
// if (0 != AddTestCalModule())
// {
// CU_cleanup_registry();
// return CU_get_error();
// }
//ʹnsole
//CU_console_run_tests();
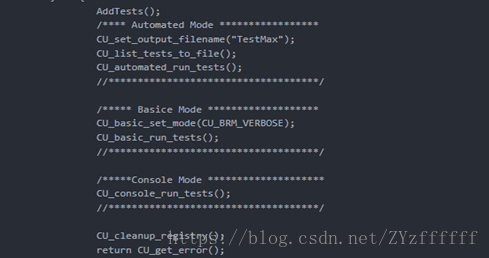
/***ʹLʽ********/
//CU_set_output_filename("TestMax");
// CU_list_tests_to_file();
//CU_automated_run_tests();
CU_basic_set_mode(CU_BRM_VERBOSE);
CU_basic_run_tests();
//עϢ
CU_cleanup_registry();
return 0;
}
Makefile文件
root@Ubuntu1610:~/.jenkins/workspace/14sDemo-Cunit/cunit-test# cat Makefile

INC=-I/usr/local/include/CUnit

LIB=-L/usr/local/lib/

#gcc -o test $(INC) $(LIB)  $^ -lcunit *.c

#gcc -o test -I /usr/include/CUnit/ -L /usr/lib64/ -lcunit *.c

all: cal.c testcal.c test.c

        gcc $^ -o hello $(INC) $(LIB) -lcunit

clean:

        rm -rf hello
2.3运行
root@Ubuntu1610:~/.jenkins/workspace/14sDemo-Cunit/cunit-test# make

gcc cal.c testcal.c test.c -o hello -I/usr/local/include/CUnit -L/usr/local/lib/ -lcunit
生成你好文件
root@Ubuntu1610:~/.jenkins/workspace/14sDemo-Cunit/cunit-test# ls

cal.c  cal.h  hello  Makefile  test.c  testcal.c
运行招呼文件,结果:
root@Ubuntu1610:~/.jenkins/workspace/14sDemo-Cunit/cunit-test# ./hello


     CUnit - A unit testing framework for C - Version 2.1-3

     http://cunit.sourceforge.net/

Suite: cal模块

  Test: testadd() ...FAILED

    1. testcal.c:22  - CU_ASSERT_EQUAL(result,real)

  Test: testminus() ...passed


Run Summary:    Type  Total    Ran Passed Failed Inactive

              suites      1      1    n/a      0        0

               tests      2      2      1      1        0

             asserts      2      2      1      1      n/a

Elapsed time =    0.000 seconds

2.4 cunit详解
(1)CUNIT 的架构
按官方文档说明,使用Cunit的主要步骤有:
1) Write functions for tests (and suite init/cleanup if necessary).
2) Initialize the test registry - CU_initialize_registry()
3) Add suites to the test registry - CU_add_suite()
4) Add tests to the suites - CU_add_test()
5) Run tests using an appropriate interface, e.g. CU_console_run_tests
6) Cleanup the test registry - CU_cleanup_registry
(2)测试模式
下面是四种测试模式:
1 Automated Output to xml file Non-interactive
2 Basic Flexible programming interface Non-interactive
3 Console Console interface (ansi C) Interactive
4 Curses Graphical interface (Unix) Interactive
第一种模式是将结果输出到XML文档中,便于生成报告。第二种模式是每一次运行结束之后在standard output中显示测试结果,不能保留测试结果数据。第三种模式是console方式的,可以人机交互;前两种模式是非交互式的。第四种只在Unix中使用。
(3)测试的基本流程
1)编写单元测试函数(有必要的话要写套件的init / cleanup函数)。用于测试的函数(如有必要,还可以进行套件初始化/清理)。
2)调用函数CU_initialize_registry()初始化测试注册单元(Test Registry)。初始化测试注册表 - CU_initialize_registry()
3)调用函数CU_add_suite()将测试包(套件)添加到测试注册单元(Test Registry)中。添加套件到测试注册表 - CU_add_suite()
4)调用函数CU_add_test()将测试用例添加到测试包(套件)中。添加测试到套件 - CU_add_test()
5)使用合适的接口来运行测试用例。运行测试使用一个合适的接口,例如CU_console_run_tests
6)调用函数CU_cleanup_registry清除测试注册单元(Test Registry)。清理测试注册表 - CU_cleanup_registry()
测试模式: