今天这个网页,其实用以前的基本方法也可以做出来。在这里主要是用到了CSS3的新特性font-face以及fontawesome的应用。
HTML部分
这一部分的主要框架如下图:
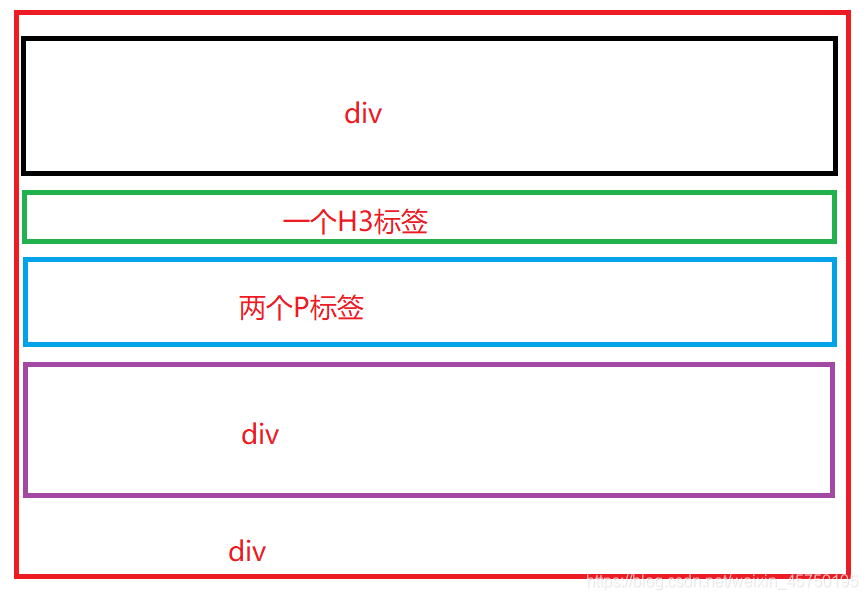
黑色的div里面存放的是英文。h3和p标记存放的相应的文字。紫色的div里面是存放的图标和文字,这里的图标不是插入的图片。是使用fontawesome完成的。通过设置边距来实现了四个图标的分布效果。
下面是代码:
<!DOCTYPE html>
<html>
 <head>
  <meta charset="utf-8">
  <title>软文推广页面</title>
  <link rel="stylesheet" href="index.css">
  <link rel="stylesheet" href="css/font-awesome.min.css">
 </head>
 <body>
   <div class=bg>
    <div class="text1"><strong>One World,Any Device</strong></div>
    <h3 align="center">万物互联,极致体验</h3><br>
    <P>【HTML5】全面兼容移动设备</P>
    <p>原生应用指日可待,传智播客重新定义前端开发</p>
    <div style="padding-top: 70px;">
     <div>
      <i class="fa fa-apple" style="font-size: 50px;margin-left: 12%;color: white;"></i>
      <i class="fa fa-weixin" style="font-size: 50px;margin-left: 20%;color: white;"></i>
      <i class="fa fa-television" style="font-size: 50px;margin-left: 20%;color: white;"></i>
      <i class="fa fa-laptop" style="font-size: 50px;margin-left: 20%;color: white;"></i>
     </div>
     <div>
      <h5 style="margin-left: 11%;">原生移动APP</h5>
      <h5 style="margin-left: 16%;">开发微信公共平台升级</h5>
      <h5 style="margin-left: 17%;">网站的开发</h5>
      <h5 style="margin-left: 19%;">桌面应用开发</h5>
     </div>
    </div>
   </div>
 </body>
</html>
CSS部分
- font-face属性的使用方法
- font-family是设置你的网页字体的名字,比如我在下面的代码中设置名为first。
- src是设置你的字体的路径。
- 再下面的属性是设置一些基本样式。
设置完成后,在对应的选择器内通过font-family:<你的字体名>来实现。例如我的网页字体名为first,然后我需要在我的text1类中去实现这个效果,那么我就在text1中写上font-family:first; 然后就实现了我需要的样式。
- 基本格式:
@font-face{
	font-family:<YourWebFont>;
	src:url(),url()…;
	font-weight:样式;
}
这一部分中链入的font-awesome样式表中设置的属性就不详细说明了,就只要掌握它的用法就行了。其中index.css设置里页面的显示样式。bg类是设置里外层div的背景以及宽高;text1类是设置了英文的字体、字号以及它的位置等,其中用到的font-face属性在上面已经进行了说明;H5是实现图标下面的小字处于同一行;通用选择器实现的是设置所有元素为白色。
.bg{
 width: 100%;
 height: 600px;
 background: url(bg.jpg) no-repeat;
 background-size: contain;
}
.text1{
 padding-top: 90px;
 font-family:first;
 font-size: 100px;
 text-align: center;
}
@font-face {
 font-family:first;
 src: url(fonts/KUNSTLER.ttf),
   url(fonts/ITCEDSCR.ttf);
 font-weight: bolder;
}
h5{display: inline;}
p{text-align: center;}
*{color: white;}
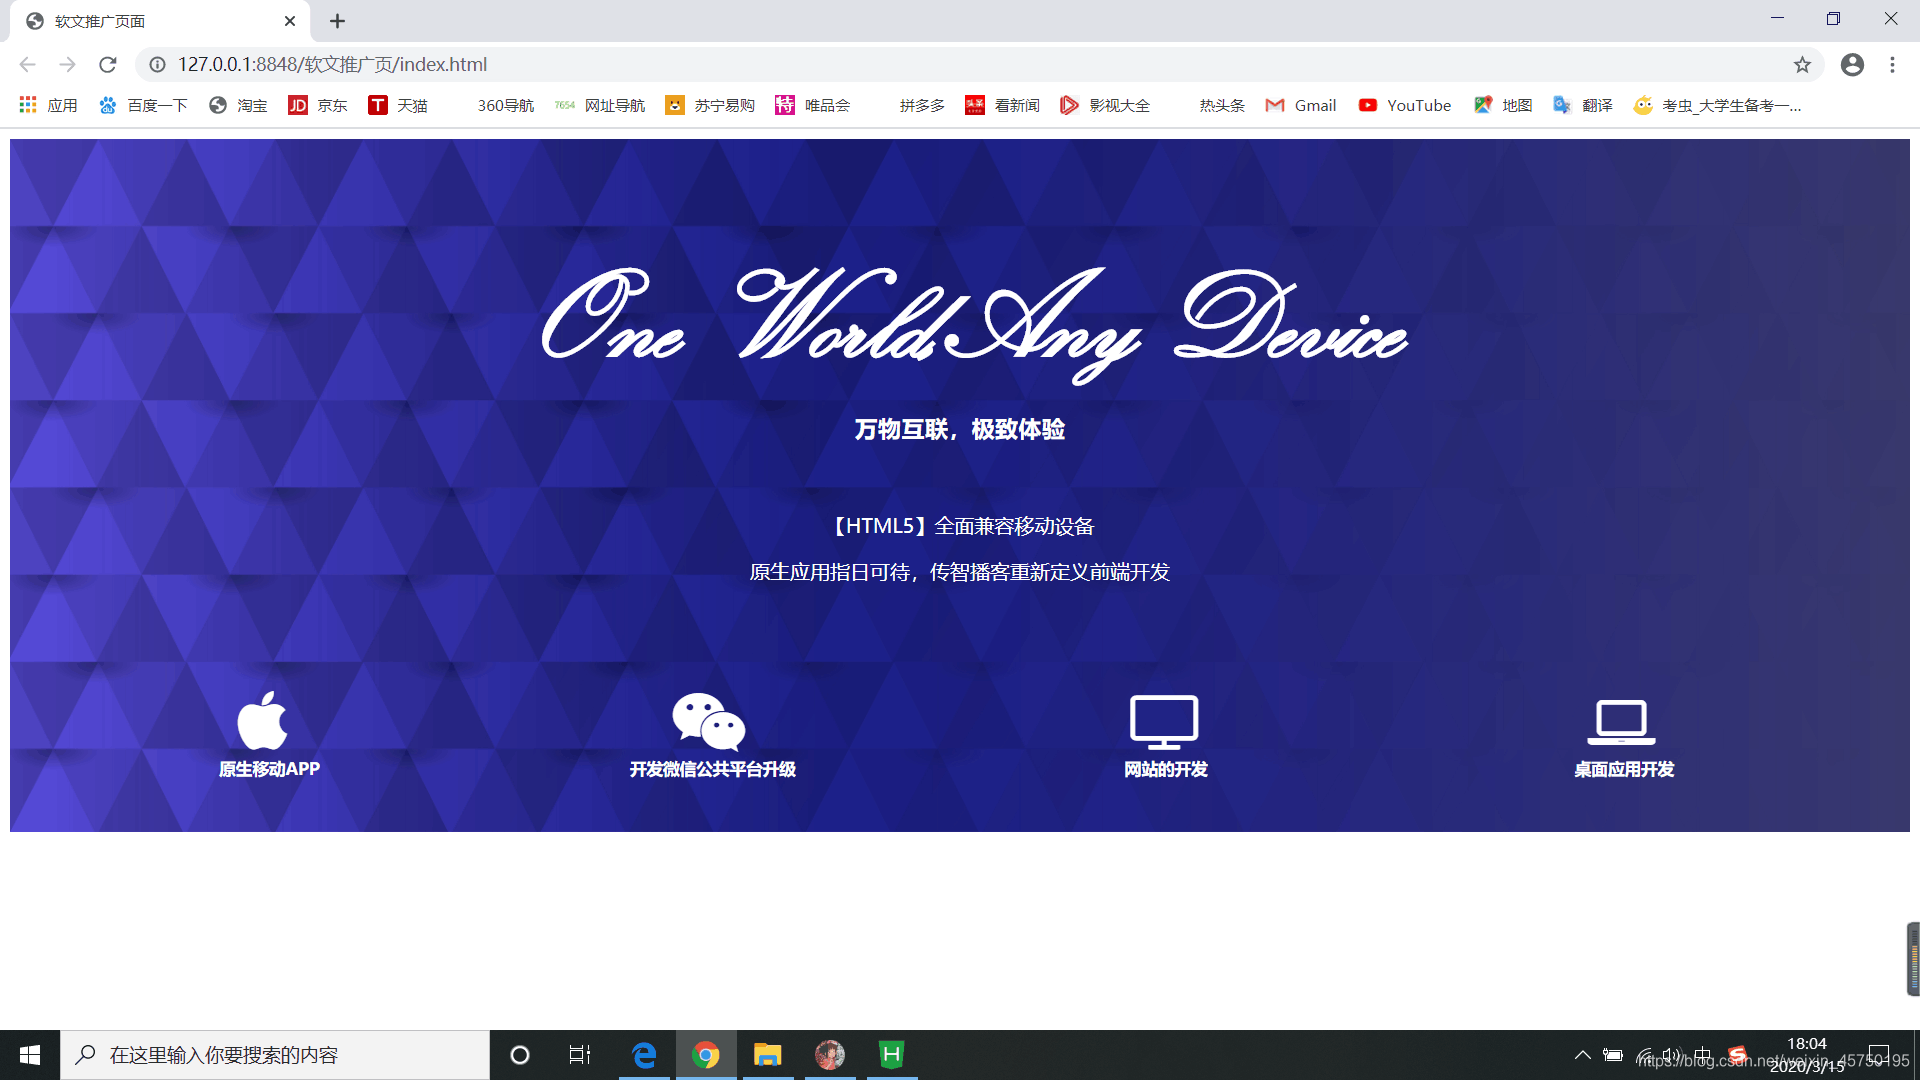
最后的效果图: