为了我们职责统一,可以把角色的操作单独放在一个包中,和pojo中的对应。
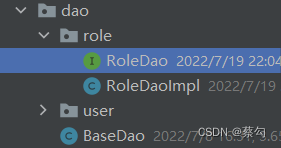
RoleDao(接口):
package com.Li.dao.role;

import com.Li.pojo.Role;

import java.sql.Connection;
import java.sql.SQLException;
import java.util.List;
//专职搞Role这一块。
public interface RoleDao {
    //获取角色列表
    public List<Role> getRoleList(Connection connection) throws SQLException;
}
RoleDaoImpl(实现类):
package com.Li.dao.role;

import com.Li.dao.BaseDao;
import com.Li.pojo.Role;

import java.sql.Connection;
import java.sql.PreparedStatement;
import java.sql.ResultSet;
import java.sql.SQLException;
import java.util.ArrayList;
import java.util.List;

public class RoleDaoImpl implements RoleDao{
    //获取角色列表
    public List<Role> getRoleList(Connection connection) throws SQLException {

        PreparedStatement pstm = null;
        ResultSet resultSet = null;
        ArrayList<Role> roleList = new ArrayList<Role>();

        if (connection!=null){
            String sql = "select * from smbms_role";
            Object[] params = {};
            resultSet = BaseDao.execute(connection, sql, params, resultSet, pstm);

            while (resultSet.next()){//从数据库中读出来.把所有角色读取,放在列表里面
                Role _role = new Role();
                _role.setId(resultSet.getInt("id"));
                _role.setRoleCode(resultSet.getString("roleCode"));
                _role.setRoleName(resultSet.getString("roleName"));
                roleList.add(_role);
            }
            BaseDao.closeResource(null, resultSet, pstm);
        }
        return roleList;

    }
}

之前没放进user包中,我这次自己建了一个包放了进去。
RoleService(接口):
package com.Li.service.role;

import com.Li.pojo.Role;

import java.sql.Connection;
import java.sql.SQLException;
import java.util.List;

public interface RoleService {
    //获取角色列表
    public List<Role> getRoleList();
}
RoleServiceImpl(实现类):
package com.Li.service.role;

import com.Li.dao.BaseDao;
import com.Li.dao.role.RoleDao;
import com.Li.dao.role.RoleDaoImpl;
import com.Li.pojo.Role;

import java.sql.Connection;
import java.sql.SQLException;
import java.util.List;

public class RoleServiceImpl implements RoleService{

    //先引入Dao.为了一开始进入这个java文件就加载下层的Dao。
    private RoleDao roleDao;
    public RoleServiceImpl() {
        roleDao = new RoleDaoImpl();
    }

    //得到用户的列表.并且返回
    public List<Role> getRoleList() {

        Connection connection = null;
        List<Role> roleList = null;

        try {
            connection = BaseDao.getConnection();//就这try里面这两句。其他的都是衍生的。
            roleList = roleDao.getRoleList(connection);//得到用户的列表
        } catch (SQLException throwables) {
            throwables.printStackTrace();
        } finally {
            BaseDao.closeResource(connection, null, null);
        }
        return roleList;
    }
}
接下来可以在service层的实现类进行测试:
@Test
    public void test(){
        RoleServiceImpl roleService = new RoleServiceImpl();
        List<Role> roleList = roleService.getRoleList();
        for (Role role : roleList) {
            System.out.println(role.getRoleName());
        }
    }
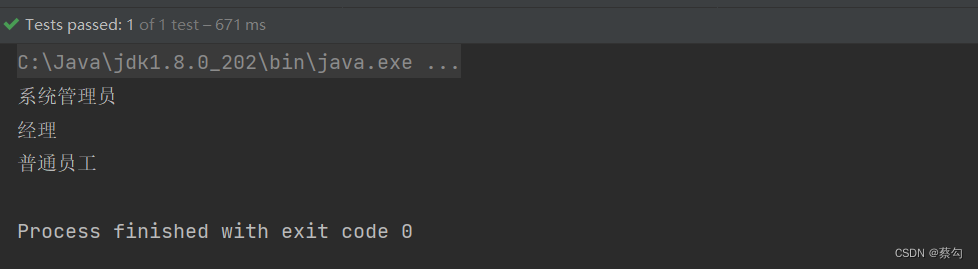
成功!
接下来就依据前端的代码开始写了。。。
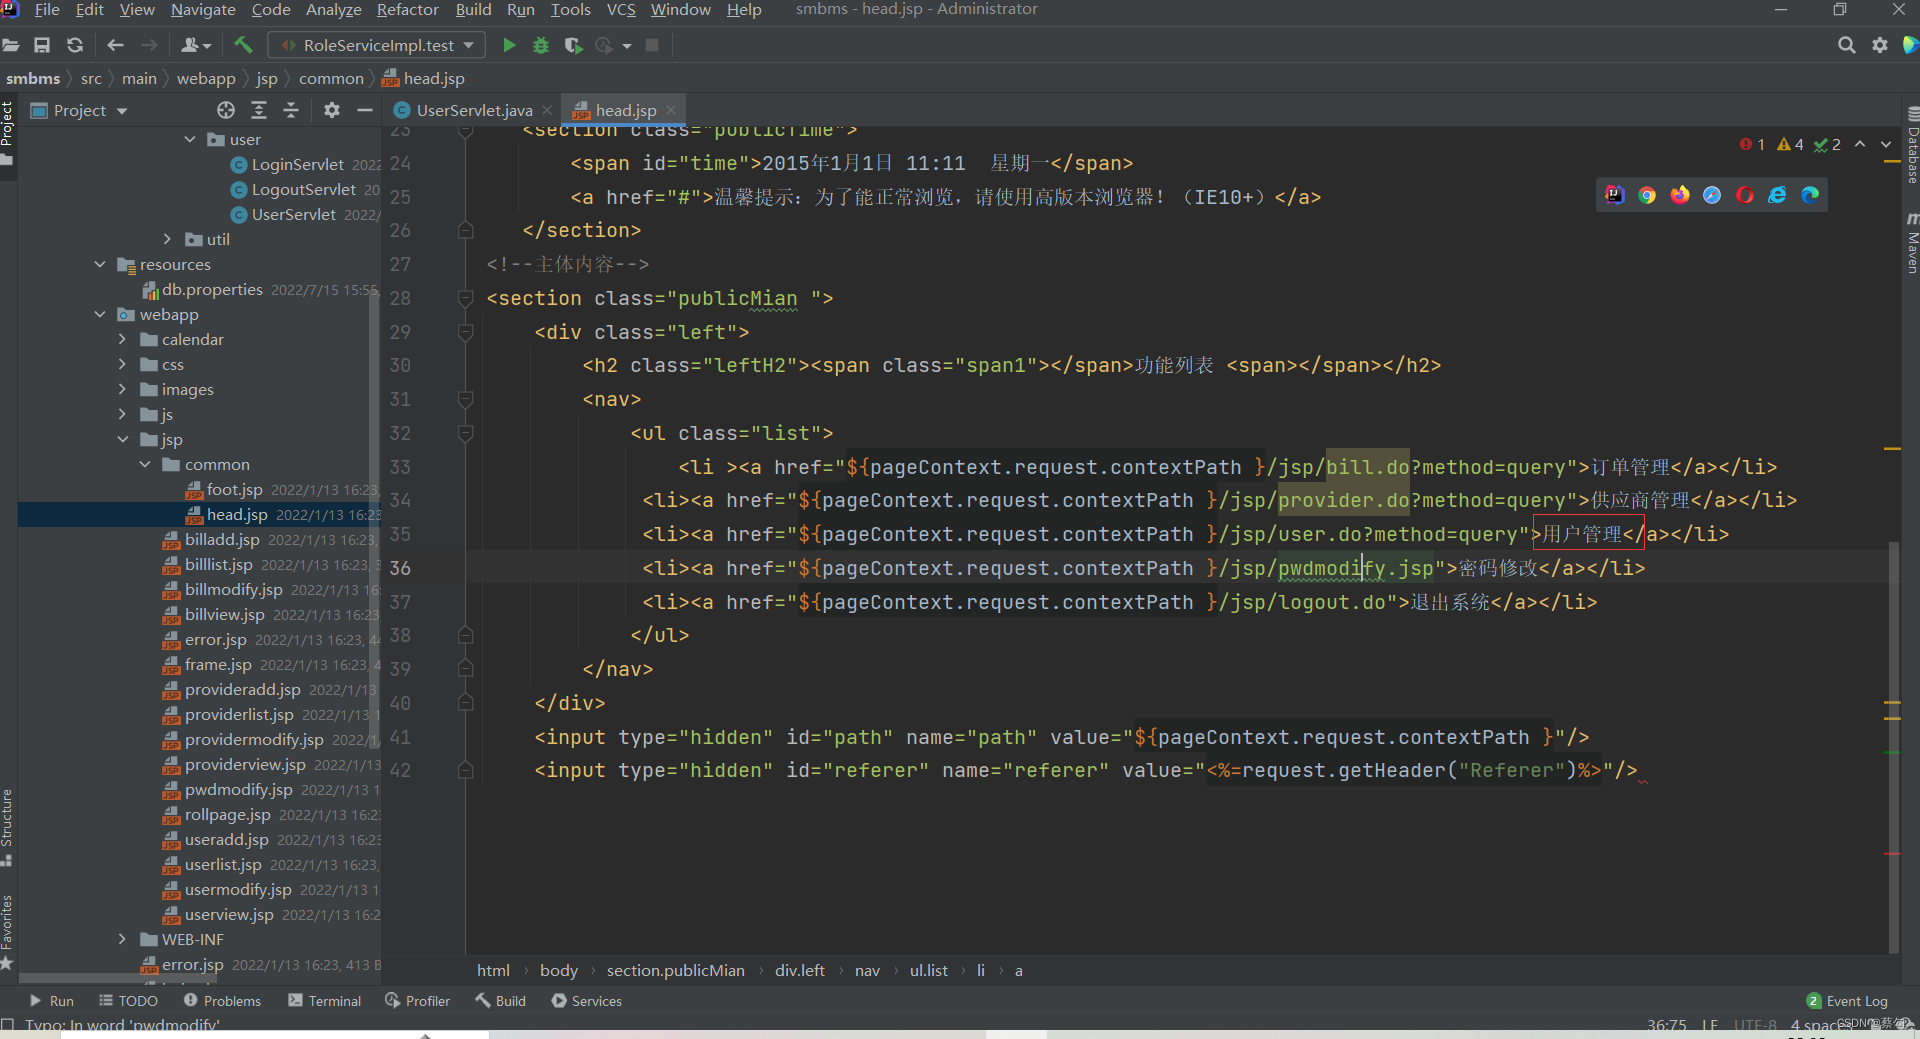
在servlet中:
 以上都是准备工作,可以和上一个博客内容放在一块。准备工作做完。下面才是重点!
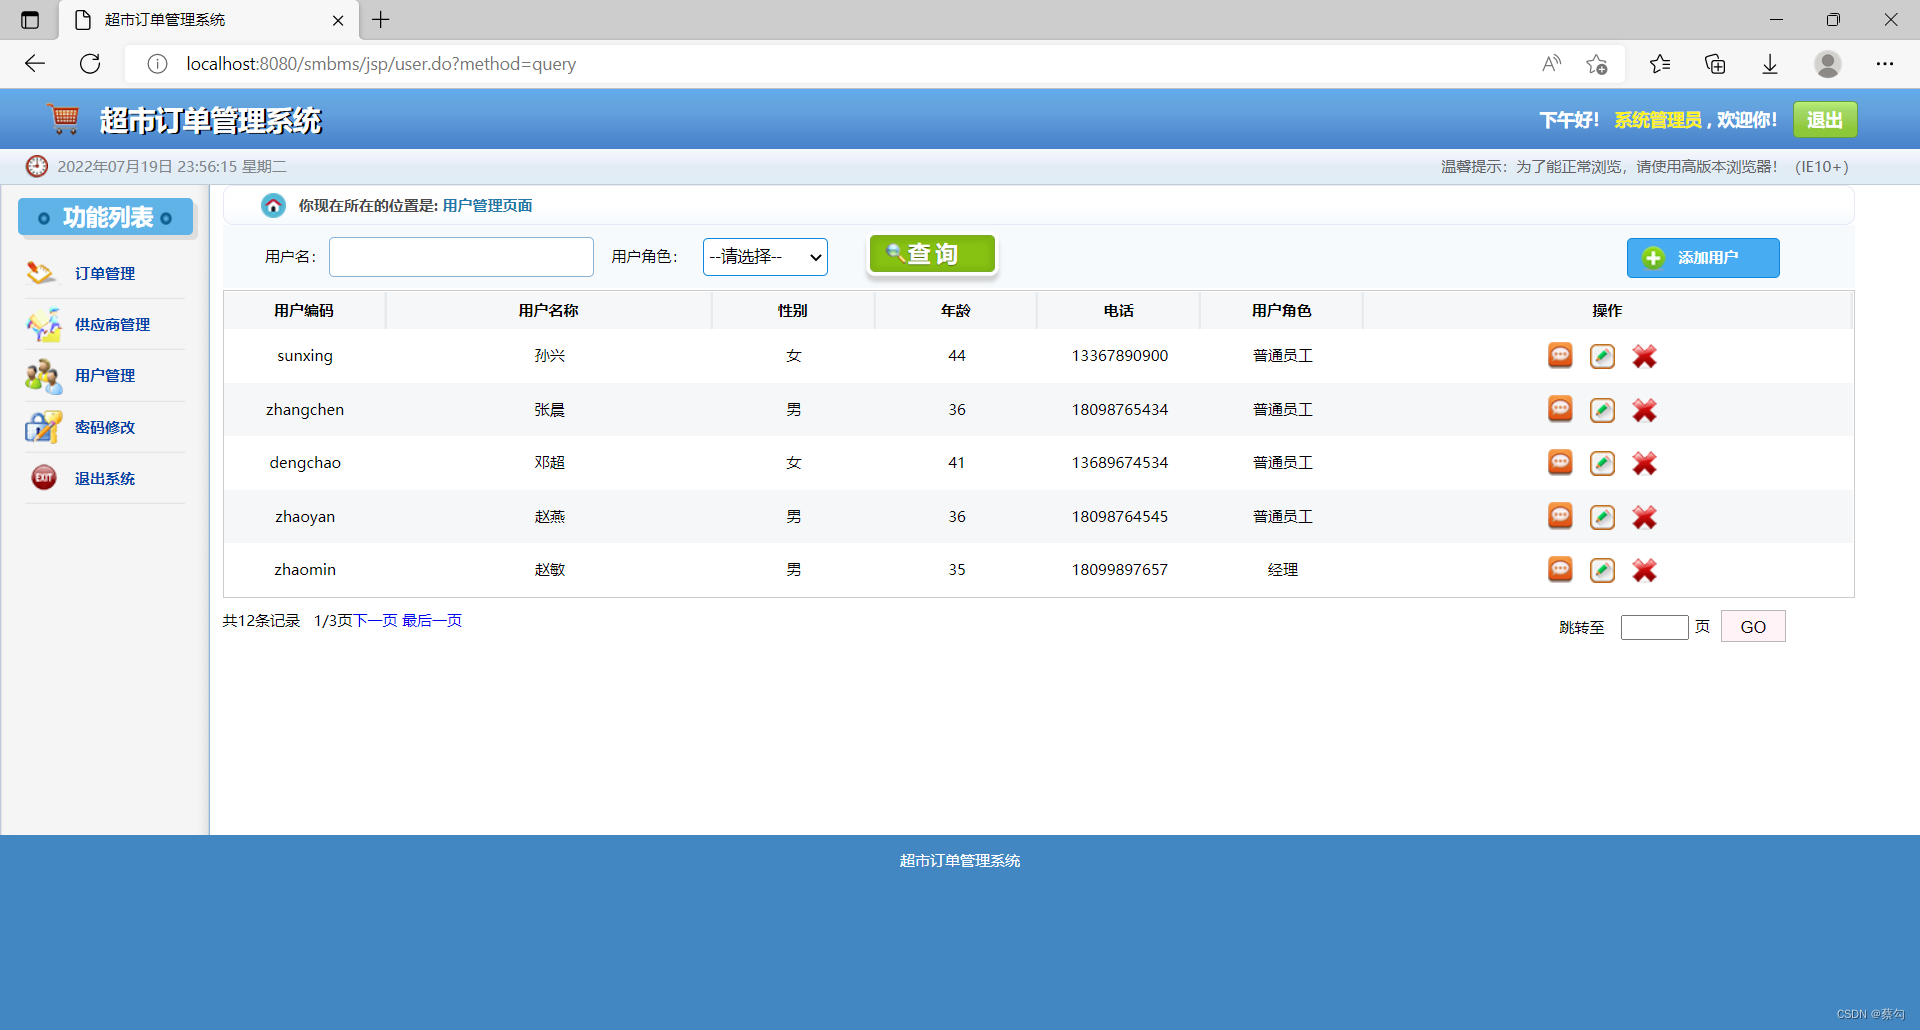
用户显示的servlet:
步骤:(都是由需求而创建的)
1.获取用户前端的数据(查询)
2.判断请求是否需要执行,看参数的值判断
3.为了实现分页,需要计算当前页面和总页面,页面的大小
4.用户列表展示
5.返回前端
新写的是query类。我把所有的类都粘了过来,不要介意。
package com.Li.servlet.user;
import com.Li.pojo.Role;
import com.Li.pojo.User;
import com.Li.service.role.RoleServiceImpl;
import com.Li.service.user.UserServiceImp1;
import com.Li.util.Constants;
import com.Li.util.PageSupport;
import com.alibaba.fastjson.JSONArray;
import com.mysql.cj.util.StringUtils;
import javax.servlet.ServletException;
import javax.servlet.http.HttpServlet;
import javax.servlet.http.HttpServletRequest;
import javax.servlet.http.HttpServletResponse;
import java.io.IOException;
import java.io.PrintWriter;
import java.util.HashMap;
import java.util.List;
import java.util.Map;
//实现servlet复用
//实现把前端的内容返回给后端。
public class UserServlet extends HttpServlet {
@Override
protected void doGet(HttpServletRequest req, HttpServletResponse resp) throws ServletException, IOException {
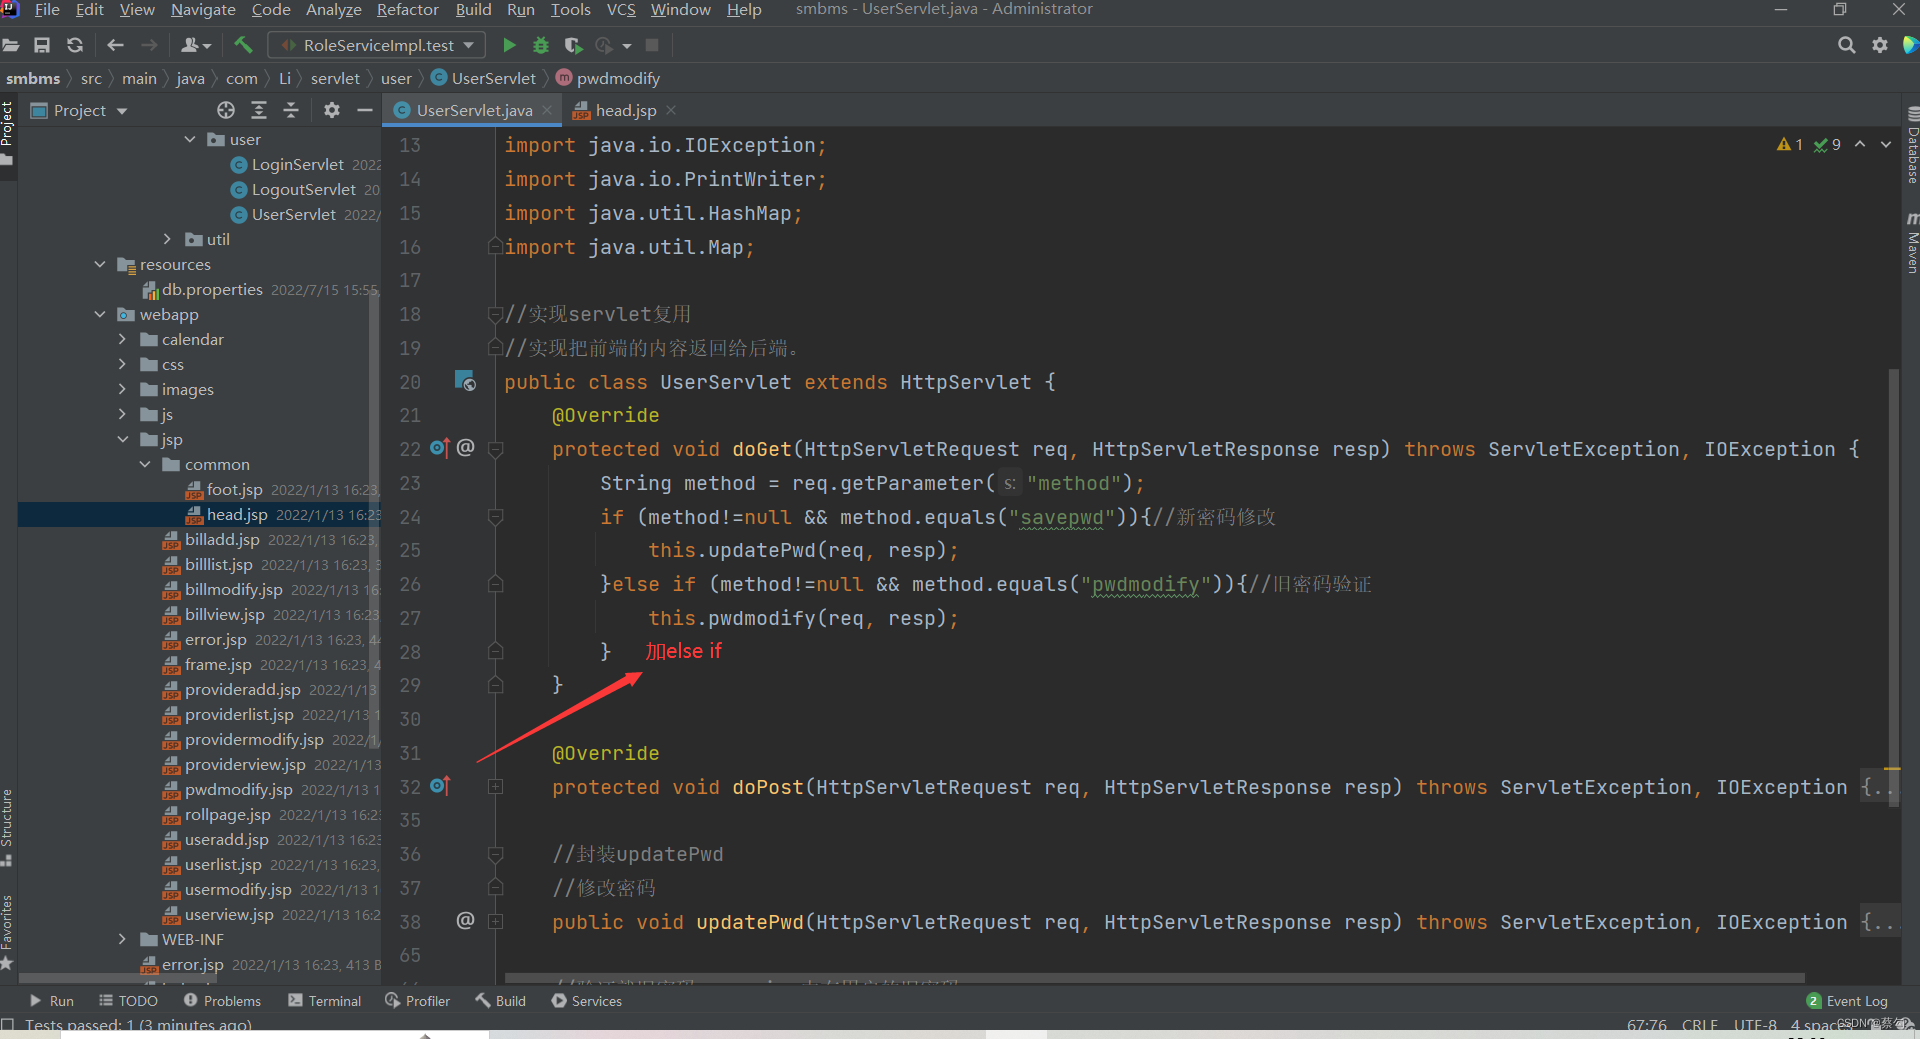
String method = req.getParameter("method");
if (method!=null && method.equals("savepwd")){//新密码修改
this.updatePwd(req, resp);
}else if (method!=null && method.equals("pwdmodify")){//旧密码验证
this.pwdmodify(req, resp);
}else if (method!=null && method.equals("query")){
this.query(req, resp);
}
}
@Override
protected void doPost(HttpServletRequest req, HttpServletResponse resp) throws ServletException, IOException {
doGet(req, resp);
}
//重难点!
public void query(HttpServletRequest req, HttpServletResponse resp) throws ServletException, IOException{
//查询用户列表
String queryUserName = req.getParameter("queryname");
String temp = req.getParameter("queryUserRole");
String pageIndex = req.getParameter("pageIndex");
int queryUserRole = 0;
//获取用户列表
UserServiceImp1 userService = new UserServiceImp1();
//第一次走这个请求,一定是第一页,页面大小固定
int pageSize = 5;//可以把这个写到配置文件中,方便后期的修改;
int currentPageNo = 1;
if (queryUserName==null){
queryUserName = "";
}
if (temp!=null && !temp.equals("")){
queryUserRole = Integer.parseInt(temp);//给查询先赋初值。0123等等。。。
}
if(pageIndex!=null){//解析前端传过来的数字。判断具体是第几页,对current进行赋值
currentPageNo = Integer.parseInt(pageIndex);
}
//获取用户的总数
int totalCount = userService.getUserCount(queryUserName, queryUserRole);
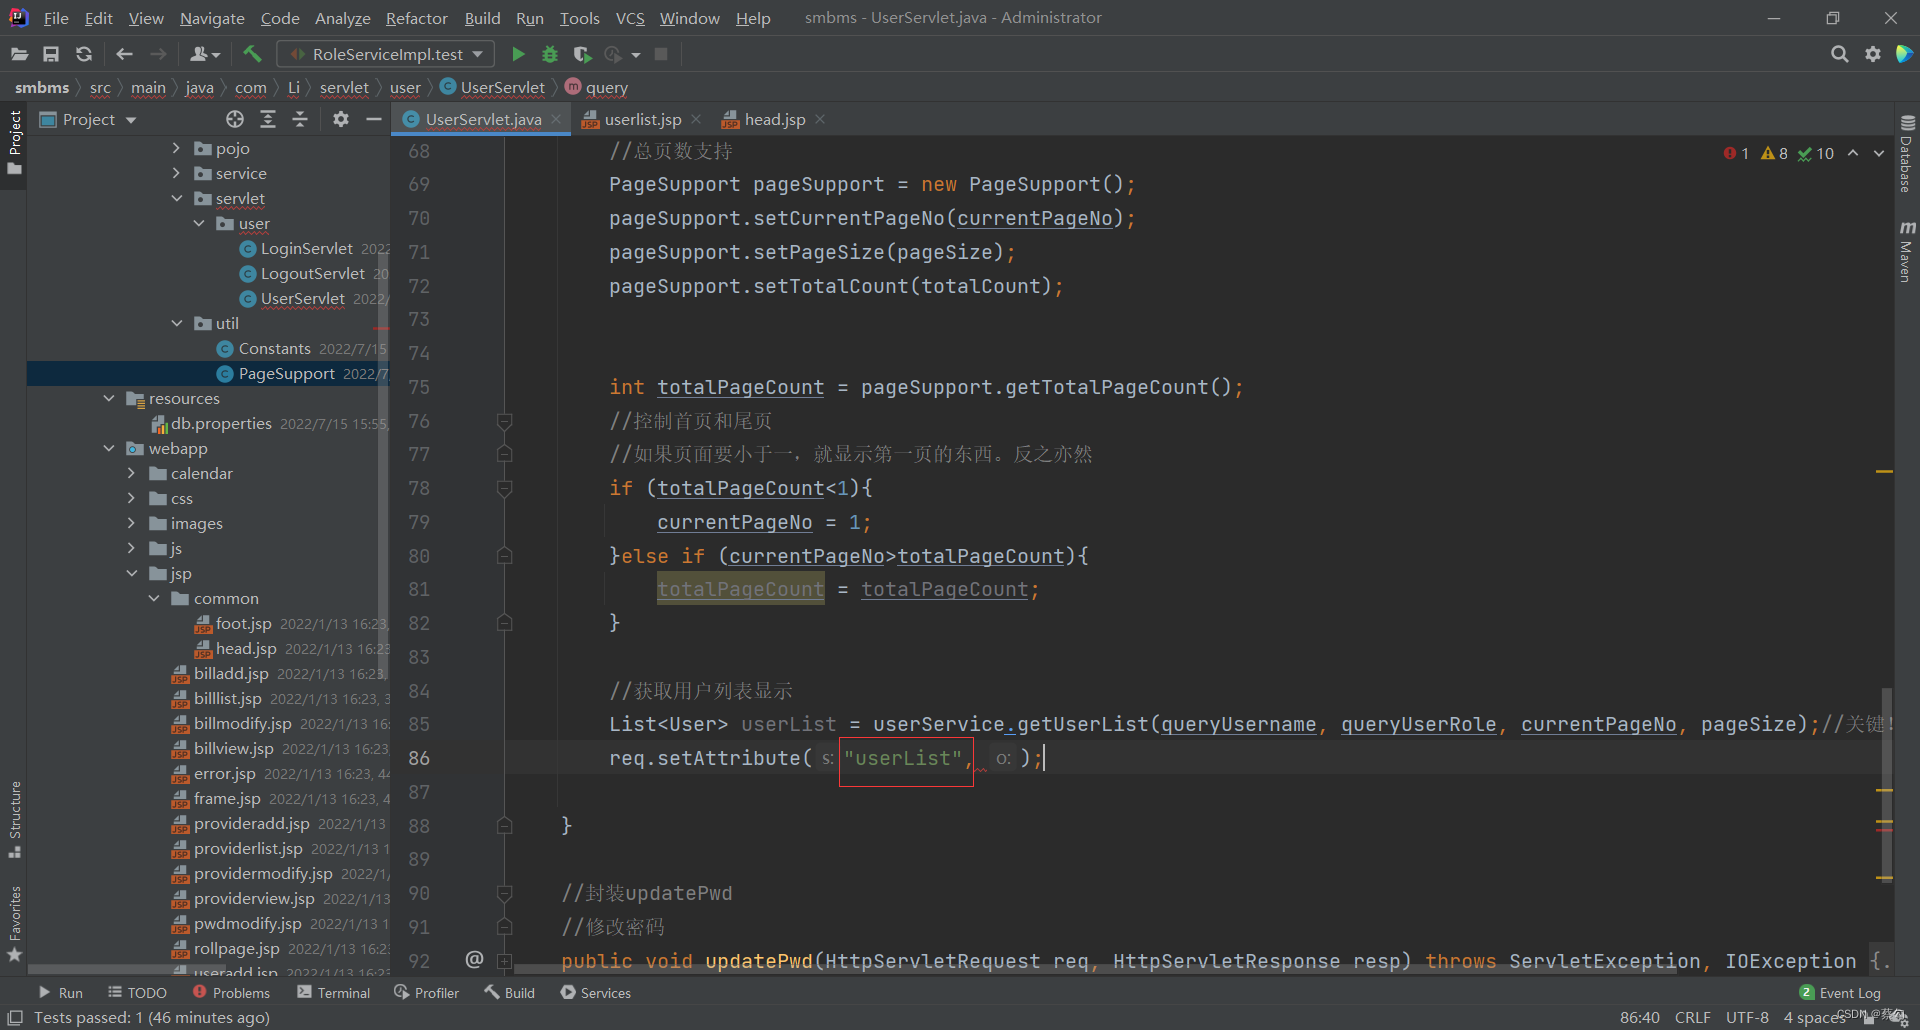
//总页数支持
PageSupport pageSupport = new PageSupport();
pageSupport.setCurrentPageNo(currentPageNo);
pageSupport.setPageSize(pageSize);
pageSupport.setTotalCount(totalCount);
int totalPageCount = ((int)totalCount/pageSize)+1;//这里是狂神的方式,建议自己升级一下
//控制首页和尾页
//如果页面要小于一,就显示第一页的东西。反之亦然
if (totalPageCount<1){
currentPageNo = 1;
}else if (currentPageNo>totalPageCount){
totalPageCount = totalPageCount;
}
//获取用户列表显示
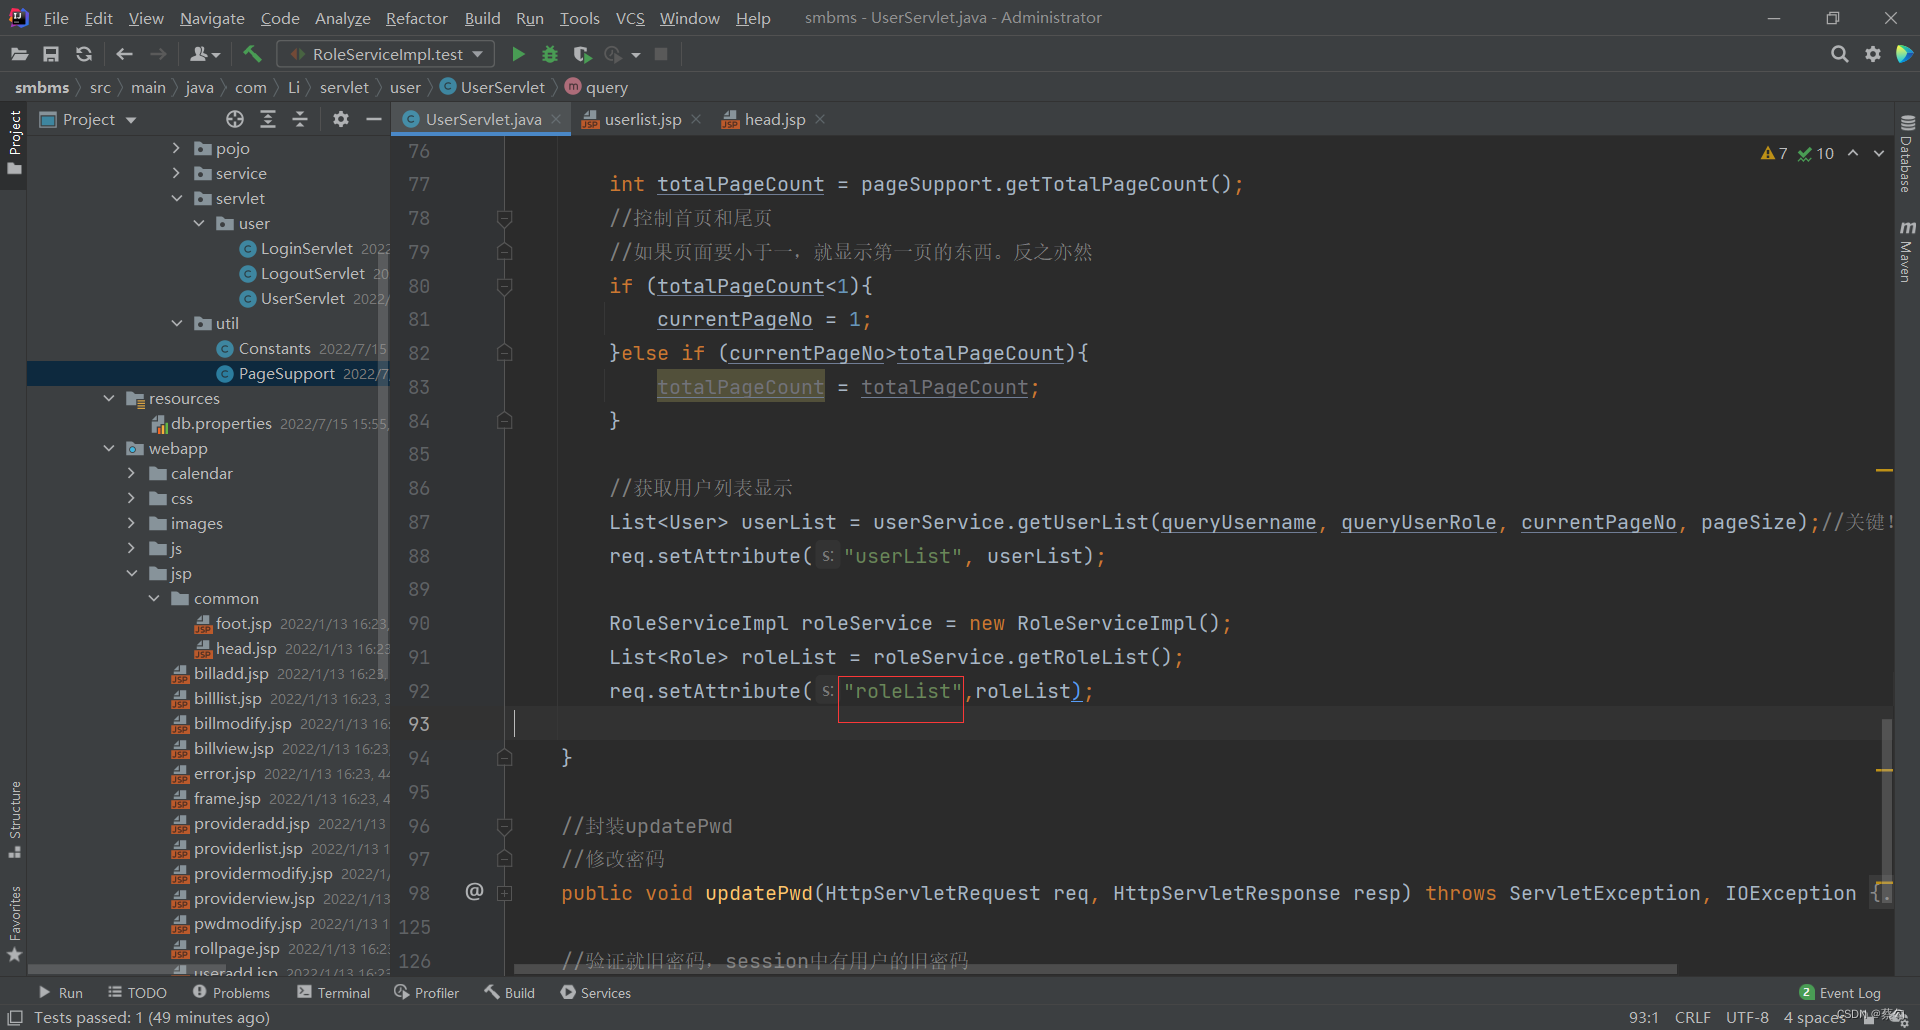
List<User> userList = userService.getUserList(queryUserName, queryUserRole, currentPageNo, pageSize);//关键!之前的都是铺垫。
req.setAttribute("userList", userList);
RoleServiceImpl roleService = new RoleServiceImpl();
List<Role> roleList = roleService.getRoleList();
req.setAttribute("roleList",roleList);
req.setAttribute("totalCount",totalCount);
req.setAttribute("currentPageNo",currentPageNo);
req.setAttribute("totalPageCount",totalPageCount);
req.setAttribute("queryUserName",queryUserName);
req.setAttribute("queryUserRole",queryUserRole);
//返回前端
req.getRequestDispatcher("userlist.jsp").forward(req, resp);
}
//封装updatePwd
//修改密码
public void updatePwd(HttpServletRequest req, HttpServletResponse resp) throws ServletException, IOException {
//从session中拿ID
Object o = req.getSession().getAttribute(Constants.USER_SESSION);
String newpassword = req.getParameter("newpassword");
boolean flag = false;
if (o!=null && newpassword!=null){
UserServiceImp1 userService = new UserServiceImp1();
flag = userService.updatePwd(((User) o).getId(), newpassword);//将o转为User并且获取代码
//如果27句成功。
if (flag){
req.setAttribute("message", "修改密码成功,请退出,使用新密码登录");
//密码修改成功。移除当前Session.之后由于过滤器,没有session之后就会跳转到错误页面
req.getSession().removeAttribute(Constants.USER_SESSION);
}else {
req.setAttribute("message", "密码修改失败。");
//密码修改失败。
}
}else {
req.setAttribute("message", "新密码有问题。");
}
req.getRequestDispatcher("pwdmodify.jsp").forward(req, resp);
}
//验证就旧密码,session中有用户的旧密码
public void pwdmodify(HttpServletRequest req, HttpServletResponse resp){
//从session中拿ID
Object o = req.getSession().getAttribute(Constants.USER_SESSION);
String oldpassword = req.getParameter("oldpassword");
//万能的Map : 结果集
Map<String, String> resultMap = new HashMap<String,String>();
if (o==null){//session失效了,session过期了
resultMap.put("result", "sessionerror");
}else if (StringUtils.isNullOrEmpty(oldpassword)){//输入的密码为空
resultMap.put("result","error");
}else {
String userPassword = ((User) o).getUserPassword();//session中用户的密码
if (oldpassword.equals(userPassword)){
resultMap.put("result","true");
}else {
resultMap.put("result","false");
}
}
try {
resp.setContentType("application/json");
PrintWriter writer = resp.getWriter();
//JSONArray 阿里巴巴的Json工具类,就是一个转换格式的。
/*
* resultMap = ["result","error","result","true"]
* Json格式 = {key,value}
* */
writer.write(JSONArray.toJSONString(resultMap));//就是把结果集编程json字符串传给前端。
writer.flush();
writer.close();
} catch (IOException e) {
e.printStackTrace();
}
}
}
里面的细节:
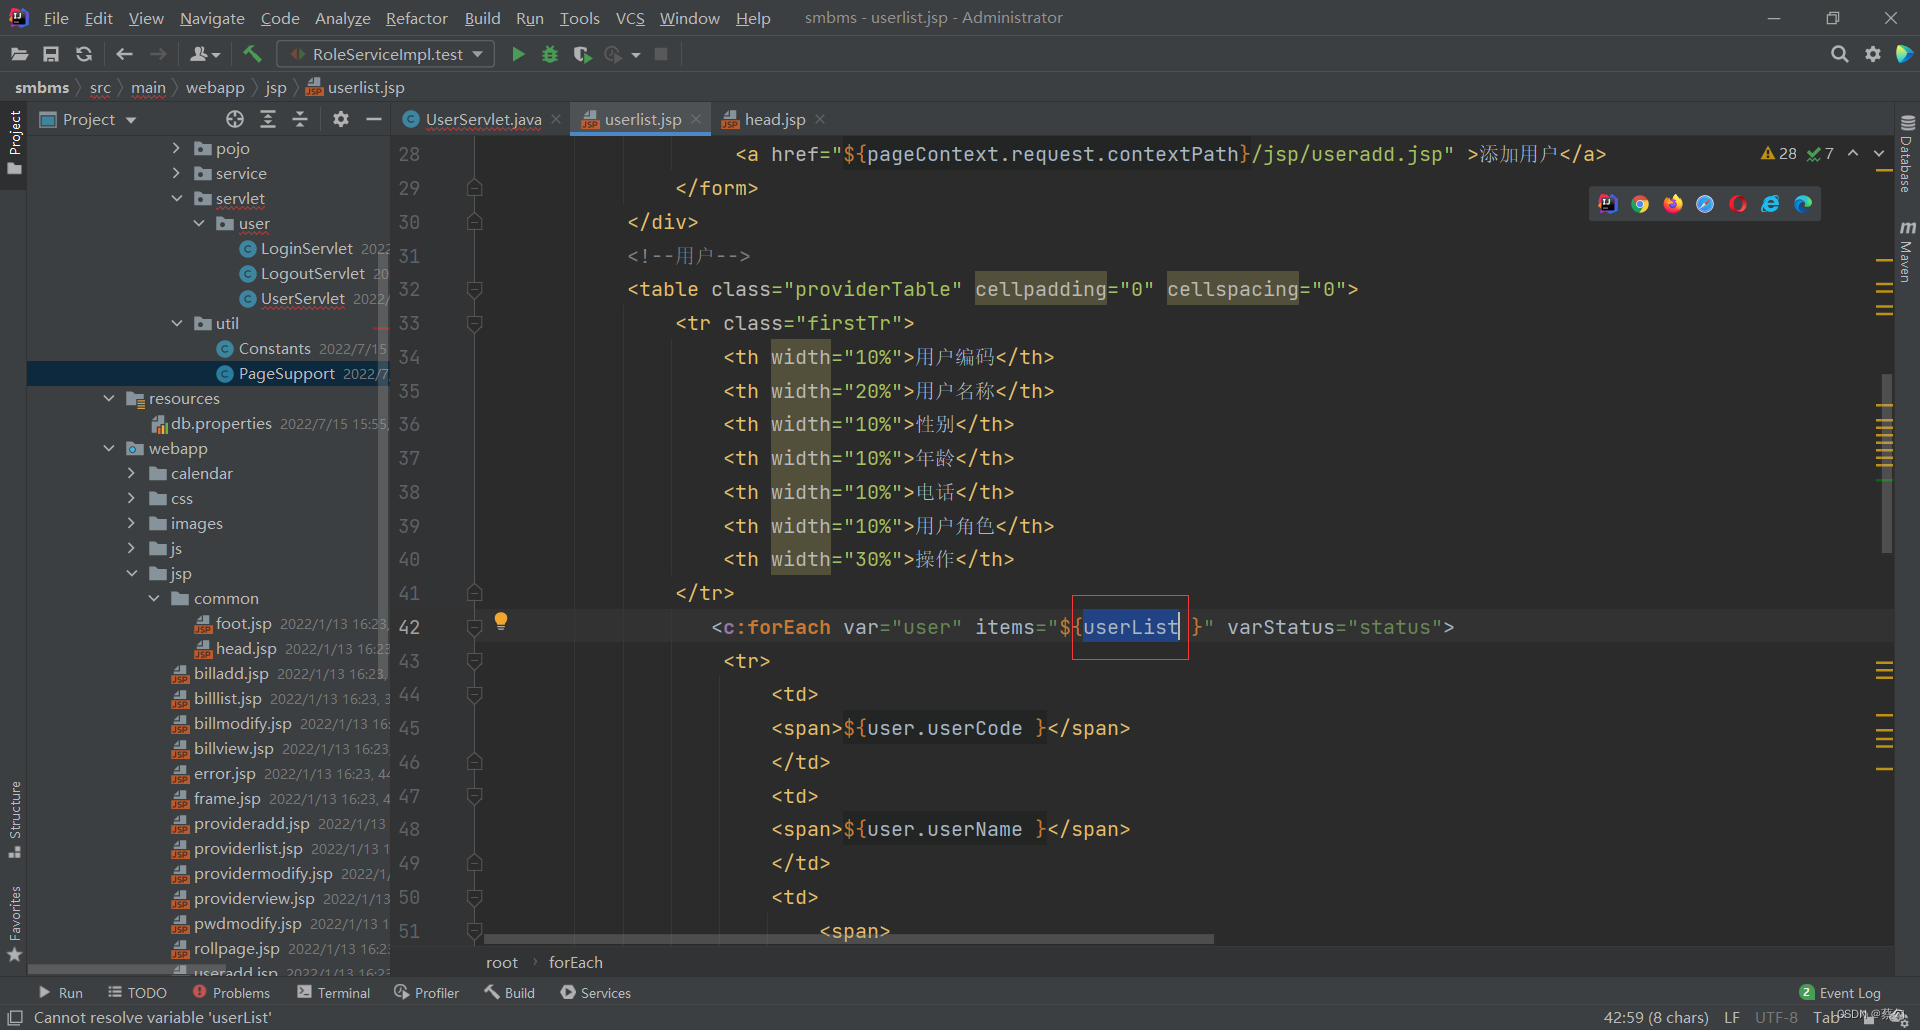
userList的由来
roleList:

set的值由来:

成果: