环境
  "react": "16.13.1",
  "react-native": "0.63.2",
  "jcore-react-native": "^1.9.0",
  "jpush-react-native": "^2.8.2",
一、安装
npm install jpush-react-native --save
npm install jcore-react-native --save
安装完成后
react-native link
或
react-native link jpush-react-native
react-native link jcore-react-native
二、配置
2.1 Android
android {
defaultConfig {
applicationId "yourApplicationId"
...
manifestPlaceholders = [
JPUSH_APPKEY: "yourAppKey",
JPUSH_CHANNEL: "yourChannel"
]
}
}
dependencies {
...
implementation project(':jpush-react-native')
implementation project(':jcore-react-native')
}
	include ':jpush-react-native'
	project(':jpush-react-native').projectDir = new File(rootProject.projectDir, '../node_modules/jpush-react-native/android')
	include ':jcore-react-native'
	project(':jcore-react-native').projectDir = new File(rootProject.projectDir, '../node_modules/jcore-react-native/android')
- android\app\src\main\AndroidManifest.xml
<meta-data
	android:name="JPUSH_CHANNEL"
	android:value="${JPUSH_CHANNEL}" />
<meta-data
	android:name="JPUSH_APPKEY"
	android:value="${JPUSH_APPKEY}" />
- android\app\src\main\java\com\bm\mm\MainApplication.java
...
import java.util.List;
import cn.jiguang.plugins.push.JPushModule;
import cn.jiguang.plugins.push.JPushPackage;
public class MainApplication extends MultiDexApplication implements ReactApplication {
private final ReactNativeHost mReactNativeHost = new ReactNativeHost(this) {
...
@Override
protected List<ReactPackage> getPackages() {
return Arrays.asList(
...
new JPushPackage()
);
}
...
};
...
@Override
public void onCreate() {
super.onCreate();
SoLoader.init(this, false);
JPushModule.registerActivityLifecycle(this);
}
}
2.2 IOS
首先是配置好ios的推送证书(官方文档说的很详细)
极光ios证书设置指南.
2.2.1 pod
pod install
pod deintegrate
2.2.2 手动方式
-
检查项目中是否开启了Push Notification
-
Capabilities - Push Notification

-
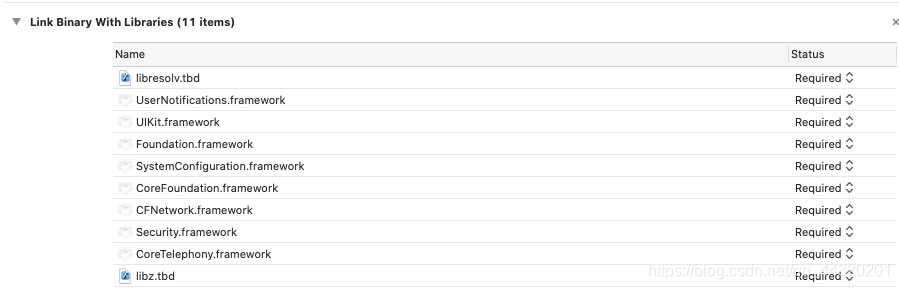
Build Phases - Link Binart With Libraries
-
AppDelegate.m
...
#import <RCTJPushModule.h>
#import "JPUSHService.h"
#ifdef NSFoundationVersionNumber_iOS_9_x_Max
#import <UserNotifications/UserNotifications.h>
#endif
#import <AdSupport/AdSupport.h>
...
@interface AppDelegate ()<JPUSHRegisterDelegate>
- 在didFinishLaunchingWithOptions中添加如下代码
if ([[UIDevice currentDevice].systemVersion floatValue] >= 10.0) {
#ifdef NSFoundationVersionNumber_iOS_9_x_Max
JPUSHRegisterEntity * entity = [[JPUSHRegisterEntity alloc] init];
entity.types = UNAuthorizationOptionAlert | UNAuthorizationOptionBadge | UNAuthorizationOptionSound;
[JPUSHService registerForRemoteNotificationConfig:entity delegate:self];
#endif
} else if ([[UIDevice currentDevice].systemVersion floatValue] >= 8.0) {
[JPUSHService registerForRemoteNotificationTypes:(UIUserNotificationTypeBadge |
UIUserNotificationTypeSound |
UIUserNotificationTypeAlert)
categories:nil];
} else {
[JPUSHService registerForRemoteNotificationTypes:(UNAuthorizationOptionBadge |
UNAuthorizationOptionSound |
UNAuthorizationOptionAlert)
categories:nil];
}
[JPUSHService setupWithOption:launchOptions appKey:@"youAppKey"
channel:nil apsForProduction:YES]
在sourceURLForBridge后面添加如下代码
#pragma mark -注册 APNS 成功并上报 DeviceToken
- (void)application:(UIApplication *)application didRegisterForRemoteNotificationsWithDeviceToken:(NSData *)deviceToken {
[JPUSHService registerDeviceToken:deviceToken];
}
- (void)application:(UIApplication *)application didReceiveRemoteNotification: (NSDictionary *)userInfo fetchCompletionHandler:(void (^)(UIBackgroundFetchResult))completionHandler {
NSLog(@"iOS 7 APNS");
[JPUSHService handleRemoteNotification:userInfo];
[[NSNotificationCenter defaultCenter] postNotificationName:J_APNS_NOTIFICATION_ARRIVED_EVENT object:userInfo];
completionHandler(UIBackgroundFetchResultNewData);
}
#pragma mark -iOS 10 前台收到消息
- (void)jpushNotificationCenter:(UNUserNotificationCenter *)center willPresentNotification:(UNNotification *)notification withCompletionHandler:(void (^)(NSInteger))completionHandler {
NSDictionary * userInfo = notification.request.content.userInfo;
if([notification.request.trigger isKindOfClass:[UNPushNotificationTrigger class]]) {
NSLog(@"iOS 10 APNS 前台收到消息");
[JPUSHService handleRemoteNotification:userInfo];
[[NSNotificationCenter defaultCenter] postNotificationName:J_APNS_NOTIFICATION_ARRIVED_EVENT object:userInfo];
}
else {
NSLog(@"iOS 10 本地通知 前台收到消息");
[[NSNotificationCenter defaultCenter] postNotificationName:J_LOCAL_NOTIFICATION_ARRIVED_EVENT object:userInfo];
}
completionHandler(UNNotificationPresentationOptionAlert);
}
#pragma mark -iOS 10 消息事件回调
- (void)jpushNotificationCenter:(UNUserNotificationCenter *)center didReceiveNotificationResponse:(UNNotificationResponse *)response withCompletionHandler: (void (^)(void))completionHandler {
NSDictionary * userInfo = response.notification.request.content.userInfo;
if([response.notification.request.trigger isKindOfClass:[UNPushNotificationTrigger class]]) {
NSLog(@"iOS 10 APNS 消息事件回调");
[JPUSHService handleRemoteNotification:userInfo];
[[RCTJPushEventQueue sharedInstance]._notificationQueue insertObject:userInfo atIndex:0];
[[NSNotificationCenter defaultCenter] postNotificationName:J_APNS_NOTIFICATION_OPENED_EVENT object:userInfo];
}
else {
NSLog(@"iOS 10 本地通知 消息事件回调");
[[RCTJPushEventQueue sharedInstance]._localNotificationQueue insertObject:userInfo atIndex:0];
[[NSNotificationCenter defaultCenter] postNotificationName:J_LOCAL_NOTIFICATION_OPENED_EVENT object:userInfo];
}
completionHandler();
}
#pragma mark - 自定义消息
- (void)networkDidReceiveMessage:(NSNotification *)notification {
NSDictionary * userInfo = [notification userInfo];
[[NSNotificationCenter defaultCenter] postNotificationName:J_CUSTOM_NOTIFICATION_EVENT object:userInfo];
}
#pragma mark - 清除角标
- (void)applicationDidBecomeActive:(UIApplication *)application {
[UIApplication sharedApplication].applicationIconBadgeNumber=0;
[JPUSHService setBadge:0];
}
注意
开发环境测试
在对 JPush iOS 开发环境进行测试前,请确保 3 个统一:
App 是开发环境打包(开发证书 Development )
上传了开发证书并验证通过(现支持上传生产证书后勾选“将生产证书用于开发环境”,即可不用上传开发证书)
发布环境测试
在对 JPush iOS 生产环境进行测试前,请确保 3 个统一:
App 是 ad-hoc 打包或者 App Store 版本(发布证书 Production),不可使用 Xcode 直接运行。
上传了发布证书并验证通过
总结
至此,可以在极光后台发送通知测试推送消息啦
本文内容由网友自发贡献,版权归原作者所有,本站不承担相应法律责任。如您发现有涉嫌抄袭侵权的内容,请联系:hwhale#tublm.com(使用前将#替换为@)