可以转载,请注明出处!
在阅读这一章节之前,需要本地安装llvm环境,没安装可以参考这里:https://blog.csdn.net/qq_42570601/article/details/107146407
1.1 LLVM IR的三种结构
LLLLVM的代码有3种表示形式(三种形式等价):
- 1)内存编译器中的IR,用户不可知。
- 2)存于磁盘的 bitcode,是一个二进制文件,以.bc为后缀,用户可以看到,但是看不懂。
- 3)用户可读的汇编码,这个就是我们要学习和编写的IR,以.ll为后缀。
1.2将C文件转为LLVM IR汇编码
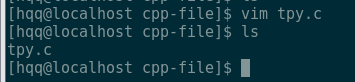
1> 首先在你已经安装了llvm环境的Linux系统中,选择一个你方便的目录,创建一个*.c文件,文件中用C的语法写一个简单的程序,比如输出hello world,下面我创建的是tpy.c文件。
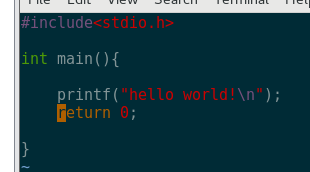
//tpy.c文件
#include <stdio.h>

int main(){
        printf("Hello World!");
		return 0;
}
2> 使用以下命令来将C语言代码转换成LLVM IR:clang -emit-llvm -S tpy.c -o tpy.ll
这里有所有的命令:https://llvm.org/docs/CommandGuide/index.html

3> 生成如下的LLVM IR文件tpy.ll:
; ModuleID = 'tpy.c'
source_filename = "tpy.c"
target datalayout = "e-m:e-i64:64-f80:128-n8:16:32:64-S128"
target triple = "x86_64-unknown-linux-gnu"

@.str = private unnamed_addr constant [13 x i8] c"Hello World!\00", align 1

; Function Attrs: noinline nounwind optnone uwtable
define i32 @main() #0 {
entry:
  %call = call i32 (i8*, ...) @printf(i8* getelementptr inbounds ([13 x i8], [13 x i8]* @.str, i32 0, i32 0))
  ret i32 0
}

declare i32 @printf(i8*, ...) #1

attributes #0 = { noinline nounwind optnone uwtable "correctly-rounded-divide-sqrt-fp-math"="false" "disable-tail-calls"="false" "less-precise-fpmad"="false" "no-frame-pointer-elim"="true" "no-frame-pointer-elim-non-leaf" "no-infs-fp-math"="false" "no-jump-tables"="false" "no-nans-fp-math"="false" "no-signed-zeros-fp-math"="false" "no-trapping-math"="false" "stack-protector-buffer-size"="8" "target-cpu"="x86-64" "target-features"="+fxsr,+mmx,+sse,+sse2,+x87" "unsafe-fp-math"="false" "use-soft-float"="false" }
attributes #1 = { "correctly-rounded-divide-sqrt-fp-math"="false" "disable-tail-calls"="false" "less-precise-fpmad"="false" "no-frame-pointer-elim"="true" "no-frame-pointer-elim-non-leaf" "no-infs-fp-math"="false" "no-nans-fp-math"="false" "no-signed-zeros-fp-math"="false" "no-trapping-math"="false" "stack-protector-buffer-size"="8" "target-cpu"="x86-64" "target-features"="+fxsr,+mmx,+sse,+sse2,+x87" "unsafe-fp-math"="false" "use-soft-float"="false" }

!llvm.module.flags = !{!0}
!llvm.ident = !{!1}

!0 = !{i32 1, !"wchar_size", i32 4}
!1 = !{!"clang version 6.0.0 (tags/RELEASE_600/final)"}
此时的tpy.ll文件还不能执行,因为这是一种用户可读的IR中间码,如果要执行该文件,还需要将其转成二进制文件bitcode。
1.3将LLVM IR汇编码转为bitcode
执行以下命令把tpy.ll文件的LLVM IR转为bitcode格式:llvm-as tpy.ll –o tpy.bc

生成的tpy.bc文件内容如下:

1.4执行LLVM bitcode
执行命令:lli tpy.bc,可以输出如下内容:

1.5链接LLVM bitcode
- 1.、为了展示llvm-link的功能,首先在不同文件中编写两段代码,其 中一个引用另一个:
// $ cat test1.c 被引用文件
 int func(int a) {
 a = a*2;
 return a;
 }
// $ cat test2.c 引用文件
 #include<stdio.h>
 extern int func(int a);
int main() {
 int num = 5;
 num = func(num);
 printf("number is %d\n", num);
 return num;
 }
- 2、使用以下命令将C代码转换成位流文件格式,先转成.ll文件,再 将.ll文件转成.bc文件:
clang -emit-llvm -S test1.c -o test1.ll
clang -emit-llvm -S test2.c -o test2.ll
llvm-as test1.ll -o test1.bc
llvm-as test2.ll -o test2.bc
我们得到了test1.bc和test2.bc,而test2.bc引用了test1.bc文件中的func 语法。
- 3、通过如下方式使用llvm-link命令链接两个LLVM bitcode文件:
llvm-link test1.bc test2.bc –o output.bc
lli output.bc
1.6自己写一个IR然后编译执行
IR基本语法参考链接:https://blog.csdn.net/qq_42570601/article/details/107157224
在你已经安装了llvm环境的Linux系统中,选择一个你方便的目录,创建一个.ll文件,编写一段IR代码,然后同1步骤中的一样:
llvm-as tpy.ll –o tpy.bc,用该命令汇编。
lli tpy.bc,用该命令执行。
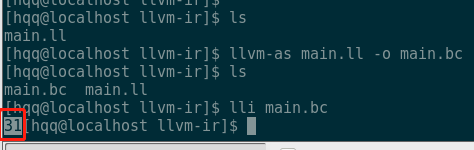
上面这个程序的输出结果是31。
1.7编译C接口的API,执行生成IR
使用API参考链接:https://blog.csdn.net/qq_42570601/article/details/107771289
编写生成IR的C++代码
生成IR有以下几种方式:
需要会使用的是2、3,IRBuilder是对C接口指令类的封装,所以这两个要结合看,用2生成module、function等,用到指令就用IRBuilder。
在你已经安装了llvm环境的Linux系统中,选择一个你方便的目录,创建一个.cpp文件,编写C++代码。
编译C++代码生成可执行文件
下面main.cpp就是一个用C++编写的自动生成IR的代码,编写好代码后,使用下面命令即可生成可执行文件:
clang++ -O3 main.cpp -o main `llvm-config --cflags --ldflags` `llvm-config --libs` `llvm-config --system-libs`

使用./main命令执行可执行文件main,执行结果如下:
