前言
rsync+sersync实时同步数据。
简介
rsync+sersync实时同步数据的原理是在客户端安装sersync监控目录的变化,一般是增删改,检测到变化以后,将变化的文件同步到服务端。
rsync+sersync实时同步数据
实验环境:
服务器:tudou64
客户端:tudou63
服务端tudou64的操作:
1.安装完rsync后修改服务端tudou64的rsyncd的配置文件
[root@tudou64 web-bak]# yum -y install rsync
[root@tudou64 web-bak]# vim /etc/rsyncd.conf
uid = root #运行进程的身份。
gid = root #运行进程的组。
address =192.168.130.64 #监听 IP。
port =873 #监听端口。
hosts allow =* #用*表示所 有
use chroot = yes #是否囚牢,锁定家目录,rsync 被黑之后,黑客无法再 rsync 运行的家目录之外创建文件,选项设置为 yes。
max connections =5 #最大连接数。
pid file =/var/run/rsyncd.pid #进程 PID,自动生成。
lock file =/var/run/rsync.lock #指 max connectios 参数的锁文件。
log file =/var/log/rsyncd.log #日志文件位置。
motd file =/etc/rsyncd.motd #客户端登陆之后弹出的消息,需要创建。
[wwwroot] #共享模块名称。
path =/web-back/ #路径。
comment = used for web-data root #描述。
read only = false #只读权限为假。
list = yes #是否允许查看模块信息。
auth users = rsyncuser #备份的用户,和系统用户无关。
secrets file =/etc/rsync.passwd #存放用户的密码文件,格式是 用户名:密码。
2.创建登陆提示文件和密码文件
[root@tudou64 web-bak]# echo “Welcome to Backup Server” > /etc/rsync.motd
[root@tudou64 web-bak]# echo “rsyncuser:123456” > /etc/rsync.passwd
3.修改密码文件权限(这个很重要)
[root@tudou64 web-bak]# chmod 600 /etc/rsync.passwd
4.启动rsyncd服务
[root@tudou64 web-bak]# systemctl start rsyncd && systemctl enable rsyncd
[root@tudou64 web-bak]# netstat -antpu |grep 873
tcp 0 0 0.0.0.0:873 0.0.0.0:* LISTEN 3114/rsync
tcp6 0 0 :::873 ::😗 LISTEN 3114/rsync
客户端tudou63的操作:
1.下载sersync并安装sersync
[root@tudou63 ~]#wget https://sersync.googlecode.com/files/sersync2.5.4_64bit_binary_stable_final.tar.gz
[root@tudou63 ~]# tar -xf sersync2.5.4_64bit_binary_stable_final.tar.gz
[root@tudou63 ~]# mv ./GNU-Linux-x86/ ./sersync
[root@tudou63 ~]# mv sersync /opt/
2.创建rsyncd的密码文件
[root@tudou63 html]# echo 123456 > /etc/rsync.passwd
3.修改密码文件权限(这个很重要)
[root@tudou63 html]#chmod 600 /etc/rsync.passwd
4.修改sersync的配置文件
[root@tudou63 sersync]# cp confxml.xml{,.bak}
[root@tudou63 sersync]# vim confxml.xml
#修改配置文件中的 24–28 行,sersync 模块部分
#修改 31–34 行,rsync 密码认证部分
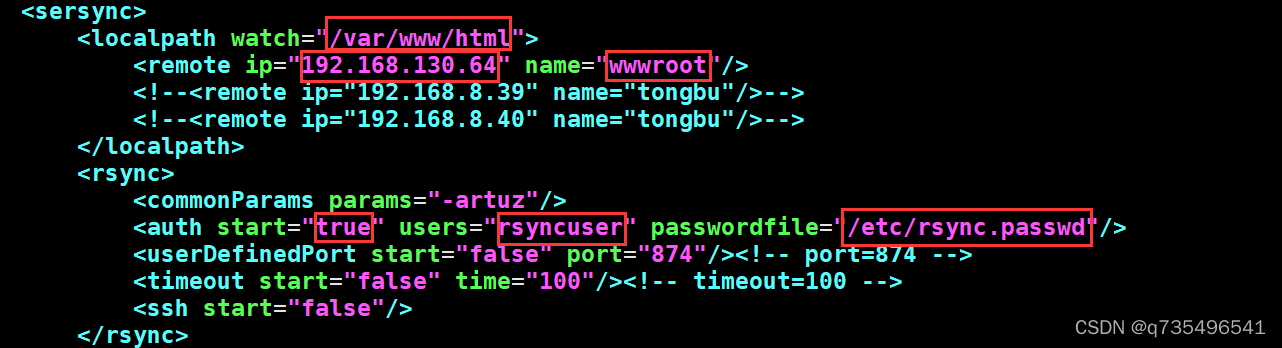
注:
根据tudou64服务端的配置更改tudou63客户端sersync的配置文件
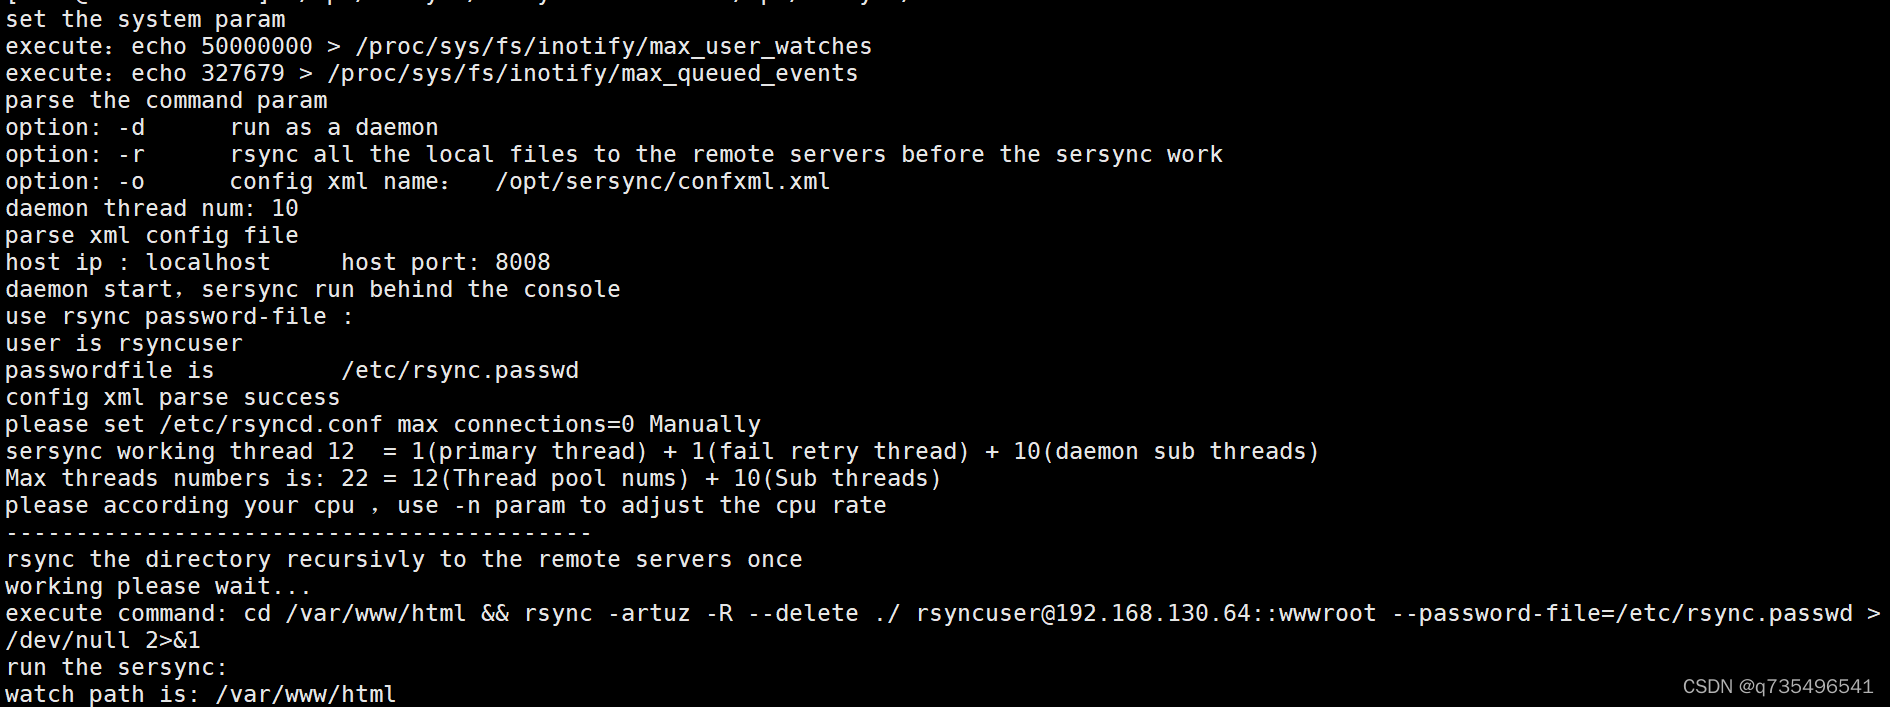
5.启动sersync监控并备份/var/www/html目录
[root@tudou63 ~]# /opt/sersync/sersync2 -d -r -o /opt/sersync/confxml.xml
[root@tudou63 html]# vim /root/webbackup.sh
#!/bin/bash
rsync -avz /var/www/html/ rsyncuser@192.168.130.64::wwwroot --password-file=/etc/rsync.passwd
6.编写sersync监控自动开机启动脚本
[root@tudou63 ~]# vim /opt/check-sersync.sh
#!/bin/sh
sersync="/opt/sersync/sersync2"
confxml="/opt/sersync/confxml.xml"
status=$(ps aux |grep ‘sersync2’|grep -v ‘grep’|wc -l)
if [ $status -eq 0 ];
then
$sersync -d -r -o $confxml &
else
exit 0;
fi
[root@tudou63 ~]# chmod +x /opt/check-sersync.sh
[root@tudou63 ~]# echo “sh /opt/check-sersync.sh” >> /etc/rc.d/rc.local
总结
需要注意的 2 点:
-
密码文件一定要加600的权限。
-
服务端的配置文件不要出错。
-
sersync的配置文件需要根据服务端进行配置。
本文内容由网友自发贡献,版权归原作者所有,本站不承担相应法律责任。如您发现有涉嫌抄袭侵权的内容,请联系:hwhale#tublm.com(使用前将#替换为@)