React-Native-Register-Login-Demo
这是最终的效果图
项目Demo可以到github上下载,方便大家理解。
下面将一步一步带大家完成这个Demo
搭建环境
环境的搭建只需要安装React Native中文网的步骤搭建环境即可,可以选择不同的桌面系统对不同的手机系统的环境的搭建。
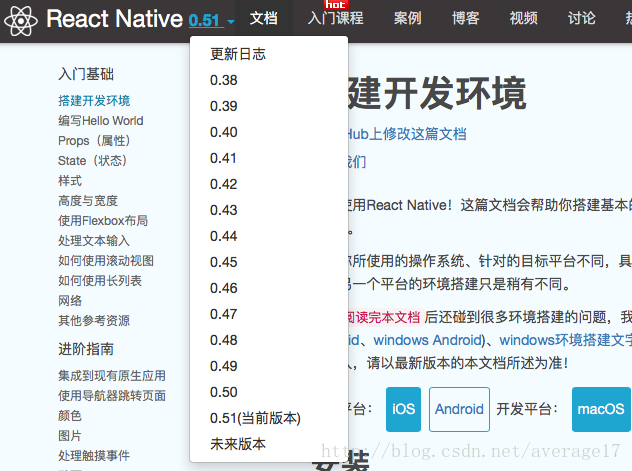
这是使用的是最新的0.51版本,想要切换版本的可以点击左上角的版本来切换所需的版本
程序开发
引入依赖
我们的Demo中使用了navigation,所以就需要引入依赖
首先,编辑package.json文件,在”dependencies”中添加”react-navigation”: “git+https://github.com/react-community/react-navigation.git“,这样就引入了依赖,添加后的”dependencies”如下所示
"dependencies": {
  "react": "16.2.0",
  "react-native": "0.52.0",
  "react-navigation": "git+https://github.com/react-community/react-navigation.git"
},
然后,我们就需要安装依赖了,使用命令行(mac的终端,windows的cmd)先进入项目根目录,然后执行npm install命令,然后运行一次项目,如果出错,就需要先将node_modules文件夹删除,然后重新执行一次npm install命令,这样就准备完成了
集中代码
个人习惯将js代码放到同一个文件夹下面,这样方便管理代码,所以我们需要先自己创建一个scene文件夹,然后将App.js文件夹移到scene文件夹中
如果使用的是WebStorm编辑的项目的话,我们移动App.js文件之后,它会自动修改index.js文件,便不用执行下一步了(以防万一,还是打开index.js查看是否正确)
当我们移动了App.js文件之后,运行项目可能出错,这是因为index.js文件中的程序入口指向的是App.js,而在上一步更改了App.js的路径,所以这里需要将路径更改正确
import { AppRegistry } from 'react-native';
import App from './scene/App';

AppRegistry.registerComponent('Demo', () => App);
这就是修改过后的index.js文件内容,注意第二行代码的impoot指向的是scene下的App.js文件
界面搭建
到这里,准备工作就都做完了,现在开始编写界面的文件,因为这个工程用了三个界面,所以我们再新建三个js文件,分别为loginScene.js、registerScene.js、homeScene.js,三个不同的js文件显示三个不同的界面,最后再用navigation来相互跳转即可(后话)
因为界面的搭建非常简单,所以直接贴代码,如果还有不清楚的,可以参考如下几个链接
《Flex 布局教程:语法篇》——阮一峰
《Flex 布局教程:实例篇》——阮一峰
《React-Native 的基本控件属性方法》——冬瓜小生
LoginScene.js
import React, { Component } from 'react';
import {
TouchableOpacity,
StyleSheet,
TextInput,
View,
Text,
Alert,
Button
} from 'react-native';
export default class LoginScene extends Component {
render() {
return (
<TouchableOpacity
activeOpacity={1.0}
style={styles.container}>
<View
style={styles.inputBox}>
<TextInput
style={styles.input}
autoCapitalize='none'
underlineColorAndroid={'transparent'}
placeholderTextColor={'#ccc'}
placeholder={'用户名'}
/>
</View>
<View
style={styles.inputBox}>
<TextInput
style={styles.input}
autoCapitalize='none'
underlineColorAndroid={'transparent'}
secureTextEntry={true}
placeholderTextColor={'#ccc'}
placeholder={'密码'}
/>
</View>
<TouchableOpacity
style={styles.button}>
<Text
style={styles.btText}>登录</Text>
</TouchableOpacity>
<TouchableOpacity
style={styles.button}>
<Text
style={styles.btText}>注册</Text>
</TouchableOpacity>
</TouchableOpacity>
);
}
}
const styles = StyleSheet.create({
container: {
flex: 1,
justifyContent: 'center',
alignItems: 'center',
backgroundColor: '#F5FCFF',
},
input: {
width: 200,
height: 40,
fontSize: 20,
color: '#fff',
},
inputBox: {
flexDirection: 'row',
justifyContent: 'center',
alignItems: 'center',
width: 280,
height: 50,
borderRadius: 8,
backgroundColor: '#58812F',
marginBottom: 8,
},
button: {
height: 50,
width: 280,
justifyContent: 'center',
alignItems: 'center',
borderRadius: 8,
backgroundColor: '#58812F',
marginTop: 20,
},
btText: {
color: '#fff',
fontSize: 20,
}
});
registerScene.js
import React, { Component } from 'react';
import {
TouchableOpacity,
StyleSheet,
TextInput,
View,
Text,
Alert
} from 'react-native';
export default class RegisterScene extends Component {
render() {
return (
<TouchableOpacity
activeOpacity={1.0}
style={styles.container}>
<View
style={styles.inputBox}>
<TextInput
style={styles.input}
autoCapitalize='none'
underlineColorAndroid={'transparent'}
placeholderTextColor={'#ccc'}
placeholder={'用户名'}
/>
</View>
<View
style={styles.inputBox}>
<TextInput
style={styles.input}
secureTextEntry={true}
autoCapitalize='none'
underlineColorAndroid={'transparent'}
placeholderTextColor={'#ccc'}
placeholder={'密码'}
/>
</View>
<View
style={styles.inputBox}>
<TextInput
style={styles.input}
secureTextEntry={true}
autoCapitalize='none'
underlineColorAndroid={'transparent'}
placeholderTextColor={'#ccc'}
placeholder={'确认密码'}
/>
</View>
<TouchableOpacity
style={styles.button}>
<Text
style={styles.btText}>注册</Text>
</TouchableOpacity>
</TouchableOpacity>
);
}
}
const styles = StyleSheet.create({
container: {
flex: 1,
justifyContent: 'center',
alignItems: 'center',
backgroundColor: '#F5FCFF',
},
input: {
width: 200,
height: 40,
fontSize: 20,
color: '#fff',
},
inputBox: {
flexDirection: 'row',
justifyContent: 'center',
alignItems: 'center',
width: 280,
height: 50,
borderRadius: 8,
backgroundColor: '#66f',
marginBottom: 8,
},
button: {
height: 50,
width: 280,
justifyContent: 'center',
alignItems: 'center',
borderRadius: 8,
backgroundColor: '#66f',
marginTop: 20,
},
btText: {
color: '#fff',
fontSize: 20,
}
});
homeScene.js
import React, { Component } from 'react';
import {
Text,
View,
StyleSheet,
Button
} from 'react-native';
export default class HomeScene extends Component {
/**
* 返回到登陆界面
*/
backToLogin = () => {
}
render() {
return (
<View
style={styles.container}>
<Text
style={styles.content}
>登录成功!这是主页!</Text>
<Button
onPress={this.backToLogin}
style={styles.button}
title='点击返回登陆'/>
</View>
);
}
}
const styles = StyleSheet.create({
container: {
flex: 1,
justifyContent: 'center',
alignItems: 'center',
backgroundColor: '#F5FCFF',
},
content: {
fontSize: 40,
},
});
到这里,三个界面就搭建完成了,想看看效果,可以修改index.js来查看,比如试试查看登陆界面的效果,index.js文件修改如下
import { AppRegistry } from 'react-native';
// import App from './scene/App';
import LoginScene from './scene/loginScene.js'

AppRegistry.registerComponent('Demo', () => LoginScene);
现在,三个界面的现实效果分别如下


添加事件
我们的界面已经搭建完成了,但是点击按钮没有任何反应。所以,现在来添加一些事件。
输入框值改变事件
首先,要添加的是输入框的事件,我们需要接收到输入框输入的值,然后才能进行相应的操作。输入框可以添加的事件很多,我们这里需要的是获取输入框中的值,所以恰当的选择有两个,第一个是onChangeText,第二个是onEndEditing。两个都可以获取到输入结束之后输入框中的值,但是onEndEditing获取值比较麻烦,所以这里就用第一个了。
但还要思考一个问题,我们获取到的值怎么使用呢?React Native中的InputText中的值不能直接获取,必须通过其事件才能获取,所以我们只能创建几个属性来保存获取到的值,然后再去使用它们。所以需要对相应的代码进行修改了,我们在对应的类中增加代码如下(class内部,render()方法之外)。
loginScene.js
username = '';
password = '';
/**
* 当用户名输入框值改变时,保存改变的值
* @param {[type]} newUsername [输入的用户名]
*/
onUsernameChanged = (newUsername) => {
console.log(newUsername);
this.username = newUsername;
};
/**
* 当密码输入框值改变时,保存改变的值
* @param {[type]} newUsername [输入的密码]
*/
onPasswordChanged = (newPassword) => {
console.log(newPassword);
this.password = newPassword;
};
还需要给每个输入框绑定事件,就需要添加一行代码onChangeText={this.onUsernameChanged},例如,登陆界面中的用户名输入框的代码更改后的结果
<View
style={styles.inputBox}>
<TextInput
onChangeText={this.onUsernameChanged}
style={styles.input}
autoCapitalize='none'
underlineColorAndroid={'transparent'}
placeholderTextColor={'#ccc'}
placeholder={'用户名'}
/>
</View>
registerScene.js
username = '';
password = '';
confirmPassword = '';
/**
* 当用户名输入框值改变时,保存改变的值
* @param {[type]} newUsername [输入的用户名]
*/
onUsernameChanged = (newUsername) => {
console.log(newUsername);
this.username = newUsername;
};
/**
* 当密码输入框值改变时,保存改变的值
* @param {[type]} newUsername [输入的密码]
*/
onPasswordChanged = (newPassword) => {
console.log(newPassword);
this.password = newPassword;
};
/**
* 当确认密码输入框值改变时,保存改变的值
* @param {[type]} newUsername [输入的确认密码]
*/
onConfirmPasswordChanged = (newConfirmPassword) => {
console.log(newConfirmPassword);
this.confirmPassword = newConfirmPassword;
}
相应的事件可自己绑定
这时,我们再运行程序,在输入框中输入一些值,便可以在控制台中看到相应的输出了。
按钮事件
输入框的事件绑定完成之后,我们就需要给按钮添加事件了
我们的按钮用的都是TouchableOpacity(首页用的Button),它们都有一个onPress事件可以使用,所以就非常方便了,添加的方式类似,话不多说,直接上代码
loginScene.js
/**
* 登陆按钮,点击时验证输入的用户名和密码是否正确,正确时进入主页面,否则弹出提示
*/
login = () => {
if (this.username == 'Admin' && this.password == '123') {
Alert.alert("登陆成功");
} else {
Alert.alert("登陆失败","用户名或密码不正确");
}
};
/**
* 注册按钮,点击进入注册界面
*/
register = () => {
}
“登陆”按钮添加事件后的代码
<TouchableOpacity
    onPress={this.login} //添加点击事件
    style={styles.button}>
    <Text
        style={styles.btText}>登录</Text>
</TouchableOpacity>
registerScene.js
/**
 * 注册按钮,根据输入的内容判断注册是否成功
 */
register = () => {
    if (this.username != '' && this.password != '') {
        if (this.username != 'Admin') {
            if (this.password === this.confirmPassword) {
                Alert.alert("注册成功","返回登陆")
            } else {
                Alert.alert("注册失败","密码与确认密码不同");
            }
        } else {
            Alert.alert("注册失败","此用户名已经被注册");
        }
    } else {
        Alert.alert("注册失败","用户名或密码不能为空");
    }
};
到这里,事件差不多都添加完成了,但是,我们别忘了我们用的是什么做的背景。。。翻上去看代码的瞬间明白了,哦,原来是TouchableOpacity,那这个是用来干嘛的呢。这就是React Native中的一些问题了,我们的输入框输入结束之后,怎么取消它的焦点呢。前面测试的时候可能就有人遇到这个问题:当输入过数据之后,我们想重载界面(mac的command+r,windows的rr)失效了。所以,我们需要做一件事,就是点击空白处让输入框失去焦点。所以,我们需要给输入框添加一个属性ref,这样,我们就可以通过ref来获取输入框,再调用其blur方法,就可以让它们失去焦点了。代码添加如下
loginScene.js
/**
* 点击空白处使输入框失去焦点
*/
blurTextInput = () => {
this.refs.username.blur();
this.refs.password.blur();
}
......
render() {
return (
<TouchableOpacity
activeOpacity={1.0}
onPress={this.blurTextInput}
style={styles.container}>
<View
style={styles.inputBox}>
<TextInput
ref="username"
......
/>
</View>
<View
style={styles.inputBox}>
<TextInput
ref="password"
......
/>
</View>
......
</TouchableOpacity>
);
}
registerScene.js
/**
* 点击空白处使输入框失去焦点
*/
blurTextInput = () => {
this.refs.username.blur();
this.refs.password.blur();
this.refs.confirmPassword.blur();
}
......
render() {
return (
<TouchableOpacity
activeOpacity={1.0}
onPress={this.blurTextInput}
style={styles.container}>
<View
style={styles.inputBox}>
<TextInput
ref="username"
......
/>
</View>
<View
style={styles.inputBox}>
<TextInput
ref="password"
......
/>
</View>
<View
style={styles.inputBox}>
<TextInput
ref="confirmPassword"
......
/>
</View>
......
</TouchableOpacity>
);
}
现在,大家就可以点击按钮试试效果了(注意:登陆页面只有输入用户名为Admin并且密码为123时才会提示登陆成功,注册页面当用户名输入为Admin时会提示该用户已注册)
界面跳转
到这里,就是最后一步了,连接三个界面并可以相互跳转,这里就要用到我们最开始导入的navigation依赖了.
使用navigation时,需要先注册你需要使用到的界面,所以我们就需要修改App.js文件了
App.js
/**
* Sample React Native App
* https://github.com/facebook/react-native
* @flow
*/
import React from 'react';
import { StyleSheet, Text, View } from 'react-native';
import { StackNavigator } from 'react-navigation';
import HomeScene from './homeScene';
import LoginScene from './loginScene';
import RegisterScene from './registerScene';
const SimpleApp = StackNavigator({
Login: {
screen: LoginScene,
navigationOptions: {
headerTitle: '登陆',
}
},
Home: {
screen: HomeScene,
navigationOptions: {
header: null,
}
},
Register: {
screen: RegisterScene,
navigationOptions: {
headerTitle: '注册',
}
}
});
export default class App extends React.Component {
render() {
return <SimpleApp />;
}
}
当这些界面都添加到navigation中之后,就可以通过navigation来使用它们了,所以我们只需要修改相应的按钮的点击事件即可。
loginScene.js
/**
* 登陆按钮,点击时验证输入的用户名和密码是否正确,正确时进入主页面,否则弹出提示
*/
login = () => {
if (this.username == 'Admin' && this.password == '123') {
this.refs.username.blur();
this.refs.password.blur();
const { navigate } = this.props.navigation;
navigate('Home');
} else {
Alert.alert("登陆失败","用户名或密码不正确");
}
};
/**
* 注册按钮,点击进入注册界面
*/
register = () => {
const { navigate } = this.props.navigation;
navigate('Register');
}
register.js
/**
* 注册按钮,根据输入的内容判断注册是否成功
*/
register = () => {
if (this.username != '' && this.password != '') {
if (this.username != 'Admin') {
if (this.password === this.confirmPassword) {
const { goBack } = this.props.navigation;
Alert.alert("注册成功","返回登陆",[{text: '确定', onPress: () => { goBack(); }}])
} else {
Alert.alert("注册失败","密码与确认密码不同");
}
} else {
Alert.alert("注册失败","此用户名已经被注册");
}
} else {
Alert.alert("注册失败","用户名或密码不能为空");
}
};
homeScene.js
/**
* 返回到登陆界面
*/
backToLogin = () => {
const { goBack } = this.props.navigation;
goBack();
}
到这里,就完成了整个Demo的所有实现,需要看完整代码的可以将Demo下载下来。
项目的github链接
项目发布
项目发布可以分别发布到iOS端和android端,在React Native中文网也有相应的教程,只不过发布到iOS平台还需要有付费的开发者账号,才能将App上架到App Store;而android端就不需要开发者账号了,只需要生成一个属于自己的签名即可。
发布的步骤可以参考如下:
iOS端
android端
由于React Native中文网中对iOS平台发布的描述很少,所以这里还有一篇教程可供大家参考
iOS端参考
最后,这个项目打包后的安卓apk如下
[apk下载链接](链接: https://pan.baidu.com/s/1i5Znq6p) 密码: i4zu
最后再贴下所有的代码吧。
index.js
import { AppRegistry } from 'react-native';
import App from './scene/App';

AppRegistry.registerComponent('Demo', () => App);
App.js
/**
* Sample React Native App
* https://github.com/facebook/react-native
* @flow
*/
import React from 'react';
import { StyleSheet, Text, View } from 'react-native';
import { StackNavigator } from 'react-navigation';
import HomeScene from './homeScene';
import LoginScene from './loginScene';
import RegisterScene from './registerScene';
const SimpleApp = StackNavigator({
Login: {
screen: LoginScene,
navigationOptions: {
headerTitle: '登陆',
}
},
Home: {
screen: HomeScene,
navigationOptions: {
header: null,
}
},
Register: {
screen: RegisterScene,
navigationOptions: {
headerTitle: '注册',
}
}
});
export default class App extends React.Component {
render() {
return <SimpleApp />;
}
}
loginScene.js
import React, { Component } from 'react';
import {
TouchableOpacity,
StyleSheet,
TextInput,
View,
Text,
Alert,
Button
} from 'react-native';
export default class LoginScene extends Component {
username = '';
password = '';
/**
* 当用户名输入框值改变时,保存改变的值
* @param {[type]} newUsername [输入的用户名]
*/
onUsernameChanged = (newUsername) => {
console.log(newUsername);
this.username = newUsername;
};
/**
* 当密码输入框值改变时,保存改变的值
* @param {[type]} newUsername [输入的密码]
*/
onPasswordChanged = (newPassword) => {
console.log(newPassword);
this.password = newPassword;
};
/**
* 点击空白处使输入框失去焦点
*/
blurTextInput = () => {
this.refs.username.blur();
this.refs.password.blur();
}
/**
* 登陆按钮,点击时验证输入的用户名和密码是否正确,正确时进入主页面,否则弹出提示
*/
login = () => {
if (this.username == 'Admin' && this.password == '123') {
this.refs.username.blur();
this.refs.password.blur();
const { navigate } = this.props.navigation;
navigate('Home');
} else {
Alert.alert("登陆失败","用户名或密码不正确");
}
};
/**
* 注册按钮,点击进入注册界面
*/
register = () => {
const { navigate } = this.props.navigation;
navigate('Register');
}
render() {
return (
<TouchableOpacity
activeOpacity={1.0}
onPress={this.blurTextInput}
style={styles.container}>
<View
style={styles.inputBox}>
<TextInput
ref="username"
onChangeText={this.onUsernameChanged}
style={styles.input}
autoCapitalize='none'
underlineColorAndroid={'transparent'}
placeholderTextColor={'#ccc'}
placeholder={'用户名'}
/>
</View>
<View
style={styles.inputBox}>
<TextInput
ref="password"
onChangeText={this.onPasswordChanged}
style={styles.input}
autoCapitalize='none'
underlineColorAndroid={'transparent'}
secureTextEntry={true}
placeholderTextColor={'#ccc'}
placeholder={'密码'}
/>
</View>
<TouchableOpacity
onPress={this.login}
style={styles.button}>
<Text
style={styles.btText}>登录</Text>
</TouchableOpacity>
<TouchableOpacity
onPress={this.register}
style={styles.button}>
<Text
style={styles.btText}>注册</Text>
</TouchableOpacity>
</TouchableOpacity>
);
}
}
const styles = StyleSheet.create({
container: {
flex: 1,
justifyContent: 'center',
alignItems: 'center',
backgroundColor: '#F5FCFF',
},
input: {
width: 200,
height: 40,
fontSize: 20,
color: '#fff',
},
inputBox: {
flexDirection: 'row',
justifyContent: 'center',
alignItems: 'center',
width: 280,
height: 50,
borderRadius: 8,
backgroundColor: '#58812F',
marginBottom: 8,
},
button: {
height: 50,
width: 280,
justifyContent: 'center',
alignItems: 'center',
borderRadius: 8,
backgroundColor: '#58812F',
marginTop: 20,
},
btText: {
color: '#fff',
fontSize: 20,
}
});
registerScene.js
import React, { Component } from 'react';
import {
TouchableOpacity,
StyleSheet,
TextInput,
View,
Text,
Alert
} from 'react-native';
export default class RegisterScene extends Component {
username = '';
password = '';
confirmPassword = '';
/**
* 当用户名输入框值改变时,保存改变的值
* @param {[type]} newUsername [输入的用户名]
*/
onUsernameChanged = (newUsername) => {
console.log(newUsername);
this.username = newUsername;
};
/**
* 当密码输入框值改变时,保存改变的值
* @param {[type]} newUsername [输入的密码]
*/
onPasswordChanged = (newPassword) => {
console.log(newPassword);
this.password = newPassword;
};
/**
* 当确认密码输入框值改变时,保存改变的值
* @param {[type]} newUsername [输入的确认密码]
*/
onConfirmPasswordChanged = (newConfirmPassword) => {
console.log(newConfirmPassword);
this.confirmPassword = newConfirmPassword;
}
/**
* 点击空白处使输入框失去焦点
*/
blurTextInput = () => {
this.refs.username.blur();
this.refs.password.blur();
this.refs.confirmPassword.blur();
}
/**
* 注册按钮,根据输入的内容判断注册是否成功
*/
register = () => {
if (this.username != '' && this.password != '') {
if (this.username != 'Admin') {
if (this.password === this.confirmPassword) {
const { goBack } = this.props.navigation;
Alert.alert("注册成功","返回登陆",[{text: '确定', onPress: () => { goBack(); }}])
} else {
Alert.alert("注册失败","密码与确认密码不同");
}
} else {
Alert.alert("注册失败","此用户名已经被注册");
}
} else {
Alert.alert("注册失败","用户名或密码不能为空");
}
};
render() {
return (
<TouchableOpacity
activeOpacity={1.0}
onPress={this.blurTextInput}
style={styles.container}>
<View
style={styles.inputBox}>
<TextInput
ref="username"
onChangeText={this.onUsernameChanged}
style={styles.input}
autoCapitalize='none'
underlineColorAndroid={'transparent'}
placeholderTextColor={'#ccc'}
placeholder={'用户名'}
/>
</View>
<View
style={styles.inputBox}>
<TextInput
ref="password"
onChangeText={this.onPasswordChanged}
style={styles.input}
secureTextEntry={true}
autoCapitalize='none'
underlineColorAndroid={'transparent'}
placeholderTextColor={'#ccc'}
placeholder={'密码'}
/>
</View>
<View
style={styles.inputBox}>
<TextInput
ref="confirmPassword"
onChangeText={this.onConfirmPasswordChanged}
style={styles.input}
secureTextEntry={true}
autoCapitalize='none'
underlineColorAndroid={'transparent'}
placeholderTextColor={'#ccc'}
placeholder={'确认密码'}
/>
</View>
<TouchableOpacity
onPress={this.register}
style={styles.button}>
<Text
style={styles.btText}>注册</Text>
</TouchableOpacity>
</TouchableOpacity>
);
}
}
const styles = StyleSheet.create({
container: {
flex: 1,
justifyContent: 'center',
alignItems: 'center',
backgroundColor: '#F5FCFF',
},
input: {
width: 200,
height: 40,
fontSize: 20,
color: '#fff',
},
inputBox: {
flexDirection: 'row',
justifyContent: 'center',
alignItems: 'center',
width: 280,
height: 50,
borderRadius: 8,
backgroundColor: '#66f',
marginBottom: 8,
},
button: {
height: 50,
width: 280,
justifyContent: 'center',
alignItems: 'center',
borderRadius: 8,
backgroundColor: '#66f',
marginTop: 20,
},
btText: {
color: '#fff',
fontSize: 20,
}
});
homeScene.js
import React, { Component } from 'react';
import {
Text,
View,
StyleSheet,
Button
} from 'react-native';
export default class HomeScene extends Component {
/**
* 返回到登陆界面
*/
backToLogin = () => {
const { goBack } = this.props.navigation;
goBack();
}
render() {
return (
<View
style={styles.container}>
<Text
style={styles.content}
>登录成功!这是主页!</Text>
<Button
onPress={this.backToLogin}
style={styles.button}
title='点击返回登陆'/>
</View>
);
}
}
const styles = StyleSheet.create({
container: {
flex: 1,
justifyContent: 'center',
alignItems: 'center',
backgroundColor: '#F5FCFF',
},
content: {
fontSize: 40,
},
});
本文内容由网友自发贡献,版权归原作者所有,本站不承担相应法律责任。如您发现有涉嫌抄袭侵权的内容,请联系:hwhale#tublm.com(使用前将#替换为@)