我的简书:https://www.jianshu.com/p/81917864271e
ubuntu系统配置i3wm窗口管理器
文章目录
- ubuntu系统配置i3wm窗口管理器
- 前言
- i3wm的安装
- i3wm的配置
- i3wm快捷键配置介绍
- i3wm配置文件
- i3config
- i3status_config
- 随机壁纸
- 亮度调节
- ranger文件管理器
前言
ubuntu系统默认安装的桌面环境是gnome,但是我想换一个窗口管理器,主要是为了好玩,如果能将桌面改造的好看一点就更好了。因此我希望选择一些高定制的窗口管理器,例如i3wm,hvwm,awesome等,桌面环境不变 。最后肯定是像标题说的那样选择了i3wm,因为awesome配置比i3wm复杂一些,i3wm也比awesome主流一些,至于hvwm,这个用的人更少了,而且这个窗口管理器也很少更新,所以暂时选择i3wm练手。
i3wm的安装
i3wm的安装比较简单,我主要安装了xfce4,i3和lightdm(登录管理)
sudo apt-get install xfce4
sudo apt-get install i3
sudo apt-get install lightdm
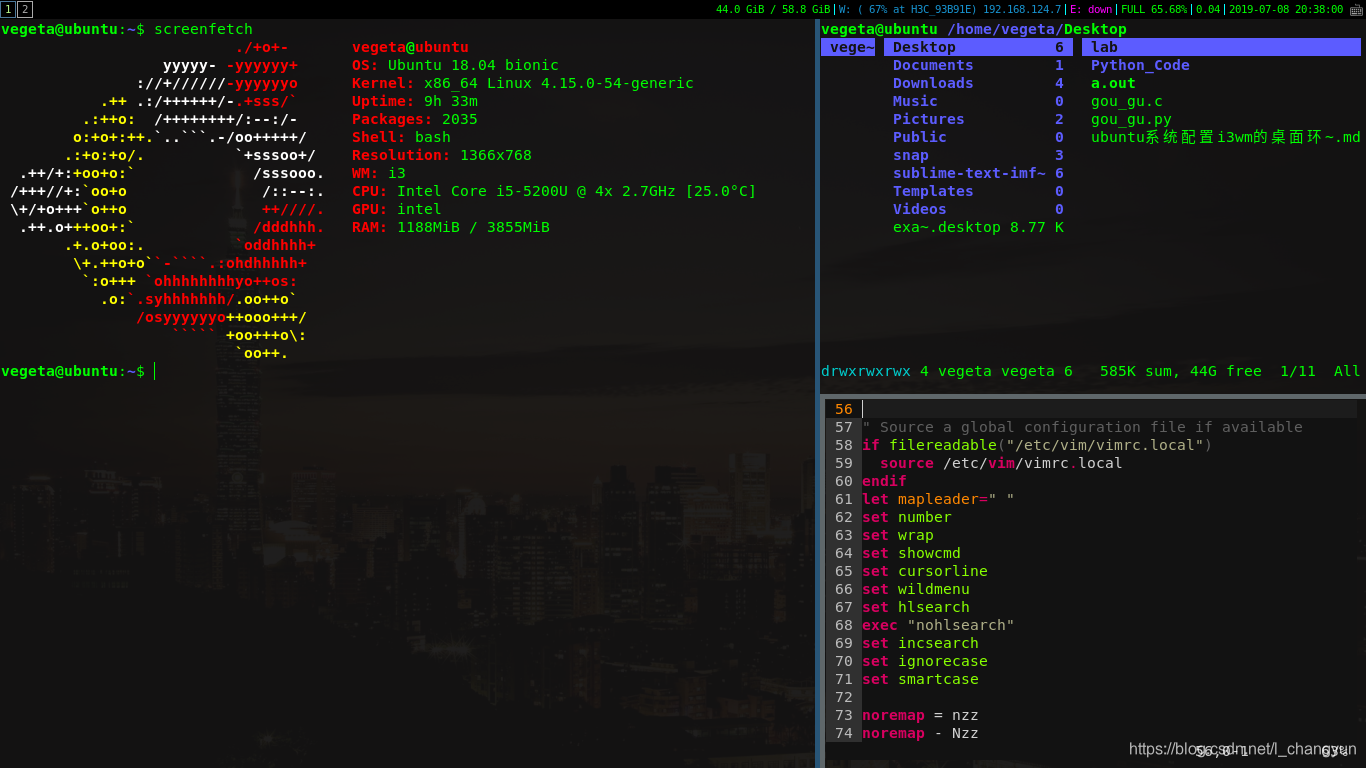
经过配置后的桌面效果大致如图所示:

i3wm的配置
i3wm快捷键配置介绍
设置windows键为mod键,i3wm中默认Mod1为Alt,Mod4为windows键,如果想让windows键为mod键,可以在配置文件前加一句:set $mod Mod4。我是直接用Mod4配置的一些快捷键。以下是一些常用的快捷键:
- win+d:打开dmenu
- win+Enter:新建一个Terimal
- win+f:窗口全屏
- win+r:存在多个窗口时,调整窗口大小
- win+t:新建窗口有标签栏
- win+y:新建窗口有边框
- win+u:新建窗口无标签栏无边框
- win+num:跳转到工作区num
- win+h:光标移到右边的窗口
- win+j:光标移到下面的窗口
- win+k:光标移到上面的窗口
- win+l:光标移到左边的窗口
- win+Shift+num:将当前窗口转移到工作区num
- win+Shift+h:将光标所在的窗口移到右边
- win+Shift+j:将光标所在的窗口移到下面
- win+Shift+k:将光标所在的窗口移到上面
- win+Shift+l:将光标所在的窗口移到左边
- win+Shift+r:重启i3wm
- win+Shift+c:重新加载i3wm配置文件
- win+Shift+e:退出i3wm
- win+Shift+q:关闭当前窗口
- win+Shift+f:打开firefox浏览器
- win+Ctrl+h:下一次新建窗口时,水平分割窗口
- win+Ctrl+v:下一次新建窗口时,垂直分割窗口
- Fn+volume+:加音量
- Fn+volume-:减音量
- Fn+volumemute:静音
i3wm配置文件
i3config
# i3 config file (v4)
#
# Please see https://i3wm.org/docs/userguide.html for a complete reference!
#
# This config file uses keycodes (bindsym) and was written for the QWERTY
# layout.
#
# To get a config file with the same key positions, but for your current
# layout, use the i3-config-wizard
#

# Font for window titles. Will also be used by the bar unless a different font
# is used in the bar {} block below.
font pango:monospace 8

# This font is widely installed, provides lots of unicode glyphs, right-to-left
# text rendering and scalability on retina/hidpi displays (thanks to pango).
#font pango:DejaVu Sans Mono 8

# Before i3 v4.8, we used to recommend this one as the default:
# font -misc-fixed-medium-r-normal--13-120-75-75-C-70-iso10646-1
# The font above is very space-efficient, that is, it looks good, sharp and
# clear in small sizes. However, its unicode glyph coverage is limited, the old
# X core fonts rendering does not support right-to-left and this being a bitmap
# font, it doesn’t scale on retina/hidpi displays.

# use these keys for focus, movement, and resize directions when reaching for
# the arrows is not convenient
set $up k
set $down j
set $left h
set $right l

# use Mouse+Mod4 to drag floating windows to their wanted position
floating_modifier Mod4

hide_edge_borders both
# start a terminal
# bindsym Mod4+Return exec i3-sensible-terminal
# bindsym Mod4+Shift+Return exec i3-sensible-terminal -e ranger
bindsym Mod4+Return exec alacritty
bindsym Mod4+Shift+Return exec alacritty -e ranger

# ==============设置窗口边框=============
new_window none                         # 普通窗口无边框无标签栏
# for_window [class=".*"] border pixel 10
new_float none                          # 悬浮窗口无边框无标签栏
bindsym Mod4+t border normal
bindsym Mod4+y border pixel 10
bindsym Mod4+u border none
for_window [window_role="pop-up"] floating enable       # 让弹窗以浮动窗口打开
for_window [window_role="task_dialog"] floating enable
# hide_edge_borders both

# kill focused window
bindsym Mod4+Shift+q kill

# start dmenu (a program launcher)
# bindsym Mod4+d exec dmenginxnu_run
bindsym Mod4+d exec --no-startup-id dmenu_run
# There also is the (new) i3-dmenu-desktop which only displays applications
# shipping a .desktop file. It is a wrapper around dmenu, so you need that
# installed.
# bindsym Mod4+d exec --no-startup-id i3-dmenu-desktop

# change focus
bindsym Mod4+$left focus left
bindsym Mod4+$down focus down
bindsym Mod4+$up focus up
bindsym Mod4+$right focus right

# alternatively, you can use the cursor keys:
bindsym Mod4+Left focus left
bindsym Mod4+Down focus down
bindsym Mod4+Up focus up
bindsym Mod4+Right focus right

# move focused window
bindsym Mod4+Shift+$left move left
bindsym Mod4+Shift+$down move down
bindsym Mod4+Shift+$up move up
bindsym Mod4+Shift+$right move right

# alternatively, you can use the cursor keys:
bindsym Mod4+Shift+Left move left
bindsym Mod4+Shift+Down move down
bindsym Mod4+Shift+Up move up
bindsym Mod4+Shift+Right move right

# split in horizontal orientation
bindsym Mod4+Ctrl+h split h

# split in vertical orientation
bindsym Mod4+Ctrl+v split v

# enter fullscreen mode for the focused container
bindsym Mod4+f fullscreen toggle

# change container layout (stacked, tabbed, toggle split)
bindsym Mod4+s layout stacking
bindsym Mod4+w layout tabbed
bindsym Mod4+e layout toggle split

# toggle tiling / floating
bindsym Mod4+Shift+space floating toggle

# change focus between tiling / floating windows
bindsym Mod4+space focus mode_toggle

# focus the parent container
bindsym Mod4+a focus parent

# focus the child container
#bindsym Mod4+d focus child

# move the currently focused window to the scratchpad
bindsym Mod4+Shift+minus move scratchpad

# Show the next scratchpad window or hide the focused scratchpad window.
# If there are multiple scratchpad windows, this command cycles through them.
bindsym Mod4+minus scratchpad show

# switch to workspace
bindsym Mod4+1 workspace "1:Terminal"
bindsym Mod4+2 workspace "2:Web"
bindsym Mod4+3 workspace "3:WPS"
bindsym Mod4+4 workspace "4:Spyder"
bindsym Mod4+5 workspace "5:MATLAB"
bindsym Mod4+6 workspace "6:Other"
bindsym Mod4+7 workspace 7
bindsym Mod4+8 workspace 8
bindsym Mod4+9 workspace 9
bindsym Mod4+0 workspace 10

# move focused container to workspace
bindsym Mod4+Shift+1 move container to workspace "1:Terminal"
bindsym Mod4+Shift+2 move container to workspace "2:Web"
bindsym Mod4+Shift+3 move container to workspace "3:WPS"
bindsym Mod4+Shift+4 move container to workspace "4:Spyder"
bindsym Mod4+Shift+5 move container to workspace "5:MATLAB"
bindsym Mod4+Shift+6 move container to workspace "6:Other"
bindsym Mod4+Shift+7 move container to workspace 7
bindsym Mod4+Shift+8 move container to workspace 8
bindsym Mod4+Shift+9 move container to workspace 9
bindsym Mod4+Shift+0 move container to workspace 10

# =============指定程序打开后出现在指定工作区===============
assign [class="Firefox"] "2:Web"
assign [class="(?i)wps"] "3:WPS"
assign [class="Spyder"] "4:Spyder"
assign [class="MATLAB"] "5:MATLAB"
# ===================快捷键启动程序=======================
bindsym Mod4+Shift+f exec firefox
bindsym Mod4+Shift+a exec "shutter -s"
bindsym Mod4+Shift+m exec bash /usr/local/MATLAB/R2018b/bin/matlab -desktop
bindsym Mod4+Shift+s exec spyder3
bindsym Mod4+Shift+w exec "wps &"
bindsym Mod4+Shift+p exec bash ~/Pictures/wallpapers/wallpaper.sh
# reload the configuration file
bindsym Mod4+Shift+c reload
# restart i3 inplace (preserves your layout/session, can be used to upgrade i3)
bindsym Mod4+Shift+r restart
# exit i3 (logs you out of your X session)
bindsym Mod4+Shift+e exec "i3-nagbar -t warning -m 'You pressed the exit shortcut. Do you really want to exit i3? This will end your X session.' -b 'Yes, exit i3' 'i3-msg exit'"

# ========volume control===================
bindsym XF86AudioRaiseVolume exec --no-startup-id pactl set-sink-volume 0 +5% #increase sound volume
bindsym XF86AudioLowerVolume exec --no-startup-id pactl set-sink-volume 0 -5% #decrease sound volume
bindsym XF86AudioMute exec --no-startup-id pactl set-sink-mute 0 toggle # mute sound

# resize window (you can also use the mouse for that)
mode "resize" {
        # These bindings trigger as soon as you enter the resize mode

        # Pressing left will shrink the window’s width.
        # Pressing right will grow the window’s width.
        # Pressing up will shrink the window’s height.
        # Pressing down will grow the window’s height.
        bindsym $left       resize shrink width 10 px or 10 ppt
        bindsym $down       resize grow height 10 px or 10 ppt
        bindsym $up         resize shrink height 10 px or 10 ppt
        bindsym $right      resize grow width 10 px or 10 ppt

        # same bindings, but for the arrow keys
        bindsym Left        resize shrink width 10 px or 10 ppt
        bindsym Down        resize grow height 10 px or 10 ppt
        bindsym Up          resize shrink height 10 px or 10 ppt
        bindsym Right       resize grow width 10 px or 10 ppt

        # back to normal: Enter or Escape
        bindsym Return mode "default"
        bindsym Escape mode "default"
}

bindsym Mod4+r mode "resize"

# Start i3bar to display a workspace bar (plus the system information i3status
# finds out, if available)
bar {
#        status_command i3status
#   i3bar_command i3bar -t
    position top
        status_command i3status --config ~/.i3/i3status/config
    colors {
        background #000000
        statusline #00FF00
#       separator #B8F788
        separator #00FFFF
        focused_workspace #B8F788 #000000AA
        active_workspace #FFFFFF #FFFFFFAA
        inactive_workspace #AAAAAA #000000AA #AAAAAA
        urgent_workspace #E57B85 #000000AA
    }

}

#######################################################################
# automatically start i3-config-wizard to offer the user to create a
# keysym-based config which used their favorite modifier (alt or windows)
#
# i3-config-wizard will not launch if there already is a config file
# in ~/.i3/config.
#
# Please remove the following exec line:
#######################################################################
# 关闭屏保
exec --no-startup-id xset s 0
exec --no-startup-id xset dpms 0 0 0
# exec_always --no-startup-id xcompmgr -Fcf -nc -t -5 &
# exec_always --no-startup-id compton
exec_always compton -b
# exec_always --no-startup-id feh --bg-fill ~/Pictures/wallpapers/wallpaper02.jpeg
exec_always --no-startup-id bash ~/Pictures/wallpapers/wallpaper.sh
exec i3-config-wizard
xcompmgr是一个使终端半透明的插件。(gnome自带的Terimal也可以设置透明效果)
feh是一个图片查看工具,也可以设置壁纸。
i3status_config
i3status是桌面顶端的长条状态栏(默认在桌面下方,可设置为上方)
# i3status configuration file.
# see "man i3status" for documentation.

# It is important that this file is edited as UTF-8.
# The following line should contain a sharp s:
# ß
# If the above line is not correctly displayed, fix your editor first!

general {
        colors = true
		color_good = "#1793D0"
		color_degraded = "#006298"
		color_bad = "#FF00FF"
        interval = 5
}

# order += "ipv6"
order += "disk /"
order += "wireless _first_"
order += "ethernet _first_"
order += "battery all"
order += "load"
order += "tztime local"

wireless _first_ {
        format_up = "W: (%quality at %essid) %ip"
        format_down = "W: down"
}

ethernet _first_ {
        # if you use %speed, i3status requires root privileges
        format_up = "E: %ip (%speed)"
        format_down = "E: down"
}

battery all {
        format = "%status %percentage %remaining"
#        format = "%status %percentage"
}

tztime local {
        format = "%Y-%m-%d %H:%M:%S"
}

load {
        format = "%1min"
}

disk "/" {
        format = "%avail / %total"
#        format = "%free / %total"
}
随机壁纸
我自己写了一个比较简单的脚本来从我的壁纸库中随机抽取一张图片作为我的壁纸。因为我壁纸库里的图片都是我自己从网上下载的一些我比较喜欢的图片,因此下载的时候我把图片都命名成了wallpaper+数字+后缀名的形式(wallpaper01.jpg),这样方便我写脚本。目前我壁纸库里有九张壁纸,编号从01-09,所以我新建一个wallpaper.sh的脚本文件,内容如下:
#!/bin/bash

N=9
var=wallpaper0$[RANDOM%$N+1].jpg
feh --bg-fill ~/Pictures/wallpapers/$var
然后我在我i3的config文件中写入以下两条命令:
bindsym Mod4+Shift+p exec bash ~/Pictures/wallpapers/wallpaper.sh
exec_always --no-startup-id bash ~/Pictures/wallpapers/wallpaper.sh
这样我每次开机或者按下win+Shift+p就会运行wallpaper.sh这个文件,并为我选取一张幸运壁纸。
亮度调节
我安装了一些插件像xbacklight,xfce4-power-manager等,但是都不好使。但是想调节亮度的话也是有办法的。
cat /sys/class/backlight/intel_backlight/max_brightness
sudo tee /sys/class/backlight/intel_backlight/brightness <<< 100
本来写了个脚本来调节亮度,但是绑定键位不成功,也不知道为什么,不过脚本还是可用的。
var1=+50
var1=$(($var1 + $(cat /sys/class/backlight/intel_backlight/brightness)))
sudo tee /sys/class/backlight/intel_backlight/brightness <<< $var1
var1=-50
var1=$(($var1 + $(cat /sys/class/backlight/intel_backlight/brightness)))
sudo tee /sys/class/backlight/intel_backlight/brightness <<< $var1
ranger文件管理器
对,下面这个图就是ranger,它可以帮你很快的预览文件
 可以预览文本文件的内容
 也可以打开图片
 刚开始ranger打开图片大小可能不合适,需要你手动去调节(按上下键)。但是我觉得这样太傻了,如果你想让你的ranger打开图片时像上面那样,刚好可以看清整张图片,你可以修改ranger的配置文件。将图片打开尺寸设置为你电脑屏幕分辨率的一半就可以了。
ranger --copy-config=all
cd ~/.config/ranger
vi rifle.conf
将rifle.conf里的mime ^image, has feh, X, flag f = feh -- "$@"修改为
mime ^image, has feh, X, flag f = feh -g 683x384 -- "$@"
因为我电脑屏幕的分辨率为1366x768,所以我设置683x384。
本文内容由网友自发贡献,版权归原作者所有,本站不承担相应法律责任。如您发现有涉嫌抄袭侵权的内容,请联系:hwhale#tublm.com(使用前将#替换为@)