Opencv C++ Tutorial for making your own Haar Classifier.
This Opencv C++ Article is about how to make your own Haar Cascade Classifier.
Step1:
Create a Folder ImageSample.
In it Create two folders: opencv-positive-haar && NegativeFolder.
Prerequisites:
Set of Positive Images:
Images which need to be detected or in other words the actual objects.E.g. Face for Face detection,eyes for Eye detection,Pen for Pen Detection etc.
The more unique the Positive Images,the better our Classifier gets Trained.
- For Training Classifier for face detection we need to collect a vast database of faces,where face belong to almost each age group,males and females,with and without mustaches and beards,with varied skin colour etc.
- While when we need to train our classifier for one unique object, only one image can be enough.For e.g Image of a Company Logo,a Particular sign board etc.
Set of Negative Images:
Images other than the desired Images or in other words the one without object in it.
It should be minimum 3 times the no. of positive images for better object recognition and should include all the backgrounds where you want your object to get detected.
Note: Below mentioned method is for Creating Training Set from a Single Positive Image.
Creating Samples:
- Place the Positive Image in a separated folder.(Here it is opencv-positive-haar).
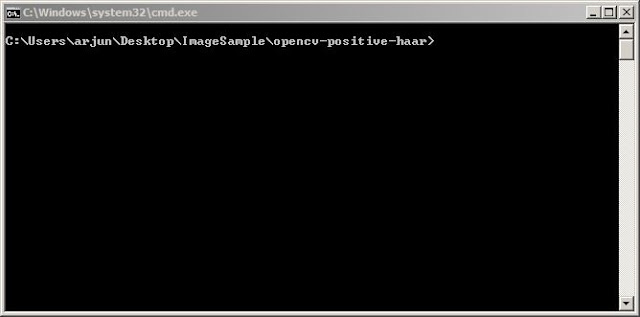
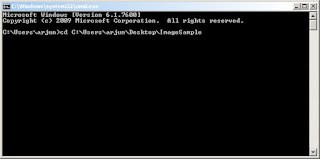
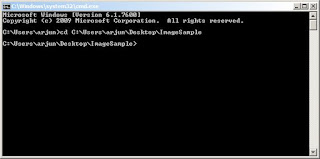
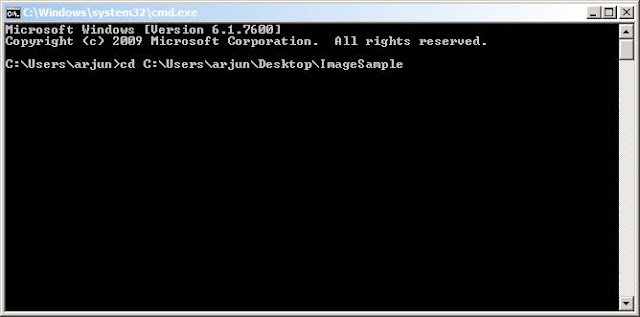
- Navigate to that folder which contains positive images(folder name is opencv-positive-haar).
Right Click on that folder(opencv-positive-haar) and Open Command Window Here. - Or Navigate to that folder in cmd
- Then,
Type : dir /b> positive.txt
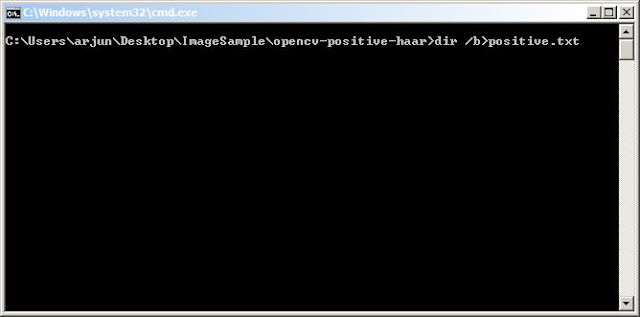
Thus a positive.txt file will be created in the folder opencv-positive-haar.
Open that positive.txt file.
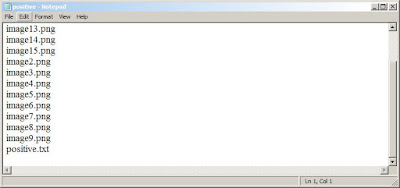
You will also find the name of the file positive.txt in it.
Delete it.
So,after deletion, the positive.txt file would only contain the names of the image.

Similarly,For Negative Images make a separate folder which will contain the negative images.
Make negative.txt file by typing: dir /b> negative.txt (Only after Navigating to that Folder)Then,
- Open the text file negative.txt.
- Delete the file name "negative.txt" from it, so that it only contains the name of negative images
opencv_createsamples:
A large dataset of positive images is created by applying perspective transform (rotating the images at various angle and changing the intensity of light).
The amount of randmoness can be controlled by varing the command line arguments of opencv_createsamples.
Command line arguments:
-vec
Name of the output file containing the positive samples for training.
-img
Source object image (e.g., a company logo,a text file describng the path of postive images etc).
-bg
Background description file; contains a list of images which are used as a background for randomly distorted versions of the object.
-num
Number of positive samples to generate.
-bgcolor -bgthresh
Background color (currently grayscale images are assumed); the background color denotes the transparent color. Since there might be compression artifacts, the amount of color tolerance can be specified by -bgthresh. All pixels withing bgcolor-bgthresh and bgcolor+bgthresh range are interpreted as transparent.
-inv
If specified, colors will be inverted.
-randinv
If specified, colors will be inverted randomly.
-maxidev
Maximal intensity deviation of pixels in foreground samples.
-maxxangle
-maxyangle
-maxzangle
Maximum rotation angles must be given in radians.
-show
Useful debugging option. If specified, each sample will be shown. Pressing Esc will continue the samples creation process without.
-w
Width (in pixels) of the output samples.
-h
Height (in pixels) of the output samples.
-pngoutput
With this option switched on opencv_createsamples tool generates a collection of PNG samples and a number of associated annotation files, instead of a single vec file.
Method 1:
Navigate to the location where OpenCV is installed .
(In my PC the path is:D:\opencv2410\build\x86\vc10\bin.)
And check in the bin\ folder if the .exe files (opencv_createsamples.exe, opencv_traincascade.exe , opencv_haartraining.exe )are present or not.
Copy all these .exe (opencv_createsamples.exe , opencv_traincascade.exe) in ImageSample folder.
To show the parameters that can be used for creating the samples type: cd opencv_createsamples.(i.e cd filename_for_creating_samples only after navigating to that folder through cmd).
i.e. "Right Click" That folder(ImageSample) while pressing "Shift Key"
Click Open Command Window here.
Method 2:
1. Open the cmd. 2. Type cd /d (path_of_opencv_createsamples) (without curly bracket as shown in fig)

The next step is to create a positive .vec file
- Open Notepad
- Type the following command for a Single Image called my_image_name.jpg:
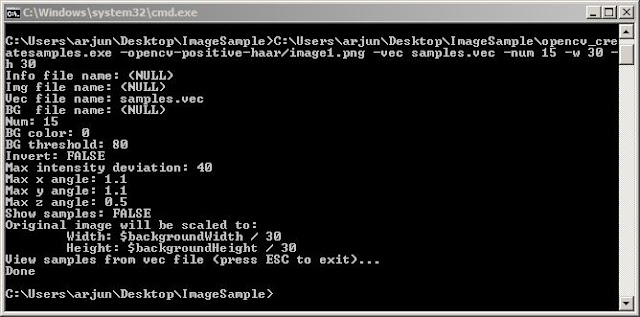
- C:\Users\arjun\Desktop\ImageSample\opencv_createsamples.exe -img \opencv-positive-haar\img my_image_name.jpg -vec samples.vec -num 250 -w 30 -h 30 PAUSE
Note:Though we have taken one positive image we are specifying -num 250.Because it will do perspective transformation and generate 250 positive images. - And save it with .bat extension.
- Now double click the .bat file created.
Note:
C:\Users\arjun\Desktop\ImageSample\opencv_createsamples.exe : It is the File path So you need to give that path which is there in your PC.
Followed by -info negative.txt -vec samples.vec -num 250 -w 30 -h 30 PAUSE
where: negative.txt is the text file which contains path of negative samples
samples.vec: It is the name of the .vec file
num: refers to the number of positive image which we need to be generated in vec file.
w and h specifies the with and height.(If it is more the better the detection.So if possible take it 500)
To view the samples in the .vec file again create a .bat file with the code:
C:\Users\arjun\Desktop\ImageSample\opencv_createsamples.exe -vec samples.vec -w 30 -h 30 -show
i.e.
file_path -vec name_of_vecfile -w width -h height -show
Training the Classifier:
Navigate to the folder ImageSample.
Locate opencv_traincascade.exe

You can find the command line arguemnts of opencv_traincascade.exe
Common arguments:
-data
Where the trained classifier should be stored.
-vec
vec-file with positive samples (created by opencv_createsamples utility).
-bg
Background description file.
-numPos
-numNeg
Number of positive/negative samples used in training for every classifier stage.
-numStages
Number of cascade stages to be trained.
-precalcValBufSize
Size of buffer for precalculated feature values (in Mb).
-precalcIdxBufSize
Size of buffer for precalculated feature indices (in Mb). The more memory you have the faster the training process.
-baseFormatSave
This argument is actual in case of Haar-like features. If it is specified, the cascade will be saved in the old format.
-acceptanceRatioBreakValue
This argument is used to determine how precise your model should keep learning and when to stop. A good guideline is to train not further than 10e-5, to ensure the model does not overtrain on your training data. By default this value is set to -1 to disable this feature.
Cascade parameters:
-stageType
Type of stages. Only boosted classifier are supported as a stage type at the moment.
-featureType<{HAAR(default), LBP}>
Type of features: HAAR - Haar-like features, LBP - local binary patterns.
-w
-h
Size of training samples (in pixels). Must have exactly the same values as used during training samples creation (opencv_createsamples utility).
Boosted classifer parameters:
-bt <{DAB, RAB, LB, GAB(default)}>
Type of boosted classifiers: DAB - Discrete AdaBoost, RAB - Real AdaBoost, LB - LogitBoost, GAB - Gentle AdaBoost.
-minHitRate
Minimal desired hit rate for each stage of the classifier. Overall hit rate may be estimated as (min_hit_rate^number_of_stages).
-maxFalseAlarmRate
Maximal desired false alarm rate for each stage of the classifier. Overall false alarm rate may be estimated as (max_false_alarm_rate^number_of_stages).
-weightTrimRate
Specifies whether trimming should be used and its weight. A decent choice is 0.95.
-maxDepth
Maximal depth of a weak tree. A decent choice is 1, that is case of stumps.
-maxWeakCount
Maximal count of weak trees for every cascade stage. The boosted classifier (stage) will have so many weak trees (<=maxWeakCount), as needed to achieve the given -maxFalseAlarmRate.
Haar-like feature parameters:
-mode
Selects the type of Haar features set used in training. BASIC use only upright features, while ALL uses the full set of upright and 45 degree rotated feature set. See [Rainer2002] for more details.
Local Binary Patterns parameters:
Local Binary Patterns don’t have parameters.
Now,
First Create a Folder Classifier in ImageSample.
Thus its directory structure would be ImageSample/Classifier.
Create a .bat file with the following command:
C:\Users\arjun\Desktop\ImageSample\opencv_traincascade.exe -data classifier -vec samples.vec -bg NegativeFolder\negative.txt -numStages 20 -minHitRate 0.999 -maxFalseAlarmRate 0.5 -numPos 250 -numNeg 400 -w 30 -h 30 -mode ALL -precalcValBufSize 2048 -precalcldxBufSize 2048
Double Click the .bat file.
Note:
-
- C:\Users\arjun\Desktop\ImageSample\opencv_traincascase.exe : Is the path of the file.
- samples.vec: Is the name of the .vec file
- negative.txt: It is the text file which contains the path of all the negative images.
Thus we have successfully generated the haarcascade file with .xml extension in Classifier Folder..
本文内容由网友自发贡献,版权归原作者所有,本站不承担相应法律责任。如您发现有涉嫌抄袭侵权的内容,请联系:hwhale#tublm.com(使用前将#替换为@)