创建一个基于WebPacket的TypeScript项目
- 安装node.js环境
- 建立目录结构
- 在 `templates` 目录新建 `template.index.html`并写入
- 安装VSCode
- 创建一个NPM项目
-
- 安装TypeScript
- 创建一个TypeScript项目
- 配置项目
- 修改`package.json` 配置
- 修改`devDependencies` 和 `dependencies`
- 修改 `scripts`配置为
- 修改`tsconfig.json` 配置
- 初始化 npm包
- `webpack.config.js`文件并写入
- 调试代码
- 启动Chrome
- End
安装node.js环境
下载并安装Node.js
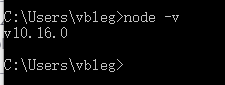
打开CMD输入 node -v 如出现如下图版本号则表示node安装成功
建立目录结构
新建文件夹 ts
在ts目录新建 src templates 目录
src 源码目录
templates html模板目录
在 templates 目录新建 template.index.html并写入
<!DOCTYPE html>
<html>
<head>
    <meta charset="UTF-8">
    <title>Webpack Demo</title>
</head>
<body>
</body>
</html>
安装VSCode
下载并安装 VSCode
创建一个NPM项目
打开终端进入ts目录,我是用的git bash,你如果没装git的话可以用cmd。
输入 npm init 回车

package name 要创建的npm包名可以写你的项目名,如果你的代码想要发布成npm包的话就写成npm包名。 这里我们写myproject
version 当前npm包的版本,默认为1.0.0可以直接按回车跳过后续可修改。跳过
description npm包说明,可按回车跳过后续可修改 跳过
entry point npm的入口点通常填写main.js,但是我们创建的项目是基于webpacket的所以我们填写 webpack.config.js 当然你也可以后面再做修改
text command 测试命令,我们先不填。跳过
git repository npm包的开源git仓库,可以跳过后面再修改。跳过
keywords npm包的关键字,以便让更多的人找到它,可以跳过后面再修改。跳过
author npm包的作者,可以写入你的代表性昵称,可以跳过后面再修改。跳过
license npm的许可证,如果别人要用你的npm包需要什么样的许可证。跳过
确认

输入 yes 或直接按回车键完成创建,会在当前目录生成一个package.json的文件。
安装TypeScript
打开终端 输入 npm install typescript -g 安装typescript
终端输入 tsc -v 回车 如出现下图版本号 说明安装成功。

创建一个TypeScript项目
继续上面那一步,打开终端进入ts目录,输入tsc --init初始化typescript项目。
如果成功的话它将提示message TS6071: Successfully created a tsconfig.json file.
同时 ts目录下会创建一个tsconfig.json文件。

配置项目
在ts目录右键打开 vscode

修改package.json 配置
点击左侧目录打开package.json 我们添加项目依赖。
修改devDependencies 和 dependencies
一个是开发依赖包devDependencies
一个是运行依赖包dependencies
修改完的文件内容如下删掉注释部分
{
"name": "myproject",
"version": "1.0.0",
"description": "",
"main": "webpack.config.js",
"dependencies": {
"lodash": "^4.17.15",
},
"devDependencies": {
"@babel/core": "^7.2.2",
"babel-loader": "^8.0.4",
"babel-preset-env": "^1.7.0",
"@types/node": "^12.12.14",
"copy-webpack-plugin": "^5.0.5",
"html-webpack-plugin": "^3.2.0",
"ts-loader": "^6.2.1",
"typescript": "^3.7.2",
"webpack": "^4.41.2",
"webpack-cli": "^3.3.10",
"http-server": "^0.12.3",
"concurrently":"^5.2.0"
},
"scripts": {
"test": "echo \"Error: no test specified\" && exit 1"
},
"author": "Hanks",
"license": "ISC"
}
修改 scripts配置为
删掉注释部分
"scripts": {
"build": "webpack --watch",
"httpserver": "http-server dist\\ --port=8080",
"debug": "concurrently \"npm run build\" \"npm run httpserver\""
}
这里我们添加了3条npm测试命令
build:执行webpack命令编译打包我们的typescript项目,--watch为进程实时监控代码的变动并编译。
httpserver:启动http服务供我们调试预览代码。
debug:使用concurrently包来实现同时运行build、httpserver两条指令。
修改tsconfig.json 配置
打开 tsconfig.js 修改内容为以下删掉注释部分
{
"compilerOptions": {
"target": "es5",
"outDir": "./dist/",
"module": "commonjs",
"declaration": false,
"noImplicitAny": true,
"moduleResolution": "node",
"removeComments": true,
"sourceMap": true,
"emitDecoratorMetadata": true,
"experimentalDecorators": true,
"resolveJsonModule": true,
"allowJs": true
},
"exclude": [
"node_modules",
]
}
初始化 npm包
VScode 顶部菜单点击 终端 新建终端
在下方终端输入 npm i 初始化包 等待大约1分钟后

在src目录新建 TestClass.ts 并写入
export class TestClass {
    say(content: String) {
        console.log(content);
    }
}
在ts目录新建 Index.ts 并写入
import { TestClass } from "./src/TestClass";

var test = new TestClass();
test.say("Hello World");
webpack.config.js文件并写入
const path = require('path');
var HtmlWebpackPlugin = require('html-webpack-plugin');
var CopyWebpackPlugin = require('copy-webpack-plugin');
module.exports = {
entry: './Index.ts',
devtool: 'inline-source-map',
mode: 'development',
module: {
rules: [{
test: /\.tsx?$/,
use: 'ts-loader',
exclude: /node_modules/
}, {
test: /\.css$/,
use: [
'style-loader',
'css-loader?modules&importLoaders=1',
'typed-css-modules-loader'
]
},
{
test: /\.js$/,
use: {
loader: 'babel-loader'
},
exclude: '/node_module/'
}
]
},
resolve: {
extensions: ['.tsx', '.ts', '.js']
},
output: {
filename: '[name].js',
path: path.resolve(__dirname, 'dist')
},
plugins: [new HtmlWebpackPlugin({
template: "./templates/template.index.html",
title: "PowerDistribution Demo",
filename: 'index.html',
minify: {
collapseWhitespace: false,
},
hash: true
}), new CopyWebpackPlugin([{
from: __dirname + '/src/assets',
to: __dirname + '/dist',
toType: "dir",
force: false,
ignore: ['.*']
}])]
};
调试代码
终端输入 npm run debug 如果不出意外的话将出现如下图,表示成功编译。

启动Chrome
点击左侧调试菜单 点击创建 launch.json文件 在顶部的弹出菜单中选择Chrome

在你的代码里打上断点,按F5运行Chrome浏览器。 不出意外的话将会进入断点。

End
还有更多的webpack插件,webpack远比你想的要强大。
typescript的智能语法提示保证让你用过之后再也不想去写javascript。
备份下我的package.json配置
{
  "name": "myproject",
  "version": "1.0.0",
  "description": "",
  "main": "webpack.config.js",
  "dependencies": {
    "@juggle/resize-observer": "^2.4.0",
    "lodash": "^4.17.15",
    "typed-css-modules": "^0.6.3",
    "typed-css-modules-loader": "0.0.18"
  },
  "devDependencies": {
    "@babel/core": "^7.2.2",
    "@types/node": "^12.12.14",
    "babel-loader": "^8.0.4",
    "babel-preset-env": "^1.7.0",
    "copy-webpack-plugin": "^5.0.5",
    "css-loader": "^3.2.0",
    "html-webpack-plugin": "^3.2.0",
    "json-loader": "^0.5.7",
    "style-loader": "^1.0.1",
    "ts-loader": "^6.2.1",
    "typescript": "^3.7.2",
    "typings-for-css-modules-loader": "^1.7.0",
    "webpack": "^4.41.2",
    "webpack-cli": "^3.3.10",
    "http-server": "^0.12.3",
    "concurrently":"^5.2.0"
  },
  "scripts": {
    "build": "webpack  --watch",
    "httpserver": "http-server dist\\ --port=8080",
    "debug": "concurrently \"npm run build\" \"npm run httpserver\""
  },
  "author": "Hanks",
  "license": "ISC"
}
GitHub仓库 https://github.com/vblegend/web-es6-typescript-template
本文内容由网友自发贡献,版权归原作者所有,本站不承担相应法律责任。如您发现有涉嫌抄袭侵权的内容,请联系:hwhale#tublm.com(使用前将#替换为@)