IdeneityServer 使用的是内存缓存的存储方式,所有的配置都写在Config.cs里。在实际应用中,应该使用数据库存储方式,方便随时配置,如添加新的用户、资源、客户端,也可以节省服务器内存。
本文从三个方面来实现 IdentityServer4 结合 Mysql 从而实现数据库存储方式,分别是客户端及资源数据、令牌及授权码数据以及用户数据。
一、核心
这里的核心是有三个上下文:
1. 配置数据(资源、客户端、身份)对应配置上下文 ConfigurationDbContext(负责数据库中对客户端、资源和 CORS 设置的配置存储);
2. 操作数据(令牌,代码和用户的授权信息 consents)对应操作上下文 PersistedGrantDbContext(负责存储同意、授权代码、刷新令牌和引用令牌);
3. 用户数据(用户,角色,Claim)对应用户上下文 ApplicationDbContext(实现 User、Role、Claim 之间交互)。
前两个在 IdentityServer4中已经封装好了,第三个可以自定义 ApplicationDbContext 继承 NetCore 自带的 Identity 认证机制,也可以不继承自定义表结构。
二、准备内容
mysql 数据库
Nuget 所需包
IdentityServer4
IdentityServer4.EntityFramework
IdentityServer4.AspNetIdentity
Pomelo.EntityFrameworkCore.MySql
Microsoft.EntityFrameworkCore.Tools
新建 appsettings.json 文件添加数据库连接字符串
{"ConnectionStrings": {"SSOConnection": "server=ipAddress;userid=root;pwd=Password;database=DB;"}
}
注意:使用Pomelo.EntityFrameworkCore.MySql
1.初始化及构造
public IConfiguration Configuration { get; }public IHostingEnvironment Environment { get; }publicStartup(IConfiguration configuration, IHostingEnvironment environment)
{
Configuration=configuration;
Environment=environment;
}
2.定义数据库连接及获取项目名称
string connectionString = Configuration.GetConnectionString("SSOConnection");var migrationsAssembly = typeof(Startup).GetTypeInfo().Assembly.GetName().Name;
3.注释 AddInMemory 方式
AddInMemoryIdentityResources(Config.GetIdentityResources())
AddInMemoryApiResources(Config.GetApis())
AddInMemoryClients(Config.GetClients())
三、客户端和资源的数据库存储
前文我们使用的是 AddInMemory 的方式加载配置数据,接下来使用数据库连接方式加载配置数据
1.添加 AddConfigurationStore
.AddConfigurationStore(opt =>{
opt.ConfigureDbContext= context =>{
context.UseMySql(connectionString, sql=>{
sql.MigrationsAssembly(migrationsAssembly);
});
};
})
2.配置客户端和资源数据表,把项目设为启动项目,打开程序包管理器控制台,控制台设置默认项目,在控制台执行以下指令添加数据表
Add-Migration InitConfiguration -Context ConfigurationDbContext -o Date\Migrations\IdentityServer\ConfiguragtionDb
四、令牌和授权码的数据库存储
1.添加 AddOperationalStore
.AddOperationalStore(opt =>{
opt.ConfigureDbContext= context =>{
context.UseMySql(connectionString, sql=>{
sql.MigrationsAssembly(migrationsAssembly);
});
};
opt.EnableTokenCleanup= true;
opt.TokenCleanupInterval= 30;
})
2.配置令牌和授权码数据表,把项目设为启动项目,打开程序包管理器控制台,控制台设置默认项目,在控制台执行以下指令添加数据表
Add-Migration InitConfiguration -Context PersistedGrantDbContext -o Date\Migrations\IdentityServer\PersistedGrantDb
五、用户数据
1.添加 AddAspNetIdentity
.AddAspNetIdentity()
2.添加系统配置(在数据库连接定义后添加)
//数据库配置系统应用用户数据上下文
services.AddDbContext(options =>options.UseMySql(connectionString));//启用 Identity 服务 添加指定的用户和角色类型的默认标识系统配置
services.AddIdentity()
.AddEntityFrameworkStores()
.AddDefaultTokenProviders();
3.自定义 ApplicationDbContext 类,继承 NetCore 自带的 Identity 认证机制(也可以不继承而自定义表结构)
//定义用户管理上下文,继承 NetCore 自带的 Identity 认证机制,也可以不继承而自定义表结构。
public class ApplicationDbContext : IdentityDbContext{public ApplicationDbContext(DbContextOptionsoptions)
:base(options)
{
}protected override voidOnModelCreating(ModelBuilder builder)
{base.OnModelCreating(builder);//Customize the ASP.NET Identity model and override the defaults if needed.//For example, you can rename the ASP.NET Identity table names and more.//Add your customizations after calling base.OnModelCreating(builder);
}
}public classApplicationUser : IdentityUser
{//可以在这里扩展,下文会说到
}
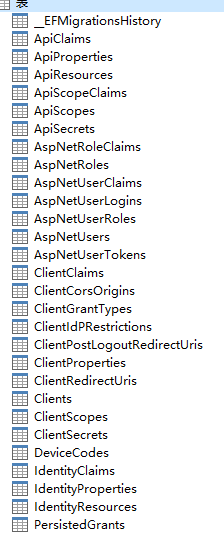
六、创建数据表
上述操作将会在 Startup.cs 中配置三个上下文,以及进行 Migrations 迁移,接下来分别执行以下语句将 Migrations 迁移的表创建到数据库中
Update-Database -Context PersistedGrantDbContext
update-database -context ConfigurationDbContext
Update-Database -Context ApplicationDbContext
七、将配置数据写入数据库
Migrations 迁移后数据库会生成三个上下文对应的数据表,接下来将把 Config.cs 中已配置的数据生成到数据库中去