ROS系统SLAM基础学习:gazebo仿真建立保存地图
- 使用gmapping建立并保存地图
- 使用hector_slam建立并保存地图
-
| 软件 | 版本 |
|---|
| Ubuntu | 16.04LTS |
| ROS | kinetic |
| gazebo | 7.16 |
使用gmapping建立并保存地图
1、下载gmapping功能包
sudo apt-get install ros-kinetic-gmapping
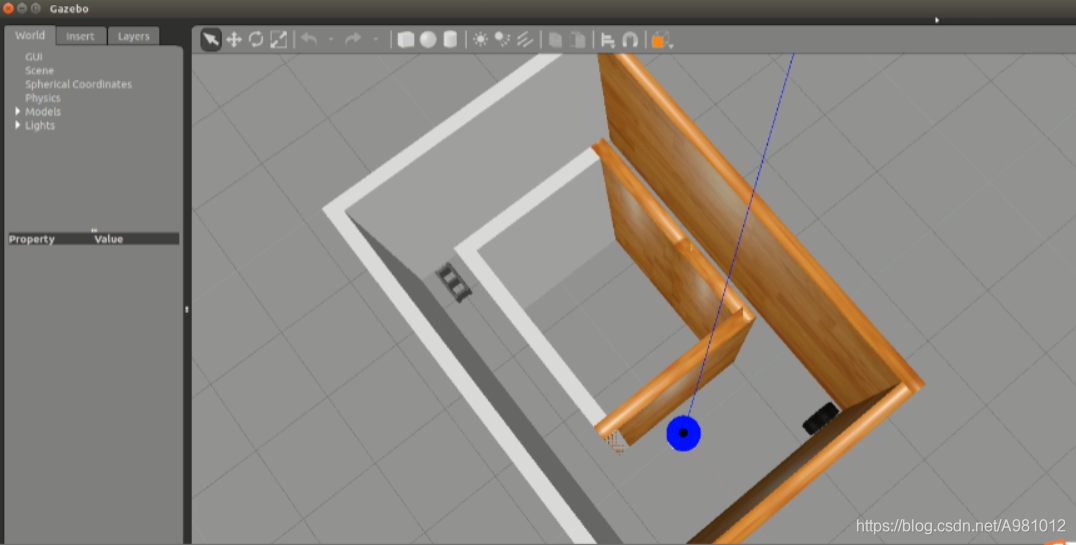
2、使用gazebo创建一个自己的world模型
终端运行gazebo命令,打开一个空的gazebo,点击Edit——>Building Editor,就可以自己去画环境模型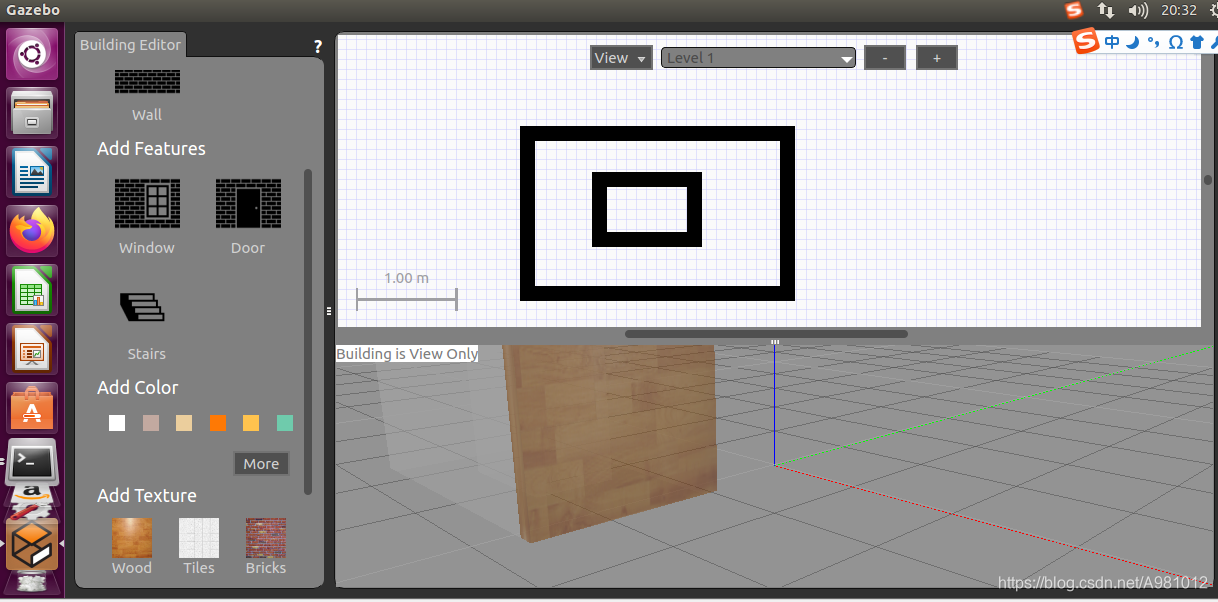
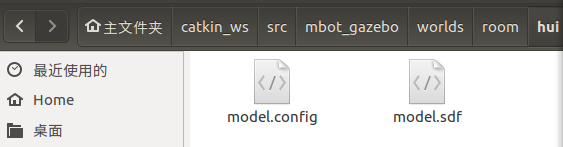
然后点击File——>save as ,选择自己想要保存的地方,就会保存两个文件,然后关闭gazebo
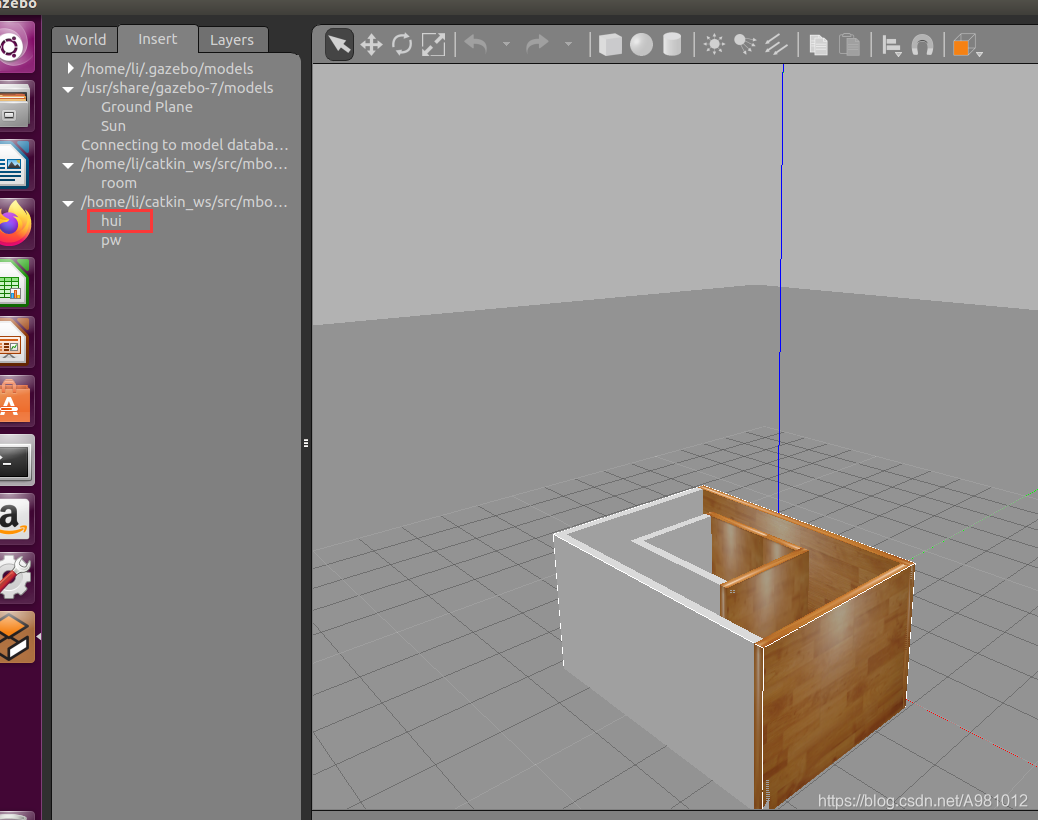
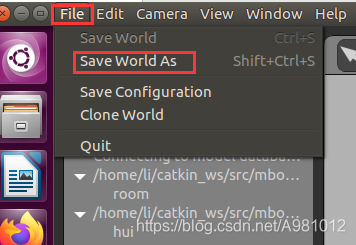
重新运行gazebo命令,打开空的gazebo,点击insert,就可以看到刚刚创建的模型,然后点击save world as选择自己要保存的路径就可以保存为world文件
补充:创建需要的功能包的命令如下:
 catkin_create_pkg mbot_gazebo gazebo_plugins gazebo_ros gazebo_ros_control roscpp rospy
 catkin_create_pkg mbot_navigation geometry_msgs move_base_msgs roscpp rospy
 catkin_create_pkg mbot_teleop geometry_msgs roscpp rospy
3、在ROS工作空间下的mbot_navigation功能包下创建一个launch文件夹,并在文件夹下建立gmapping.launch文件,内容如下:
<launch>
    <arg name="scan_topic" default="scan" />

    <node pkg="gmapping" type="slam_gmapping" name="slam_gmapping" output="screen" clear_params="true">
        <param name="odom_frame" value="odom"/>
        <param name="map_update_interval" value="5.0"/>
        <!-- Set maxUrange < actual maximum range of the Laser -->
        <param name="maxRange" value="5.0"/>
        <param name="maxUrange" value="4.5"/>
        <param name="sigma" value="0.05"/>
        <param name="kernelSize" value="1"/>
        <param name="lstep" value="0.05"/>
        <param name="astep" value="0.05"/>
        <param name="iterations" value="5"/>
        <param name="lsigma" value="0.075"/>
        <param name="ogain" value="3.0"/>
        <param name="lskip" value="0"/>
        <param name="srr" value="0.01"/>
        <param name="srt" value="0.02"/>
        <param name="str" value="0.01"/>
        <param name="stt" value="0.02"/>
        <param name="linearUpdate" value="0.5"/>
        <param name="angularUpdate" value="0.436"/>
        <param name="temporalUpdate" value="-1.0"/>
        <param name="resampleThreshold" value="0.5"/>
        <param name="particles" value="80"/>
        <param name="xmin" value="-1.0"/>
        <param name="ymin" value="-1.0"/>
        <param name="xmax" value="1.0"/>
        <param name="ymax" value="1.0"/>
        <param name="delta" value="0.05"/>
        <param name="llsamplerange" value="0.01"/>
        <param name="llsamplestep" value="0.01"/>
        <param name="lasamplerange" value="0.005"/>
        <param name="lasamplestep" value="0.005"/>
        <remap from="scan" to="$(arg scan_topic)"/>
    </node>
</launch>
在此路径下,建立gmapping_demo.launch文件,内容如下:
<launch>

    <include file="$(find mbot_navigation)/launch/gmapping.launch"/>

    <!-- 启动rviz -->
    <node pkg="rviz" type="rviz" name="rviz" args="-d $(find mbot_navigation)/rviz/gmapping.rviz"/>

</launch>
补充:还是在ROS工作空间下的mbot_navigation功能包下创建一个rviz文件夹,并在文件夹下建立gmapping.rviz文件,内容如下:
Panels:
  - Class: rviz/Displays
    Help Height: 78
    Name: Displays
    Property Tree Widget:
      Expanded:
        - /Global Options1
        - /RobotModel1/Links1/base_footprint1
        - /Map1/Position1
      Splitter Ratio: 0.652661026
    Tree Height: 536
  - Class: rviz/Selection
    Name: Selection
  - Class: rviz/Tool Properties
    Expanded:
      - /2D Pose Estimate1
      - /2D Nav Goal1
    Name: Tool Properties
    Splitter Ratio: 0.428570986
  - Class: rviz/Views
    Expanded:
      - /Current View1
    Name: Views
    Splitter Ratio: 0.5
  - Class: rviz/Time
    Experimental: false
    Name: Time
    SyncMode: 0
    SyncSource: LaserScan
Toolbars:
  toolButtonStyle: 2
Visualization Manager:
  Class: ""
  Displays:
    - Alpha: 0.5
      Cell Size: 0.5
      Class: rviz/Grid
      Color: 88; 88; 90
      Enabled: true
      Line Style:
        Line Width: 0.0299999993
        Value: Lines
      Name: Grid
      Normal Cell Count: 0
      Offset:
        X: 0
        Y: 0
        Z: 0
      Plane: XY
      Plane Cell Count: 80
      Reference Frame: map
      Value: true
    - Angle Tolerance: 0.100000001
      Class: rviz/Odometry
      Covariance:
        Orientation:
          Alpha: 0.5
          Color: 255; 255; 127
          Color Style: Unique
          Frame: Local
          Offset: 1
          Scale: 1
          Value: true
        Position:
          Alpha: 0.300000012
          Color: 204; 51; 204
          Scale: 1
          Value: true
        Value: true
      Enabled: false
      Keep: 100
      Name: Odometry
      Position Tolerance: 0.100000001
      Shape:
        Alpha: 1
        Axes Length: 1
        Axes Radius: 0.100000001
        Color: 255; 25; 0
        Head Length: 0.300000012
        Head Radius: 0.100000001
        Shaft Length: 1
        Shaft Radius: 0.0500000007
        Value: Arrow
      Topic: /odom
      Unreliable: false
      Value: false
    - Angle Tolerance: 0.100000001
      Class: rviz/Odometry
      Covariance:
        Orientation:
          Alpha: 0.5
          Color: 255; 255; 127
          Color Style: Unique
          Frame: Local
          Offset: 1
          Scale: 1
          Value: true
        Position:
          Alpha: 0.300000012
          Color: 204; 51; 204
          Scale: 1
          Value: true
        Value: true
      Enabled: false
      Keep: 100
      Name: Odometry EKF
      Position Tolerance: 0.100000001
      Shape:
        Alpha: 1
        Axes Length: 1
        Axes Radius: 0.100000001
        Color: 255; 25; 0
        Head Length: 0.300000012
        Head Radius: 0.100000001
        Shaft Length: 1
        Shaft Radius: 0.0500000007
        Value: Arrow
      Topic: /odom
      Unreliable: false
      Value: false
    - Alpha: 1
      Class: rviz/RobotModel
      Collision Enabled: false
      Enabled: true
      Links:
        All Links Enabled: true
        Expand Joint Details: false
        Expand Link Details: false
        Expand Tree: false
        Link Tree Style: Links in Alphabetic Order
        back_caster_link:
          Alpha: 1
          Show Axes: false
          Show Trail: false
          Value: true
        base_footprint:
          Alpha: 1
          Show Axes: false
          Show Trail: false
          Value: true
        base_link:
          Alpha: 1
          Show Axes: false
          Show Trail: false
          Value: true
        front_caster_link:
          Alpha: 1
          Show Axes: false
          Show Trail: false
          Value: true
        laser_link:
          Alpha: 1
          Show Axes: false
          Show Trail: false
          Value: true
        left_wheel_link:
          Alpha: 1
          Show Axes: false
          Show Trail: false
          Value: true
        right_wheel_link:
          Alpha: 1
          Show Axes: false
          Show Trail: false
          Value: true
      Name: RobotModel
      Robot Description: robot_description
      TF Prefix: ""
      Update Interval: 0
      Value: true
      Visual Enabled: true
    - Alpha: 0.5
      Class: rviz/Map
      Color Scheme: map
      Draw Behind: true
      Enabled: true
      Name: Map
      Topic: /map
      Unreliable: false
      Use Timestamp: false
      Value: true
    - Alpha: 1
      Autocompute Intensity Bounds: true
      Autocompute Value Bounds:
        Max Value: 0.30399999
        Min Value: 0.30399999
        Value: true
      Axis: Z
      Channel Name: intensity
      Class: rviz/LaserScan
      Color: 255; 0; 0
      Color Transformer: FlatColor
      Decay Time: 0
      Enabled: true
      Invert Rainbow: false
      Max Color: 255; 255; 255
      Max Intensity: 4096
      Min Color: 0; 0; 0
      Min Intensity: 0
      Name: LaserScan
      Position Transformer: XYZ
      Queue Size: 10
      Selectable: true
      Size (Pixels): 3
      Size (m): 0.100000001
      Style: Spheres
      Topic: /scan
      Unreliable: false
      Use Fixed Frame: true
      Use rainbow: true
      Value: true
  Enabled: true
  Global Options:
    Background Color: 0; 0; 0
    Default Light: true
    Fixed Frame: map
    Frame Rate: 30
  Name: root
  Tools:
    - Class: rviz/MoveCamera
    - Class: rviz/Interact
      Hide Inactive Objects: true
    - Class: rviz/Select
    - Class: rviz/SetInitialPose
      Topic: /initialpose
    - Class: rviz/SetGoal
      Topic: /move_base_simple/goal
  Value: true
  Views:
    Current:
      Class: rviz/XYOrbit
      Distance: 25.5129166
      Enable Stereo Rendering:
        Stereo Eye Separation: 0.0599999987
        Stereo Focal Distance: 1
        Swap Stereo Eyes: false
        Value: false
      Focal Point:
        X: 0.456349134
        Y: -4.62145996
        Z: 4.76837158e-07
      Focal Shape Fixed Size: true
      Focal Shape Size: 0.0500000007
      Invert Z Axis: false
      Name: Current View
      Near Clip Distance: 0.00999999978
      Pitch: 1.19979608
      Target Frame: <Fixed Frame>
      Value: XYOrbit (rviz)
      Yaw: 5.34539318
    Saved: ~
Window Geometry:
  Displays:
    collapsed: false
  Height: 749
  Hide Left Dock: false
  Hide Right Dock: false
  QMainWindow State: 000000ff00000000fd00000004000000000000016a000002a7fc0200000005fb0000001200530065006c0065006300740069006f006e00000001e10000009b0000006100fffffffb0000001e0054006f006f006c002000500072006f007000650072007400690065007302000001ed000001df00000198000000a3fb000000120056006900650077007300200054006f006f02000001df000002110000018500000122fb000000200054006f006f006c002000500072006f0070006500720074006900650073003203000002880000011d000002210000017afb000000100044006900730070006c0061007900730100000028000002a7000000d700ffffff000000010000010f00000324fc0200000003fb0000001e0054006f006f006c002000500072006f00700065007200740069006500730100000041000000780000000000000000fb0000000a00560069006500770073000000002800000324000000ad00fffffffb0000001200530065006c0065006300740069006f006e010000025a000000b200000000000000000000000200000490000000a9fc0100000001fb0000000a00560069006500770073030000004e00000080000002e10000019700000003000004a00000003efc0100000002fb0000000800540069006d00650000000000000004a00000030000fffffffb0000000800540069006d0065010000000000000450000000000000000000000242000002a700000004000000040000000800000008fc0000000100000002000000010000000a0054006f006f006c00730100000000ffffffff0000000000000000
  Selection:
    collapsed: false
  Time:
    collapsed: false
  Tool Properties:
    collapsed: false
  Views:
    collapsed: false
  Width: 946
  X: 766
  Y: 197
4、在ROS工作空间下的mbot_gazebo功能包下的launch文件夹下,创建mbot_laser_nav_gazebo.launch文件,内容如下:
hui.world是我自己创建的world环境名称
<launch>

    <!-- 设置launch文件的参数 -->
    <arg name="world_name" value="$(find mbot_gazebo)/worlds/hui.world"/>
    <arg name="paused" default="false"/>
    <arg name="use_sim_time" default="true"/>
    <arg name="gui" default="true"/>
    <arg name="headless" default="false"/>
    <arg name="debug" default="false"/>

    <!-- 运行gazebo仿真环境 -->
    <include file="$(find gazebo_ros)/launch/empty_world.launch">
        <arg name="world_name" value="$(arg world_name)" />
        <arg name="debug" value="$(arg debug)" />
        <arg name="gui" value="$(arg gui)" />
        <arg name="paused" value="$(arg paused)"/>
        <arg name="use_sim_time" value="$(arg use_sim_time)"/>
        <arg name="headless" value="$(arg headless)"/>
    </include>

    <!-- 加载机器人模型描述参数 -->
    <param name="robot_description" command="$(find xacro)/xacro --inorder '$(find mbot_description)/urdf/xacro/gazebo/mbot_with_laser_gazebo.xacro'" />

    <!-- 运行joint_state_publisher节点,发布机器人的关节状态  -->
    <node name="joint_state_publisher" pkg="joint_state_publisher" type="joint_state_publisher" ></node>

    <!-- 运行robot_state_publisher节点,发布tf  -->
    <node name="robot_state_publisher" pkg="robot_state_publisher" type="robot_state_publisher"  output="screen" >
        <param name="publish_frequency" type="double" value="50.0" />
    </node>

    <!-- 在gazebo中加载机器人模型-->
    <node name="urdf_spawner" pkg="gazebo_ros" type="spawn_model" respawn="false" output="screen"
          args="-urdf -model mrobot -param robot_description"/>

</launch>
5、在ROS工作空间下的mbot_teleop功能包下的launch文件夹里,创建mbot_teleop.launch文件,内容如下:
<launch>
  <node name="mbot_teleop" pkg="mbot_teleop" type="mbot_teleop.py" output="screen">
    <param name="scale_linear" value="0.1" type="double"/>
    <param name="scale_angular" value="0.4" type="double"/>
  </node>
</launch>
在mbot_teleop功能包下创建mbot_teleop.py文件,内容如下:
#!/usr/bin/env python
# -*- coding: utf-8 -*-

import rospy
from geometry_msgs.msg import Twist
import sys, select, termios, tty

msg = """
Control mbot!
---------------------------
Moving around:
   u    i    o
   j    k    l
   m    ,    .

q/z : increase/decrease max speeds by 10%
w/x : increase/decrease only linear speed by 10%
e/c : increase/decrease only angular speed by 10%
space key, k : force stop
anything else : stop smoothly

CTRL-C to quit
"""

moveBindings = {
        'i':(1,0),
        'o':(1,-1),
        'j':(0,1),
        'l':(0,-1),
        'u':(1,1),
        ',':(-1,0),
        '.':(-1,1),
        'm':(-1,-1),
           }

speedBindings={
        'q':(1.1,1.1),
        'z':(.9,.9),
        'w':(1.1,1),
        'x':(.9,1),
        'e':(1,1.1),
        'c':(1,.9),
          }

def getKey():
    tty.setraw(sys.stdin.fileno())
    rlist, _, _ = select.select([sys.stdin], [], [], 0.1)
    if rlist:
        key = sys.stdin.read(1)
    else:
        key = ''

    termios.tcsetattr(sys.stdin, termios.TCSADRAIN, settings)
    return key

speed = .2
turn = 1

def vels(speed,turn):
    return "currently:\tspeed %s\tturn %s " % (speed,turn)

if __name__=="__main__":
    settings = termios.tcgetattr(sys.stdin)

    rospy.init_node('mbot_teleop')
    pub = rospy.Publisher('/cmd_vel', Twist, queue_size=5)

    x = 0
    th = 0
    status = 0
    count = 0
    acc = 0.1
    target_speed = 0
    target_turn = 0
    control_speed = 0
    control_turn = 0
    try:
        print msg
        print vels(speed,turn)
        while(1):
            key = getKey()
            # 运动控制方向键(1:正方向,-1负方向)
            if key in moveBindings.keys():
                x = moveBindings[key][0]
                th = moveBindings[key][1]
                count = 0
            # 速度修改键
            elif key in speedBindings.keys():
                speed = speed * speedBindings[key][0]  # 线速度增加0.1倍
                turn = turn * speedBindings[key][1]    # 角速度增加0.1倍
                count = 0

                print vels(speed,turn)
                if (status == 14):
                    print msg
                status = (status + 1) % 15
            # 停止键
            elif key == ' ' or key == 'k' :
                x = 0
                th = 0
                control_speed = 0
                control_turn = 0
            else:
                count = count + 1
                if count > 4:
                    x = 0
                    th = 0
                if (key == '\x03'):
                    break

            # 目标速度=速度值*方向值
            target_speed = speed * x
            target_turn = turn * th

            # 速度限位,防止速度增减过快
            if target_speed > control_speed:
                control_speed = min( target_speed, control_speed + 0.02 )
            elif target_speed < control_speed:
                control_speed = max( target_speed, control_speed - 0.02 )
            else:
                control_speed = target_speed

            if target_turn > control_turn:
                control_turn = min( target_turn, control_turn + 0.1 )
            elif target_turn < control_turn:
                control_turn = max( target_turn, control_turn - 0.1 )
            else:
                control_turn = target_turn

            # 创建并发布twist消息
            twist = Twist()
            twist.linear.x = control_speed;
            twist.linear.y = 0;
            twist.linear.z = 0
            twist.angular.x = 0;
            twist.angular.y = 0;
            twist.angular.z = control_turn
            pub.publish(twist)

    except:
        print e

    finally:
        twist = Twist()
        twist.linear.x = 0; twist.linear.y = 0; twist.linear.z = 0
        twist.angular.x = 0; twist.angular.y = 0; twist.angular.z = 0
        pub.publish(twist)

    termios.tcsetattr(sys.stdin, termios.TCSADRAIN, settings)
其中控制各个方向的是i/,控制前进/后退 u/m控制小车顺时针/逆时针旋转 j/l控制右转左转
6、打开终端运行roscore命令打开ros系统,新建一个终端,cd到ROS工作空间下,运行命令,打开就可以环境中带有激光雷达的机器人
catkin_make
source ~/catkin_ws/devel/setup.bash
roslaunch src/mbot_gazebo/launch/mbot_laser_nav_gazebo.launch
7、新建一个终端,cd到ROS工作空间下,运行命令,就可以看到rviz打开
roslaunch src/mbot_navigation/launch/gmapping_demo.launch
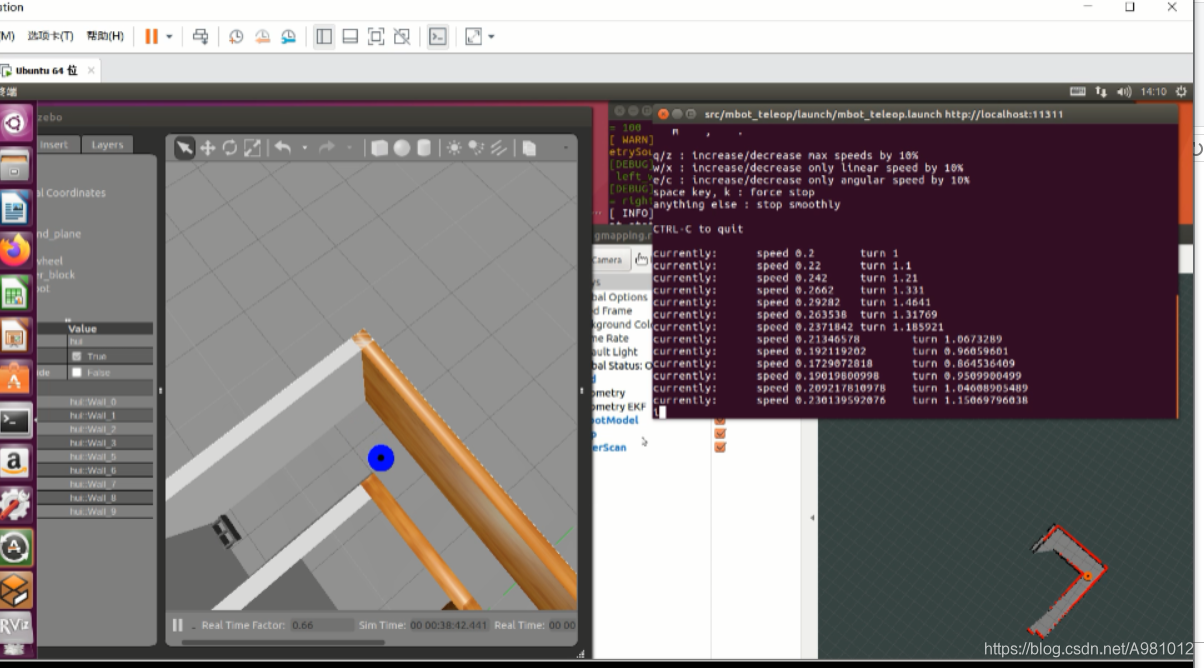
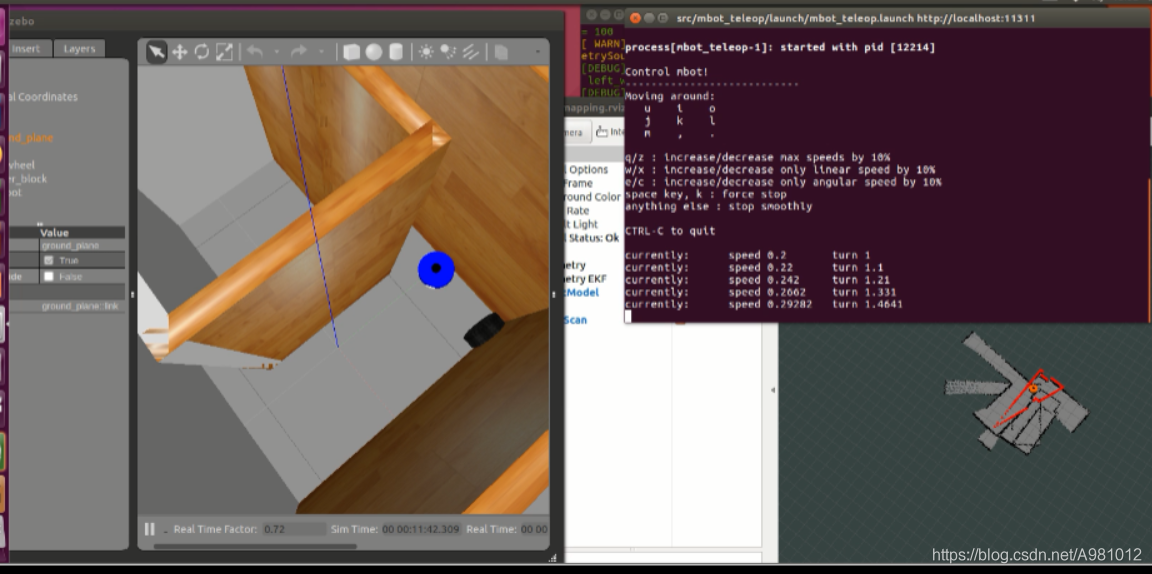
8、新建一个终端,cd到ROS工作空间下,运行
roslaunch src/mbot_teleop/launch/mbot_teleop.launch
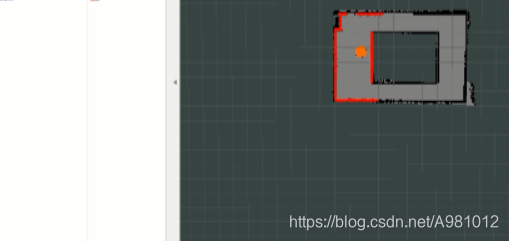
通过键盘控制小车运动,并显示出地图
9、新建终端,运行命令
sudo apt-get install ros-kinetic-map-server
rosrun map_server map_saver -f ~/catkin_ws/src/mbot_navigation/maps/图片名称
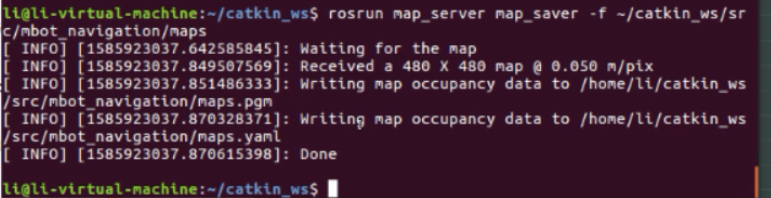
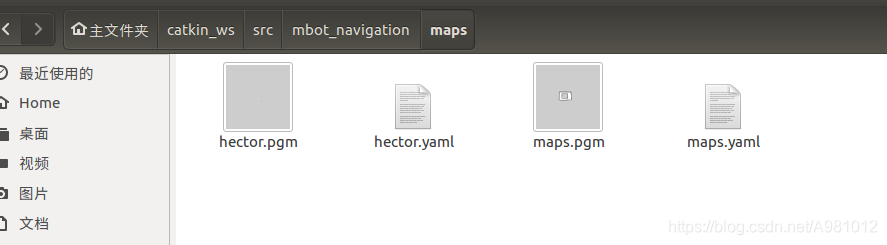
地图就保存了,可以在路径下看到pgm图片和对应的yaml文件。
使用hector_slam建立并保存地图
1、下载hector_slam功能包
sudo apt-get install ros-kinetic-hector-slam
2、配置hector_mapping节点
在ROS工作空间下mbot_navigation功能包的launch文件夹下,创建hector.launch文件,内容如下:
<launch>

    <node pkg = "hector_mapping" type="hector_mapping" name="hector_mapping" output="screen">
        <!-- Frame names -->
        <param name="pub_map_odom_transform" value="true"/>
        <param name="map_frame" value="map" />
        <param name="base_frame" value="base_footprint" />
        <param name="odom_frame" value="odom" />

        <!-- Tf use -->
        <param name="use_tf_scan_transformation" value="true"/>
        <param name="use_tf_pose_start_estimate" value="false"/>

        <!-- Map size / start point -->
        <param name="map_resolution" value="0.05"/>
        <param name="map_size" value="2048"/>
        <param name="map_start_x" value="0.5"/>
        <param name="map_start_y" value="0.5" />
        <param name="laser_z_min_value" value = "-1.0" />
        <param name="laser_z_max_value" value = "1.0" />
        <param name="map_multi_res_levels" value="2" />

        <param name="map_pub_period" value="2" />
        <param name="laser_min_dist" value="0.4" />
        <param name="laser_max_dist" value="5.5" />
        <param name="output_timing" value="false" />
        <param name="pub_map_scanmatch_transform" value="true" />

        <!-- Map update parameters -->
        <param name="update_factor_free" value="0.4"/>
        <param name="update_factor_occupied" value="0.7" />
        <param name="map_update_distance_thresh" value="0.2"/>
        <param name="map_update_angle_thresh" value="0.06" />

        <!-- Advertising config -->
        <param name="advertise_map_service" value="true"/>
        <param name="scan_subscriber_queue_size" value="5"/>
        <param name="scan_topic" value="scan"/>
    </node>

</launch>
同样在此目录下,创建hector_demo.launch文件
<launch>

    <include file="$(find mbot_navigation)/launch/hector.launch"/>

    <!-- 启动rviz-->
    <node pkg="rviz" type="rviz" name="rviz" args="-d $(find mbot_navigation)/rviz/gmapping.rviz"/>

</launch>
3、新建一个终端,cd到ROS工作空间下运行命令
catkin_make
source ~/catkin_ws/devel/setup.bash
roslaunch src/mbot_gazebo/launch/mbot_laser_nav_gazebo.launch
新建一个终端,cd到ROS工作空间下,运行命令
roslaunch src/mbot_navigation/launch/hector_demo.launch
新建一个终端,cd到ROS工作空间下,运行命令
roslaunch src/mbot_teleop/launch/mbot_teleop.launch
通过键盘控制机器人运动,并用rviz显示出地图成像,
直至地图图像显示完成,就可以停止机器人的运动

4、新建终端,cd到ROS工作空间下,运行命令保存地图图像
rosrun map_server map_saver -f ~/catkin_ws/src/mbot_navigation/maps/图片名
在选择的目录下就可以看到pgm图片和yaml文件
遇到的问题解决以及总结

是没有安装map-server包,运行sudo apt-get install ros-kinetic-map-server命令安装
用hector_slam进行地图建立容易出现打滑现象,但是其实是键盘控制机器人运动没有控制好,出现打滑现象,我是将roslaunch src/mbot_navigation/launch/hector_demo.launch停止后,重新运行一遍,仔细观察机器人轮子的方向来判断运动方向,然后就没有出现这种情况了。
要将机器人遍历出的地图运用到机器人的自主导航上,还需要对pgm图片进行封边,就是运用编辑工具,将出现的建筑物的边框线条有断点,或是不太明显的地方进行弥补,使其清晰且没有断点,不然在机器人自主导航时,机器人运动会出现很大误差。
ps:我已将这些功能包上传,如有需要可自行下载。
这些launch文件夹什么的都是需要自己新建的
如有错误请指正!
本文内容由网友自发贡献,版权归原作者所有,本站不承担相应法律责任。如您发现有涉嫌抄袭侵权的内容,请联系:hwhale#tublm.com(使用前将#替换为@)