这是我的推广信息,以激励自己更好的分享自己的知识和经验!也希望看到的你能够多多支持,谢谢!
1. 滴滴云AI大师:
目前滴滴云正在大力推广自己的云计算服务,需要购买的朋友们用我的AI大师码 「2049」在滴滴云上购买 GPU / vGPU / 机器学习产品可额外享受 9 折优惠,点击这里前往滴滴云官网。
参考信息
- pyrealsense2 documentation
- 官方示例
示例代码
import numpy as np
import cv2
import matplotlib.pyplot as plt
import random

import pyrealsense2 as rs
bagfile = 'realsense/record/20200901.bag'
初始化工作
注意要预先知道彩色图像和深度图像的分辨率,否则报错。
pipeline = rs.pipeline()

config = rs.config()
rs.config.enable_device_from_file(config, bagfile, repeat_playback=False)

config.enable_stream(rs.stream.color, 1280, 720, rs.format.rgb8, 30)
config.enable_stream(rs.stream.depth, 848, 480, rs.format.z16, 30)

pf = pipeline.start(config)
<ipython-input-3-291a003cf405>:6: DeprecationWarning: an integer is required (got type pyrealsense2.format).  Implicit conversion to integers using __int__ is deprecated, and may be removed in a future version of Python.
  config.enable_stream(rs.stream.color, 1280, 720, rs.format.rgb8, 30)
<ipython-input-3-291a003cf405>:7: DeprecationWarning: an integer is required (got type pyrealsense2.format).  Implicit conversion to integers using __int__ is deprecated, and may be removed in a future version of Python.
  config.enable_stream(rs.stream.depth, 848, 480, rs.format.z16, 30)
print(f"device: {pf.get_device()}")
print(f"depth_sensor: {pf.get_device().first_depth_sensor()}")
print(f"depth_scale: {pf.get_device().first_depth_sensor().get_depth_scale()}")
print(f"streams: {pf.get_streams()}")
device: <pyrealsense2.device: Intel RealSense D435I (S/N: 939622075496)>
depth_sensor: <pyrealsense2.depth_sensor object at 0x7fd10032ac70>
depth_scale: 0.0010000000474974513
streams: [<pyrealsense2.video_stream_profile: 1(0) 848x480 @ 30fps 1>, <pyrealsense2.video_stream_profile: 2(0) 1280x720 @ 30fps 5>]
读取一帧数据
align_to = rs.stream.color
align = rs.align(align_to)
print(f"align:{align}")
frame = pipeline.wait_for_frames()
print(f"data: {frame.data}")
print(f"frame_number: {frame.frame_number}")
print(f"frame_timestamp_domain: {frame.frame_timestamp_domain}")
print(f"profile: {frame.profile}")
print(f"timestamp: {frame.timestamp}")
align:<pyrealsense2.align object at 0x7fd0f9fd6870>
data: <pyrealsense2.BufData object at 0x7fd0fa2820f0>
frame_number: 3744
frame_timestamp_domain: timestamp_domain.system_time
profile: <pyrealsense2.video_stream_profile: 1(0) 848x480 @ 30fps 1>
timestamp: 1598934180418.8987
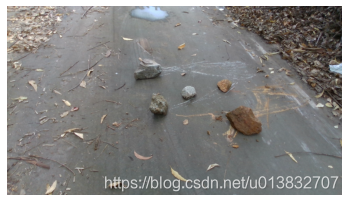
获取RGB图像
data_sz = frame.get_data_size()
print(data_sz, f"1280*720={1280* 720 * 3}")
color_rs = frame.get_color_frame()
img = np.asanyarray(color_rs.get_data())
plt.imshow(img)
plt.axis('off')
plt.show()
814080 1280*720=2764800
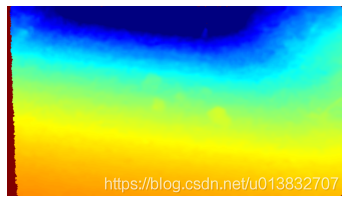
获取深度图
一般深度图的单位是mm,用np.uint16来表示.
depth_rs = frame.get_depth_frame()
depth = np.asanyarray(depth_rs.get_data())
print(depth.shape, depth.dtype)
print(depth[0, 0])
print(f"max(depth):{np.max(depth)}; min(depth:{np.min(depth)})")
(480, 848) uint16
0
max(depth):7302; min(depth:0)
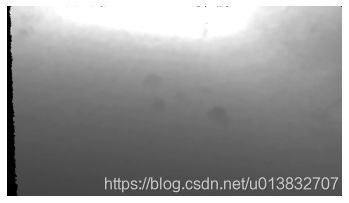
dimg_gray = cv2.convertScaleAbs(depth, alpha=255/4000)
dimg = cv2.applyColorMap(dimg_gray, cv2.COLORMAP_JET)
plt.imshow(dimg)
plt.axis('off')
plt.show()
plt.imshow(dimg_gray, cmap='gray')
plt.axis('off')
plt.show()
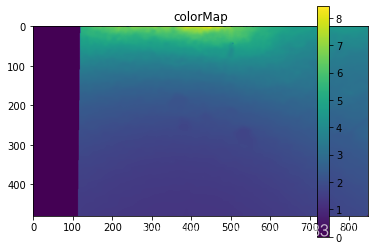
获取点云
点云数据就是一系列的点的合集,如下:
pc = rs.pointcloud()
pc.map_to(color_rs)
points_rs = pc.calculate(depth_rs)

points = np.asanyarray(points_rs.get_vertices())
print(points.shape, f"848*480 = {848*480}")
print(points[0], type(points[0]))
(407040,) 848*480 = 407040
(-0., -0., 0.) <class 'numpy.void'>
def calc_dist(xyz):
    x, y, z = xyz
    return (x**2 + y**2 + z**2)**0.5
dists = list(map(calc_dist, points))
dists = np.array(dists).reshape(dimg_gray.shape)

fig = plt.figure()

ax = fig.add_subplot(111)
ax.set_title('colorMap')
plt.imshow(dists)
ax.set_aspect('equal')

cax = fig.add_axes([0.12, 0.1, 0.78, 0.8])
cax.get_xaxis().set_visible(False)
cax.get_yaxis().set_visible(False)
cax.patch.set_alpha(0)
cax.set_frame_on(False)
plt.colorbar(orientation='vertical')
plt.show()
本文内容由网友自发贡献,版权归原作者所有,本站不承担相应法律责任。如您发现有涉嫌抄袭侵权的内容,请联系:hwhale#tublm.com(使用前将#替换为@)