以前使用websocket都是使用
window.webSocket = new WebSocket('ws://' + config.webSocketUrl + '/webData/websocket?token=' + token + '&username=' + username);
这种方式进行操作。由于项目要求,需要访问网关因此需要使用http的连接方式进行socket信息推送,以下用的是 SockJS。
# 2020-02-19更新在项目前期开发,我们都是在全局的js文件中定义socket的连接ip和端口,在页面调用。但在项目优化过程中,我们希望可以直接使用webpack的代理模式,直接通过代码进行请求,这样页面就不需要进行socket地址的配置。
优点:(1)页面减少全量变量的配置;(2)系统方法调用的统一性,和其他普通的接口调用代理一致。
缺点:(1)由于在页面中配置的代理,而不是直接请求http:xxxx,导致需要在代理服务器中(例如ngnix)上多添加一个代理配置。相当于把以前http的直接请求方式变成代理转发请求。
具体更改模式为:
1、在自定义的websocket.js文件中,创建SockJS对象:
新写法:const socket = new SockJS('/bullet');// 连接SockJS的endpoint名称为"bullet"
旧写法:let socket = new SockJS('http://'+config.webSocketUrl+'/bullet');//连接SockJS的endpoint名称为"bullet"
2、在项目根目录下的config/index.js文件中(vue-cli2.0),或者vue.config.js(vue-cli3.0)添加代理配置即可。
proxyTable: {
'/bullet': {
target: target, //target为目标变量
ws: true,
pathRewrite: {
'^/bullet': '/bullet'
},
}
},
#2019-04-11更新随着项目的模块化,需要把websocket相关的功能独自创建一个模块进行引入使用,以下是本人的操作方式:
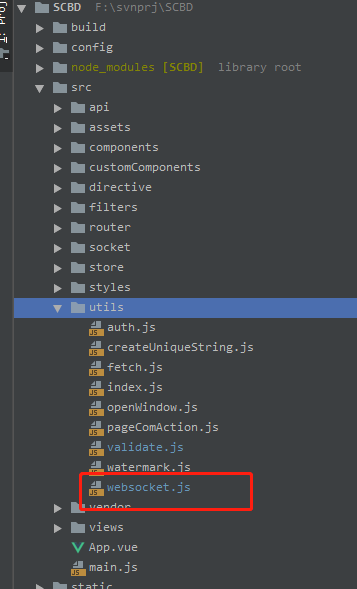
1.在utils目录下创建一个js文件,可以命名为:websocket.js
2.在websocket.js文件中写入相关的socket.io代码
说明:config.webSocketUrl是一个url地址的变量。主要是在vue项目中的static文件夹下创建一个js文件(不会被webpack压缩),定义全局常量、变量,并在index.html中做为一个原生的js文件使用
//socket功能
import SockJS from "sockjs-client";
import Stompfrom "stompjs";
import storefrom "../store";
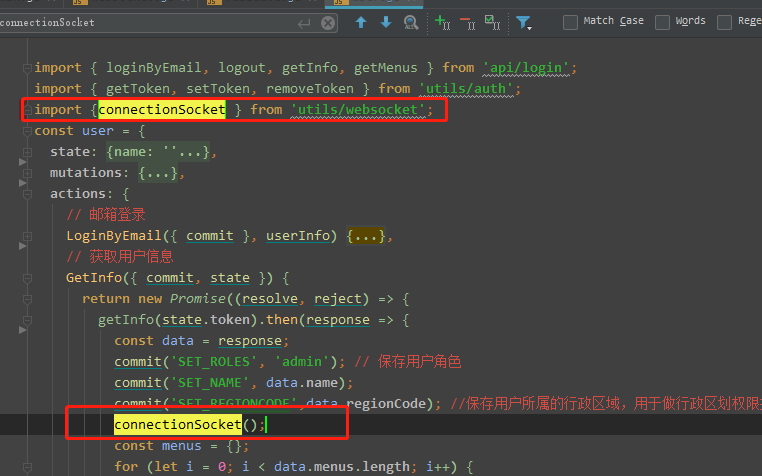
export function connectionSocket() {
let socket= new SockJS('http://'+config.webSocketUrl+'/bullet');//连接SockJS的endpoint名称为"bullet"
console.log('socket连接地址:'+'http://'+config.webSocketUrl+'/bullet');//获取STOMP子协议的客户端对象
let stompClient =Stomp.over(socket);//定义客户端的认证信息,按需求配置
let headers ={
Authorization:store.getters.token
};//拦截输出的一大堆垃圾信息
stompClient.debug =function (str) {
$("#debug").append(str + "\n");
};//向服务器发起websocket连接
stompClient.connect(headers,() =>{
stompClient.subscribe('/topic/getResponse', (response) => { //订阅服务端提供的某个topic
if(response.body) {const repObj =JSON.parse(response.body);
if (repObj.data.webSocketType == 'ISEVehicle') { //监控管理,新版车辆监控
if (repObj.status == 200) {
store.dispatch('carMonitorFun', repObj);
}else if (repObj.data.webSocketType == 'vehicleAlarm') { //首页,车辆告警数据推送
if (repObj.status == 200) {
store.commit('vehicleAlarmMUTA', repObj.data);
}
}
}
});
stompClient.subscribe('/user/'+store.getters.userRegionCode+'/queue/getResponse', (response) => { //订阅服务端提供的某个topic
if(response.body) {const repObj =JSON.parse(response.body);if (repObj.data.webSocketType == 'personAlarm') { //首页,人脸预警数据推送
if (repObj.status == 200) {
store.commit('personAlarmMUTA', repObj.data);
}
}else if (repObj.data.webSocketType == 'vehicleAlarm') { //首页,车辆告警数据推送
if (repObj.status == 200) {
store.commit('vehicleAlarmMUTA', repObj.data);
}
}
}
});
stompClient.subscribe('/user/'+store.getters.token+'/queue/getResponse', (response) => { //订阅服务端提供的某个topic
if(response.body) {
let repObj=JSON.parse(response.body);if (repObj.data.webSocketType =='task') { store.commit('monitorStatus', repObj);} //任务列表//当监控到websocket有数据返回的时候,修改monitorStatus使其发生变化即可
else if (repObj.data.webSocketType == 'networkConfig') { store.commit('monitorStatusMUTA', repObj);}//联网配置
}
});
}, (err)=>{//连接发生错误时的处理函数
console.log('失败')
});
}
3.在页面需要初始化的地方因为该js文件即可
# 2018-12-13创建
先安装 sockjs-client 和 stompjs
npm install sockjs-client
npm install stompjs
import SockJS from 'sockjs-client';
import Stompfrom 'stompjs';
exportdefault{
data(){return{
stompClient:'',
timer:'',
}
},
methods:{
initWebSocket() {this.connection();
let that= this;//断开重连机制,尝试发送消息,捕获异常发生时重连
this.timer = setInterval(() =>{try{
that.stompClient.send("test");
}catch(err) {
console.log("断线了:" +err);
that.connection();
}
},5000);
},
connection() {//建立连接对象
let socket = new SockJS('http://10.10.91.4:8081/ws');//获取STOMP子协议的客户端对象
this.stompClient =Stomp.over(socket);//定义客户端的认证信息,按需求配置
let headers ={
Authorization:''}//向服务器发起websocket连接
this.stompClient.connect(headers,() =>{this.stompClient.subscribe('/topic/public', (msg) => { //订阅服务端提供的某个topic
console.log('广播成功')
console.log(msg);//msg.body存放的是服务端发送给我们的信息
},headers);this.stompClient.send("/app/chat.addUser",
headers,
JSON.stringify({sender:'',chatType: 'JOIN'}),
)//用户加入接口
}, (err) =>{//连接发生错误时的处理函数
console.log('失败')
console.log(err);
});
},//连接 后台
disconnect() {if (this.stompClient) {this.stompClient.disconnect();
}
},//断开连接
},
mounted(){this.initWebSocket();
},
beforeDestroy: function () {//页面离开时断开连接,清除定时器
this.disconnect();
clearInterval(this.timer);
}
}
问题
安装 sockjs-client、stompjs;在这儿要注意一下,我在"stompjs": "^2.3.3"这个版本发现,引入stompjs会报一个net模块找不到,需要在stompjs模块根目录下执行npm install net,这个是个奇葩的问题
进入到module目录下的stompjs目录,执行npm install net

