4.1 IoC 控制反转
- 控制反转是一种思想。
- 控制反转是为了降低程序耦合度,提高程序扩展力,达到OCP原则,达到DIP原则。
- 控制反转,反转的是什么?
-
- 将对象的创建权利交出去,交给第三方容器负责。
- 将对象和对象之间关系的维护权交出去,交给第三方容器负责。
-
- DI(Dependency Injection):依赖注入
4.2 依赖注入
依赖注入实现了控制反转的思想。
Spring通过依赖注入的方式来完成Bean管理的。
Bean管理说的是:Bean对象的创建,以及Bean对象中属性的赋值(或者叫做Bean对象之间关系的维护)。
依赖注入:
- 依赖指的是对象和对象之间的关联关系。
- 注入指的是一种数据传递行为,通过注入行为来让对象和对象产生关系。
依赖注入常见的实现方式包括两种:
新建模块:spring6-002-dependency-injection
4.2.1 set注入
set注入,基于set方法实现的,底层会通过反射机制调用属性对应的set方法然后给属性赋值。这种方式要求属性必须对外提供set方法。
<?xml version="1.0" encoding="UTF-8"?>
<project xmlns="http://maven.apache.org/POM/4.0.0"
         xmlns:xsi="http://www.w3.org/2001/XMLSchema-instance"
         xsi:schemaLocation="http://maven.apache.org/POM/4.0.0 http://maven.apache.org/xsd/maven-4.0.0.xsd">
    <modelVersion>4.0.0</modelVersion>
    <groupId>com.powernode</groupId>
    <artifactId>spring6-002-dependency-injection</artifactId>
    <version>1.0-SNAPSHOT</version>
    <packaging>jar</packaging>

    <repositories>
        <repository>
            <id>repository.spring.milestone</id>
            <name>Spring Milestone Repository</name>
            <url>https://repo.spring.io/milestone</url>
        </repository>
    </repositories>

    <dependencies>
        <dependency>
            <groupId>org.springframework</groupId>
            <artifactId>spring-context</artifactId>
            <version>6.0.0-M2</version>
        </dependency>
        <dependency>
            <groupId>junit</groupId>
            <artifactId>junit</artifactId>
            <version>4.13.2</version>
            <scope>test</scope>
        </dependency>
    </dependencies>

    <properties>
        <maven.compiler.source>17</maven.compiler.source>
        <maven.compiler.target>17</maven.compiler.target>
    </properties>

</project>
package com.powernode.spring6.dao;
/**
* @author 动力节点
* @version 1.0
* @className UserDao
* @since 1.0
**/
public class UserDao {
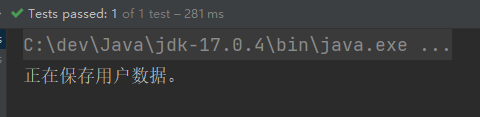
public void insert(){
System.out.println("正在保存用户数据。");
}
}
package com.powernode.spring6.service;

import com.powernode.spring6.dao.UserDao;

/**
 * @author 动力节点
 * @version 1.0
 * @className UserService
 * @since 1.0
 **/
public class UserService {

    private UserDao userDao;

    // 使用set方式注入,必须提供set方法。
    // 反射机制要调用这个方法给属性赋值的。
    public void setUserDao(UserDao userDao) {
        this.userDao = userDao;
    }

    public void save(){
        userDao.insert();
    }
}
<?xml version="1.0" encoding="UTF-8"?>
<beans xmlns="http://www.springframework.org/schema/beans"
       xmlns:xsi="http://www.w3.org/2001/XMLSchema-instance"
       xsi:schemaLocation="http://www.springframework.org/schema/beans http://www.springframework.org/schema/beans/spring-beans.xsd">

    <bean id="userDaoBean" class="com.powernode.spring6.dao.UserDao"/>

    <bean id="userServiceBean" class="com.powernode.spring6.service.UserService">
        <property name="userDao" ref="userDaoBean"/>
    </bean>

</beans>
package com.powernode.spring6.test;
import com.powernode.spring6.service.UserService;
import org.junit.Test;
import org.springframework.context.ApplicationContext;
import org.springframework.context.support.ClassPathXmlApplicationContext;
/**
* @author 动力节点
* @version 1.0
* @className DITest
* @since 1.0
**/
public class DITest {
@Test
public void testSetDI(){
ApplicationContext applicationContext = new ClassPathXmlApplicationContext("spring.xml");
UserService userService = applicationContext.getBean("userServiceBean", UserService.class);
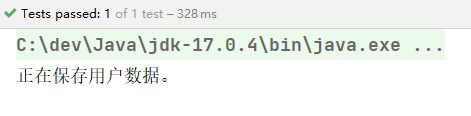
userService.save();
}
}
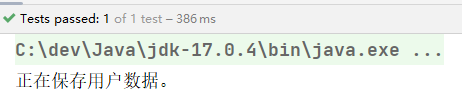
运行结果:
重点内容是,什么原理:
<?xml version="1.0" encoding="UTF-8"?>
<beans xmlns="http://www.springframework.org/schema/beans"
       xmlns:xsi="http://www.w3.org/2001/XMLSchema-instance"
       xsi:schemaLocation="http://www.springframework.org/schema/beans http://www.springframework.org/schema/beans/spring-beans.xsd">

    <bean id="userDaoBean" class="com.powernode.spring6.dao.UserDao"/>

    <bean id="userServiceBean" class="com.powernode.spring6.service.UserService">
        <property name="userDao" ref="userDaoBean"/>
    </bean>

</beans>
实现原理:
通过property标签获取到属性名:userDao
通过属性名推断出set方法名:setUserDao
通过反射机制调用setUserDao()方法给属性赋值
property标签的name是属性名。
property标签的ref是要注入的bean对象的id。(通过ref属性来完成bean的装配,这是bean最简单的一种装配方式。装配指的是:创建系统组件之间关联的动作)
可以把set方法注释掉,再测试一下:

通过测试得知,底层实际上调用了setUserDao()方法。所以需要确保这个方法的存在。
我们现在把属性名修改一下,但方法名还是setUserDao(),我们来测试一下:
package com.powernode.spring6.service;

import com.powernode.spring6.dao.UserDao;

/**
 * @author 动力节点
 * @version 1.0
 * @className UserService
 * @since 1.0
 **/
public class UserService {

    private UserDao aaa;

    // 使用set方式注入,必须提供set方法。
    // 反射机制要调用这个方法给属性赋值的。
    public void setUserDao(UserDao userDao) {
        this.aaa = userDao;
    }

    public void save(){
        aaa.insert();
    }
}
运行测试程序:
通过测试看到程序仍然可以正常执行,说明property标签的name是:setUserDao()方法名演变得到的。演变的规律是:
- setUsername() 演变为 username
- setPassword() 演变为 password
- setUserDao() 演变为 userDao
- setUserService() 演变为 userService
另外,对于property标签来说,ref属性也可以采用标签的方式,但使用ref属性是多数的:
<bean id="userServiceBean" class="com.powernode.spring6.service.UserService">
  <property name="userDao">
    <ref bean="userDaoBean"/>
  </property>
</bean>
总结:set注入的核心实现原理:通过反射机制调用set方法来给属性赋值,让两个对象之间产生关系。
4.2.2 构造注入
核心原理:通过调用构造方法来给属性赋值。
package com.powernode.spring6.dao;

/**
 * @author 动力节点
 * @version 1.0
 * @className OrderDao
 * @since 1.0
 **/
public class OrderDao {
    public void deleteById(){
        System.out.println("正在删除订单。。。");
    }
}
package com.powernode.spring6.service;

import com.powernode.spring6.dao.OrderDao;

/**
 * @author 动力节点
 * @version 1.0
 * @className OrderService
 * @since 1.0
 **/
public class OrderService {
    private OrderDao orderDao;

    // 通过反射机制调用构造方法给属性赋值
    public OrderService(OrderDao orderDao) {
        this.orderDao = orderDao;
    }

    public void delete(){
        orderDao.deleteById();
    }
}
<bean id="orderDaoBean" class="com.powernode.spring6.dao.OrderDao"/>
<bean id="orderServiceBean" class="com.powernode.spring6.service.OrderService">
  <!--index="0"表示构造方法的第一个参数,将orderDaoBean对象传递给构造方法的第一个参数。-->
  <constructor-arg index="0" ref="orderDaoBean"/>
</bean>
@Test
public void testConstructorDI(){
    ApplicationContext applicationContext = new ClassPathXmlApplicationContext("spring.xml");
    OrderService orderServiceBean = applicationContext.getBean("orderServiceBean", OrderService.class);
    orderServiceBean.delete();
}
运行结果如下:
如果构造方法有两个参数:
package com.powernode.spring6.service;

import com.powernode.spring6.dao.OrderDao;
import com.powernode.spring6.dao.UserDao;

/**
 * @author 动力节点
 * @version 1.0
 * @className OrderService
 * @since 1.0
 **/
public class OrderService {
    private OrderDao orderDao;
    private UserDao userDao;

    // 通过反射机制调用构造方法给属性赋值
    public OrderService(OrderDao orderDao, UserDao userDao) {
        this.orderDao = orderDao;
        this.userDao = userDao;
    }

    public void delete(){
        orderDao.deleteById();
        userDao.insert();
    }
}
spring配置文件:
<bean id="orderDaoBean" class="com.powernode.spring6.dao.OrderDao"/>

<bean id="orderServiceBean" class="com.powernode.spring6.service.OrderService">
  <!--第一个参数下标是0-->
  <constructor-arg index="0" ref="orderDaoBean"/>
  <!--第二个参数下标是1-->
  <constructor-arg index="1" ref="userDaoBean"/>
</bean>

<bean id="userDaoBean" class="com.powernode.spring6.dao.UserDao"/>
执行测试程序:

不使用参数下标,使用参数的名字可以吗?
<bean id="orderDaoBean" class="com.powernode.spring6.dao.OrderDao"/>

<bean id="orderServiceBean" class="com.powernode.spring6.service.OrderService">
  <!--这里使用了构造方法上参数的名字-->
  <constructor-arg name="orderDao" ref="orderDaoBean"/>
  <constructor-arg name="userDao" ref="userDaoBean"/>
</bean>

<bean id="userDaoBean" class="com.powernode.spring6.dao.UserDao"/>
执行测试程序:

不指定参数下标,不指定参数名字,可以吗?
<bean id="orderDaoBean" class="com.powernode.spring6.dao.OrderDao"/>
<bean id="orderServiceBean" class="com.powernode.spring6.service.OrderService">
  <!--没有指定下标,也没有指定参数名字-->
  <constructor-arg ref="orderDaoBean"/>
  <constructor-arg ref="userDaoBean"/>
</bean>

<bean id="userDaoBean" class="com.powernode.spring6.dao.UserDao"/>
执行测试程序:

配置文件中构造方法参数的类型顺序和构造方法参数的类型顺序不一致呢?
<bean id="orderDaoBean" class="com.powernode.spring6.dao.OrderDao"/>

<bean id="orderServiceBean" class="com.powernode.spring6.service.OrderService">
  <!--顺序已经和构造方法的参数顺序不同了-->
  <constructor-arg ref="userDaoBean"/>
  <constructor-arg ref="orderDaoBean"/>
</bean>

<bean id="userDaoBean" class="com.powernode.spring6.dao.UserDao"/>
执行测试程序:
通过测试得知,通过构造方法注入的时候:
- 可以通过下标
- 可以通过参数名
- 也可以不指定下标和参数名,可以类型自动推断。
Spring在装配方面做的还是比较健壮的。
4.3 set注入专题
4.3.1 注入外部Bean
在之前4.2.1中使用的案例就是注入外部Bean的方式。
<?xml version="1.0" encoding="UTF-8"?>
<beans xmlns="http://www.springframework.org/schema/beans"
       xmlns:xsi="http://www.w3.org/2001/XMLSchema-instance"
       xsi:schemaLocation="http://www.springframework.org/schema/beans http://www.springframework.org/schema/beans/spring-beans.xsd">

    <bean id="userDaoBean" class="com.powernode.spring6.dao.UserDao"/>

    <bean id="userServiceBean" class="com.powernode.spring6.service.UserService">
        <property name="userDao" ref="userDaoBean"/>
    </bean>

</beans>
外部Bean的特点:bean定义到外面,在property标签中使用ref属性进行注入。通常这种方式是常用。
4.3.2 注入内部Bean
内部Bean的方式:在bean标签中嵌套bean标签。
<?xml version="1.0" encoding="UTF-8"?>
<beans xmlns="http://www.springframework.org/schema/beans"
       xmlns:xsi="http://www.w3.org/2001/XMLSchema-instance"
       xsi:schemaLocation="http://www.springframework.org/schema/beans http://www.springframework.org/schema/beans/spring-beans.xsd">

    <bean id="userServiceBean" class="com.powernode.spring6.service.UserService">
        <property name="userDao">
            <bean class="com.powernode.spring6.dao.UserDao"/>
        </property>
    </bean>

</beans>
@Test
public void testInnerBean(){
    ApplicationContext applicationContext = new ClassPathXmlApplicationContext("spring-inner-bean.xml");
    UserService userService = applicationContext.getBean("userServiceBean", UserService.class);
    userService.save();
}
执行测试程序:
这种方式作为了解。
4.3.3 注入简单类型
我们之前在进行注入的时候,对象的属性是另一个对象。
public class UserService{

    private UserDao userDao;

    public void setUserDao(UserDao userDao){
        this.userDao = userDao;
    }

}
那如果对象的属性是int类型呢?
public class User{

    private int age;

    public void setAge(int age){
        this.age = age;
    }

}
可以通过set注入的方式给该属性赋值吗?
- 当然可以。因为只要能够调用set方法就可以给属性赋值。
编写程序给一个User对象的age属性赋值20:
第一步:定义User类,提供age属性,提供age属性的setter方法。
package com.powernode.spring6.beans;

/**
 * @author 动力节点
 * @version 1.0
 * @className User
 * @since 1.0
 **/
public class User {
    private int age;

    public void setAge(int age) {
        this.age = age;
    }

    @Override
    public String toString() {
        return "User{" +
                "age=" + age +
                '}';
    }
}
第二步:编写spring配置文件:spring-simple-type.xml
<?xml version="1.0" encoding="UTF-8"?>
<beans xmlns="http://www.springframework.org/schema/beans"
       xmlns:xsi="http://www.w3.org/2001/XMLSchema-instance"
       xsi:schemaLocation="http://www.springframework.org/schema/beans http://www.springframework.org/schema/beans/spring-beans.xsd">
    <bean id="userBean" class="com.powernode.spring6.beans.User">
        <!--如果像这种int类型的属性,我们称为简单类型,这种简单类型在注入的时候要使用value属性,不能使用ref-->
        <!--<property name="age" value="20"/>-->
        <property name="age">
            <value>20</value>
        </property>
    </bean>
</beans>
第三步:编写测试程序
@Test
public void testSimpleType(){
    ApplicationContext applicationContext = new ClassPathXmlApplicationContext("spring-simple-type.xml");
    User user = applicationContext.getBean("userBean", User.class);
    System.out.println(user);
}
第四步:运行测试程序

需要特别注意:如果给简单类型赋值,使用value属性或value标签。而不是ref。
简单类型包括哪些呢?可以通过Spring的源码来分析一下:BeanUtils类
public class BeanUtils{

    //.......

    /**
	 * Check if the given type represents a "simple" property: a simple value
	 * type or an array of simple value types.
	 * <p>See {@link #isSimpleValueType(Class)} for the definition of <em>simple
	 * value type</em>.
	 * <p>Used to determine properties to check for a "simple" dependency-check.
	 * @param type the type to check
	 * @return whether the given type represents a "simple" property
	 * @see org.springframework.beans.factory.support.RootBeanDefinition#DEPENDENCY_CHECK_SIMPLE
	 * @see org.springframework.beans.factory.support.AbstractAutowireCapableBeanFactory#checkDependencies
	 * @see #isSimpleValueType(Class)
	 */
	public static boolean isSimpleProperty(Class<?> type) {
		Assert.notNull(type, "'type' must not be null");
		return isSimpleValueType(type) || (type.isArray() && isSimpleValueType(type.getComponentType()));
	}

	/**
	 * Check if the given type represents a "simple" value type: a primitive or
	 * primitive wrapper, an enum, a String or other CharSequence, a Number, a
	 * Date, a Temporal, a URI, a URL, a Locale, or a Class.
	 * <p>{@code Void} and {@code void} are not considered simple value types.
	 * @param type the type to check
	 * @return whether the given type represents a "simple" value type
	 * @see #isSimpleProperty(Class)
	 */
	public static boolean isSimpleValueType(Class<?> type) {
		return (Void.class != type && void.class != type &&
				(ClassUtils.isPrimitiveOrWrapper(type) ||
				Enum.class.isAssignableFrom(type) ||
				CharSequence.class.isAssignableFrom(type) ||
				Number.class.isAssignableFrom(type) ||
				Date.class.isAssignableFrom(type) ||
				Temporal.class.isAssignableFrom(type) ||
				URI.class == type ||
				URL.class == type ||
				Locale.class == type ||
				Class.class == type));
	}

    //........
}
通过源码分析得知,简单类型包括:
- 基本数据类型
- 基本数据类型对应的包装类
- String或其他的CharSequence子类
- Number子类
- Date子类
- Enum子类
- URI
- URL
- Temporal子类
- Locale
- Class
- 另外还包括以上简单值类型对应的数组类型。
经典案例:给数据源的属性注入值:
假设我们现在要自己手写一个数据源,我们都知道所有的数据源都要实现javax.sql.DataSource接口,并且数据源中应该有连接数据库的信息,例如:driver、url、username、password等。
package com.powernode.spring6.beans;

import javax.sql.DataSource;
import java.io.PrintWriter;
import java.sql.Connection;
import java.sql.SQLException;
import java.sql.SQLFeatureNotSupportedException;
import java.util.logging.Logger;

/**
 * @author 动力节点
 * @version 1.0
 * @className MyDataSource
 * @since 1.0
 **/
public class MyDataSource implements DataSource {
    private String driver;
    private String url;
    private String username;
    private String password;

    public void setDriver(String driver) {
        this.driver = driver;
    }

    public void setUrl(String url) {
        this.url = url;
    }

    public void setUsername(String username) {
        this.username = username;
    }

    public void setPassword(String password) {
        this.password = password;
    }

    @Override
    public String toString() {
        return "MyDataSource{" +
                "driver='" + driver + '\'' +
                ", url='" + url + '\'' +
                ", username='" + username + '\'' +
                ", password='" + password + '\'' +
                '}';
    }

    @Override
    public Connection getConnection() throws SQLException {
        return null;
    }

    @Override
    public Connection getConnection(String username, String password) throws SQLException {
        return null;
    }

    @Override
    public PrintWriter getLogWriter() throws SQLException {
        return null;
    }

    @Override
    public void setLogWriter(PrintWriter out) throws SQLException {

    }

    @Override
    public void setLoginTimeout(int seconds) throws SQLException {

    }

    @Override
    public int getLoginTimeout() throws SQLException {
        return 0;
    }

    @Override
    public Logger getParentLogger() throws SQLFeatureNotSupportedException {
        return null;
    }

    @Override
    public <T> T unwrap(Class<T> iface) throws SQLException {
        return null;
    }

    @Override
    public boolean isWrapperFor(Class<?> iface) throws SQLException {
        return false;
    }
}
我们给driver、url、username、password四个属性分别提供了setter方法,我们可以使用spring的依赖注入完成数据源对象的创建和属性的赋值吗?看配置文件
<?xml version="1.0" encoding="UTF-8"?>
<beans xmlns="http://www.springframework.org/schema/beans"
       xmlns:xsi="http://www.w3.org/2001/XMLSchema-instance"
       xsi:schemaLocation="http://www.springframework.org/schema/beans http://www.springframework.org/schema/beans/spring-beans.xsd">

    <bean id="dataSource" class="com.powernode.spring6.beans.MyDataSource">
        <property name="driver" value="com.mysql.cj.jdbc.Driver"/>
        <property name="url" value="jdbc:mysql://localhost:3306/spring"/>
        <property name="username" value="root"/>
        <property name="password" value="123456"/>
    </bean>

</beans>
测试程序:
@Test
public void testDataSource(){
    ApplicationContext applicationContext = new ClassPathXmlApplicationContext("spring-datasource.xml");
    MyDataSource dataSource = applicationContext.getBean("dataSource", MyDataSource.class);
    System.out.println(dataSource);
}
执行测试程序:

你学会了吗?
接下来,我们编写一个程序,把所有的简单类型全部测试一遍:
编写一个类A:
package com.powernode.spring6.beans;

import java.net.URI;
import java.net.URL;
import java.time.LocalDate;
import java.util.Date;
import java.util.Locale;

/**
 * @author 动力节点
 * @version 1.0
 * @className A
 * @since 1.0
 **/
public class A {
    private byte b;
    private short s;
    private int i;
    private long l;
    private float f;
    private double d;
    private boolean flag;
    private char c;

    private Byte b1;
    private Short s1;
    private Integer i1;
    private Long l1;
    private Float f1;
    private Double d1;
    private Boolean flag1;
    private Character c1;

    private String str;

    private Date date;

    private Season season;

    private URI uri;

    private URL url;

    private LocalDate localDate;

    private Locale locale;

    private Class clazz;

    // 生成setter方法
    // 生成toString方法
}

enum Season {
    SPRING, SUMMER, AUTUMN, WINTER
}
<?xml version="1.0" encoding="UTF-8"?>
<beans xmlns="http://www.springframework.org/schema/beans"
       xmlns:xsi="http://www.w3.org/2001/XMLSchema-instance"
       xsi:schemaLocation="http://www.springframework.org/schema/beans http://www.springframework.org/schema/beans/spring-beans.xsd">

    <bean id="a" class="com.powernode.spring6.beans.A">
        <property name="b" value="1"/>
        <property name="s" value="1"/>
        <property name="i" value="1"/>
        <property name="l" value="1"/>
        <property name="f" value="1"/>
        <property name="d" value="1"/>
        <property name="flag" value="false"/>

        <property name="c" value="a"/>
        <property name="b1" value="2"/>
        <property name="s1" value="2"/>
        <property name="i1" value="2"/>
        <property name="l1" value="2"/>
        <property name="f1" value="2"/>
        <property name="d1" value="2"/>
        <property name="flag1" value="true"/>
        <property name="c1" value="a"/>

        <property name="str" value="zhangsan"/>
        <!--注意:value后面的日期字符串格式不能随便写,必须是Date对象toString()方法执行的结果。-->
        <!--如果想使用其他格式的日期字符串,就需要进行特殊处理了。具体怎么处理,可以看后面的课程!!!!-->
        <property name="date" value="Fri Sep 30 15:26:38 CST 2022"/>
        <property name="season" value="WINTER"/>
        <property name="uri" value="/save.do"/>
        <!--spring6之后,会自动检查url是否有效,如果无效会报错。-->
        <property name="url" value="http://www.baidu.com"/>
        <property name="localDate" value="EPOCH"/>
        <!--java.util.Locale 主要在软件的本地化时使用。它本身没有什么功能,更多的是作为一个参数辅助其他方法完成输出的本地化。-->
        <property name="locale" value="CHINESE"/>
        <property name="clazz" value="java.lang.String"/>
    </bean>
</beans>
编写测试程序:
@Test
public void testAllSimpleType(){
    ApplicationContext applicationContext = new ClassPathXmlApplicationContext("spring-all-simple-type.xml");
    A a = applicationContext.getBean("a", A.class);
    System.out.println(a);
}
执行结果如下:

需要注意的是:
- 如果把Date当做简单类型的话,日期字符串格式不能随便写。格式必须符合Date的toString()方法格式。显然这就比较鸡肋了。如果我们提供一个这样的日期字符串:2010-10-11,在这里是无法赋值给Date类型的属性的。
- spring6之后,当注入的是URL,那么这个url字符串是会进行有效性检测的。如果是一个存在的url,那就没问题。如果不存在则报错。
4.3.4 级联属性赋值(了解)
package com.powernode.spring6.beans;

/**
 * @author 动力节点
 * @version 1.0
 * @className Clazz
 * @since 1.0
 **/
public class Clazz {
    private String name;

    public Clazz() {
    }

    public Clazz(String name) {
        this.name = name;
    }

    public String getName() {
        return name;
    }

    public void setName(String name) {
        this.name = name;
    }

    @Override
    public String toString() {
        return "Clazz{" +
                "name='" + name + '\'' +
                '}';
    }
}
package com.powernode.spring6.beans;

/**
 * @author 动力节点
 * @version 1.0
 * @className Student
 * @since 1.0
 **/
public class Student {
    private String name;
    private Clazz clazz;

    public Student() {
    }

    public Student(String name, Clazz clazz) {
        this.name = name;
        this.clazz = clazz;
    }

    public void setName(String name) {
        this.name = name;
    }

    public void setClazz(Clazz clazz) {
        this.clazz = clazz;
    }

    public Clazz getClazz() {
        return clazz;
    }

    @Override
    public String toString() {
        return "Student{" +
                "name='" + name + '\'' +
                ", clazz=" + clazz +
                '}';
    }
}
<?xml version="1.0" encoding="UTF-8"?>
<beans xmlns="http://www.springframework.org/schema/beans"
       xmlns:xsi="http://www.w3.org/2001/XMLSchema-instance"
       xsi:schemaLocation="http://www.springframework.org/schema/beans http://www.springframework.org/schema/beans/spring-beans.xsd">

    <bean id="clazzBean" class="com.powernode.spring6.beans.Clazz"/>

    <bean id="student" class="com.powernode.spring6.beans.Student">
        <property name="name" value="张三"/>

        <!--要点1:以下两行配置的顺序不能颠倒-->
        <property name="clazz" ref="clazzBean"/>
        <!--要点2:clazz属性必须有getter方法-->
        <property name="clazz.name" value="高三一班"/>
    </bean>
</beans>
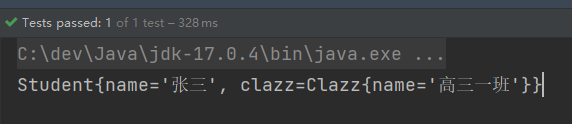
@Test
public void testCascade(){
    ApplicationContext applicationContext = new ClassPathXmlApplicationContext("spring-cascade.xml");
    Student student = applicationContext.getBean("student", Student.class);
    System.out.println(student);
}
运行结果:
要点:
- 在spring配置文件中,如上,注意顺序。
- 在spring配置文件中,clazz属性必须提供getter方法。
4.3.5 注入数组
当数组中的元素是简单类型:
package com.powernode.spring6.beans;

import java.util.Arrays;

public class Person {
    private String[] favariteFoods;

    public void setFavariteFoods(String[] favariteFoods) {
        this.favariteFoods = favariteFoods;
    }

    @Override
    public String toString() {
        return "Person{" +
                "favariteFoods=" + Arrays.toString(favariteFoods) +
                '}';
    }
}
<?xml version="1.0" encoding="UTF-8"?>
<beans xmlns="http://www.springframework.org/schema/beans"
       xmlns:xsi="http://www.w3.org/2001/XMLSchema-instance"
       xsi:schemaLocation="http://www.springframework.org/schema/beans http://www.springframework.org/schema/beans/spring-beans.xsd">

    <bean id="person" class="com.powernode.spring6.beans.Person">
        <property name="favariteFoods">
            <array>
                <value>鸡排</value>
                <value>汉堡</value>
                <value>鹅肝</value>
            </array>
        </property>
    </bean>
</beans>
@Test
public void testArraySimple(){
    ApplicationContext applicationContext = new ClassPathXmlApplicationContext("spring-array-simple.xml");
    Person person = applicationContext.getBean("person", Person.class);
    System.out.println(person);
}
当数组中的元素是非简单类型:一个订单中包含多个商品。
package com.powernode.spring6.beans;

/**
 * @author 动力节点
 * @version 1.0
 * @className Goods
 * @since 1.0
 **/
public class Goods {
    private String name;

    public Goods() {
    }

    public Goods(String name) {
        this.name = name;
    }

    public String getName() {
        return name;
    }

    public void setName(String name) {
        this.name = name;
    }

    @Override
    public String toString() {
        return "Goods{" +
                "name='" + name + '\'' +
                '}';
    }
}
package com.powernode.spring6.beans;

import java.util.Arrays;

/**
 * @author 动力节点
 * @version 1.0
 * @className Order
 * @since 1.0
 **/
public class Order {
    // 一个订单中有多个商品
    private Goods[] goods;

    public Order() {
    }

    public Order(Goods[] goods) {
        this.goods = goods;
    }

    public void setGoods(Goods[] goods) {
        this.goods = goods;
    }

    @Override
    public String toString() {
        return "Order{" +
                "goods=" + Arrays.toString(goods) +
                '}';
    }
}
<?xml version="1.0" encoding="UTF-8"?>
<beans xmlns="http://www.springframework.org/schema/beans"
       xmlns:xsi="http://www.w3.org/2001/XMLSchema-instance"
       xsi:schemaLocation="http://www.springframework.org/schema/beans http://www.springframework.org/schema/beans/spring-beans.xsd">

    <bean id="goods1" class="com.powernode.spring6.beans.Goods">
        <property name="name" value="西瓜"/>
    </bean>

    <bean id="goods2" class="com.powernode.spring6.beans.Goods">
        <property name="name" value="苹果"/>
    </bean>

    <bean id="order" class="com.powernode.spring6.beans.Order">
        <property name="goods">
            <array>
                <!--这里使用ref标签即可-->
                <ref bean="goods1"/>
                <ref bean="goods2"/>
            </array>
        </property>
    </bean>

</beans>
测试程序:
@Test
public void testArray(){
    ApplicationContext applicationContext = new ClassPathXmlApplicationContext("spring-array.xml");
    Order order = applicationContext.getBean("order", Order.class);
    System.out.println(order);
}
执行结果:

要点:
- 如果数组中是简单类型,使用value标签。
- 如果数组中是非简单类型,使用ref标签。
4.3.6 注入List集合
List集合:有序可重复
package com.powernode.spring6.beans;

import java.util.List;

/**
 * @author 动力节点
 * @version 1.0
 * @className People
 * @since 1.0
 **/
public class People {
    // 一个人有多个名字
    private List<String> names;

    public void setNames(List<String> names) {
        this.names = names;
    }

    @Override
    public String toString() {
        return "People{" +
                "names=" + names +
                '}';
    }
}
<?xml version="1.0" encoding="UTF-8"?>
<beans xmlns="http://www.springframework.org/schema/beans"
       xmlns:xsi="http://www.w3.org/2001/XMLSchema-instance"
       xsi:schemaLocation="http://www.springframework.org/schema/beans http://www.springframework.org/schema/beans/spring-beans.xsd">

    <bean id="peopleBean" class="com.powernode.spring6.beans.People">
        <property name="names">
            <list>
                <value>铁锤</value>
                <value>张三</value>
                <value>张三</value>
                <value>张三</value>
                <value>狼</value>
            </list>
        </property>
    </bean>
</beans>
@Test
public void testCollection(){
    ApplicationContext applicationContext = new ClassPathXmlApplicationContext("spring-collection.xml");
    People peopleBean = applicationContext.getBean("peopleBean", People.class);
    System.out.println(peopleBean);
}
执行结果:
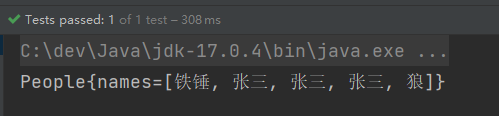
注意:注入List集合的时候使用list标签,如果List集合中是简单类型使用value标签,反之使用ref标签。
4.3.7 注入Set集合
Set集合:无序不可重复
package com.powernode.spring6.beans;

import java.util.List;
import java.util.Set;

/**
 * @author 动力节点
 * @version 1.0
 * @className People
 * @since 1.0
 **/
public class People {
    // 一个人有多个电话
    private Set<String> phones;

    public void setPhones(Set<String> phones) {
        this.phones = phones;
    }

    //......

    @Override
    public String toString() {
        return "People{" +
                "phones=" + phones +
                ", names=" + names +
                '}';
    }
}
<?xml version="1.0" encoding="UTF-8"?>
<beans xmlns="http://www.springframework.org/schema/beans"
       xmlns:xsi="http://www.w3.org/2001/XMLSchema-instance"
       xsi:schemaLocation="http://www.springframework.org/schema/beans http://www.springframework.org/schema/beans/spring-beans.xsd">

    <bean id="peopleBean" class="com.powernode.spring6.beans.People">
        <property name="phones">
            <set>
                <!--非简单类型可以使用ref,简单类型使用value-->
                <value>110</value>
                <value>110</value>
                <value>120</value>
                <value>120</value>
                <value>119</value>
                <value>119</value>
            </set>
        </property>
    </bean>
</beans>
执行结果:

要点:
- 使用<set>标签
- set集合中元素是简单类型的使用value标签,反之使用ref标签。
4.3.8 注入Map集合
package com.powernode.spring6.beans;

import java.util.List;
import java.util.Map;
import java.util.Set;

/**
 * @author 动力节点
 * @version 1.0
 * @className People
 * @since 1.0
 **/
public class People {
    // 一个人有多个住址
    private Map<Integer, String> addrs;

    public void setAddrs(Map<Integer, String> addrs) {
        this.addrs = addrs;
    }

    //......

    @Override
    public String toString() {
        return "People{" +
                "addrs=" + addrs +
                ", phones=" + phones +
                ", names=" + names +
                '}';
    }

}
<?xml version="1.0" encoding="UTF-8"?>
<beans xmlns="http://www.springframework.org/schema/beans"
       xmlns:xsi="http://www.w3.org/2001/XMLSchema-instance"
       xsi:schemaLocation="http://www.springframework.org/schema/beans http://www.springframework.org/schema/beans/spring-beans.xsd">

    <bean id="peopleBean" class="com.powernode.spring6.beans.People">
        <property name="addrs">
            <map>
                <!--如果key不是简单类型,使用 key-ref 属性-->
                <!--如果value不是简单类型,使用 value-ref 属性-->
                <entry key="1" value="北京大兴区"/>
                <entry key="2" value="上海浦东区"/>
                <entry key="3" value="深圳宝安区"/>
            </map>
        </property>
    </bean>
</beans>
执行结果:

要点:
- 使用<map>标签
- 如果key是简单类型,使用 key 属性,反之使用 key-ref 属性。
- 如果value是简单类型,使用 value 属性,反之使用 value-ref 属性。
4.3.9 注入Properties
java.util.Properties继承java.util.Hashtable,所以Properties也是一个Map集合。
package com.powernode.spring6.beans;

import java.util.List;
import java.util.Map;
import java.util.Properties;
import java.util.Set;

/**
 * @author 动力节点
 * @version 1.0
 * @className People
 * @since 1.0
 **/
public class People {

    private Properties properties;

    public void setProperties(Properties properties) {
        this.properties = properties;
    }

    //......

    @Override
    public String toString() {
        return "People{" +
                "properties=" + properties +
                ", addrs=" + addrs +
                ", phones=" + phones +
                ", names=" + names +
                '}';
    }
}
<?xml version="1.0" encoding="UTF-8"?>
<beans xmlns="http://www.springframework.org/schema/beans"
       xmlns:xsi="http://www.w3.org/2001/XMLSchema-instance"
       xsi:schemaLocation="http://www.springframework.org/schema/beans http://www.springframework.org/schema/beans/spring-beans.xsd">

    <bean id="peopleBean" class="com.powernode.spring6.beans.People">
        <property name="properties">
            <props>
                <prop key="driver">com.mysql.cj.jdbc.Driver</prop>
                <prop key="url">jdbc:mysql://localhost:3306/spring</prop>
                <prop key="username">root</prop>
                <prop key="password">123456</prop>
            </props>
        </property>
    </bean>
</beans>
执行测试程序:

要点:
4.3.10 注入null和空字符串
注入空字符串使用:<value/> 或者 value=""
注入null使用:<null/> 或者 不为该属性赋值
package com.powernode.spring6.beans;

/**
 * @author 动力节点
 * @version 1.0
 * @className Vip
 * @since 1.0
 **/
public class Vip {
    private String email;

    public void setEmail(String email) {
        this.email = email;
    }

    @Override
    public String toString() {
        return "Vip{" +
                "email='" + email + '\'' +
                '}';
    }
}
<?xml version="1.0" encoding="UTF-8"?>
<beans xmlns="http://www.springframework.org/schema/beans"
       xmlns:xsi="http://www.w3.org/2001/XMLSchema-instance"
       xsi:schemaLocation="http://www.springframework.org/schema/beans http://www.springframework.org/schema/beans/spring-beans.xsd">

    <bean id="vipBean" class="com.powernode.spring6.beans.Vip">
        <!--空串的第一种方式-->
        <!--<property name="email" value=""/>-->
        <!--空串的第二种方式-->
        <property name="email">
            <value/>
        </property>
    </bean>

</beans>
@Test
public void testNull(){
    ApplicationContext applicationContext = new ClassPathXmlApplicationContext("spring-null.xml");
    Vip vipBean = applicationContext.getBean("vipBean", Vip.class);
    System.out.println(vipBean);
}
执行结果:

第一种方式:不给属性赋值
<?xml version="1.0" encoding="UTF-8"?>
<beans xmlns="http://www.springframework.org/schema/beans"
       xmlns:xsi="http://www.w3.org/2001/XMLSchema-instance"
       xsi:schemaLocation="http://www.springframework.org/schema/beans http://www.springframework.org/schema/beans/spring-beans.xsd">

    <bean id="vipBean" class="com.powernode.spring6.beans.Vip" />

</beans>
执行结果:

第二种方式:使用<null/>
<?xml version="1.0" encoding="UTF-8"?>
<beans xmlns="http://www.springframework.org/schema/beans"
       xmlns:xsi="http://www.w3.org/2001/XMLSchema-instance"
       xsi:schemaLocation="http://www.springframework.org/schema/beans http://www.springframework.org/schema/beans/spring-beans.xsd">

    <bean id="vipBean" class="com.powernode.spring6.beans.Vip">
        <property name="email">
            <null/>
        </property>
    </bean>

</beans>
执行结果:

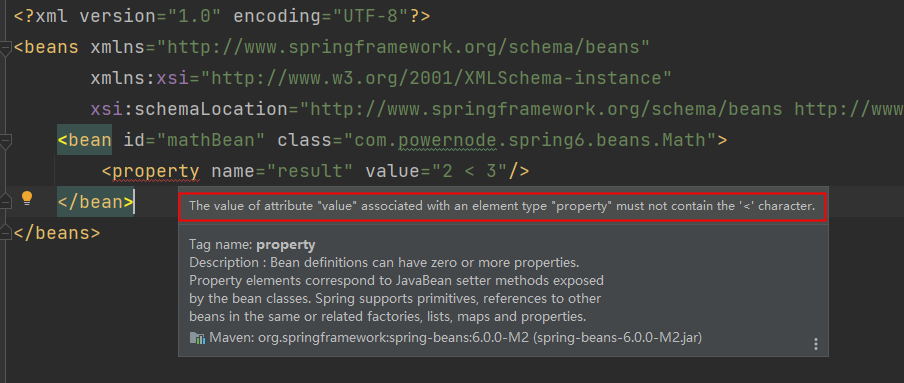
4.3.11 注入的值中含有特殊符号
XML中有5个特殊字符,分别是:<、>、'、"、&
以上5个特殊符号在XML中会被特殊对待,会被当做XML语法的一部分进行解析,如果这些特殊符号直接出现在注入的字符串当中,会报错。
解决方案包括两种:
- 第一种:特殊符号使用转义字符代替。
- 第二种:将含有特殊符号的字符串放到:<![CDATA[]]> 当中。因为放在CDATA区中的数据不会被XML文件解析器解析。
5个特殊字符对应的转义字符分别是:
| 特殊字符 | 转义字符 |
| > | > |
| < | < |
| ' | ' |
| " | " |
| & | & |
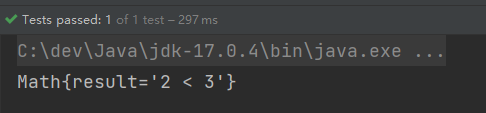
先使用转义字符来代替:
package com.powernode.spring6.beans;

/**
 * @author 动力节点
 * @version 1.0
 * @className Math
 * @since 1.0
 **/
public class Math {
    private String result;

    public void setResult(String result) {
        this.result = result;
    }

    @Override
    public String toString() {
        return "Math{" +
                "result='" + result + '\'' +
                '}';
    }
}
<?xml version="1.0" encoding="UTF-8"?>
<beans xmlns="http://www.springframework.org/schema/beans"
xmlns:xsi="http://www.w3.org/2001/XMLSchema-instance"
xsi:schemaLocation="http://www.springframework.org/schema/beans http://www.springframework.org/schema/beans/spring-beans.xsd">
<bean id="mathBean" class="com.powernode.spring6.beans.Math">
<property name="result" value="2 < 3"/>
</bean>
</beans>
@Test
public void testSpecial(){
    ApplicationContext applicationContext = new ClassPathXmlApplicationContext("spring-special.xml");
    Math mathBean = applicationContext.getBean("mathBean", Math.class);
    System.out.println(mathBean);
}
执行结果:
我们再来使用CDATA方式:
<?xml version="1.0" encoding="UTF-8"?>
<beans xmlns="http://www.springframework.org/schema/beans"
       xmlns:xsi="http://www.w3.org/2001/XMLSchema-instance"
       xsi:schemaLocation="http://www.springframework.org/schema/beans http://www.springframework.org/schema/beans/spring-beans.xsd">

    <bean id="mathBean" class="com.powernode.spring6.beans.Math">
        <property name="result">
            <!--只能使用value标签-->
            <value><![CDATA[2 < 3]]></value>
        </property>
    </bean>

</beans>
注意:使用CDATA时,不能使用value属性,只能使用value标签。
执行结果:

4.4 p命名空间注入
目的:简化配置。
使用p命名空间注入的前提条件包括两个:
- 第一:在XML头部信息中添加p命名空间的配置信息:xmlns:p="http://www.springframework.org/schema/p"
- 第二:p命名空间注入是基于setter方法的,所以需要对应的属性提供setter方法。
package com.powernode.spring6.beans;

/**
 * @author 动力节点
 * @version 1.0
 * @className Customer
 * @since 1.0
 **/
public class Customer {
    private String name;
    private int age;

    public void setName(String name) {
        this.name = name;
    }

    public void setAge(int age) {
        this.age = age;
    }

    @Override
    public String toString() {
        return "Customer{" +
                "name='" + name + '\'' +
                ", age=" + age +
                '}';
    }
}
<?xml version="1.0" encoding="UTF-8"?>
<beans xmlns="http://www.springframework.org/schema/beans"
xmlns:p="http://www.springframework.org/schema/p"
xmlns:xsi="http://www.w3.org/2001/XMLSchema-instance"
xsi:schemaLocation="http://www.springframework.org/schema/beans http://www.springframework.org/schema/beans/spring-beans.xsd">
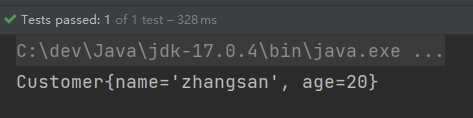
<bean id="customerBean" class="com.powernode.spring6.beans.Customer" p:name="zhangsan" p:age="20"/>
</beans>
@Test
public void testP(){
    ApplicationContext applicationContext = new ClassPathXmlApplicationContext("spring-p.xml");
    Customer customerBean = applicationContext.getBean("customerBean", Customer.class);
    System.out.println(customerBean);
}
执行结果:
把setter方法去掉:

所以p命名空间实际上是对set注入的简化。
4.5 c命名空间注入
c命名空间是简化构造方法注入的。
使用c命名空间的两个前提条件:
第一:需要在xml配置文件头部添加信息:xmlns:c="http://www.springframework.org/schema/c"
第二:需要提供构造方法。
package com.powernode.spring6.beans;

/**
 * @author 动力节点
 * @version 1.0
 * @className MyTime
 * @since 1.0
 **/
public class MyTime {
    private int year;
    private int month;
    private int day;

    public MyTime(int year, int month, int day) {
        this.year = year;
        this.month = month;
        this.day = day;
    }

    @Override
    public String toString() {
        return "MyTime{" +
                "year=" + year +
                ", month=" + month +
                ", day=" + day +
                '}';
    }
}
<?xml version="1.0" encoding="UTF-8"?>
<beans xmlns="http://www.springframework.org/schema/beans"
xmlns:c="http://www.springframework.org/schema/c"
xmlns:xsi="http://www.w3.org/2001/XMLSchema-instance"
xsi:schemaLocation="http://www.springframework.org/schema/beans http://www.springframework.org/schema/beans/spring-beans.xsd">
<!--<bean id="myTimeBean" class="com.powernode.spring6.beans.MyTime" c:year="1970" c:month="1" c:day="1"/>-->
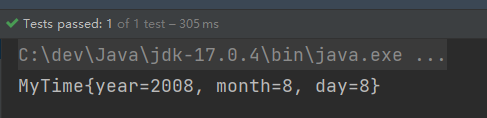
<bean id="myTimeBean" class="com.powernode.spring6.beans.MyTime" c:_0="2008" c:_1="8" c:_2="8"/>
</beans>
@Test
public void testC(){
    ApplicationContext applicationContext = new ClassPathXmlApplicationContext("spring-c.xml");
    MyTime myTimeBean = applicationContext.getBean("myTimeBean", MyTime.class);
    System.out.println(myTimeBean);
}
执行结果:
把构造方法注释掉:

所以,c命名空间是依靠构造方法的。
注意:不管是p命名空间还是c命名空间,注入的时候都可以注入简单类型以及非简单类型。
4.6 util命名空间
使用util命名空间可以让配置复用。
使用util命名空间的前提是:在spring配置文件头部添加配置信息。如下:

package com.powernode.spring6.beans;

import java.util.Properties;

/**
 * @author 动力节点
 * @version 1.0
 * @className MyDataSource1
 * @since 1.0
 **/
public class MyDataSource1 {
    private Properties properties;

    public void setProperties(Properties properties) {
        this.properties = properties;
    }

    @Override
    public String toString() {
        return "MyDataSource1{" +
                "properties=" + properties +
                '}';
    }
}
package com.powernode.spring6.beans;

import java.util.Properties;

/**
 * @author 动力节点
 * @version 1.0
 * @className MyDataSource2
 * @since 1.0
 **/
public class MyDataSource2 {
    private Properties properties;

    public void setProperties(Properties properties) {
        this.properties = properties;
    }

    @Override
    public String toString() {
        return "MyDataSource2{" +
                "properties=" + properties +
                '}';
    }
}
<?xml version="1.0" encoding="UTF-8"?>
<beans xmlns="http://www.springframework.org/schema/beans"
       xmlns:xsi="http://www.w3.org/2001/XMLSchema-instance"
       xmlns:util="http://www.springframework.org/schema/util"
       xsi:schemaLocation="http://www.springframework.org/schema/beans http://www.springframework.org/schema/beans/spring-beans.xsd
                           http://www.springframework.org/schema/util http://www.springframework.org/schema/util/spring-util.xsd">

    <util:properties id="prop">
        <prop key="driver">com.mysql.cj.jdbc.Driver</prop>
        <prop key="url">jdbc:mysql://localhost:3306/spring</prop>
        <prop key="username">root</prop>
        <prop key="password">123456</prop>
    </util:properties>

    <bean id="dataSource1" class="com.powernode.spring6.beans.MyDataSource1">
        <property name="properties" ref="prop"/>
    </bean>

    <bean id="dataSource2" class="com.powernode.spring6.beans.MyDataSource2">
        <property name="properties" ref="prop"/>
    </bean>
</beans>
@Test
public void testUtil(){
    ApplicationContext applicationContext = new ClassPathXmlApplicationContext("spring-util.xml");

    MyDataSource1 dataSource1 = applicationContext.getBean("dataSource1", MyDataSource1.class);
    System.out.println(dataSource1);

    MyDataSource2 dataSource2 = applicationContext.getBean("dataSource2", MyDataSource2.class);
    System.out.println(dataSource2);
}
执行结果:

4.7 基于XML的自动装配
Spring还可以完成自动化的注入,自动化注入又被称为自动装配。它可以根据名字进行自动装配,也可以根据类型进行自动装配。
4.7.1 根据名称自动装配
package com.powernode.spring6.dao;

/**
 * @author 动力节点
 * @version 1.0
 * @className UserDao
 * @since 1.0
 **/
public class UserDao {

    public void insert(){
        System.out.println("正在保存用户数据。");
    }
}
package com.powernode.spring6.service;

import com.powernode.spring6.dao.UserDao;

/**
 * @author 动力节点
 * @version 1.0
 * @className UserService
 * @since 1.0
 **/
public class UserService {

    private UserDao aaa;

    // 这个set方法非常关键
    public void setAaa(UserDao aaa) {
        this.aaa = aaa;
    }

    public void save(){
        aaa.insert();
    }
}
Spring的配置文件这样配置:
<?xml version="1.0" encoding="UTF-8"?>
<beans xmlns="http://www.springframework.org/schema/beans"
       xmlns:xsi="http://www.w3.org/2001/XMLSchema-instance"
       xsi:schemaLocation="http://www.springframework.org/schema/beans http://www.springframework.org/schema/beans/spring-beans.xsd">

    <bean id="userService" class="com.powernode.spring6.service.UserService" autowire="byName"/>

    <bean id="aaa" class="com.powernode.spring6.dao.UserDao"/>

</beans>
这个配置起到关键作用:
- UserService Bean中需要添加autowire="byName",表示通过名称进行装配。
- UserService类中有一个UserDao属性,而UserDao属性的名字是aaa,对应的set方法是setAaa(),正好和UserDao Bean的id是一样的。这就是根据名称自动装配。
@Test
public void testAutowireByName(){
    ApplicationContext applicationContext = new ClassPathXmlApplicationContext("spring-autowire.xml");
    UserService userService = applicationContext.getBean("userService", UserService.class);
    userService.save();
}
执行结果:
我们来测试一下,byName装配是和属性名有关还是和set方法名有关系:
package com.powernode.spring6.service;

import com.powernode.spring6.dao.UserDao;

/**
 * @author 动力节点
 * @version 1.0
 * @className UserService
 * @since 1.0
 **/
public class UserService {
    // 这里没修改
    private UserDao aaa;

    /*public void setAaa(UserDao aaa) {
        this.aaa = aaa;
    }*/

    // set方法名变化了
    public void setDao(UserDao aaa){
        this.aaa = aaa;
    }

    public void save(){
        aaa.insert();
    }
}
在执行测试程序:

通过测试得知,aaa属性并没有赋值成功。也就是并没有装配成功。
我们将spring配置文件修改以下:
<?xml version="1.0" encoding="UTF-8"?>
<beans xmlns="http://www.springframework.org/schema/beans"
       xmlns:xsi="http://www.w3.org/2001/XMLSchema-instance"
       xsi:schemaLocation="http://www.springframework.org/schema/beans http://www.springframework.org/schema/beans/spring-beans.xsd">

  <bean id="userService" class="com.powernode.spring6.service.UserService" autowire="byName"/>
  <!--这个id修改了-->
  <bean id="dao" class="com.powernode.spring6.dao.UserDao"/>

</beans>
执行测试程序:
这说明,如果根据名称装配(byName),底层会调用set方法进行注入。
例如:setAge() 对应的名字是age,setPassword()对应的名字是password,setEmail()对应的名字是email。
4.7.2 根据类型自动装配
package com.powernode.spring6.dao;

/**
 * @author 动力节点
 * @version 1.0
 * @className AccountDao
 * @since 1.0
 **/
public class AccountDao {
    public void insert(){
        System.out.println("正在保存账户信息");
    }
}
package com.powernode.spring6.service;

import com.powernode.spring6.dao.AccountDao;

/**
 * @author 动力节点
 * @version 1.0
 * @className AccountService
 * @since 1.0
 **/
public class AccountService {
    private AccountDao accountDao;

    public void setAccountDao(AccountDao accountDao) {
        this.accountDao = accountDao;
    }

    public void save(){
        accountDao.insert();
    }
}
<?xml version="1.0" encoding="UTF-8"?>
<beans xmlns="http://www.springframework.org/schema/beans"
       xmlns:xsi="http://www.w3.org/2001/XMLSchema-instance"
       xsi:schemaLocation="http://www.springframework.org/schema/beans http://www.springframework.org/schema/beans/spring-beans.xsd">

    <!--byType表示根据类型自动装配-->
    <bean id="accountService" class="com.powernode.spring6.service.AccountService" autowire="byType"/>

    <bean class="com.powernode.spring6.dao.AccountDao"/>

</beans>
@Test
public void testAutowireByType(){
    ApplicationContext applicationContext = new ClassPathXmlApplicationContext("spring-autowire.xml");
    AccountService accountService = applicationContext.getBean("accountService", AccountService.class);
    accountService.save();
}
执行结果:

我们把UserService中的set方法注释掉,再执行:

可以看到无论是byName还是byType,在装配的时候都是基于set方法的。所以set方法是必须要提供的。提供构造方法是不行的,大家可以测试一下。这里就不再赘述。
如果byType,根据类型装配时,如果配置文件中有两个类型一样的bean会出现什么问题呢?
<?xml version="1.0" encoding="UTF-8"?>
<beans xmlns="http://www.springframework.org/schema/beans"
       xmlns:xsi="http://www.w3.org/2001/XMLSchema-instance"
       xsi:schemaLocation="http://www.springframework.org/schema/beans http://www.springframework.org/schema/beans/spring-beans.xsd">

    <bean id="accountService" class="com.powernode.spring6.service.AccountService" autowire="byType"/>

    <bean id="x" class="com.powernode.spring6.dao.AccountDao"/>
    <bean id="y" class="com.powernode.spring6.dao.AccountDao"/>

</beans>
执行测试程序:

测试结果说明了,当byType进行自动装配的时候,配置文件中某种类型的Bean必须是唯一的,不能出现多个。
4.8 spring引入外部属性配置文件
我们都知道编写数据源的时候是需要连接数据库的信息的,例如:driver url username password等信息。这些信息可以单独写到一个属性配置文件中吗,这样用户修改起来会更加的方便。当然可以。
第一步:写一个数据源类,提供相关属性。
package com.powernode.spring6.beans;

import javax.sql.DataSource;
import java.io.PrintWriter;
import java.sql.Connection;
import java.sql.SQLException;
import java.sql.SQLFeatureNotSupportedException;
import java.util.logging.Logger;

/**
 * @author 动力节点
 * @version 1.0
 * @className MyDataSource
 * @since 1.0
 **/
public class MyDataSource implements DataSource {
    @Override
    public String toString() {
        return "MyDataSource{" +
                "driver='" + driver + '\'' +
                ", url='" + url + '\'' +
                ", username='" + username + '\'' +
                ", password='" + password + '\'' +
                '}';
    }

    private String driver;
    private String url;
    private String username;
    private String password;

    public void setDriver(String driver) {
        this.driver = driver;
    }

    public void setUrl(String url) {
        this.url = url;
    }

    public void setUsername(String username) {
        this.username = username;
    }

    public void setPassword(String password) {
        this.password = password;
    }

    //......
}
第二步:在类路径下新建jdbc.properties文件,并配置信息。
driver=com.mysql.cj.jdbc.Driver
url=jdbc:mysql://localhost:3306/spring
username=root
password=root123
第三步:在spring配置文件中引入context命名空间。
<?xml version="1.0" encoding="UTF-8"?>
<beans xmlns="http://www.springframework.org/schema/beans"
       xmlns:xsi="http://www.w3.org/2001/XMLSchema-instance"
       xmlns:context="http://www.springframework.org/schema/context"
       xsi:schemaLocation="http://www.springframework.org/schema/beans http://www.springframework.org/schema/beans/spring-beans.xsd
                           http://www.springframework.org/schema/context http://www.springframework.org/schema/context/spring-context.xsd">

</beans>
第四步:在spring中配置使用jdbc.properties文件。
<?xml version="1.0" encoding="UTF-8"?>
<beans xmlns="http://www.springframework.org/schema/beans"
       xmlns:xsi="http://www.w3.org/2001/XMLSchema-instance"
       xmlns:context="http://www.springframework.org/schema/context"
       xsi:schemaLocation="http://www.springframework.org/schema/beans http://www.springframework.org/schema/beans/spring-beans.xsd
                           http://www.springframework.org/schema/context http://www.springframework.org/schema/context/spring-context.xsd">

    <context:property-placeholder location="jdbc.properties"/>

    <bean id="dataSource" class="com.powernode.spring6.beans.MyDataSource">
        <property name="driver" value="${driver}"/>
        <property name="url" value="${url}"/>
        <property name="username" value="${username}"/>
        <property name="password" value="${password}"/>
    </bean>
</beans>
测试程序:
@Test
public void testProperties(){
    ApplicationContext applicationContext = new ClassPathXmlApplicationContext("spring-properties.xml");
    MyDataSource dataSource = applicationContext.getBean("dataSource", MyDataSource.class);
    System.out.println(dataSource);
}
执行结果:

本文内容由网友自发贡献,版权归原作者所有,本站不承担相应法律责任。如您发现有涉嫌抄袭侵权的内容,请联系:hwhale#tublm.com(使用前将#替换为@)