我们在SSM中的SpringMVC中配置静态资源过滤
<mvc:resources mapping="/js/**" location="/js/"/>
<mvc:resources mapping="/css/**" location="/css/"/>
<mvc:resources mapping="/html/**" location="/html/"/>
这是指定了在哪些目录下不进行拦截,和配置了映射。这是一种Ant风格的路径匹配,/**
也可以在web.xml中配置表示任意目录。如果想要都可以访问,可以这样配置
<mvc:resources mapping="/**" location="/"/>
当然,除了在xml配置文件中,我们还可以web.xml配置。
在SpringBoot中我们不使用配置文件以及在web.xml中配置,我们使用java代码的方式,也可以进行设置静态资源过滤。
@Configuration
@ComponentScan(basePackages = "com.zsl.javassm")
public class SpringMVCConfig extends WebMvcConfigurationSupport {
    @Override
    protected void addResourceHandlers(ResourceHandlerRegistry registry) {
        registry.addResourceHandler("/**").addResourceLocations("/static/");
    }
}
我们可以看出,这个配置类是继承了WebMvcConfigurationSupport,覆写了addResourceHandlers方法,在addResourceHandlers中,指定了static目录下可以直接访问。
addResourceHandler(“/**”)//定义请求 URL 规则;
addResourceLocations(“/static/”)//定义资源位置;
我们知道,在我们新建项目后, 会有个resources/static 目录,在默认的时候,把静态资源文件放在这个目录下,就可以直接访问。
其实一共有5个位置可以放静态资源,
**
- classpath:/META-INF/resources/
- classpath:/resources/
- classpath:/static/
- classpath:/public/
- /
**

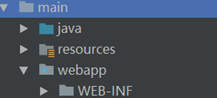
这里第5个 / 其实就是表示 webapp 目录中的静态资源也不被拦截。如果同一个文件分别出现在五个目录下,那么优先级也是按照上面列出的顺序。
添加webapp目录
点击IDEA右上角的Project Structure
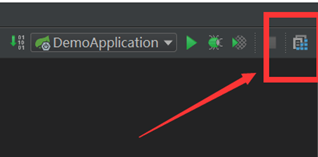
先点击下图中的+号,再点击Web

修改Web模板的位置


自定义文件的位置
除了上面5个默认的位置,我们还可以自定义文件的位置。
2种方式,1是在配置文件进行配置;2是用java代码来进行配置。
1.在application.properties
1.	spring.resources.static-locations=classpath:/zsl/
2.	spring.mvc.static-path-pattern=/**
spring.resources.static-locations是表示定义资源位置;
spring.mvc.static-path-pattern是定义请求 URL 规则;
如果向上面那样进行配置,那么我们访问resources/zsl目录下的资源文件,比如01.html,就可以使用http://localhost:8080/01.html
2.java代码
1.	@Configuration
2.	public class WebMVCConfig implements WebMvcConfigurer {
3.	    @Override
4.	    public void addResourceHandlers(ResourceHandlerRegistry registry) {
5.	        registry.addResourceHandler("/**").addResourceLocations("classpath:/zsl/");
6.	    }
7.	}
这个配置类是继承了WebMvcConfigurationSupport,覆写了addResourceHandlers方法,在addResourceHandlers中,指定了zsl目录下可以直接访问。
WebMvcConfigurationSupport源码解析

可以看到,在WebMvcAutoConfiguration中,有一个静态内部类WebMvcAutoConfigurationAdapter,它实现了WebMvcConfigurer这个接口,
我们找到addResourceHandlers这个方法,
@Override
public void addResourceHandlers(ResourceHandlerRegistry registry) {
   if (!this.resourceProperties.isAddMappings()) {
      logger.debug("Default resource handling disabled");
      return;
   }
   Duration cachePeriod = this.resourceProperties.getCache().getPeriod();
   CacheControl cacheControl = this.resourceProperties.getCache().getCachecontrol().toHttpCacheControl();
   if (!registry.hasMappingForPattern("/webjars/**")) {
      customizeResourceHandlerRegistration(registry.addResourceHandler("/webjars/**")
            .addResourceLocations("classpath:/META-INF/resources/webjars/")
            .setCachePeriod(getSeconds(cachePeriod)).setCacheControl(cacheControl));
   }
   String staticPathPattern = this.mvcProperties.getStaticPathPattern();
   if (!registry.hasMappingForPattern(staticPathPattern)) {
      customizeResourceHandlerRegistration(registry.addResourceHandler(staticPathPattern)
            .addResourceLocations(getResourceLocations(this.resourceProperties.getStaticLocations()))
            .setCachePeriod(getSeconds(cachePeriod)).setCacheControl(cacheControl));
   }
}

我们先来看看this.mvcProperties.getStaticPathPattern();

可以看到this.mvcProperties.getStaticPathPattern() 方法对应的值是 “/**”;
我们来看看this.resourceProperties.getStaticLocations();
这里把相关代码放一起了,方便我们看
public String[] getStaticLocations() {
   return this.staticLocations;
}

private String[] staticLocations = CLASSPATH_RESOURCE_LOCATIONS;

private static final String[] CLASSPATH_RESOURCE_LOCATIONS = { "classpath:/META-INF/resources/",
      "classpath:/resources/", "classpath:/static/", "classpath:/public/" };
可以看到this.resourceProperties.getStaticLocations()返回了四个位置,分别是:"classpath:/META-INF/resources/", "classpath:/resources/","classpath:/static/", "classpath:/public/";
我们再来看看getResourceLocations


好了,这回5个默认位置我给你找齐了。
registry.addResourceHandler(staticPathPattern); //定义请求 URL 规则;
addResourceLocations(getResourceLocations(this.resourceProperties.getStaticLocations()));//定义资源位置;
所以说我们要使用java代码自定义静态资源文件位置,我们只需要使用配置类来继承这个WebMvcConfigurer,使用覆写
addResourceHandlers(ResourceHandlerRegistry registry)


使用
addResourceHandler("/**")//定义请求 URL 规则;
addResourceLocations("/static/")//定义资源位置;
就可以了.
细心的人会发现,
使用自定义的配置类继承WebMvcConfigurationSupport和WebMvcCofigurer都可以实现自定义静态资源位置。那么
WebMvcConfigurerAdapter和WebMvcConfigurationSupport的区别
WebMvcConfigurerAdapter只是对WebMvcCofigurer的空实现,而WebMvcConfigurationSupport的实现的方法更全面
但是继承WebMvcConfigurationSupport会发现Spring Boot的WebMvc自动配置失效(WebMvcAutoConfiguration自动化配置),导致无法视图解析器无法解析并返回到对应的视图。
该怎么选择了?
WebMvcConfigurationSupport–>不需要返回逻辑视图,可以选择继承此类
WebMvcCofigurer–>返回逻辑视图,可以选择实现此方法,重写addInterceptor方法
关于WebMvcConfigurationSupport的源码解析,我们下篇再讲