最终效果图(参照京东)

1、实现思路
CoordinatorLayout中可以用Behavior实现特定的布局位置和滑动效果,我们使用Behavior来控制搜索框的变换。
2、具体流程
首先在home_fragment.xml中使用CoordinatorLayout+AppBarLayout实现标题栏:
xml代码如下
<?xml version="1.0" encoding="utf-8"?>
<android.support.design.widget.CoordinatorLayout xmlns:android="http://schemas.android.com/apk/res/android"
    xmlns:app="http://schemas.android.com/apk/res-auto"
    xmlns:tools="http://schemas.android.com/tools"
    android:layout_width="match_parent"
    android:layout_height="match_parent"
    tools:context=".ui.home.HomeFragment">

    <android.support.design.widget.AppBarLayout
        android:layout_width="match_parent"
        android:layout_height="wrap_content"
        android:theme="@style/AppTheme.AppBarOverlay"
        app:elevation="0dp"
        app:layout_behavior="@string/header_logo_behavior"
        tools:ignore="MissingConstraints">

        <android.support.v7.widget.Toolbar
            android:id="@+id/toolbar"
            android:layout_width="match_parent"
            android:layout_height="?attr/actionBarSize"
            app:popupTheme="@style/AppTheme.PopupOverlay">

            <RelativeLayout
                android:layout_width="match_parent"
                android:layout_height="wrap_content">

                <TextView
                    android:id="@+id/toolbar_tv"
                    android:layout_width="wrap_content"
                    android:layout_height="wrap_content"
                    android:text="@string/app_name"
                    android:textColor="@color/white"
                    android:textSize="20sp"
                    android:textStyle="italic" />
            </RelativeLayout>
        </android.support.v7.widget.Toolbar>
    </android.support.design.widget.AppBarLayout>
</android.support.design.widget.CoordinatorLayout>
不要忘记在HomeFragment类中实现代码:
Toolbar toolbar = (Toolbar) root.findViewById(R.id.toolbar);
        ((AppCompatActivity) getActivity()).setSupportActionBar(toolbar);
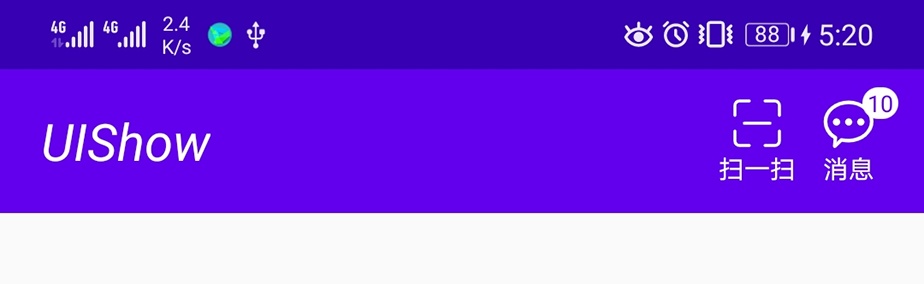
接下来我们添加标题栏右侧的菜单,Toolbar的菜单栏添加我们可以先在res/menu文件夹下新建menu_main.xml:
<menu xmlns:android="http://schemas.android.com/apk/res/android"
    xmlns:app="http://schemas.android.com/apk/res-auto"
    xmlns:tools="http://schemas.android.com/tools" tools:context=".MainActivity">
    <item android:id="@+id/action_scan"
        android:title="扫一扫"
        app:showAsAction="ifRoom"
        app:actionLayout="@layout/menu_action_scan"/>
    <item android:id="@+id/action_message"
        android:title="消息"
        app:showAsAction="ifRoom"
        app:actionLayout="@layout/menu_action_message"/>
</menu>
同时我们需要在HomeFragment类中复写onCreateOptionsMenu方法:
 @Override
    public void onCreateOptionsMenu(Menu menu, MenuInflater inflater) {
        inflater.inflate(R.menu.menu_main, menu);
        super.onCreateOptionsMenu(menu, inflater);
    }
并且我们需要调用方法setHasOptionsMenu(true),不然菜单无法展示。
接下来我们需要添加RecyclerView和Search搜索框,按照上面我们的实现思路,我们需要重写Behavior,给RecyclerView和Search搜索框分别配置Behavior,从而达到我们要的动态效果。我们先来看一下重写Behavior的流程,继承类CoordinatorLayout.Behavior< view >,重写layoutDependsOn和onDependentViewChanged方法。
- layoutDependsOn :是否依赖于特定view
- onDependentViewChanged : 依赖于的特定view有变化时触发
根据以上得知我们需要一个依赖的view,当RecyclerView滑动时view滑动,特定view滑动出发Search搜索框做出变化,完成动态效果。为了不影响页面控件和滑动效果,我们在home_fragment.xml的CoordinatorLayout布局第一个子控件位置新建一个RelativeLayout(按照自己习惯选择),我们让其和标题栏颜色一致
<RelativeLayout
        android:id="@+id/image"
        android:layout_width="match_parent"
        android:layout_height="90dp"
        android:background="@color/colorPrimary" />
同时我们创建Search搜索框,注意其要在AppBarLayout之后避免被AppBarLayout盖住:
 <RelativeLayout
        android:id="@+id/search_rl"
        android:layout_width="match_parent"
        android:layout_height="wrap_content"
        android:layout_marginLeft="30dp"
        android:layout_marginRight="30dp"
        android:layout_marginBottom="10dp"
        android:gravity="right"
        android:visibility="visible"
        app:layout_behavior="@string/header_search_behavior">

        <RelativeLayout
            android:layout_width="match_parent"
            android:layout_height="@dimen/collapsed_search_height"
            android:layout_alignParentRight="true"
            android:background="@drawable/stroke_corner_search_shape"
            app:layout_behavior=".header_float_behavior">

            <ImageView
                android:layout_width="20dp"
                android:layout_height="20dp"
                android:layout_centerVertical="true"
                android:layout_marginLeft="5dp"
                android:background="@drawable/search" />
        </RelativeLayout>
    </RelativeLayout>
@string/header_search_behavior在string.xml中实现:
<string name="header_search_behavior">com.libinbin.uishow.behavior.HeaderSearchBehavior</string>
指向HeaderSearchBehavior类,我们来看这个类的一下具体的实现
        @Override
    public boolean layoutDependsOn(CoordinatorLayout parent, View child, View dependency) {
        if (dependency != null && dependency.getId() == R.id.image) {
            return true;
        }
        return false;
    }

    @Override
    public boolean onDependentViewChanged(CoordinatorLayout parent, View child, View dependency) {
        if (dependency != null && dependency.getId() == R.id.image) {
            Resources resources = dependency.getResources();
            final float progress = 1.f -
                    Math.abs(dependency.getTranslationY() / (dependency.getHeight() - resources.getDimension(R.dimen.collapsed_header_height)));
            final float header_height = resources.getDimension(R.dimen.collapsed_header_height);
            final float offset_y = resources.getDimension(R.dimen.collapsed_float_offset_y);
            final float child_height = child.getHeight();
            final float child_height_end = (header_height - child_height) / 2 - (header_height + offset_y);
            child.setTranslationY(header_height + resources.getDimension(R.dimen.collapsed_float_offset_y));
            return true;
        }
        return false;

    }
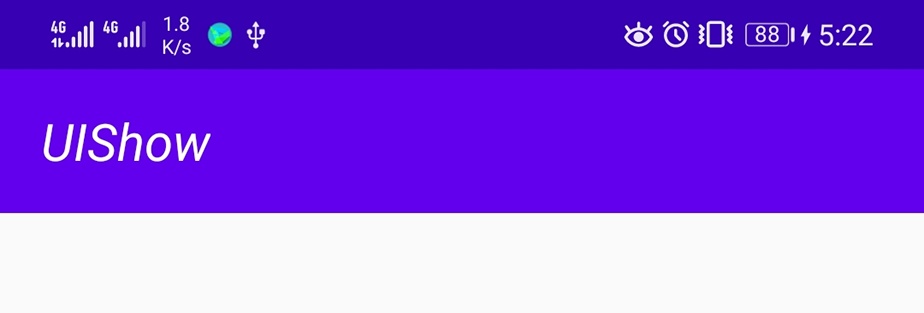
首先我们需要依赖于我们设定的view,通过dependency.getId() == R.id.image判定,在onDependentViewChanged方法中我们给search搜索框(这个child就是我们的搜索框)设定位置,标题栏的高度header_height向上移一点。效果如下:

现在我们创建RecyclerView,我们只需要做个简单实现就可以,在home_fragment.xml的CoordinatorLayout布局的底部添加:
    <android.support.v7.widget.RecyclerView
        android:id="@+id/recyclerView"
        android:layout_width="match_parent"
        android:layout_height="match_parent"
        android:background="#fff"
        app:layoutManager="LinearLayoutManager"
        app:layout_behavior="@string/header_scrolling_behavior" />
HomeFragment类中实现并添加adapter就可以了,这里我们就不做阐述了,我们还是来看@string/header_scrolling_behavior
<string name="header_scrolling_behavior">com.libinbin.uishow.behavior.HeaderScrollingBehavior</string>
指向类HeaderScrollingBehavior,我们来分析一下这类要怎么实现,首先这个类同样继承自CoordinatorLayout.Behavior< RecyclerView>,view换成了RecyclerView,我们想要根据RecyclerView的滑动来滑动这个特定的view,我们需要复写滑动的相关方法:
- onStartNestedScroll :用户按下手指时触发,询问 NestedScrollParent 是否要处理这次滑动操作
- onNestedScrollAccepted :当 NestedScrollParent 接受要处理本次滑动后,这个回调被调用,
- onNestedPreScroll :当 NestedScrollChild 即将被滑动时调用,在这里你可以做一些处理。
- onNestedScroll : 上一个方法结束后,NestedScrollChild 处理剩下的距离。
- onNestedPreFling :用户松开手指并且会发生惯性滚动之前调用。参数提供了速度信息
- onStopNestedScroll :一切滚动停止后调用,如果不会发生惯性滚动,fling 相关方法不会调用,直接执行到这里。
这几个方法的定义我只做了简单的介绍,具体的方法用途在下边项目代码中都有标注,我们需要结合实际效果才能理清楚。
我们来看一下重点方法,首先我们还是要实现layoutDependsOn和onDependentViewChanged:
@Override
    public boolean layoutDependsOn(CoordinatorLayout parent, RecyclerView child, View dependency) {
        if (dependency != null && dependency.getId() == R.id.image) {
            if(dependentView==null){
                dependentView = new WeakReference<>(dependency);
            }
            return true;
        }
        return false;
    }

  @Override
    public boolean onDependentViewChanged(CoordinatorLayout parent, RecyclerView child, View dependency) {
        child.setTranslationY(dependency.getHeight() + dependency.getTranslationY());
        return true;
    }
因为在滑动系列方法中会用到这个dependency,所以我们单独定义了一个弱引用去存储它。滑动方法我们重点关注onNestedPreScroll和onNestedScroll
 @Override
    public void onNestedPreScroll(@NonNull CoordinatorLayout coordinatorLayout, @NonNull RecyclerView child, @NonNull View target, int dx, int dy, @NonNull int[] consumed, int type) {
        if (dy < 0) {
            return;
        }
        View dependentView = getDependentView();
        float newTranslateY = dependentView.getTranslationY() - dy;
        float minHeaderTranslate = -(dependentView.getHeight() - getDependentViewCollapsedHeight());


        if (newTranslateY > minHeaderTranslate) {
            dependentView.setTranslationY(newTranslateY);
            consumed[1] = dy;
        }else{
            dependentView.setTranslationY(minHeaderTranslate);
        }
    }

    @Override
    public void onNestedScroll(@NonNull CoordinatorLayout coordinatorLayout, @NonNull RecyclerView child, @NonNull View target, int dxConsumed, int dyConsumed, int dxUnconsumed, int dyUnconsumed, int type) {
        if (dyUnconsumed > 0) {
            return;
        }
        View dependentView = getDependentView();
        float newTranslateY = dependentView.getTranslationY() - dyUnconsumed;
        final float maxHeaderTranslate = 0;

        if (newTranslateY < maxHeaderTranslate) {
            dependentView.setTranslationY(newTranslateY);
        }else{
            dependentView.setTranslationY(maxHeaderTranslate);
        }
    }
特定view也就是dependentView的Y值取决于dy和dyUnconsumed,为了避免RecyclerView会有一个惯性滚动导致的dependentView突然卡顿的问题,我们需要在newTranslateY 于maxHeaderTranslate/minHeaderTranslate的判定不满足的情况下给定一个定值maxHeaderTranslate/minHeaderTranslate。到这里我们还没有做完,我们还需要在HeaderSearchBehavior的onDependentViewChanged方法中添加特定view和search搜索框的联动效果:
    final float collapsedMargin = resources.getDimension(R.dimen.collapsed_search_margin_right);
            final float zero = resources.getDimension(R.dimen.collapsed_float_zero);
            final float marginLeftRight = resources.getDimension(R.dimen.collapsed_search_margin_left2right);
            final int marginRight = (int) (collapsedMargin + (marginLeftRight - collapsedMargin) * progress);
            final int marginTop = (int) (child_height_end + (zero - child_height_end) * progress);
            final int marginLeft = (int) marginLeftRight;
            CoordinatorLayout.LayoutParams lp = (CoordinatorLayout.LayoutParams) child.getLayoutParams();
            lp.setMargins(marginLeft, marginTop, marginRight, 0);
            child.setLayoutParams(lp);
到这里我们已经实现了RecyclerView和搜索框的联动效果。至于标题栏左侧文字的显隐效果更加简单,这里就不重复描述了,可以到项目中去看。
3、问题解决
在滑动测试的过程中我们发现RecyclerView的底部并不能完全展示,这里存在一个高度问题,解决办法是我们在HeaderScrollingBehavior类中复写方法onLayoutChild,设定其高度,具体实现:
    @Override
    public boolean onLayoutChild(CoordinatorLayout parent, RecyclerView child, int layoutDirection) {
        CoordinatorLayout.LayoutParams lp = (CoordinatorLayout.LayoutParams) child.getLayoutParams();
        if (lp.height == CoordinatorLayout.LayoutParams.MATCH_PARENT) {
            child.layout(0, 0, parent.getWidth(), (int) (parent.getHeight() - getDependentViewCollapsedHeight()));
            return true;
        }
        return super.onLayoutChild(parent, child, layoutDirection);
    }
项目地址
https://github.com/li-21/UIShow