在虚拟机初始化的基础上
安装Docker
wget -O /etc/yum.repos.d/CentOS-Base.repo http://mirrors.aliyun.com/repo/Centos-7.repo
wget https://mirrors.aliyun.com/docker-ce/linux/centos/docker-ce.repo -O /etc/yum.repos.d/docker-ce.repo
yum -y install docker-ce
systemctl enable docker && systemctl start docker
配置镜像下载加速器:
cat > /etc/docker/daemon.json << EOF
{
"registry-mirrors": ["https://b9pmyelo.mirror.aliyuncs.com"],
"insecure-registries": ["http://192.168.20.160:801"
}
EOF
systemctl restart docker
安装Docker-compose(需要挂加速器)
[root@harbor ~]# wget -c https://github.com/docker/compose/releases/download/1.25.5/docker-compose-Linux-x86_64
[root@harbor ~]# mv docker-compose-Linux-x86_64 /usr/bin/docker-compose
[root@harbor ~]# chmod a+x /usr/bin/docker-compose
[root@harbor ~]# docker-compose --version
docker-compose version 1.25.5, build 8a1c60f6
下载harbor离线安装包并解压
[root@harbor ~]# wget -c https://github.com/goharbor/harbor/releases/download/v2.0.0/harbor-offline-installer-v2.0.0.tgz
[root@harbor ~]# tar -xf harbor-offline-installer-v2.0.0.tgz
cd harbor
cp harbor.yml.tmpl harbor.yml
# mkdir -p /opt/application/harbor //用于存放harbor的持久化数据
harbor.yml配置文件主要修改参数如下:
5 hostname: 192.168.20.160
#//设置访问地址,可以使用ip、域名,不可以设置为127.0.0.1或localhost。默认情况下,harbor使用的端口是80,若使用自定义的端口,除了要改docker-compose.yml文件中的配置外,这里的hostname也要加上自定义的端口,否则在docker login、push时会报错
10 port: 801
34 harbor_admin_password: yuguoli12345
#https配置(如不需要可不配置,注释掉)
12 # https related config
13 #https:
14 # https port for harbor, default is 443
15 # port: 443
16 # The path of cert and key files for nginx
17 #certificate: /your/certificate/path
18 #private_key: /your/private/key/path
29 # external_url: https://reg.mydomain.com:8433
# //如果要启用外部代理,比如外层的NGINX、LB等,请取消注释external_url,当它启用时,hostname将不再使用。
34 harbor_admin_password: admin密码
#//admin密码
#数据库配置
37 database:
38 # The password for the root user of Harbor DB. Change this before any produ ction use.
39 password: root123
40 # The maximum number of connections in the idle connection pool. If it <=0, no idle connections are retained.
41 max_idle_conns: 50
42 # The maximum number of open connections to the database. If it <= 0, then there is no limit on the number of open connections.
43 # Note: the default number of connections is 100 for postgres.
44 max_open_conns: 100
#持久化数据目录
47 data_volume: /opt/application/harbor
创建 https 证书
# 创建证书目录,并赋予权限
[root@harbor ~]# mkdir /https/ca -p
[root@harbor ~]# chmod -R 777 /https/ca/
[root@harbor ~]# cd /https/ca/
# 生成私钥,需要设置密码:1234
[root@harbor ca]# openssl genrsa -des3 -out harbor.key 2048
Generating RSA private key, 2048 bit long modulus
.........+++
..................................+++
e is 65537 (0x10001)
Enter pass phrase for harbor.key:1234
Verifying - Enter pass phrase for harbor.key:1234
# 生成CA证书,需要输入密码1234
[root@harbor ca]# openssl req -sha512 -new \
> -subj "/C=CN/ST=JS/L=WX/O=zwx/OU=jhmy/CN=10.0.0.28" \
> -key harbor.key \
> -out harbor.csr
Enter pass phrase for harbor.key:1234
# 备份证书
[root@harbor ca]# cp harbor.key harbor.key.org
# 退掉私钥密码,以便docker访问(也可以参考官方进行双向认证)
[root@harbor ca]# openssl rsa -in harbor.key.org -out harbor.key
Enter pass phrase for harbor.key.org:1234
writing RSA key
# 使用证书进行签名
[root@harbor ca]# openssl x509 -req -days 100000 -in harbor.csr -signkey harbor.key -out harbor.crt
Signature ok
subject=/C=CN/ST=JS/L=WX/O=zwx/OU=jhmy/CN=10.0.0.28
Getting Private key
[root@harbor ~]# cd harbor/
[root@harbor harbor]# vim harbor.yml
https:
# https port for harbor, default is 443
port: 443
# The path of cert and key files for nginx
certificate: /https/ca/harbor.crt
private_key: /https/ca/harbor.key
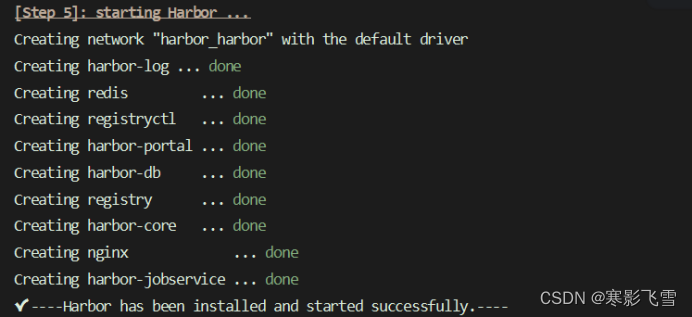
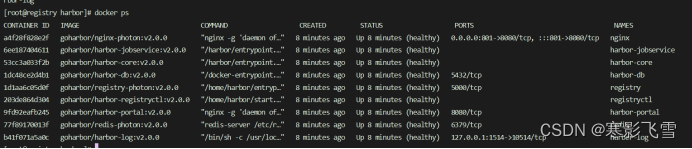
安装并启动Harbor
安装之前需要启动docker,然后执行安装脚本:
--with-clair参数是启用漏洞扫描功能
[root@harbor harbor]# ./root/harbor/install.sh --with-clair
浏览器访问
http://IP:801
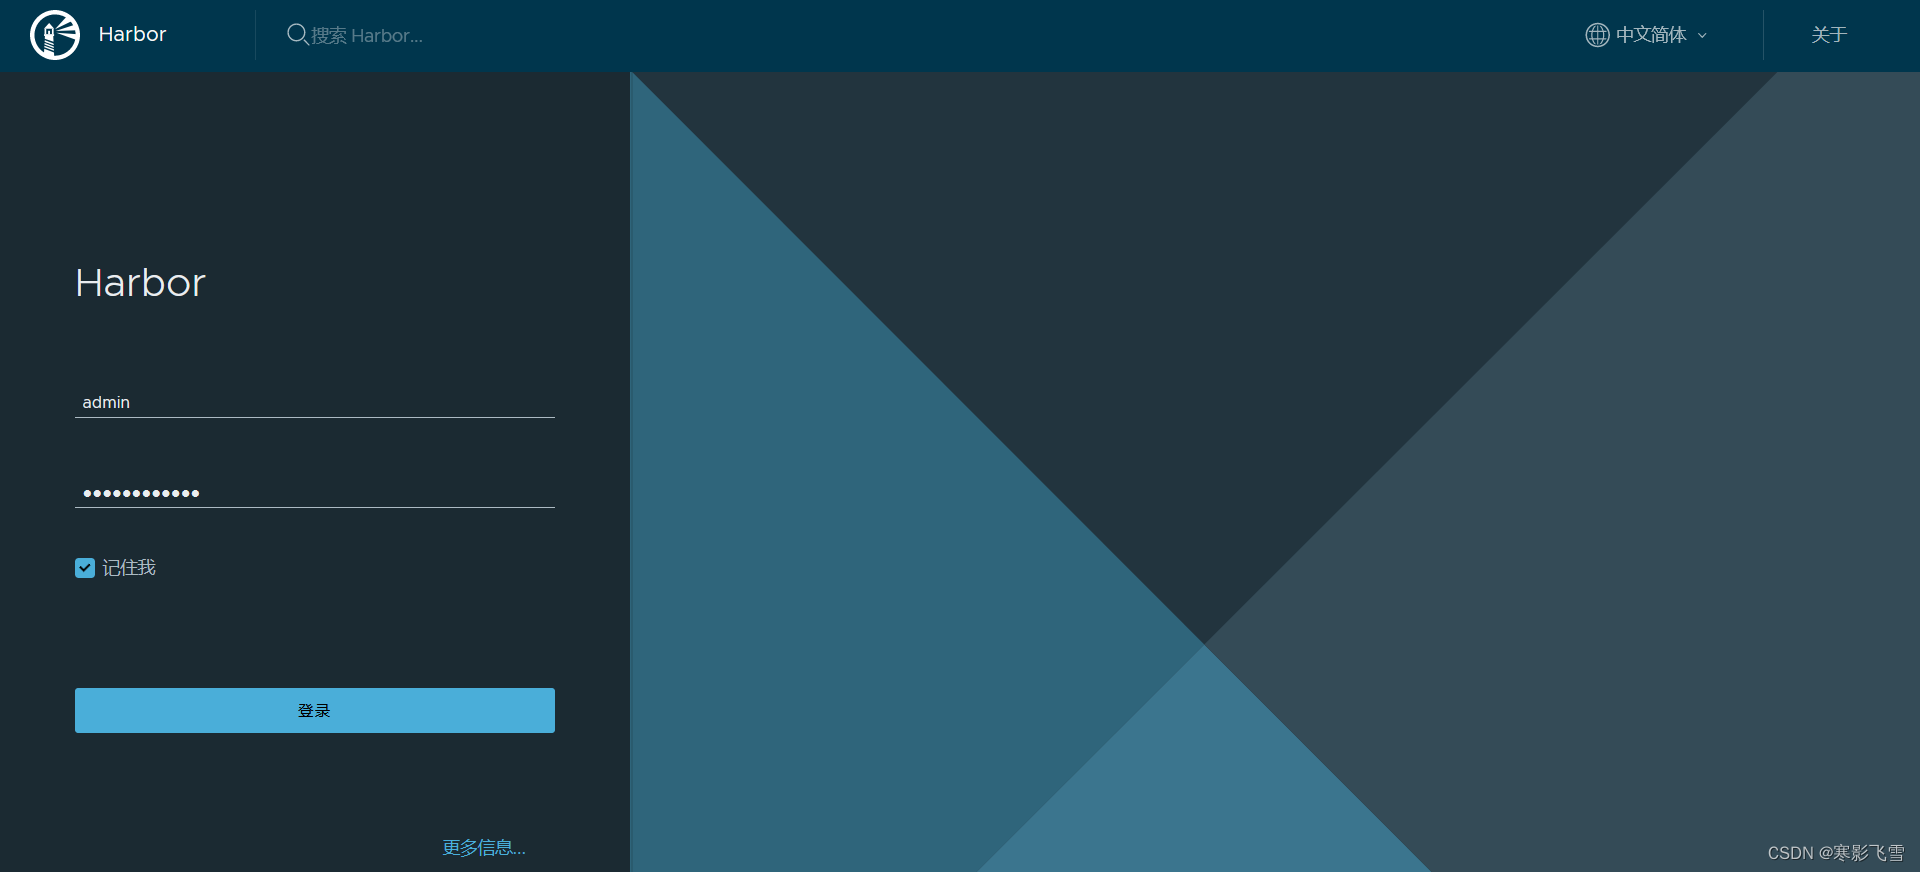
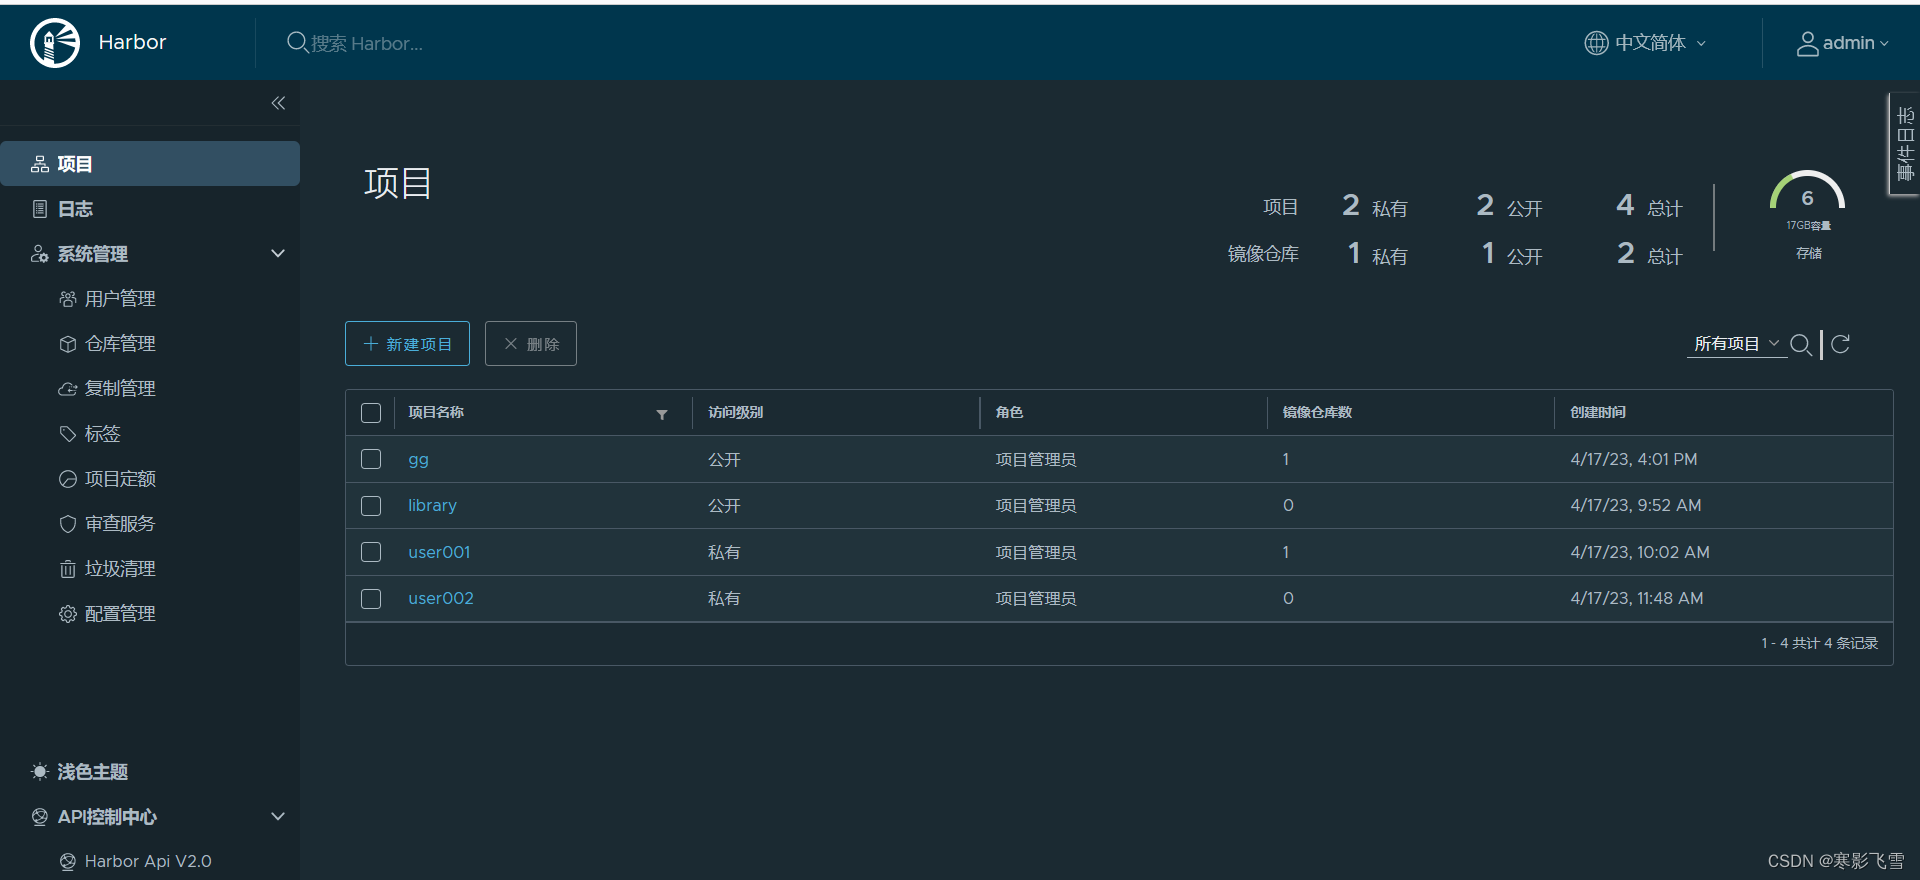
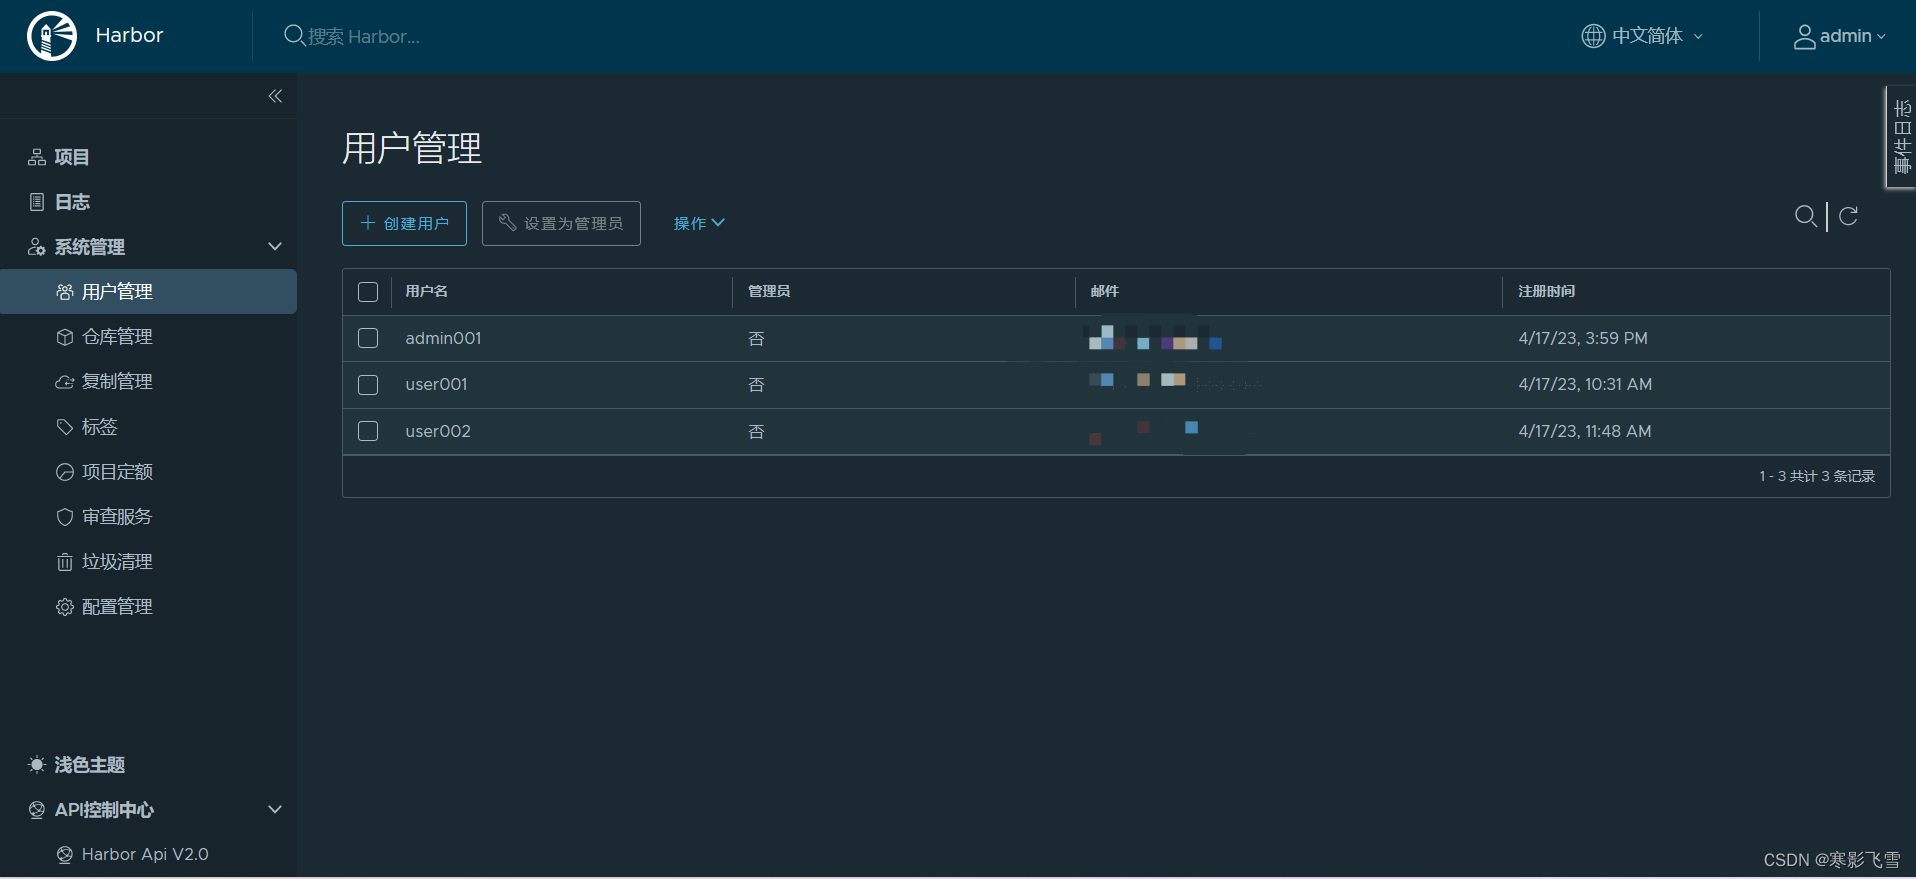
先创建用户
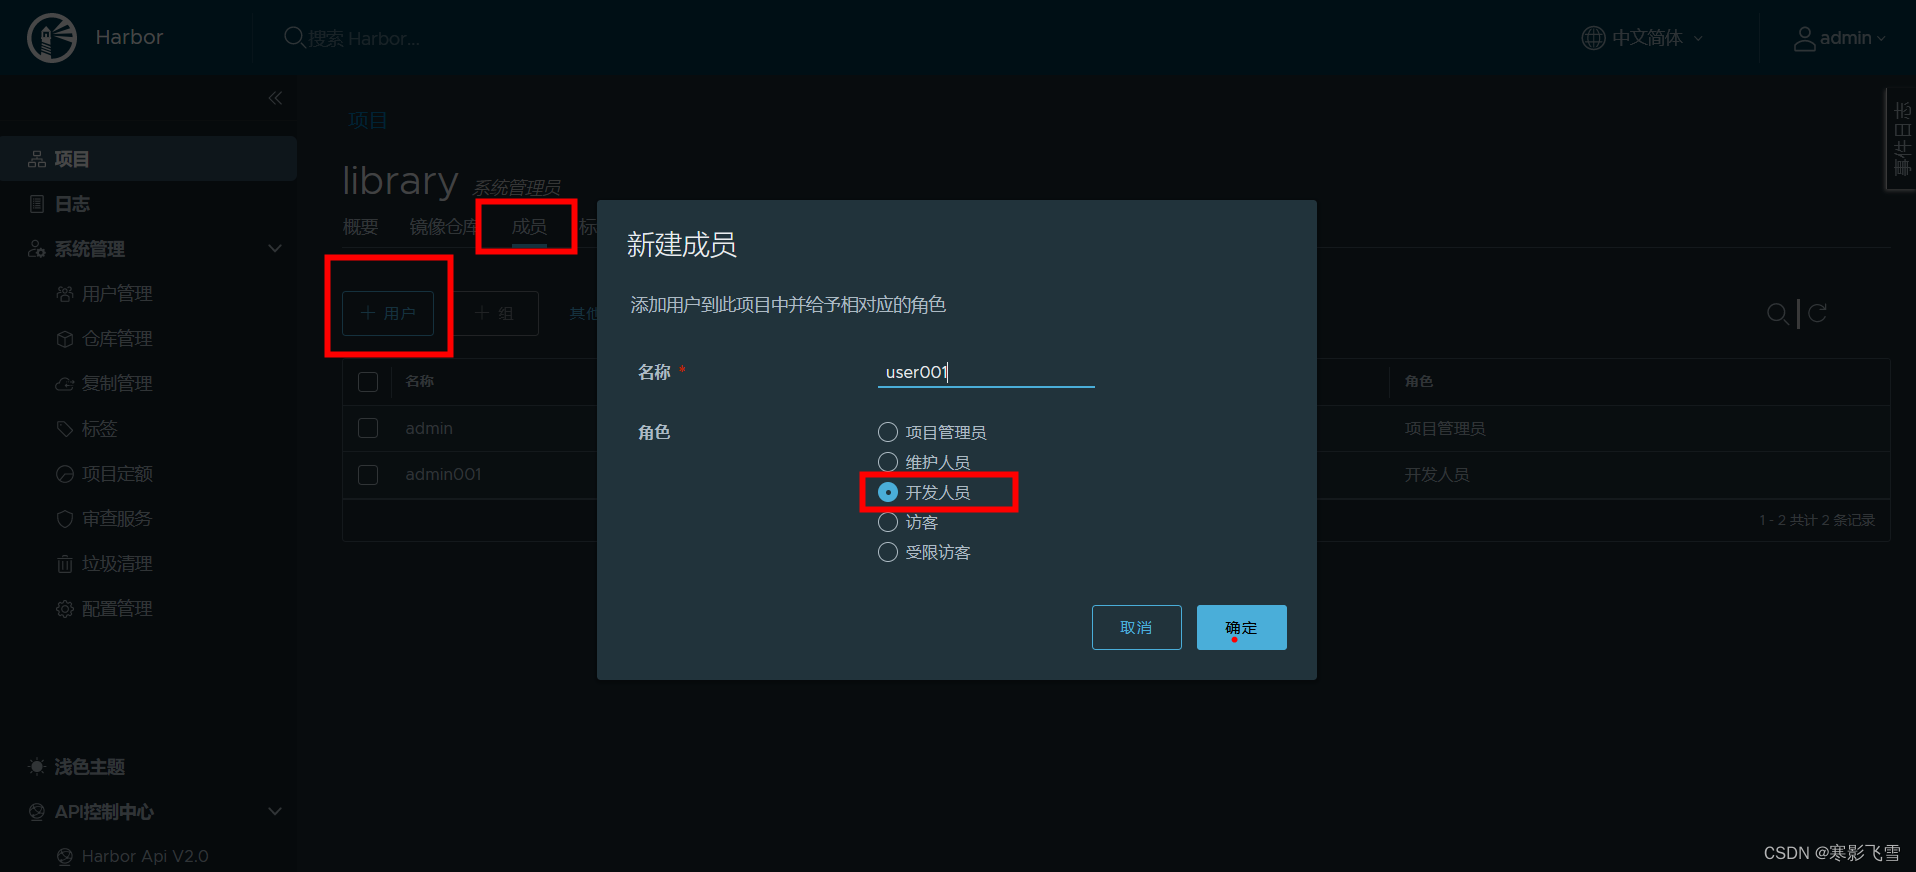
创建项目

给项目加入用户,设置角色
查看推送命令
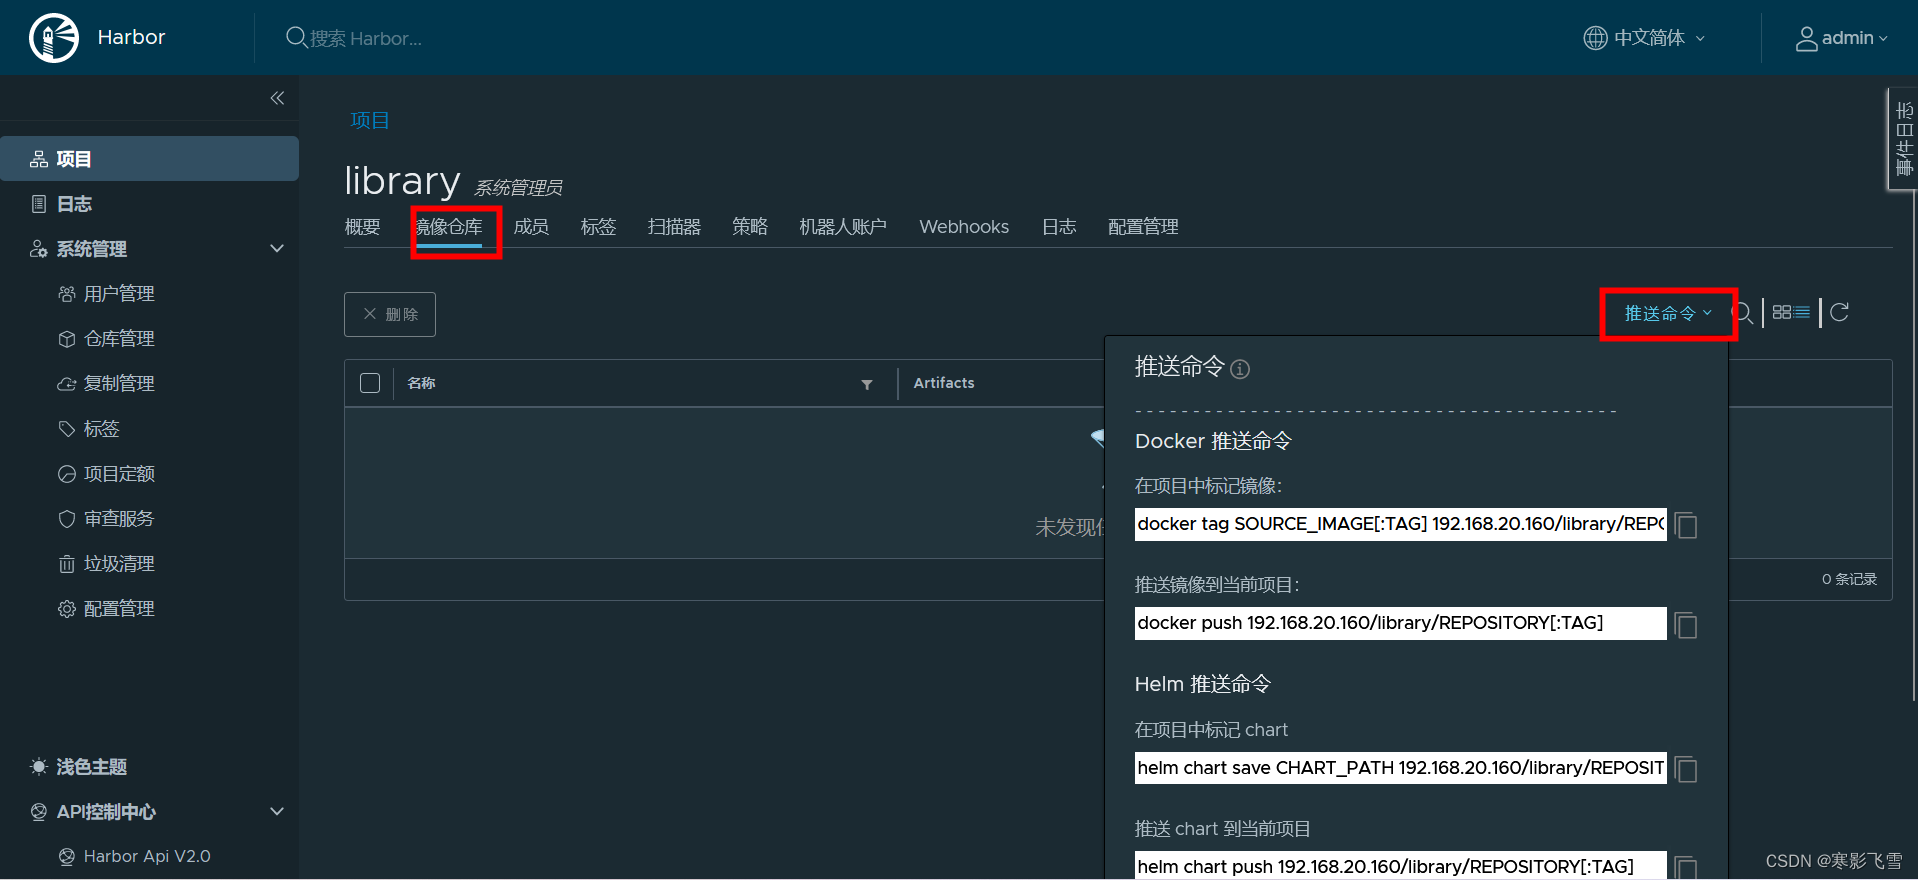
# 给镜像打上标签
- 镜像仓库地址/项目名称/标签信息
docker tag nginx:1.16 IP:801/user001/nginx:1.16.1
服务器主机要对镜像进行操作必须先登录!!!
# 登录仓库
docker login http://IP:801
#退出登录
docker logout https://IP:801
推送镜像
docker push IP:801/user001/nginx:1.16.1
拉取镜像
docker pull IP:801/user001/nginx:1.16.1