时序数据库timescaleDB安装

2023-11-10

参考链接 :时序数据库timescaleDB安装 :http://www.lwops.cn/thread-300-1-1.html

本环境在Centos7.5采用编译安装的方式,主要介绍PostgreSQL 11.7,TimescaleDB 1.6.1,cmake3.8.2

PostgreSQL编译安装需要cmake3.4以上的版本
TimescaleDB目前只支持PostgreSQL 9.6.3 +,10.9 +或11.4+

一、postgresql11部署

1、安装cmake
解压cmake-v3.8.2.zip

[root@TimescaleDB tmp]# unzip cmake-v3.8.2.zip
[root@TimescaleDB tmp]# cd cmake-v3.8.2

安装gcc++ 后,再安装cmake

[root@TimescaleDB cmake-v3.8.2]# yuminstall -y gcc*
[root@TimescaleDB cmake-v3.8.2]#  ./bootstrap && make && makeinstall
[root@TimescaleDB cmake-v3.8.2]# ln -s/usr/local/bin/cmake /usr/bin/cmake

2、安装postgresq
软件包链接:https://ftp.postgresql.org/pub/source/v11.7/
解压postgresql-11.7.tar.gz

[root@TimescaleDB tmp]# tar -zxvfpostgresql-11.7.tar.gz
[root@TimescaleDB tmp]# cd postgresql-11.7

安装依赖包

[root@TimescaleDB postgresql-11.7]# yuminstall -y zlib* readline*

安装postgresql

[root@TimescaleDB postgresql-11.7]#./configure --prefix=/usr/local/postgresql --with-readline --with-zlib
[root@TimescaleDB postgresql-11.7]#make&& make install

在这里插入图片描述
添加环境变量
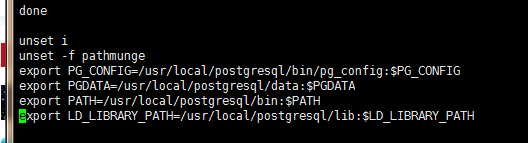
在/etc/profile最后,添加以下内容

[root@TimescaleDB postgresql-11.7]#vi/etc/profile
exportPG_CONFIG=/usr/local/postgresql/bin/pg_config:$PG_CONFIG
exportPGDATA=/usr/local/postgresql/data:$PGDATA
export PATH=/usr/local/postgresql/bin:$PATH
exportLD_LIBRARY_PATH=/usr/local/postgresql/lib:$LD_LIBRARY_PATH   

在这里插入图片描述

[root@TimescaleDB postgresql-11.7]#source /etc/profile

创建用户和用户组,创建数据库文件目录

[root@TimescaleDB postgresql-11.7]# useraddpostgres
[root@TimescaleDB postgresql-11.7]#groupadd postgres
[root@TimescaleDB postgresql-11.7]# mkdir/usr/local/postgresql/data
[root@TimescaleDB postgresql-11.7]# chownpostgres /usr/local/postgresql/data
[root@TimescaleDB postgresql-11.7]# chgrppostgres /usr/local/postgresql/data
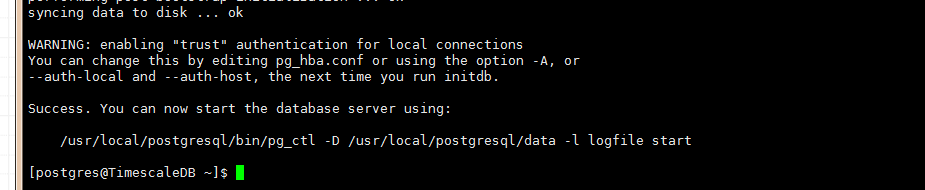
切换用户,初始化数据库

[root@TimescaleDB postgresql-11.7]# su -postgres
[postgres@TimescaleDB ~]$  /usr/local/postgresql/bin/initdb -D/usr/local/postgresql/data
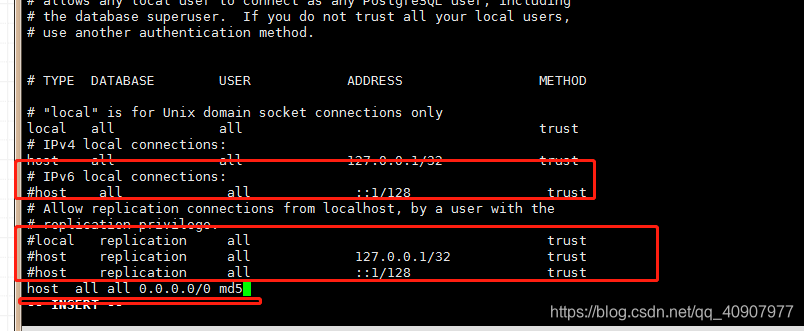
在这里插入图片描述
配置访问权限

[postgres@TimescaleDB ~]$ vi/usr/local/postgresql/data/pg_hba.conf

在这里插入图片描述
配置监控地址,连接端口号

[postgres@TimescaleDB ~]$ vi/usr/local/postgresql/data/postgresql.conf
listen_addresses配置监听地址范围,改为*则为所有
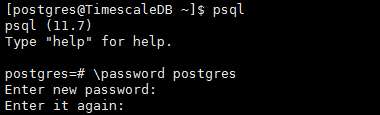
在这里插入图片描述
启动数据库,修改数据库密码

[postgres@TimescaleDB ~]$/usr/local/postgresql/bin/pg_ctl -D /usr/local/postgresql/data -l/usr/local/postgresql/data/logfile start

在这里插入图片描述

[postgres@TimescaleDB ~]$ psql
postgres=# \password postgres

在这里插入图片描述

二、timescaledb安装

软件包链接https://codeload.github.com/timescale/timescaledb/zip/master
1、安装timescaledb
解压并授权

[root@TimescaleDB tmp]# unziptimescaledb-master.zip
[root@TimescaleDB tmp]# chown -Rpostgres:postgres timescaledb-master
[root@TimescaleDB tmp]#  chmod -R 775 timescaledb-master

编译安装

[root@TimescaleDB tmp]# cdtimescaledb-master
[root@TimescaleDB tmp]# ./bootstrap-DUSE_OPENSSL=0 -DREGRESS_CHECKS=OFF

在这里插入图片描述

[root@TimescaleDB timescaledb-master]# cd./build && make

在这里插入图片描述

root@TimescaleDB build]# make install

在这里插入图片描述
#2、配置timescaledb
1、编辑postgresql.conf文件,添加timescaledb库

[root@TimescaleDB build]# su – postgres
[postgres@TimescaleDB ~]$ vi/usr/local/postgresql/data/postgresql.conf

在这里插入图片描述
重启postgresql数据库

[root@TimescaleDBbuild]# su – postgres
[postgres@TimescaleDB~]$ /usr/local/postgresql/bin/pg_ctl -D /usr/local/postgresql/data -l /usr/local/postgresql/data/logfilerestart
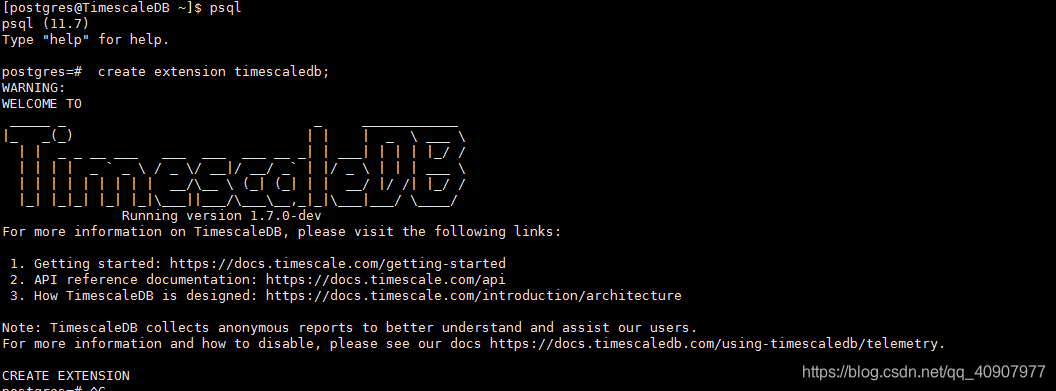
在这里插入图片描述
添加timescaledb扩展

[postgres@TimescaleDB ~]$ psql
postgres=# create extension timescaledb;

在这里插入图片描述
3、验证timescaleDB扩展安装完成
现在创建一个新的空数据库
postgres=# CREATE database tutorial;
进入tutorial库

\c tutorial

把tutorial库转换为使用TimescaleDB扩展数据库

tutorial=# CREATE EXTENSION IF NOT EXISTStimescaledb CASCADE;

在这里插入图片描述
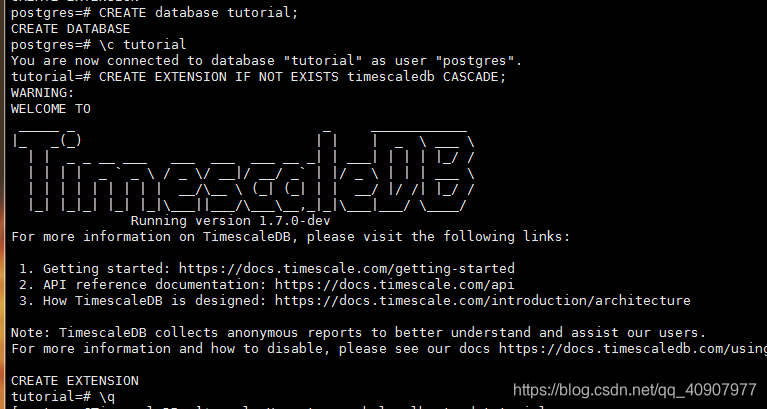
验证完成,timescaleDB扩展安装成功。

参考链接 :时序数据库timescaleDB安装 :http://www.lwops.cn/thread-300-1-1.html

本文内容由网友自发贡献,版权归原作者所有,本站不承担相应法律责任。如您发现有涉嫌抄袭侵权的内容,请联系:hwhale#tublm.com(使用前将#替换为@)

时序数据库timescaleDB安装 的相关文章

  • Failed to create the java virtual machine解决办法

    1 原因 JAVA虚拟机报错 计算机的内存不足所致 还有一种说法是你的eclipse版本和虚拟机不兼容 2 解决方法 找到eclipse安装目录下的eclipse ini配置文件 打开 startup vm D Java jre6 bin
  • No module named 'tensorflow.contrib

    No module named tensorflow contrib 错误原因 解决方法 错误原因 这个错误可能是由 from tensorflow contrib learn python learn datasets import ba

随机推荐

  • 网络基础之网络层协议介绍(ping命令和ARP协议)

    文章目录 一 IP数据包格式 IP字段 二 ICMP协议 1 ICMP协议 Internet控制消息协议 2 ICMP协议的封装 3 ICMP的基本使用 Ping 4 跟踪路由路径命令 三 ARP协议 1 广播和广播域 2 ARP协议概述
  • stylecop4.0下载地址

    http soft city366 com version480 aspx
  • redis哨兵主从不切换_别找了!Redis主从模式和哨兵模式,这篇看完就足够了

    1 概述 一般的文档 都把redis的集群方式分成三种 主从 哨兵 集群 这里的集群只是广义集群的一种 但是这么分类很不严谨 哨兵模式 单独使用是没有意义的 哨兵的作用有两个 监控 监控主节点和从节点是否正常运行 提醒 当被监控的某个Red
  • Callable和Future原理解析

    首先进行分析前 我们需要了解到的概念 Callable是一个接口 是用于创建线程执行里面有一个call方法 用于线程执行的内容 由业务自己定义 Future也是一个接口 可以异步的通过get方法获取到call返回的内容 比较常见的使用场景
  • java如何声明公众类_类#是公共的,应在名为#.java的文件中声明

    classComplex privateintrealPart privateintimaginPart Complex this realPart 0 this imaginPart 0 Complex intrealPart intim
  • jdk-8u162 java安装

    linux下java环境配置 参照如下文章安装jdk https blog csdn net daerzei article details 80136457 1 上传jdk 8u162 文件 然后执行如下命令进行安装 安装完成之后设定环境
  • 边玩边学,15个学习Python 的编程游戏网站

    经常听到有朋友说 学习编程是一件非常枯燥无味的事情 其实 大家有没有认真想过 可能是我们的学习方法不对 比方说 你有没有想过 可以通过打游戏来学编程 今天我想跟大家分享几个网站 教你如何通过边打游戏边学编程 1 Coding Games 一
  • 力扣 289. 生命游戏

    虽然难度是中等但其实很简单 遍历矩阵判断每个点是死是活就可以了 进阶要求使用原地算法 即空间复杂度为O 1 所以我们不能简单的记录1是活 0是死 我规定 1 原来活 活变活 0 原来死 死变死 2 死变活 1 活变死 自己的 0ms cla
  • Windows Server 2012 R2 -DNS服务器安装与测试(VMware workstation环境)

    Windows Server 2012 R2 DNS服务器安装与测试 VMware workstation环境 搭建拓扑如下 DNS后缀名设置 DNS服务器 虚拟机 IP设置 DNS指向自己 物理机net8虚拟网卡IP设置 DNS指向DNS
  • Vivado 2018.3 安装步骤及 license 获取

    本文的主要内容是介绍 Vivado 2018 3 版本的安装步骤及其 license 的获取与加载 首先下载安装包 将其在没有中文的路径下解压 注意在解压前最好关闭电脑的杀毒软件 防止某些文件被拦截或者删除 解压完成后打开文件夹 在最底部双
  • Java多线程-并行处理以及事务控制

    1 为了提高我们接口的响应速度 我们可以开多个线程 并行处理 比如我们要大批量写入数据到数据库 Autowired private ThreadPoolExecutor executor Autowired private Platform
  • 六. HTTPS确保Web安全

    六 HTTPS确保Web安全 1 HTTP的缺点 通信使用明文 内容可能会被盗取 互连网中使用TCP IP协议族进行通信的过程中会经过非常多的通信载体 网关 路由器等 而这些主机并不可能完全是私人的 所以可能某个环节遭到恶意窥视 抓包 当然
  • Android 整合高德地图SDK实现 地图预览,定位,模拟导航

    一 准备工作 1 到高德地图官方网申请key 我的应用 高德控制台 2 申请key方法请参考 获取Key 创建工程 开发指南 Android 地图SDK 高德地图API 3 出现的问题 其中有一个获取SHA1的问题 E AmapErr 定位
  • Tracker 服务器地址大全 Tracker List

    https dns icoa cn tracker udp tracker tiny vps com 6969 announce https 1337 abcvg info announce https tracker fastdownlo
  • 【Linux系统编程(二)】Linux文件IO操作

    文章目录 Linux文件IO操作 1 系统调用 2 系统调用和库函数的区别 3 C库中IO函数工作流程 4 文件描述符 4 1 文件描述符表是如何管理文件描述符的呢 4 2 查看当前系统文件描述最大数量 5 文件IO的操作 5 1 open
  • 关于split(String agrex)

    split a b c 得到 a b c a b c 得到 a b c 前面的空格一个都不会省略 a b c 得到 a b c 中间空格省略一个 后缀的空格全部省略 不是以空格而是以某个String为划分依据时 现象相同 split a a
  • 2021-06-22安装docker-ce

    安装docker ce Docker 支持以下的 64 位 CentOS 版本 CentOS 7 CentOS 8 更高版本 使用官方安装脚本自动安装 安装命令如下 curl fsSL https get docker com bash s
  • VUE问题汇总(一)

    vue的起步教程与api https cn vuejs org v2 guide vue组件库 https element eleme cn zh CN component installation 1 解决vue中时间控件中获取时间少一天
  • 前端三大框架(vue、react、angular)对比(一)

    官网 vue https cn vuejs org react https react docschina org angular https angular cn 三者总体介绍 都是MVVM 从后端的MVC衍生 类型的框架 基本都用于构建
  • 时序数据库timescaleDB安装

    参考链接 时序数据库timescaleDB安装 http www lwops cn thread 300 1 1 html 本环境在Centos7 5采用编译安装的方式 主要介绍PostgreSQL 11 7 TimescaleDB 1 6