Spring-day01
一、 spring入门
1.什么是框架
2.框架的作用
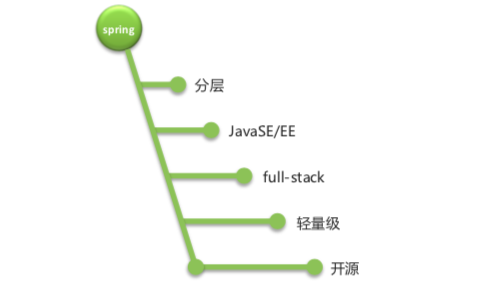
3. spring是一个轻量级的一站式解决方案,它并没有给你提供任何实质的功能,他的主要的作用是用来改善系统架构的。

4. spring体系结构
[外链图片转存失败,源站可能有防盗链机制,建议将图片保存下来直接上传(img-QPziGO9T-1596084492001)(/Users/hackerc5/Library/Application Support/typora-user-images/image-20200728091536526.png)]
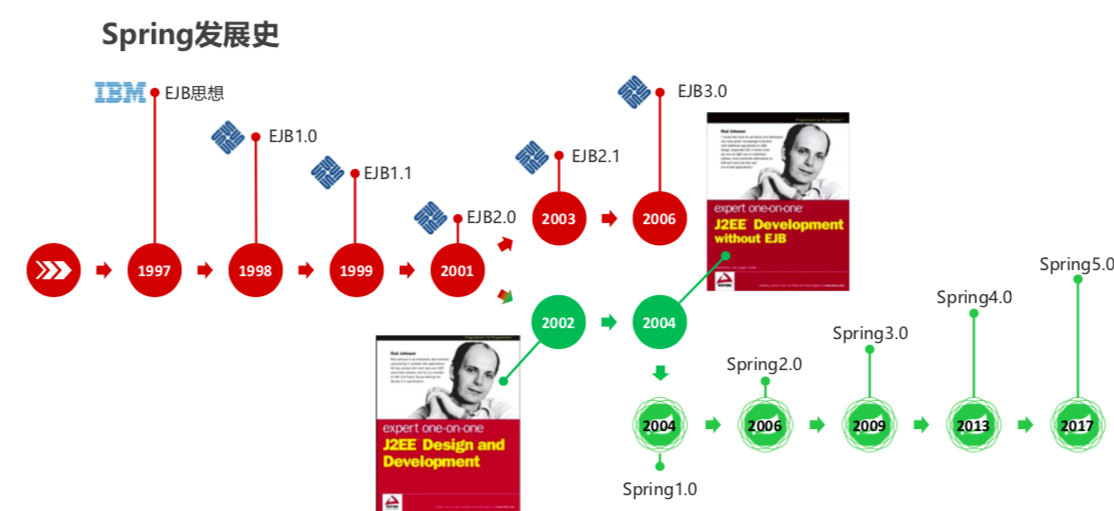
5.Spring发展史
二、Spring的核心
1. IoC(Inversion Of Control)控制反转
-
IoC就是控制反转
-
Spring反向控制应用程序所需要使用的外部资源
-
对象的创建从主动变成被动
一、IoC的入门
步骤:
1、导入jar包
2、编写java业务代码
3、创建Spring配置文件
4、创建spring控制的资源
public static void main(String[] args) {
//2.启动Spring容器
ApplicationContext ctx = new ClassPathXmlApplicationContext("applicationContext.xml");
//3.从容器中获取对象
UserService userService = (UserService) ctx.getBean("userService");
UserService userService = (UserService) ctx.getBean("userService");
//4.对象就可以调用方法
userService.save();
}
**原来是通过的方式**
```java
//在Controller层创建bean对象调用
protected UserService userService = new UserServiceImpl();
//执行方法
UserService.save();
```
2. 核心配置
一、bean标签
二、spring创建对象的方式有几种-面试题
-
使用反射调用无参的构造方法进行创建
-
静态工厂
-
编写工厂类和方法(静态的方法)-在方法里面创建对象
public static UserService getService(){
System.out.println("静态工厂创建了一个对象...");
return new UserServiceImpl();
}
-
在spring的核心配置文件中配置该静态工厂,然后在测试类中通过ctx.getBean(“userService”)获得bean对象即可调用
<bean id="userService4" class="com.itheima.service.UserServiceFactory" factory-method="getService"/>
//通过工厂即可获得bean
public static void main(String[] args) {
ApplicationContext ctx = new ClassPathXmlApplicationContext("applictionContext.xml");
UserService factoryBean = (UserService) ctx.getBean("userService4");
factoryBean.save();
}
-
实例工厂
-
- 注解方式
三、DI(Dependency Injection)依赖注入
依赖注入-其实跟ioc是一回事只是站的角度不同,ioc是站在spring容器的角度看问题,di是站在程序的角度看问题
依赖注入(DI)和控制反转(IOC)基本是一个意思,因为说起来谁都离不开谁。
简单来说,a依赖b,但a不控制b的创建和销毁,仅使用b,那么b的控制权交给a之外处理,这叫控制反转(IOC),而a要依赖b,必然要使用b的instance,那么
- 通过a的接口,把b传入;
- 通过a的构造,把b传入;
- 通过设置a的属性,把b传入;
这个过程叫依赖注入(DI)。
1、依赖注入-面试题
-
一、set方法注入
-
- 要保证需要注入的对象在spring的容器中存在
-
- 在需要的地方声明private的属性并提供set方法
- set方法必须要提供
- set方法命令的时候严格按照规范进行命名
-
- 在创建对象的时候使用标签进行属性的注入
-
二、构造方法注入
-
- 在对应的类中提供对应的构造方法
-
特别要注意:一旦你自己提供了一个构造方法那么系统默认的构造方法就不在提供了,所以你自己定义了构造方法以后一定要提供一个无参的构造方法,否则后面项目可能会出现意想不到的错误
-
- 在配置对象的时候使用标签来配置属性
-
三、注解----day02讲解
-
四、集合的注入
名称:array,list,set,map,props
list:
<!--List集合类型注入数据-->
<property name="myList">
<list>
<value>itheima</value>
<value>666</value>
<ref bean="userService"/>
<bean class="com.itheima.service.ApplyService"/>
</list>
</property>
props:
<!--Properties类型注入数据-->
<property name="myProps">
<props>
<prop key="username">root</prop>
<prop key="password">root</prop>
</props>
</property>
Array(了解)
<!--数组类型注入数据-->
<property name="myArray">
<array>
<value>itheima</value>
<value>666</value>
<ref bean="userService"/>
<bean class="com.itheima.service.ApplyService"/>
</array>
</property>
Set:
<!--Set集合类型注入数据-->
<property name="mySet">
<set>
<value>itheima</value>
<value>666</value>
<ref bean="userService"/>
<bean class="com.itheima.service.ApplyService"/>
</set>
</property>
Map:
<!--Map集合类型注入数据-->
<property name="myMap">
<map>
<entry key="name" value-ref="itheima"/> <entry key="fame" value-ref="666"/>
<entry key="userService">
<ref bean="userService"></ref> </entry>
<entry key="applyService">
<bean class="applyService"/>
</entry>
</map>
</property>
-
五、P命名空间-了解
-
作用:简化xml配置中的标签的
-
- 在xml的命名空间出导入p命名空间
- xmlns:p=“http://www.springframework.org/schema/p”
-
- 在配置bean的时候使用p:属性名名字[-ref]=xxx的形式进行配置
<bean
id="userService"
class="com.itheima.service.impl.UserServiceImpl"
p:userDao-ref="userDao"
p:bookDao-ref="bookDao"
/>
```
-
- Spring的IoC和DI分别是什么?-面试题
三、 开发实用配置
1、properties文件的加载和读取
-
- 编写properties配置文件
-
- 在xml中引入对应的命名空间(context空间)
xmlns:context="http://www.springframework.org/schema/context"
-
- 加载配置文件
<context:property-placeholder location="classpath:*.properties"/>
-
- 读取配置文件的内容
<property name="propertyName" value="${propertiesName}"/>
完整版配置文件:
<?xml version="1.0" encoding="UTF-8"?>
<beans xmlns="http://www.springframework.org/schema/beans"
xmlns:xsi="http://www.w3.org/2001/XMLSchema-instance"
xmlns:p="http://www.springframework.org/schema/p"
<!--1.加载context命名空间的支持-->
xmlns:context="http://www.springframework.org/schema/context"
xsi:schemaLocation="http://www.springframework.org/schema/beans
https://www.springframework.org/schema/beans/spring-beans.xsd
http://www.springframework.org/schema/context
https://www.springframework.org/schema/context/spring-context.xsd">
<!--2.加载配置文件-->
<context:property-placeholder location="classpath:*.properties"/>
<bean id="userDao" class="com.itheima.dao.impl.UserDaoImpl">
<property name="userName" value="${username}"/>
<property name="password" value="${pwd}"/>
</bean>
<beans/>
-
注意:
-
如果需要加载所有的properties文件,可以使用***.properties**表示加载所有的properties文件
-
读取数据使用**${propertiesName}格式进行,其中propertiesName**指properties文件中的属性名
2.配置文件的分割和合并
-
一般在开发的过程中,都会按照层或者业务的功能把一个大的配置文件拆分为N个小的配置文件
-
在项目开发的过程中一般都会有一个主配置文件,在主配置文件中需要使用import来导入我们拆分的小的配置文件
<import resource="config.xml"/>
-
Spring容器加载多个配置文件
new ClassPathXmlApplicationContext("config1.xml","config2.xml");
-
Spring容器中的bean定义冲突问题
- 同id的bean,后定义的覆盖先定义的
- 导入配置文件可以理解为将导入的配置文件复制粘贴到对应位置
- 导入配置文件的顺序与位置不同可能会导致最终程序运行结果不同
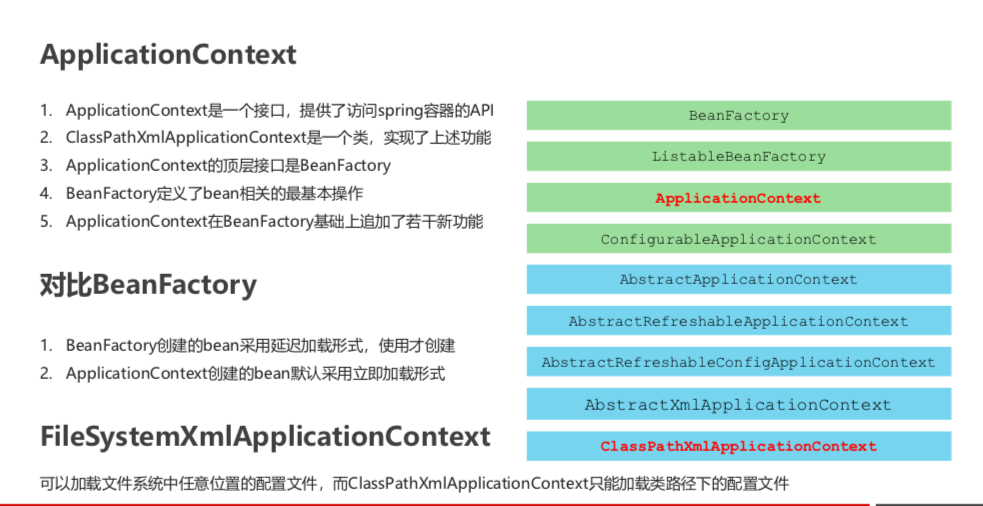
四、ApplicationContext对象层次结构
五、第三方资源配置(Spring整合其他框架)
1、导入对应的jar包
-
- 把其他框架的核心配置类交给spring来创建和管理-整合的过程
Druid在XML配置文件里的配置
<bean id="dataSource" class="com.alibaba.druid.pool.DruidDataSource">
<property name="driverClassName" value="com.mysql.jdbc.Driver"></property>
<property name="url" value="jdbc:mysql://localhost:3306/spring_ioc"></property>
<property name="username" value="root"></property>
<property name="password" value="root"></property>
</bean>
在测试类中的获取bean,然后调用
DruidDataSource dataSource = (DruidDataSource) ctx.getBean("dataSource");
System.out.println(dataSource);
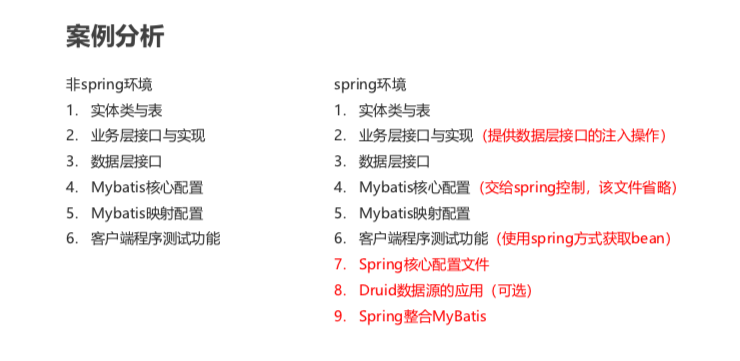
六、综合案例(整合mybatis)
案例效果:整合mybatis,完成账户模块(Account)的基础增删改查功能
一、基础准备工作
-
环境准备
-
导入Spring坐标,MyBatis坐标,MySQL坐标,Druid坐标
<dependencies>
<dependency>
<groupId>org.mybatis</groupId>
<artifactId>mybatis</artifactId>
<version>3.5.3</version>
</dependency>
<dependency>
<groupId>mysql</groupId>
<artifactId>mysql-connector-java</artifactId>
<version>5.1.47</version>
</dependency>
 <dependency>
     <groupId>org.springframework</groupId>
     <artifactId>spring-context</artifactId>
     <version>5.1.9.RELEASE</version>
  </dependency>
<dependency>
<groupId>org.springframework</groupId>
<artifactId>spring-jdbc</artifactId>
<version>5.1.9.RELEASE</version>
</dependency>
<dependency>
<groupId>com.alibaba</groupId>
<artifactId>druid</artifactId>
<version>1.1.16</version>
</dependency>
<dependency>
<groupId>org.mybatis</groupId>
<artifactId>mybatis-spring</artifactId>
<version>1.3.0</version>
</dependency>
</dependencies>
-
业务类与接口准备
-
基础配置文件
- jdbc.properties
- MyBatis映射配置文件
-
整合前基础准备工作
-
spring配置文件,加上context命名空间,用于加载properties文件
<!--加载perperties配置文件的信息-->
<context:property-placeholder location="classpath:*.properties"/>
//加载context 必须添加这个头空间
xmlns:context="http://www.springframework.org/schema/context"
xsi:schemaLocation="http://www.springframework.org/schema/beans
https://www.springframework.org/schema/beans/spring-beans.xsd
http://www.springframework.org/schema/context
https://www.springframework.org/schema/context/spring-context.xsd">
-
开启加载properties文件
-
配置数据源druid(备用)
加载完配置文件后,把配置文件读取的数据变成Druid数据源对象
    <!--加载druid资源-->
    <bean id="dataSource" class="com.alibaba.druid.pool.DruidDataSource">
        <property name="driverClassName" value="${jdbc.driver}"/>
        <property name="url" value="${jdbc.url}"/>
        <property name="username" value="${jdbc.username}"/>
        <property name="password" value="${jdbc.password}"/>
    </bean>
-
定义service层bean,注入dao层bean
<!--配置service作为spring的bean,注入dao-->
<bean id="accountService" class="com.itheima.service.impl.AccountServiceImpl">
     <property name="accountDao" ref="accountDao"/>
</bean>
-
dao的bean无需定义,使用代理自动生成
Mybatis的数据源用了造连接对象
二、整合工作
-
导入Spring整合MyBatis坐标
-
将mybatis配置成spring管理的bean(SqlSessionFactoryBean)
-
将原始配置文件中的所有项,转入到当前配置中
-
数据源转换
<!--spring整合mybatis后控制的创建连接用的对象-->
<bean class="org.mybatis.spring.SqlSessionFactoryBean">
    <property name="dataSource" ref="dataSource"/>
  	<!--设置类型别名-->
    <property name="typeAliasesPackage" value="com.itheima.domain"/>
</bean>
-
映射转换
<!--加载mybatis映射配置的扫描,将其作为spring的bean进行管理-->
<bean class="org.mybatis.spring.mapper.MapperScannerConfigurer">
	<property name="basePackage" value="com.itheima.dao"/>
</bean>
-
因为底层是通过jdbc实现,但是导入的Spring包没有自动导入jdbc,所有要手动导入jdbc
<dependency>
    <groupId>org.springframework</groupId>
    <artifactId>spring-jdbc</artifactId>
    <version>5.1.9.RELEASE</version>
</dependency>
-
通过spring加载mybatis的映射配置文件到spring环境中
然后创建测试类使用getBean获取Servicebean就可以测试了