介绍
本博客是讲如何使用yolov5对测试集进行检测,然后使用cocotools进行评估。
增加COCOeval的每个类别ap显示
5.0版本模型看这个博客
代码:
环境
pytorch只需要保证能跑起来yolov5
yolov5版本: yolov5 6.1(其他版本使用类似,低于6.1版本模型可以直接使用,测试成功的,高于的没测试,只需要修改模型导入部分代码)
coco格式介绍
1. coco数据集格式
coco数据集的格式也就是本博客中使用的ground true。
# 整体格式
{
	"info": {},  # 数据集的一些信息
	"licenses": [{}],  # 许可相关信息
	"images": [{}],  # 图片信息list,重要
	"annotations": [{}]  # 标注信息list,重要
	"categories": [{}]  # 类别信息list,重要
}

# 部分详细格式
info: {
   "description": "mpj Dataset",  # 数据集的介绍
   "url": "www.mpj520.com",  # 下载地址
   "version": "1.0",  # 版本
   "year": 2022,  # 年份
   "contributor": "mpj",  # 贡献者
   "date_created": "2022-12-15 10:34:37.288392"  # 时间
 }
licenses: [
   {
     "url": "http://creativecommons.org/licenses/by-nc-sa/2.0/",
     "id": 1,
     "name": "Attribution-NonCommercial-ShareAlike License"
   }
 ]
images: [
   {
     "id": 0,  # 图片的id(唯一索引,会和标注中image_id对应)
     "file_name": "0.jpg",  # 图片名称
     "width": 1706,  # 宽
     "height": 1279,  # 高
     "date_captured": "2022-12-15 10:34:37.310393",
     "license": 1
   }
 ]
annotations: [
   {
     "image_id": 0,  # 图片id(对应于images里面id)
     "category_id": 1,  # 类别id(对应于categories里面id)
     "bbox": [  # 标签框,左上角坐标+宽高
       1342.000163,
       720.0002599999999,
       306.00010199999997,
       211.999366
     ],
     "id": 0,  # 标签id
     "area": 64871.82761993533,  # 标签面积
     "iscrowd": 0,  # 0为polygon格式,1为RLE格式
     "segmentation": [],  # 分割数据
     "attributes": ""
   }
 ]
categories: [
   {
     "id": 1,  # 类别id,最好从1开始
     "name": "live",  # 子类别名
     "supercategory": "live" # 主类别名
   }
 ]
2. coco中预测完格式
使用cocotools进行评测时,需要的predict后的数据格式。
整个json文件是一个数组list。
[
  {
    "image_id": 0,
    "category_id": 2,
    "bbox": [
      1.0,
      680.0,
      70.0,
      197.0
    ],
    "score": 0.257080078125,  # 置信度
    "area": 13790.0
  },
 ...
]
代码和使用
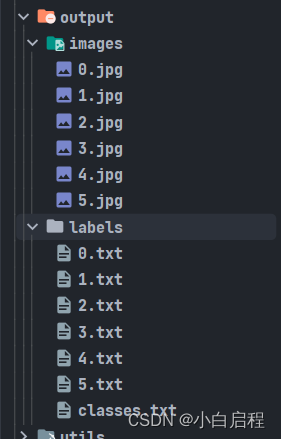
1. 将测试集名字全部转成数字
这个代码是讲所有测试集中图片和对应的txt标签名字全部转成数字,方便对于image_id的获得,这个image_id是int格式。
数据集目录格式
data
├── images
│ ├── 000000000001.jpg
│ ├── 000000000002.jpg
│ ├── 000000000003.jpg
├── labels
│ ├── 000000000001.txt
│ ├── 000000000002.txt
│ ├── 000000000003.txt
rename_yolo_txt.py
# -*- coding: UTF-8 -*-
"""
  @Author: mpj
  @Date  : 2022/12/18 20:33
  @version V1.0
"""
import os
import shutil

# 重命名yolo的图片和对应的txt文件名,新名字都是从0开始的数字

# 数据集目录格式
# data
# ├── images
# │   ├── 000000000001.jpg
# │   ├── 000000000002.jpg
# │   ├── 000000000003.jpg
# ├── labels
# │   ├── 000000000001.txt
# │   ├── 000000000002.txt
# │   ├── 000000000003.txt

input_path = './dataset'
output_path = './output'
# 判断文件夹是否存在
if not os.path.exists(output_path):
	os.makedirs(output_path)
if not os.path.exists(output_path + '/images'):
	os.makedirs(output_path + '/images')
if not os.path.exists(output_path + '/labels'):
	os.makedirs(output_path + '/labels')

# 移动classes.txt文件
if not os.path.exists(input_path + '/labels/classes.txt'):
	print('classes.txt文件不存在')
	exit()
shutil.copy(input_path + '/labels/classes.txt', output_path + '/labels/classes.txt')

# 读取文件夹下的所有文件
images = os.listdir(input_path + '/images')
labels = os.listdir(input_path + '/labels')

count = 0
for image in images:
	# 获取文件名,后缀
	image_name, image_suffix = os.path.splitext(image)
	new_image_name = str(count) + image_suffix
	new_label_name = str(count) + '.txt'
	# 复制图片和对应的txt文件
	shutil.copy(input_path + '/images/' + image, output_path + '/images/' + new_image_name)
	shutil.copy(input_path + '/labels/' + image_name + '.txt', output_path + '/labels/' + new_label_name)
	count += 1
print('共处理', count, '张图片')
结果
2. 将重名完的测试数据集进行格式转换
将yolo格式的标签转成cocotools的ground true格式的json文件。
yolo2coco.py
# -*- coding: UTF-8 -*-
"""
@Author: mpj
@Date : 2022/12/18 20:45
@version V1.0
"""
import datetime
import json
import os
import cv2
# 将yolo格式的数据集转换成coco格式的数据集
# 读取文件夹下的所有文件
images_path = './output/images'
labels_path = './output/labels'
output_path = './output'
coco_json_save = output_path + '/gt_coco.json'
# 创建coco格式的json文件
coco_json = {
'info': {
"description": "mpj Dataset",
"url": "www.mpj520.com",
"version": "1.0",
"year": 2022,
"contributor": "mpj",
"date_created": datetime.datetime.utcnow().isoformat(' ')
},
"licenses": [
{
"url": "http://creativecommons.org/licenses/by-nc-sa/2.0/",
"id": 1,
"name": "Attribution-NonCommercial-ShareAlike License"
}
],
'images': [],
'annotations': [],
'categories': []
}
# 判断文件夹是否存在
if not os.path.exists(output_path):
os.makedirs(output_path)
# 判断classes.txt文件是否存在
if not os.path.exists(labels_path + '/classes.txt'):
print('classes.txt文件不存在')
exit()
# 读取classes.txt文件
classes = []
with open(labels_path + '/classes.txt', 'r') as f:
classes = f.readlines()
classes = [c.strip() for c in classes]
# 创建coco格式的json文件
for i, c in enumerate(classes):
coco_json['categories'].append({'id': i + 1, 'name': c, 'supercategory': c})
# 读取images文件夹下的所有文件
images = os.listdir(images_path)
for image in images:
# 获取图片名和后缀
image_name, image_suffix = os.path.splitext(image)
# 获取图片的宽和高
image_path = images_path + '/' + image
img = cv2.imread(image_path)
height, width, _ = img.shape
# 添加图片信息
coco_json['images'].append({
'id': int(image_name),
'file_name': image,
'width': width,
'height': height,
'date_captured': datetime.datetime.utcnow().isoformat(' '),
'license': 1
})
# 读取图片对应的标签文件
label_path = labels_path + '/' + image_name + '.txt'
if not os.path.exists(label_path):
continue
with open(label_path, 'r') as f:
labels = f.readlines()
labels = [l.strip() for l in labels]
for j, label in enumerate(labels):
label = label.split(' ')
# 获取类别id
category_id = int(label[0])
# 将yolo格式的数据转换成coco格式的数据
x = float(label[1]) * width
y = float(label[2]) * height
w = float(label[3]) * width
h = float(label[4]) * height
xmin = x - w / 2
ymin = y - h / 2
xmax = x + w / 2
ymax = y + h / 2
# 添加bbox信息
coco_json['annotations'].append({
'image_id': int(image_name),
'category_id': category_id + 1,
'bbox': [xmin, ymin, w, h],
'id': len(coco_json['annotations']),
'area': w * h,
'iscrowd': 0,
'segmentation': [],
'attributes': ""
})
# 保存json文件
with open(coco_json_save, 'w') as f:
json.dump(coco_json, f, indent=2)
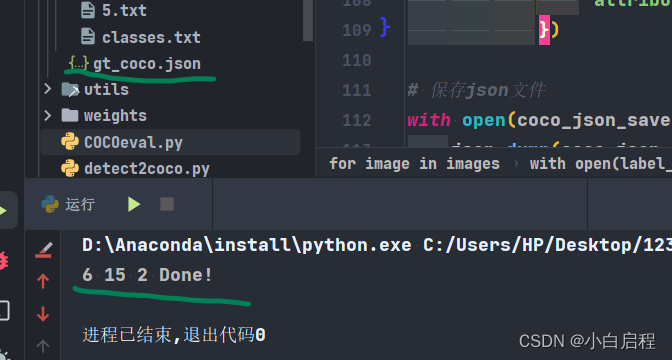
print(len(coco_json['images']), len(coco_json['annotations']), len(coco_json['categories']), 'Done!')
结果
3. 使用yolov5对测试集进行检测
本博客使用的yolov5 6.1代码,如果你是别的版本,这段代码你是需要修改。
低于6.1版本的模型可以直接导入使用,高于的没有测试。
修改有关模型导入,类别这些。
在检测完后,会保存成为cocotools的predict格式的json文件。
detect2coco.py
# -*- coding: UTF-8 -*-
"""
@Author: mpj
@Date : 2022/12/17 22:24
@version V1.0
"""
import json
import os
import torch
from models.common import DetectMultiBackend
from utils.datasets import LoadImages
from utils.general import (check_img_size, non_max_suppression, scale_coords)
from utils.torch_utils import select_device
# 读取文件夹下的所有文件
input_path = './output/images'
output_path = './output'
device = ''
weights = './weights/best.pt'
imgsz = 640
source = input_path
coco_json_save = output_path + '/detect_coco.json'
data = './data/coco.yaml'
imgsz = [640, 640]
conf_thres = 0.001
iou_thres = 0.6
max_det = 100
device = ''
half = False
# 创建coco格式的预测结果
coco_json = []
# Load model
device = select_device(device)
model = DetectMultiBackend(weights, device=device, data=data)
stride, names, pt, jit, onnx, engine = model.stride, model.names, model.pt, model.jit, model.onnx, model.engine
imgsz = check_img_size(imgsz, s=stride) # check image size
# Half
half &= (pt or jit or onnx or engine) and device.type != 'cpu' # FP16 supported on limited backends with CUDA
if pt or jit:
model.model.half() if half else model.model.float()
# Dataloader
dataset = LoadImages(source, img_size=imgsz, stride=stride, auto=pt)
bs = 1 # batch_size
# Run inference
model.warmup(imgsz=(1 if pt else bs, 3, *imgsz), half=half) # warmup
for path, im, im0s, vid_cap, s in dataset:
# 获取图片名字
image_name = os.path.basename(path).split('.')[0]
im = torch.from_numpy(im).to(device)
im = im.half() if half else im.float() # uint8 to fp16/32
im /= 255 # 0 - 255 to 0.0 - 1.0
if len(im.shape) == 3:
im = im[None] # expand for batch dim
# Inference
pred = model(im)
# NMS
pred = non_max_suppression(pred, conf_thres, iou_thres, max_det=max_det)
# Process predictions
for i, det in enumerate(pred): # per image
if len(det):
# Rescale boxes from img_size to im0 size
det[:, :4] = scale_coords(im.shape[2:], det[:, :4], im0s.shape).round()
# Write results
for *xyxy, conf, cls in reversed(det):
# 将检测结果保存到coco_json中
coco_json.append({
'image_id': int(image_name),
'category_id': int(cls) + 1,
'bbox': [float(xyxy[0]), float(xyxy[1]), float(xyxy[2] - xyxy[0]), float(xyxy[3] - xyxy[1])],
'score': float(conf),
'area': float((xyxy[2] - xyxy[0]) * (xyxy[3] - xyxy[1]))
})
# 保存json文件
with open(os.path.join(coco_json_save), 'w') as f:
# indent=2 保存json文件时,缩进2个空格
json.dump(coco_json, f, indent=2)
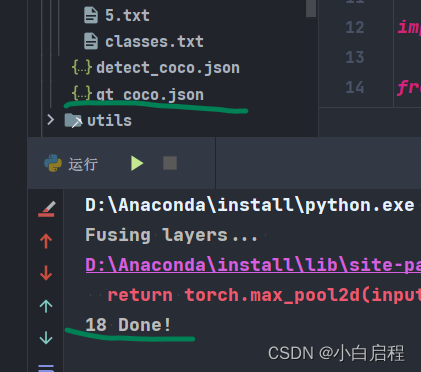
print(len(coco_json), 'Done!')
结果
4. 进行cocotools评测
直接使用就行
COCOeval.py
# -*- coding: UTF-8 -*-
"""
  @Author: mpj
  @Date  : 2022/12/18 20:46
  @version V1.0
"""
from pycocotools.coco import COCO
from pycocotools.cocoeval import COCOeval

if __name__ == '__main__':
	pred_json = './output/detect_coco.json'
	anno_json = './output/gt_coco.json'

	# 使用COCO API加载预测结果和标注
	cocoGt = COCO(anno_json)
	cocoDt = cocoGt.loadRes(pred_json)

	# 创建COCOeval对象
	cocoEval = COCOeval(cocoGt, cocoDt, 'bbox')

	# 执行评估
	cocoEval.evaluate()
	cocoEval.accumulate()
	cocoEval.summarize()

	# 保存结果
	with open('./output/coco_eval.txt', 'w') as f:
		f.write(str(cocoEval.stats))

	# 打印结果
	print(cocoEval.stats)
结果
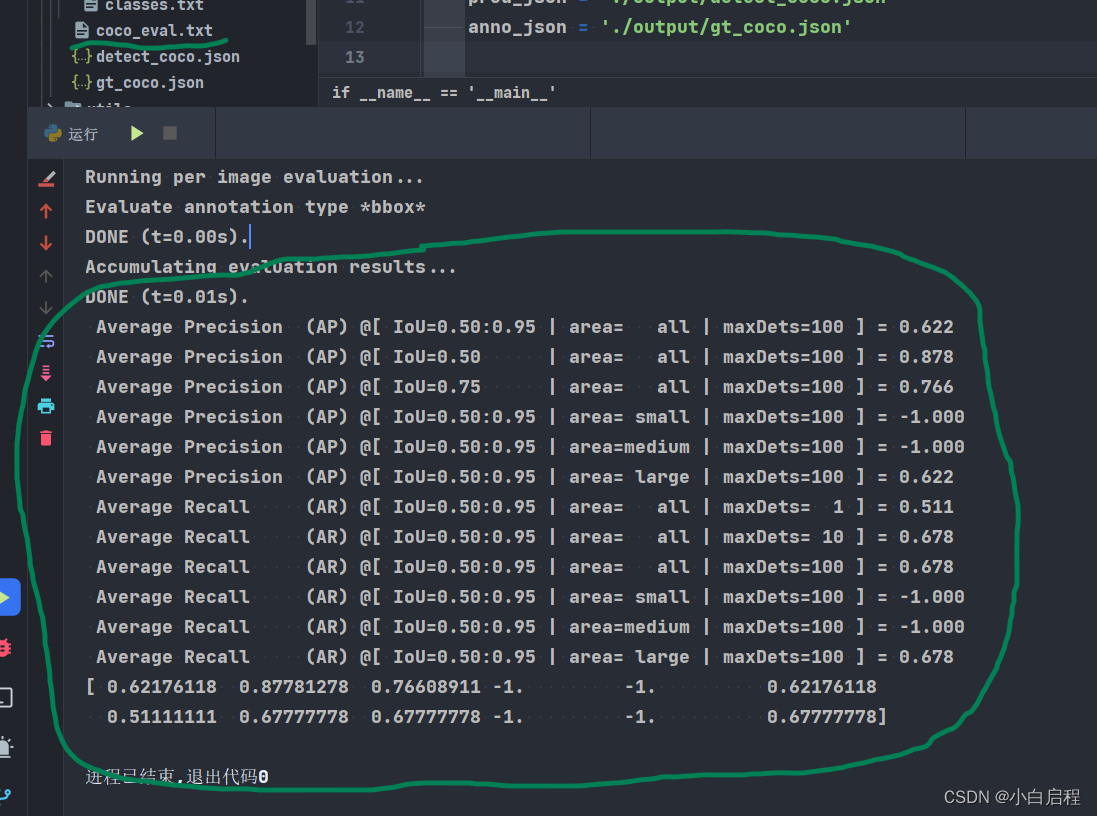
如果发现cocotools和yolov5的test两个结果差距较大,检查你是用的置信度阈值和NMS阈值是否统一。
我测试的结果是y使用olov5的val.py得到的map@.5和map@.5:.95值和cocotools得到的值有出入,在2个点左右
参考
https://blog.csdn.net/weixin_44751294/article/details/126580294