编译好的程序的下载链接:百度网盘 请输入提取码(提取码:ocmm)
概述
通常情况下,我们是在电脑里面开一个Linux虚拟机, 在虚拟机里面用交叉编译工具链编译好可执行文件后,将可执行文件拷贝到板子里面运行。也就是说,我们是用电脑上运行的gcc编译ARM板子上运行的程序,即交叉编译。
对于用automake制作的软件包来说,有时候交叉编译会非常麻烦。Linux系统下绝大部分软件包都是automake制作的。交叉编译小型的软件,如make、file、mlocate这种还比较简单。但是如果是apache、mysql、php这种大型的软件,交叉编译就非常麻烦,首先要在电脑上编译一套本地版本(x86_64版本),然后再结合编译出的本地版本里面的工具,修改Makefile文件,再用交叉编译器去编译arm版本,整个过程非常繁琐,很容易出错。要是能够直接在板子上本地编译这些软件该多好。
现在我们已经有了arm的交叉编译工具,那我们能不能用这个交叉编译器编译gcc源码,做一个板子上能直接运行的gcc(和g++)编译器,用这个编译器直接在板子上编译程序(即本地编译)然后运行呢?
本教程就教大家制作能直接在ARM板子上运行的gcc和g++编译器。
我们的目标是:用ARM交叉编译器编译GCC官网的GCC源代码, 得到ARM本地编译器。
编译得到的这个gcc编译器是在arm板子上运行的,用这个gcc编译器编译出来生成的可执行文件也是在arm板子上运行的。
gcc官网(GCC, the GNU Compiler Collection- GNU Project)上的gcc源代码,里面什么平台的代码都有。
用电脑(x86_64)上的gcc编译器编译这套源代码,得到的是电脑上的gcc本地编译器。
用arm gcc编译器编译这套源代码,得到的是arm板子上的gcc本地编译器。
本教程涉及到以下软件包:
| 软件名称 |
板上安装路径 |
作用 |
是否必须安装 |
| gcc-10.3.0 + binutils-2.35.2 |
/usr/local |
gcc编译C程序,g++编译C++程序
binutils里面的as负责汇编,ld负责连接 |
是 |
| make-4.3 |
/usr/local |
提供make命令 |
是 |
| gdb-10.2 |
/usr/local |
用于单步调试程序 |
否 |
| ncurses-6.2 |
/usr |
gdb tui模式的依赖项 |
取决于gdb |
| file-5.39 |
/usr/local |
查看文件的类型,以及可执行文件运行的平台 |
否 |
| mlocate-0.26 |
/usr/local和/var |
提供locate命令用于查找文件 |
否 |
本教程使用的开发板:迅为iTOP-4412精英版,exynos4412 SCP 1GB
CPU:exynos4412 4核 ARMv7-A架构 Cortex-A9系列 32位
电脑Linux系统:Fedora 34 Workstation
电脑gcc和g++版本:gcc version 11.2.1 20210728 (Red Hat 11.2.1-1) (GCC)
Fedora 34系统安装好(或者直接用Live CD光盘启动也行,不安装系统)后,还需要安装C++编译器,以及makeinfo命令:
sudo dnf install g++
sudo dnf install texinfo
否则编译时会报错。
提示:没有makeinfo命令的话,能成功编译gcc,但是无法成功编译gdb。
根据sudo dnf whatprovides makeinfo,可以查出makeinfo命令所在的软件包是texinfo。
下载GCC交叉编译工具链
去arm官网下载适用于exynos4412 CPU的交叉编译工具链:
GNU Toolchain | GNU-A Downloads – Arm Developer
选择x86_64 Linux hosted cross compilers -> AArch32 target with hard float (arm-linux-none-gnueabihf)栏目下的gcc-arm-10.3-2021.07-x86_64-arm-none-linux-gnueabihf.tar.xz
下载后解压出来,笔者的解压路径是/mnt/test/gcc-arm-10.3-2021.07-x86_64-arm-none-linux-gnueabihf
配置busybox根文件系统环境
exynos4412板子上需要搭建好Linux最小系统(uboot+linux内核+linux设备树+busybox根文件系统),搭建的方法请参考【教程】迅为iTOP-4412精英版exynos4412开发板搭建原生Linux最小系统。
在教程里面,我们已经将交叉编译器的下面两个库目录复制到了busybox根文件系统中:
arm-none-linux-gnueabihf/libc/lib => /lib
arm-none-linux-gnueabihf/libc/usr/lib => /usr/lib
但是这是不够的,我们还没有把交叉编译器的glibc库的所有文件复制完。
为了让gcc编译器能在板子上正常运行,我们还需要把交叉编译器中arm-none-linux-gnueabihf/libc里面的所有文件全部复制到根文件系统里面。也就是:
arm-none-linux-gnueabihf/libc => /
复制完后需要全部改为root权限。
其中usr/include文件夹是C语言头文件夹,里面包含了math.h、unistd.h等常用的头文件。请注意C语言的math.h和C++语言的math.h是不同的。编译完成的gcc里面会有C++的math.h头文件,但是不会有C语言的math.h头文件,两者不能混用,C语言的math.h得我们从交叉编译器里面复制过去。
还有一个sbin文件夹,这个文件夹里面的ldconfig程序就比较重要了,以后在板子上本地编译软件时会经常用到。
我们进入交叉编译器的arm-none-linux-gnueabihf/libc文件夹,权限全部修改为root,然后打个包:
cd /mnt/test/gcc-arm-10.3-2021.07-x86_64-arm-none-linux-gnueabihf/arm-none-linux-gnueabihf/libc
sudo chown -R root:root *
tar cvf libc.tar *
然后删除我们之前已经复制过的lib和usr/lib文件夹(这步操作可选,也可以不删除):
tar --delete lib -f libc.tar
tar --delete usr/lib -f libc.tar
打包好了之后,上传到板子上,然后解压到根目录就可以了:
tar xvf libc.tar -C /
至于arm-none-linux-gnueabihf/lib这个文件夹我们不用管,我们编译gcc的时候会重新生成这些文件,也就不用复制了。
编译GCC
目前gcc最新的版本是11.2,但是arm官网上最新的交叉编译器是10.3版本,用这个10.3版本的交叉编译器无法编译gcc11.0和11.2版本的源代码,有可能是因为不支持最新的一些语言特性(如__is_nothrow_constructible、__is_nothrow_assignable等等),所以笔者选择了10.3版本的gcc源代码。10.3版本的gcc源代码是能够不修改任何文件直接编译成功的。
提示:虽然直接交叉编译11.2版本无法编译成功,但是如果我们先交叉编译出10.3版本的本地编译器,再用这个本地编译器本地编译11.2版本的源码包,就能成功了。
去gcc官网下载gcc-10.3.0.tar.xz源码包:
wget ftp://ftp.fu-berlin.de/unix/languages/gcc/releases/gcc-10.3.0/gcc-10.3.0.tar.xz
解压gcc源码包:
tar xf gcc-10.3.0.tar.xz
笔者的解压路径是/mnt/test/gcc/gcc-10.3.0
下载依赖包(GMP、MPFR、MPC和ISL):contrib/download_prerequisites
[liveuser@localhost-live gcc]$ cd gcc-10.3.0
[liveuser@localhost-live gcc-10.3.0]$ contrib/download_prerequisites
2021-09-12 08:28:43 URL:http://gcc.gnu.org/pub/gcc/infrastructure/gmp-6.1.0.tar.bz2 [2383840/2383840] -> "./gmp-6.1.0.tar.bz2" [1]
2021-09-12 08:28:45 URL:http://gcc.gnu.org/pub/gcc/infrastructure/mpfr-3.1.4.tar.bz2 [1279284/1279284] -> "./mpfr-3.1.4.tar.bz2" [1]
2021-09-12 08:28:47 URL:http://gcc.gnu.org/pub/gcc/infrastructure/mpc-1.0.3.tar.gz [669925/669925] -> "./mpc-1.0.3.tar.gz" [1]
2021-09-12 08:28:50 URL:http://gcc.gnu.org/pub/gcc/infrastructure/isl-0.18.tar.bz2 [1658291/1658291] -> "./isl-0.18.tar.bz2" [1]
gmp-6.1.0.tar.bz2: OK
mpfr-3.1.4.tar.bz2: OK
mpc-1.0.3.tar.gz: OK
isl-0.18.tar.bz2: OK
All prerequisites downloaded successfully.
[liveuser@localhost-live gcc-10.3.0]$ cd ..
GCC官网上面已经说明了,GCC必须在源文件夹外编译,不能在源文件夹内或者源文件夹的子文件夹内编译。所以我们需要创建一个空的文件夹,用来存放编译生成的中间文件,以及编译结果。
在源文件夹外部创建一个空文件夹,命名为_build:
[liveuser@localhost-live gcc]$ mkdir _build
[liveuser@localhost-live gcc]$ cd _build
在_build文件夹里面创建一个config.sh脚本,把我们的configure命令所带的参数保存进去,以免忘记了。
脚本里面写上交叉编译器的路径,运行时首先检查PATH环境变量里面是否添加的有交叉编译器的路径,如果没有就自动添加进去。然后执行gcc源文件目录里面的configure配置脚本,带好参数。
#!/bin/sh
# 交叉编译工具链的位置
toolchain="/mnt/test/gcc-arm-10.3-2021.07-x86_64-arm-none-linux-gnueabihf/bin"

# 检查是否是source方式执行的脚本, 并且当前文件夹是脚本所在的目录
script=$(basename "$BASH_SOURCE" 2>/dev/null)
if [ "${0::1}" = "." ] || [ ! -f $script ]
then
	echo "Usage: source $script [CMD]"
	exit
fi

# 判断PATH环境变量中是否有交叉编译工具链的路径
IFS=":"
read -ra arr <<< "$PATH" # 字符串拆分成数组
found=0
for var in "${arr[@]}" # 循环遍历数组
do
	if [ "$var" = "$toolchain" ]
	then
		found=1
		break
	fi
done

# 如果没有,则将交叉编译工具链的路径添加到PATH环境变量中
if [ $found -eq 0 ]
then
	echo "Add toolchain to PATH"
	arr+=($toolchain)
	export PATH="${arr[*]}" # 数组拼接成字符串
fi
unset IFS

case "$1" in
	"config")
		# 开始配置
		../gcc-10.3.0/configure \
			--host=arm-none-linux-gnueabihf \
			--target=arm-none-linux-gnueabihf \
			--with-bugurl="https://bugs.linaro.org/" \
			--enable-shared \
			--disable-libssp \
			--disable-libmudflap \
			--enable-checking=yes \
			--enable-languages=c,c++,fortran \
			--with-arch=armv7-a \
			--with-fpu=neon \
			--with-float=hard \
			--with-mode=thumb \
			--disable-werror
		;;
	"clean")
		# 删除除脚本外的所有文件
		if [ -f Makefile ]
		then
			make distclean
		fi
		for file in $(ls)
		do
			if [ "$file" != $script ]
			then
				echo "Delete $file"
				rm -rf "$file"
			fi
		done
		;;
esac
因为我们的脚本要修改PATH环境变量,所以执行脚本应该用source config.sh,而不是./config.sh,否则PATH环境变量不能在当前终端生效。source config.sh后,PATH环境变量在终端窗口关闭前一直有效。
configure编译选项参考的是交叉编译工具链10.3-2021.07-x86_64-arm-none-linux-gnueabihf-manifest.txt里面的gcc4_configure。
值得注意的是,我们用configure配置gcc的时候,--target=arm-none-linux-gnueabihf选项不能省略,否则编译时会报错!
只有配置gcc才需要同时指定--host和--target。配置其他的软件,只指定--host就够了。
我们执行source config.sh config,开始配置:
[liveuser@localhost-live _build]$ source config.sh config
Add toolchain to PATH
checking build system type... x86_64-pc-linux-gnu
checking host system type... arm-none-linux-gnueabihf
checking target system type... arm-none-linux-gnueabihf
checking for a BSD-compatible install... /usr/bin/install -c
checking whether ln works... yes
checking whether ln -s works... yes
checking for a sed that does not truncate output... /usr/bin/sed
checking for gawk... gawk
checking for libatomic support... yes
checking for libitm support... yes
checking for libsanitizer support... yes
checking for libvtv support... yes
checking for libhsail-rt support... no
checking for libphobos support... yes
checking for arm-none-linux-gnueabihf-gcc... arm-none-linux-gnueabihf-gcc
checking whether the C compiler works... yes
checking for C compiler default output file name... a.out
checking for suffix of executables...
checking whether we are cross compiling... yes
checking for suffix of object files... o
checking whether we are using the GNU C compiler... yes
checking whether arm-none-linux-gnueabihf-gcc accepts -g... yes
checking for arm-none-linux-gnueabihf-gcc option to accept ISO C89... none needed
checking for arm-none-linux-gnueabihf-g++... arm-none-linux-gnueabihf-g++
checking whether we are using the GNU C++ compiler... yes
checking whether arm-none-linux-gnueabihf-g++ accepts -g... yes
checking whether g++ accepts -static-libstdc++ -static-libgcc... yes
checking for arm-none-linux-gnueabihf-gnatbind... no
checking for gnatbind... no
checking for arm-none-linux-gnueabihf-gnatmake... no
checking for gnatmake... no
checking whether compiler driver understands Ada... no
checking how to compare bootstrapped objects... cmp --ignore-initial=16 $$f1 $$f2
checking for objdir... .libs
configure: WARNING: using in-tree isl, disabling version check
*** This configuration is not supported in the following subdirectories:
     gnattools gotools target-libada target-libhsail-rt target-libphobos target-zlib target-libgo target-libffi target-libobjc target-liboffloadmic target-libssp
    (Any other directories should still work fine.)
checking for default BUILD_CONFIG...
checking for --enable-vtable-verify... no
checking for bison... no
checking for byacc... no
checking for yacc... no
checking for bison... no
checking for gm4... no
checking for gnum4... no
checking for m4... no
checking for flex... no
checking for lex... no
checking for flex... no
checking for makeinfo... makeinfo
checking for expect... no
checking for runtest... no
checking for arm-none-linux-gnueabihf-ar... arm-none-linux-gnueabihf-ar
checking for arm-none-linux-gnueabihf-as... arm-none-linux-gnueabihf-as
checking for arm-none-linux-gnueabihf-dlltool... no
checking for ld... (cached) /mnt/test/gcc-arm-10.3-2021.07-x86_64-arm-none-linux-gnueabihf/bin/../lib/gcc/arm-none-linux-gnueabihf/10.3.1/../../../../arm-none-linux-gnueabihf/bin/ld
checking for arm-none-linux-gnueabihf-ld... (cached) /mnt/test/gcc-arm-10.3-2021.07-x86_64-arm-none-linux-gnueabihf/bin/../lib/gcc/arm-none-linux-gnueabihf/10.3.1/../../../../arm-none-linux-gnueabihf/bin/ld
checking for arm-none-linux-gnueabihf-lipo... no
checking for arm-none-linux-gnueabihf-nm... arm-none-linux-gnueabihf-nm
checking for arm-none-linux-gnueabihf-ranlib... arm-none-linux-gnueabihf-ranlib
checking for arm-none-linux-gnueabihf-strip... arm-none-linux-gnueabihf-strip
checking for arm-none-linux-gnueabihf-windres... no
checking for arm-none-linux-gnueabihf-windmc... no
checking for arm-none-linux-gnueabihf-objcopy... arm-none-linux-gnueabihf-objcopy
checking for arm-none-linux-gnueabihf-objdump... arm-none-linux-gnueabihf-objdump
checking for arm-none-linux-gnueabihf-otool... no
checking for arm-none-linux-gnueabihf-readelf... arm-none-linux-gnueabihf-readelf
checking for arm-none-linux-gnueabihf-cc... no
checking for arm-none-linux-gnueabihf-gcc... arm-none-linux-gnueabihf-gcc
checking for arm-none-linux-gnueabihf-c++... arm-none-linux-gnueabihf-c++
checking for arm-none-linux-gnueabihf-gcc... arm-none-linux-gnueabihf-gcc
checking for arm-none-linux-gnueabihf-gfortran... arm-none-linux-gnueabihf-gfortran
checking for arm-none-linux-gnueabihf-gccgo... no
checking for arm-none-linux-gnueabihf-gdc... no
checking for arm-none-linux-gnueabihf-dlltool... no
checking for arm-none-linux-gnueabihf-lipo... no
checking for arm-none-linux-gnueabihf-otool... no
checking for arm-none-linux-gnueabihf-windres... no
checking for arm-none-linux-gnueabihf-windmc... no
checking where to find the target ar... pre-installed in /mnt/test/gcc-arm-10.3-2021.07-x86_64-arm-none-linux-gnueabihf/bin/../lib/gcc/arm-none-linux-gnueabihf/10.3.1/../../../../arm-none-linux-gnueabihf/bin
checking where to find the target as... pre-installed in /mnt/test/gcc-arm-10.3-2021.07-x86_64-arm-none-linux-gnueabihf/bin/../lib/gcc/arm-none-linux-gnueabihf/10.3.1/../../../../arm-none-linux-gnueabihf/bin
checking where to find the target cc... pre-installed
checking where to find the target c++... pre-installed
checking where to find the target c++ for libstdc++... pre-installed
checking where to find the target dlltool... pre-installed
checking where to find the target gcc... pre-installed
checking where to find the target gfortran... pre-installed
checking where to find the target gccgo... pre-installed
checking where to find the target gdc... pre-installed
checking where to find the target ld... pre-installed in /mnt/test/gcc-arm-10.3-2021.07-x86_64-arm-none-linux-gnueabihf/bin/../lib/gcc/arm-none-linux-gnueabihf/10.3.1/../../../../arm-none-linux-gnueabihf/bin
checking where to find the target lipo... pre-installed
checking where to find the target nm... pre-installed in /mnt/test/gcc-arm-10.3-2021.07-x86_64-arm-none-linux-gnueabihf/bin/../lib/gcc/arm-none-linux-gnueabihf/10.3.1/../../../../arm-none-linux-gnueabihf/bin
checking where to find the target objcopy... pre-installed in /mnt/test/gcc-arm-10.3-2021.07-x86_64-arm-none-linux-gnueabihf/bin/../lib/gcc/arm-none-linux-gnueabihf/10.3.1/../../../../arm-none-linux-gnueabihf/bin
checking where to find the target objdump... pre-installed in /mnt/test/gcc-arm-10.3-2021.07-x86_64-arm-none-linux-gnueabihf/bin/../lib/gcc/arm-none-linux-gnueabihf/10.3.1/../../../../arm-none-linux-gnueabihf/bin
checking where to find the target otool... pre-installed
checking where to find the target ranlib... pre-installed in /mnt/test/gcc-arm-10.3-2021.07-x86_64-arm-none-linux-gnueabihf/bin/../lib/gcc/arm-none-linux-gnueabihf/10.3.1/../../../../arm-none-linux-gnueabihf/bin
checking where to find the target readelf... pre-installed in /mnt/test/gcc-arm-10.3-2021.07-x86_64-arm-none-linux-gnueabihf/bin/../lib/gcc/arm-none-linux-gnueabihf/10.3.1/../../../../arm-none-linux-gnueabihf/bin
checking where to find the target strip... pre-installed in /mnt/test/gcc-arm-10.3-2021.07-x86_64-arm-none-linux-gnueabihf/bin/../lib/gcc/arm-none-linux-gnueabihf/10.3.1/../../../../arm-none-linux-gnueabihf/bin
checking where to find the target windres... pre-installed
checking where to find the target windmc... pre-installed
checking whether to enable maintainer-specific portions of Makefiles... no
configure: creating ./config.status
config.status: creating Makefile
配置成功,configure脚本已经识别到了我们的交叉编译工具arm-none-linux-gnueabihf-gcc。
配置完后用make命令编译,经过大约几个小时的时间,可以编译成功:

编译成功后,最后一步是生成安装文件。生成安装文件用的命令是make install DESTDIR=$(pwd)/_install。
由于我们现在是在交叉编译,交叉编译生成的可执行文件是arm版本的,不是x86_64版本的,无法在电脑上运行。所以我们不能直接make install,否则的话arm版本的软件就被安装到电脑上了,那肯定不行。
我们在make install的时候指定DESTDIR目录为当前文件夹下的_install文件夹,把生成的安装文件全部放到_install文件夹里面,然后进入_install文件夹,压缩打包,上传到板子上,然后再解压到板子的根目录,就能在板子上安装成功了。
执行make install DESTDIR=$(pwd)/_install,成功:

我们进入_install文件夹看看,生成了什么东西:
[liveuser@localhost-live _build]$ cd _install/
[liveuser@localhost-live _install]$ ls
usr
[liveuser@localhost-live _install]$ cd usr
[liveuser@localhost-live usr]$ ls
local
[liveuser@localhost-live usr]$ cd local
[liveuser@localhost-live local]$ ls
bin  include  lib  libexec  share
[liveuser@localhost-live local]$ ls bin
arm-none-linux-gnueabihf-c++         g++
arm-none-linux-gnueabihf-g++         gcc
arm-none-linux-gnueabihf-gcc         gcc-ar
arm-none-linux-gnueabihf-gcc-10.3.0  gcc-nm
arm-none-linux-gnueabihf-gcc-ar      gcc-ranlib
arm-none-linux-gnueabihf-gcc-nm      gcov
arm-none-linux-gnueabihf-gcc-ranlib  gcov-dump
arm-none-linux-gnueabihf-gfortran    gcov-tool
c++                                  gfortran
cpp                                  lto-dump
[liveuser@localhost-live local]$ file bin/gcc
bin/gcc: ELF 32-bit LSB executable, ARM, EABI5 version 1 (GNU/Linux), dynamically linked, interpreter /lib/ld-linux-armhf.so.3, for GNU/Linux 3.2.0, with debug_info, not stripped
我们看到,_install文件夹下有一个usr文件夹,usr里面有一个local文件夹,local文件夹里面有bin、include、lib、libexec和share文件夹。bin文件夹里面就有gcc程序,用file命令可以看到这个gcc程序是arm版本的。
bin文件夹存放的是可执行文件,include文件夹存放的是软件包涉及到的C/C++头文件,lib文件夹存放的是软件包涉及到的库文件,share/info文件夹存放的是软件的info手册,share/man文件夹存放的是软件的man手册,share/locale文件夹存放的是软件界面的各种语言的翻译。
显然,_install文件夹的基准就是板子的根目录。我们要把gcc软件安装到板子上,只需要把_install文件夹里面的内容拷贝到板子的根目录就行了。
由此可见,gcc编译器在板子上的安装目录是/usr/local。如果我们想安装到其他目录,比如/myusr,那么之前在configure的时候可以指定--prefix=/myusr选项,这样make install DESTDIR=$(pwd)/_install后,我们在_install文件夹里面看到的就是myusr文件夹,然后myusr里面有bin、include、lib、libexec和share文件夹。这个时候要把gcc软件安装到板子上,还是把_install文件夹里面的内容拷贝到板子的根目录,使gcc可执行文件的路径为/myusr/bin/gcc。
这下大家知道--prefix和DESTDIR的区别了吧。
usr到底是什么意思呢?/usr不是user的缩写,是Unix Software Resource的缩写,是专门放置Linux软件资源的目录。通常软件都是安装到/usr或者/usr/local里面的。
不过这个时候gcc安装到板子上还不能编译程序,因为/usr/local/bin文件夹里面少了as和ld工具。
gcc本身只能将C语言源文件转变为汇编语言源文件,我们还需要用as汇编器,将汇编语言文件编译成目标文件,再用ld连接工具和系统的库文件连接,最后生成可执行文件。
[root@exynos4412 ~/haha]# echo -en "int main(void)\n{\n\treturn 0;\n}\n" > haha.c
[root@exynos4412 ~/haha]# cat haha.c
int main(void)
{
        return 0;
}
[root@exynos4412 ~/haha]# gcc haha.c -o haha
gcc: fatal error: cannot execute 'as': execvp: No such file or directory
compilation terminated.
编译提示gcc: fatal error: cannot execute 'as': execvp: No such file or directory,意思是execvp函数启动as进程失败,找不到as汇编器。
但是gcc -S haha.c命令却能执行成功,gcc能成功将C语言源文件解析成汇编语言源文件(.s),只是因为没有as汇编器,无法编译这个汇编语言源文件。
[root@exynos4412 ~/haha]# gcc -S haha.c
[root@exynos4412 ~/haha]# cat haha.s
        .arch armv7-a
        .eabi_attribute 28, 1
        .eabi_attribute 20, 1
        .eabi_attribute 21, 1
        .eabi_attribute 23, 3
        .eabi_attribute 24, 1
        .eabi_attribute 25, 1
        .eabi_attribute 26, 2
        .eabi_attribute 30, 6
        .eabi_attribute 34, 1
        .eabi_attribute 18, 4
        .file   "haha.c"
        .text
        .align  1
        .global main
        .arch armv7-a
        .syntax unified
        .thumb
        .thumb_func
        .fpu neon
        .type   main, %function
main:
        @ args = 0, pretend = 0, frame = 0
        @ frame_needed = 1, uses_anonymous_args = 0
        @ link register save eliminated.
        push    {r7}
        add     r7, sp, #0
        movs    r3, #0
        mov     r0, r3
        mov     sp, r7
        @ sp needed
        ldr     r7, [sp], #4
        bx      lr
        .size   main, .-main
        .ident  "GCC: (GNU) 10.3.0"
        .section        .note.GNU-stack,"",%progbits
我们已经可以看到这个汇编代码就是arm平台的代码,我们制作出来的gcc确确实实是一个arm本地编译器,不是arm->x86_64的交叉编译器。
其实笔者一开始以为的是gcc官网的源代码是x86和x86_64平台的gcc源代码,arm官网那个源代码(gcc-arm-src-snapshot-10.3-2021.07.tar.xz)才是arm版的gcc源代码。用arm交叉编译器编译gcc官网的源代码,得到的是arm->x86_64交叉编译器,也就是说这个gcc编译器能在板子上运行,但编译出来的程序是运行在电脑上的。后来才发现这个想法是错误的,gcc官网的源代码里面什么平台都支持,用什么平台的编译器编译这套源代码,得到的就是什么平台的本地编译器。
编译binutils
as汇编器和ld连接器不在gcc软件包里面,那在哪个软件包里面呢?
我们用sudo dnf whatprovides as和sudo dnf whatprovides ld看看呢:
[liveuser@localhost-live _build2]$ sudo dnf whatprovides as
Fedora 34 openh264 (From Cisco) - x86_64        1.2 kB/s | 2.5 kB     00:02
Fedora Modular 34 - x86_64                      3.4 MB/s | 4.9 MB     00:01
Fedora Modular 34 - x86_64 - Updates            3.6 MB/s | 4.6 MB     00:01
Fedora 34 - x86_64 - Updates                    5.3 MB/s |  26 MB     00:04
Fedora 34 - x86_64                              7.8 MB/s |  74 MB     00:09
Last metadata expiration check: 0:00:01 ago on Mon 13 Sep 2021 03:34:33 AM EDT.
binutils-2.35.1-41.fc34.i686 : A GNU collection of binary utilities
Repo        : fedora
Matched from:
Filename    : /usr/bin/as
[liveuser@localhost-live _build2]$ sudo dnf whatprovides ld
Last metadata expiration check: 0:03:33 ago on Mon 13 Sep 2021 03:34:33 AM EDT.
binutils-2.35.1-41.fc34.i686 : A GNU collection of binary utilities
Repo        : fedora
Matched from:
Filename    : /usr/bin/ld
可以看到,as和ld命令都在binutils软件包里面。于是我们下载binutils软件包的源代码:
sudo dnf download --source binutils
(Ubuntu系统下也有类似的命令:sudo apt-get source 软件包名称)
[liveuser@localhost-live binutils]$ sudo dnf download --source binutils
enabling fedora-modular-source repository
enabling updates-modular-source repository
enabling updates-source repository
enabling fedora-source repository
Fedora Modular 34 - Source                      140 kB/s | 193 kB     00:01
Fedora Modular 34 - Updates Source              263 kB/s | 239 kB     00:00
Fedora 34 - Updates Source                      1.2 MB/s | 1.7 MB     00:01
Fedora 34 - Source                              3.3 MB/s | 7.3 MB     00:02
binutils-2.35.2-5.fc34.src.rpm                  4.9 MB/s |  21 MB     00:04
下载下来的文件是binutils-2.35.2-5.fc34.src.rpm,这是一个rpm压缩包,用rpm2cpio binutils-2.35.2-5.fc34.src.rpm | cpio -div命令解压:
[liveuser@localhost-live binutils]$ rpm2cpio binutils-2.35.2-5.fc34.src.rpm | cpio -div
binutils-2.19.50.0.1-output-format.sed
binutils-2.20.51.0.2-libtool-lib64.patch
binutils-2.22.52.0.4-no-config-h-check.patch
binutils-2.25-version.patch
binutils-2.27-aarch64-ifunc.patch
binutils-2.29-filename-in-error-messages.patch
binutils-2.29-revert-PLT-elision.patch
binutils-2.35.2.tar.xz
binutils-CVE-2019-1010204.patch
binutils-CVE-2020-35448.patch
binutils-CVE-2021-20197.patch
binutils-CVE-2021-20284.patch
binutils-CVE-2021-3487.patch
binutils-SHF_LINK_ORDER.patch
binutils-aarch64-condbranch-relocs.patch
binutils-add-sym-cache-to-elf-link-hash.patch
binutils-attach-to-group.patch
binutils-config.patch
binutils-do-not-link-with-static-libstdc++.patch
binutils-duplicate-sections.patch
binutils-dwarf-5-dir0.patch
binutils-elf-add-objects.patch
binutils-export-demangle.h.patch
binutils-extend-s390-arch14-support.patch
binutils-fix-testsuite-failures.patch
binutils-gcc-10-fixes.patch
binutils-gold-gnu-properties.patch
binutils-gold-mismatched-section-flags.patch
binutils-gold-warn-unsupported.patch
binutils-ld-DWARF-5-sections.patch
binutils-plugin-as-needed.patch
binutils-ppc-annobin-disassembly.patch
binutils-ppc64le-note-merge.patch
binutils-readelf-no-warn-gaps.patch
binutils-readelf-other-sym-info.patch
binutils-recursive-debuglink-following.patch
binutils-s390-arch14-insns.patch
binutils-s390-build.patch
binutils-special-sections-in-groups.patch
binutils-strip-merge.patch
binutils-testsuite-failures.patch
binutils-unexpected-form-20.patch
binutils-use-long-long.patch
binutils-warnings.patch
binutils.spec
44099 blocks
提示:busybox提供了rpm2cpio和cpio命令,在板子上也可以使用。
解压出来还是一个binutils-2.35.2.tar.xz压缩文件,用tar -xf binutils-2.35.2.tar.xz命令再次解压,得到binutils-2.35.2源文件夹。
这次,我们还是在源文件夹外新建_build空文件夹编译。
_build文件夹里面放入刚才gcc用的config.sh,把里面的configure命令改为:
# 开始配置
../binutils-2.35.2/configure --host=arm-none-linux-gnueabihf
交叉编译binutils软件包,我们只需要指定--host选项就够了,不需要--target选项了。
执行脚本source config.sh config,开始配置:
[liveuser@localhost-live binutils]$ mkdir _build
[liveuser@localhost-live binutils]$ cd _build
[liveuser@localhost-live _build]$ source config.sh config
Add toolchain to PATH
checking build system type... x86_64-pc-linux-gnu
checking host system type... arm-none-linux-gnueabihf
checking target system type... arm-none-linux-gnueabihf
checking for a BSD-compatible install... /usr/bin/install -c
checking whether ln works... yes
checking whether ln -s works... yes
checking for a sed that does not truncate output... /usr/bin/sed
checking for gawk... gawk
checking for arm-none-linux-gnueabihf-gcc... arm-none-linux-gnueabihf-gcc
checking whether the C compiler works... yes
checking for C compiler default output file name... a.out
checking for suffix of executables...
checking whether we are cross compiling... yes
checking for suffix of object files... o
checking whether we are using the GNU C compiler... yes
checking whether arm-none-linux-gnueabihf-gcc accepts -g... yes
checking for arm-none-linux-gnueabihf-gcc option to accept ISO C89... none needed
checking for arm-none-linux-gnueabihf-g++... arm-none-linux-gnueabihf-g++
checking whether we are using the GNU C++ compiler... yes
checking whether arm-none-linux-gnueabihf-g++ accepts -g... yes
checking whether g++ accepts -static-libstdc++ -static-libgcc... yes
checking for arm-none-linux-gnueabihf-gnatbind... no
checking for gnatbind... no
checking for arm-none-linux-gnueabihf-gnatmake... no
checking for gnatmake... no
checking whether compiler driver understands Ada... no
checking how to compare bootstrapped objects... cmp --ignore-initial=16 $$f1 $$f2
checking for objdir... .libs
checking whether to use debuginfod... auto
checking for debuginfod_begin in -ldebuginfod... no
checking whether debuginfod_begin is declared... no
configure: WARNING: debuginfod is missing or unusable; some features may be unavailable.
checking for isl 0.15 or later... no
required isl version is 0.15 or later
checking for default BUILD_CONFIG...
checking for --enable-vtable-verify... no
checking for bison... no
checking for byacc... no
checking for yacc... no
checking for bison... no
checking for gm4... no
checking for gnum4... no
checking for m4... no
checking for flex... no
checking for lex... no
checking for flex... no
checking for makeinfo... makeinfo
checking for expect... no
checking for runtest... no
checking for arm-none-linux-gnueabihf-ar... arm-none-linux-gnueabihf-ar
checking for arm-none-linux-gnueabihf-as... arm-none-linux-gnueabihf-as
checking for arm-none-linux-gnueabihf-dlltool... no
checking for ld... (cached) /mnt/test/gcc-arm-10.3-2021.07-x86_64-arm-none-linux-gnueabihf/bin/../lib/gcc/arm-none-linux-gnueabihf/10.3.1/../../../../arm-none-linux-gnueabihf/bin/ld
checking for arm-none-linux-gnueabihf-ld... (cached) /mnt/test/gcc-arm-10.3-2021.07-x86_64-arm-none-linux-gnueabihf/bin/../lib/gcc/arm-none-linux-gnueabihf/10.3.1/../../../../arm-none-linux-gnueabihf/bin/ld
checking for arm-none-linux-gnueabihf-lipo... no
checking for arm-none-linux-gnueabihf-nm... arm-none-linux-gnueabihf-nm
checking for arm-none-linux-gnueabihf-ranlib... arm-none-linux-gnueabihf-ranlib
checking for arm-none-linux-gnueabihf-strip... arm-none-linux-gnueabihf-strip
checking for arm-none-linux-gnueabihf-windres... no
checking for arm-none-linux-gnueabihf-windmc... no
checking for arm-none-linux-gnueabihf-objcopy... arm-none-linux-gnueabihf-objcopy
checking for arm-none-linux-gnueabihf-objdump... arm-none-linux-gnueabihf-objdump
checking for arm-none-linux-gnueabihf-readelf... arm-none-linux-gnueabihf-readelf
checking where to find the target ar... pre-installed
checking where to find the target as... pre-installed
checking where to find the target cc... pre-installed
checking where to find the target c++... pre-installed
checking where to find the target c++ for libstdc++... pre-installed
checking where to find the target dlltool... pre-installed
checking where to find the target gcc... pre-installed
checking where to find the target gfortran... pre-installed
checking where to find the target gccgo... pre-installed
checking where to find the target ld... pre-installed
checking where to find the target lipo... pre-installed
checking where to find the target nm... pre-installed
checking where to find the target objcopy... pre-installed
checking where to find the target objdump... pre-installed
checking where to find the target ranlib... pre-installed
checking where to find the target readelf... pre-installed
checking where to find the target strip... pre-installed
checking where to find the target windres... pre-installed
checking where to find the target windmc... pre-installed
checking whether to enable maintainer-specific portions of Makefiles... no
configure: creating ./config.status
config.status: creating Makefile
编译:make,成功。

生成安装文件:make install DESTDIR=$(pwd)/_install,成功。

与刚才gcc的安装文件合并:cp -r /mnt/test/gcc/_build/_install .
(注意命令最后是一个点,代表当前文件夹_build)
全部安装文件所属用户和组改为root,然后制作成压缩包:
cd _install
sudo chown -R root:root usr
tar czf gcc-10.3.0-binary.tar.gz usr
一定要先进入_install目录,再执行tar命令创建压缩包,这样才能保证打开压缩包后看到的是usr目录。
安装文件用户组一定要改为root,避免复制到板子上之后ls一看是未知用户1000。
压缩完成后,得到了597MB的gcc-10.3.0-binary.tar.gz压缩文件。
通过ftp将压缩文件上传到板子上,然后通过telnet连接到板子终端(搭建Linux最小系统的教程里面教了大家怎样搭建busybox ftp和telnet服务器)。
解压压缩包到根目录下(必须解压到根目录):
tar xvf gcc-10.3.0-binary.tar.gz -C /
编译器就安装成功了,安装路径仍然为/usr/local
让我们来试试看这个编译器:
[root@exynos4412 /]# gcc
-/bin/sh: gcc: not found
[root@exynos4412 /]# echo $PATH
/sbin:/usr/sbin:/bin:/usr/bin
执行gcc提示找不到gcc编译器,因为我们还没有把/usr/local/bin放到PATH环境变量里面去。
执行export PATH=$PATH:/usr/local/bin放进去,然后gcc命令就能使用了,同时g++命令也能使用了。
[root@exynos4412 /]# export PATH=$PATH:/usr/local/bin
[root@exynos4412 /]# gcc
gcc: fatal error: no input files
compilation terminated.
[root@exynos4412 /]# g++
g++: fatal error: no input files
compilation terminated.
[root@exynos4412 /]# gcc -v
Using built-in specs.
COLLECT_GCC=gcc
COLLECT_LTO_WRAPPER=/usr/local/libexec/gcc/arm-none-linux-gnueabihf/10.3.0/lto-wrapper
Target: arm-none-linux-gnueabihf
Configured with: ../gcc-10.3.0/configure --host=arm-none-linux-gnueabihf --target=arm-none-linux-gnueabihf --with-bugurl=https://bugs.linaro.org/ --enable-shared --disable-libssp --disable-libmudflap --enable-checking=yes --enable-languages=c,c++,fortran --with-arch=armv7-a --with-fpu=neon --with-float=hard --with-mode=thumb --disable-werror
Thread model: posix
Supported LTO compression algorithms: zlib
gcc version 10.3.0 (GCC)
gcc -v可以看到版本号是10.3.0。
为了让带/usr/local/bin路径的PATH环境变量永久生效,我们将修改后的PATH的内容写入到/etc/profile里面:
# /etc/profile: system-wide .profile file for the Bourne shells

echo
echo -n "Processing /etc/profile... "
# no-op

awktext="\$1==\"$USER\"{print \$6}"
export HOME=`awk -F: "$awktext" /etc/passwd`
export PS1="[\\u@\\h \\w]\\$ "

export PATH=/sbin:/usr/sbin:/bin:/usr/bin:/usr/local/bin

echo "Done"
echo
我们用gcc编译器编译一下刚才的haha.c试试看:
[root@exynos4412 /]# cd ~/haha
[root@exynos4412 ~/haha]# ls
haha.c  haha.s
[root@exynos4412 ~/haha]# gcc haha.c -o haha
[root@exynos4412 ~/haha]# ls
haha    haha.c  haha.s
[root@exynos4412 ~/haha]# ./haha
[root@exynos4412 ~/haha]#
这下终于可以编译成功了,而且生成的haha可执行文件可以在板子上运行!
修改一下haha.c,添加一点复杂的东西试试看:
#include <math.h>
#include <pthread.h>
#include <stdio.h>

static void *func(void *arg)
{
        printf("arg=%s\n", arg);
        return "end";
}

int main(void)
{
        pthread_t thread;
        void *ret;

        printf("Hello World!\n");
        printf("sin1=%lf\n", sin(1));

        pthread_create(&thread, NULL, func, "hello");
        pthread_join(thread, &ret);
        printf("ret=%s\n", ret);

        return 0;
}
[root@exynos4412 ~/haha]# gcc haha.c -o haha -lpthread
[root@exynos4412 ~/haha]# ./haha
Hello World!
sin1=0.841471
arg=hello
ret=end
也能编译并执行成功!
再试试看C++编译器:
#include <iostream>
#include <string>

using namespace std;

int main(void)
{
        string str = "hello";
        str += " world";
        cout << "str=" << str << endl;
        cout << "len=" << str.length() << endl;
        return 0;
}
[root@exynos4412 ~/haha]# g++ hehe.cpp -o hehe
[root@exynos4412 ~/haha]# ./hehe
str=hello world
len=11
gcc和g++编译器都能正常工作,我们的目的已经达到了!
接下来我们把make命令也移植到板子上运行。
编译make
下载:sudo dnf download --source make
解压:
rpm2cpio make-4.3-5.fc34.src.rpm | cpio -div
tar xf make-4.3.tar.gz
mkdir _build
cd _build
复制config.sh到_build目录,configure选项修改为:
../make-4.3/configure --host=arm-none-linux-gnueabihf
配置:source config.sh config
编译:make
生成安装文件:make install DESTDIR=$(pwd)/_install
制作成压缩包:
cd _install
sudo chown -R root:root usr
tar czf make-4.3-binary.tar.gz usr
将压缩包上传到板子上,执行“tar xvf make-4.3-binary.tar.gz -C /”解压到根目录,然后再添加两个环境变量:
export CC=gcc
export CXX=g++
就可以使用make命令了。
为了使CC和CXX环境变量永久生效,应写入到/etc/profile里面:
# /etc/profile: system-wide .profile file for the Bourne shells

echo
echo -n "Processing /etc/profile... "
# no-op

awktext="\$1==\"$USER\"{print \$6}"
export HOME=`awk -F: "$awktext" /etc/passwd`
export PS1="[\\u@\\h \\w]\\$ "

export PATH=/sbin:/usr/sbin:/bin:/usr/bin:/usr/local/bin
export CC=gcc
export CXX=g++

echo "Done"
echo
准备好Makefile文件:
CPPFLAGS=-g

all: simple myhello mycpp
myhello: myhello.c
        $(CC) $^ -o $@ $(CPPFLAGS) -lpthread
simple.c是最开始main函数为空的那个C程序,myhello.c是有printf输出的那个C程序,mycpp.cpp是那个C++程序。
现在我们试试make命令:
[root@exynos4412 /]# cd ~/myhello
[root@exynos4412 ~/myhello]# make
gcc  -g   simple.c   -o simple
gcc myhello.c -o myhello -g -lpthread
g++  -g   mycpp.cpp   -o mycpp
[root@exynos4412 ~/myhello]# ./simple
[root@exynos4412 ~/myhello]# ./myhello
Hello World!
sin1=0.841471
arg=hello
ret=end
[root@exynos4412 ~/myhello]# ./mycpp
str=hello world
len=11
[root@exynos4412 ~/myhello]# make
make: Nothing to be done for 'all'.
make命令也可以使用了。
提示:如果在板子上使用make命令时,出现warning: Clock skew detected. Your build may be incomplete的警告,说明当前系统时间不对,make工具发现了有些源文件的修改日期大于当前系统时间。解决办法很简单,用date命令把系统时间修改正确就好了。
编译GDB
有了编译器和make工具,我们还不满足。我们还想在板子上单步调试程序,这就需要gdb调试器了。
gdb调试器有一个tui模式(图形化GDB调试模式),可以在configure的时候决定是否要启用这个功能,若要启用这个功能,则还需要编译一个ncurses库。
编译ncurses依赖库
现在让我们来编译一下ncurses库。
下载并解压ncurses源码包:
sudo dnf download --source ncurses
rpm2cpio ncurses-6.2-4.20200222.fc34.src.rpm | cpio -div
tar xf ncurses-6.2-20200222.tgz
mkdir _build
cd _build
在_build里面放入config.sh文件,里面的configure命令改为:
../ncurses-6.2-20200222/configure --host=arm-none-linux-gnueabihf --with-shared
注意:末尾的--with-shared选项非常重要,目的是把动态库lib*.so也要编译出来。linux系统下依赖ncurses库的软件有很多,如果不把动态库编译出来,那么后面编译很多linux软件都会报错。
例如编译mysql数据库会报dangerous relocation: unsupported relocation的错误,编译gettext会报/usr/lib/libncurses.a(lib_setup.o): relocation R_ARM_THM_MOVW_ABS_NC against `a local symbol' can not be used when making a shared object; recompile with -fPIC的错误。
建议大家以后在配置软件的时候,最好每次都把--with-shared(有的是叫--enable-shared)这个选项带上,以免动态库没有编译出来,后面再编译其他依赖这个库的软件时出现dangerous relocation错误。
笔者就遇到过,编译python2.7.18时忘记加--enable-shared,结果只编译出了libpython2.7.a,没有把libpython2.7.so.1.0编译出来,后面再编译libxml2就出错了,就连再次编译python本身都要报错,得手动去把系统里面的python静态库全部删除。
配置:source config.sh config
编译:make
生成安装文件:make install DESTDIR=$(pwd)/_install
生成时报错:
/usr/bin/install -c -s tic /mnt/test/ncurses/_build/_install/usr/bin/`echo tic| sed 's/$//'|sed 's,x,x,'|sed 's/$//'`
strip: Unable to recognise the format of the input file `/mnt/test/ncurses/_build/_install/usr/bin/tic'
/usr/bin/install: strip process terminated abnormally
make[1]: *** [Makefile:202: install.progs] Error 1
make[1]: Leaving directory '/mnt/test/ncurses/_build/progs'
make: *** [Makefile:121: install] Error 2
修改_build/progs/Makefile文件里面第82行的INSTALL_PROG变量,在变量值的末尾添加
--strip-program=arm-none-linux-gnueabihf-strip

然后再次执行make install DESTDIR=$(pwd)/_install,成功
头文件目录:/mnt/test/ncurses/_build/_install/usr/include
库目录:/mnt/test/ncurses/_build/_install/usr/lib
库目录里面有lib*.a静态库,也有lib*.so动态库
制作成压缩包:
cd _install
sudo chown -R root:root usr
tar czf ncurses-6.2-binary.tar.gz usr
编译gdb本身
编译前请提前安装好texinfo软件包(含有makeinfo命令)。
下载并解压gdb源码包:
sudo dnf download --source gdb
rpm2cpio gdb-10.2-3.fc34.src.rpm | cpio -div
tar xf gdb-10.2.tar.xz
mkdir _build
cd _build
在_build里面放入config.sh文件,里面的configure命令改为:
../gdb-10.2/configure \
--host=arm-none-linux-gnueabihf \
--target=arm-none-linux-gnueabihf \
--enable-64-bit-bfd \
--enable-targets=arm-none-eabi,arm-none-linux-gnueabihf,armeb-none-eabi,armeb-none-linux-gnueabihf \
--with-bugurl="https://bugs.linaro.org/" \
--enable-initfini-array \
--enable-plugins \
--enable-tui \
--disable-binutils \
--disable-sim \
--disable-as \
--disable-ld \
--disable-doc \
--disable-gdbtk \
--disable-nls \
--disable-werror \
--without-x
此configure编译选项参考的是交叉编译工具链10.3-2021.07-x86_64-arm-none-linux-gnueabihf-manifest.txt里面的gdb_configure。其中--enable-tui决定了是否启用TUI模式。
配置:source config.sh config
编译:
make CFLAGS="-I/mnt/test/ncurses/_build/_install/usr/include" CPPFLAGS="-I/mnt/test/ncurses/_build/_install/usr/include" LDFLAGS="-L/mnt/test/ncurses/_build/_install/usr/lib"
(编译时指定了ncurses的头文件目录和库目录。-I指定的include路径优先级更高,所以即使系统里面装了电脑版ncurses库,也会优先采用-I路径里面的arm版ncurses库的头文件)
生成安装文件:
make install DESTDIR=$(pwd)/_install
打包安装文件:
cd _install
sudo chown -R root:root usr
tar czf gdb-10.2-binary.tar.gz usr
使用gdb
将ncurses-6.2-binary.tar.gz和gdb-10.2-binary.tar.gz上传到板子上,然后解压到根目录:
tar xvf ncurses-6.2-binary.tar.gz -C /
tar xvf gdb-10.2-binary.tar.gz -C /
执行gdb mycpp,我们来调试一下mycpp这个程序。
break mycpp.cpp:6是在mycpp.cpp文件的第6行打断点。
start是开始运行程序。
step是单步调试(逐语句)。
next是单步调试(逐过程)。
finish是跳出当前函数。
continue是继续运行程序。
quit是退出gdb调试器。
print xxx是查看变量xxx的值。
[root@exynos4412 ~/myhello]# gdb mycpp
GNU gdb (GDB) 10.2
Copyright (C) 2021 Free Software Foundation, Inc.
License GPLv3+: GNU GPL version 3 or later <http://gnu.org/licenses/gpl.html>
This is free software: you are free to change and redistribute it.
There is NO WARRANTY, to the extent permitted by law.
Type "show copying" and "show warranty" for details.
This GDB was configured as "arm-none-linux-gnueabihf".
Type "show configuration" for configuration details.
For bug reporting instructions, please see:
<https://bugs.linaro.org/>.
Find the GDB manual and other documentation resources online at:
    <http://www.gnu.org/software/gdb/documentation/>.

For help, type "help".
Type "apropos word" to search for commands related to "word"...
Reading symbols from mycpp...
(gdb) break mycpp.cpp:6
Breakpoint 1 at 0x10aae: file mycpp.cpp, line 8.
(gdb) start
Temporary breakpoint 2 at 0x10aae: file mycpp.cpp, line 8.
Starting program: /root/myhello/mycpp

Breakpoint 1, main () at mycpp.cpp:8
8               string str = "hello";
(gdb) next
9               str += " world";
(gdb) print str.c_str()
$1 = 0xbefffca4 "hello"
(gdb) next
10              cout << "str=" << str << endl;
(gdb) print str.c_str()
$2 = 0xbefffca4 "hello world"
(gdb) next
str=hello world
11              cout << "len=" << str.length() << endl;
(gdb) next
len=11
12              return 0;
(gdb) continue
Continuing.
[Inferior 1 (process 1224) exited normally]
(gdb) quit
[root@exynos4412 ~/myhello]#
我们再来试一下gdb的tui模式:
gdb mycpp -tui


这个TUI图形模式很厉害吧,可以边看源文件的内容,边调试。
不过有个不足的地方是,如果下面(gdb)命令行里面printf了东西,那么上面的调试窗口就会错位。。。电脑上的gdb调试器也有这个问题。
交叉编译时避免x86库和arm库冲突
刚才编译gdb的时候,提到了-I选项指定的路径优先级更高,可以让编译器优先搜索arm库的头文件,找不到的话才去搜索系统里面装的x86(或x86_64)库的头文件。
我们做一个实验来验证这一点。
[root@exynos4412 ~]# mkdir inctest
[root@exynos4412 ~]# cd inctest
[root@exynos4412 ~/inctest]# ls
[root@exynos4412 ~/inctest]# mkdir arpa
[root@exynos4412 ~/inctest]# vi arpa/inet.h
[root@exynos4412 ~/inctest]# vi inctest.c
我们建立自己的arpa/inet.h头文件,内容如下:
struct hello
{
        char *name;
        int len;
};
然后建立inctest.c源文件,内容如下:
#include <arpa/inet.h>
#include <stdio.h>

int main(void)
{
        socklen_t len = 5;
        struct hello hello;

        hello.name = "hello";
        hello.len = len;
        printf("name=%s\n", hello.name);
        printf("len=%d\n", hello.len);
        return 0;
}
这个时候编译肯定是编译不通过的。因为我们包含的是系统里面的arpa/inet.h文件,里面没有struct hello结构体的定义:
[root@exynos4412 ~/inctest]# gcc inctest.c -o inctest
inctest.c: In function 'main':
inctest.c:7:15: error: storage size of 'hello' isn't known
    7 |  struct hello hello;
于是我们加上-I.选项,优先在我们自己的目录下搜索arpa/inet.h文件,这样就能找到struct hello的定义了:
[root@exynos4412 ~/inctest]# gcc inctest.c -o inctest -I.
inctest.c: In function 'main':
inctest.c:6:2: error: unknown type name 'socklen_t'
    6 |  socklen_t len = 5;
但是我们同时又想用系统里面的<arpa/inet.h>定义的socklen_t类型,那怎么办呢?
我们可以在我们自己的arpa/inet.h里面加上#include_next <arpa/inet.h>,这样就能再把系统里面的arpa/inet.h包含进去了,问题就解决了。
#include_next <arpa/inet.h>

struct hello
{
        char *name;
        int len;
};
[root@exynos4412 ~/inctest]# gcc inctest.c -o inctest -I.
[root@exynos4412 ~/inctest]# ./inctest
name=hello
len=5
编译file和locate命令
在电脑上输入file命令可以查看文件的类型,尤其是可执行文件的运行平台。locate命令可以快速查找文件的位置。然而板子上却没有这两个命令。
现在我们把这两个命令也移植到板子上运行。
file命令
下载file的源代码:sudo dnf download --source file
解压:
rpm2cpio file-5.39-6.fc34.src.rpm | cpio -div
tar xf file-5.39.tar.gz
配置:
mkdir _build
cd _build
source config.sh config(其中的configure命令是../file-5.39/configure --host=arm-none-linux-gnueabihf)
编译:make
生成安装文件:make install DESTDIR=$(pwd)/_install
制作成压缩包:
cd _install
sudo chown -R root:root usr
tar czf file-5.39-binary.tar.gz usr
上传到板子上,然后解压到根目录:tar xvf file-5.39-binary.tar.gz -C /
file命令就可以使用了:
[root@exynos4412 ~/packages]# file /bin/busybox
/bin/busybox: ELF 32-bit LSB executable, ARM, EABI5 version 1 (SYSV), dynamically linked, interpreter /lib/ld-linux-armhf.so.3, for GNU/Linux 3.2.0, stripped
[root@exynos4412 ~/packages]# file ~/myhello/*
/root/myhello/Makefile:  makefile script, ASCII text
/root/myhello/mycpp:     ELF 32-bit LSB executable, ARM, EABI5 version 1 (SYSV), dynamically linked, interpreter /lib/ld-linux-armhf.so.3, for GNU/Linux 3.2.0, with debug_info, not stripped
/root/myhello/mycpp.cpp: C++ source, ASCII text
/root/myhello/myhello:   ELF 32-bit LSB executable, ARM, EABI5 version 1 (SYSV), dynamically linked, interpreter /lib/ld-linux-armhf.so.3, for GNU/Linux 3.2.0, with debug_info, not stripped
/root/myhello/myhello.c: C source, ASCII text
/root/myhello/simple:    ELF 32-bit LSB executable, ARM, EABI5 version 1 (SYSV), dynamically linked, interpreter /lib/ld-linux-armhf.so.3, for GNU/Linux 3.2.0, with debug_info, not stripped
/root/myhello/simple.c:  C source, ASCII text
locate命令
首先查询locate命令所在的软件包:sudo dnf whatprovides locate
查出来locate命令所在的软件包是mlocate
于是下载mlocate的源代码:sudo dnf download --source mlocate
解压:
rpm2cpio mlocate-0.26-28.fc34.src.rpm | cpio -div
tar xf mlocate-0.26.tar.xz
配置:
mkdir _build
cd _build
source config.sh config(其中的configure命令是../mlocate-0.26/configure --host=arm-none-linux-gnueabihf --localstatedir=/var)
编译:make
生成安装文件:make install DESTDIR=$(pwd)/_install
制作成压缩包(注意这次多了一个var文件夹):
cd _install
sudo chown -R root:root usr var
tar czf mlocate-0.26-binary.tar.gz usr var
上传到板子上,然后解压到根目录:tar xvf mlocate-0.26-binary.tar.gz -C /
运行locate命令,提示locate: can not stat () `/var/mlocate/mlocate.db': No such file or directory的错误
[root@exynos4412 /]# locate mycpp
locate: can not stat () `/var/mlocate/mlocate.db': No such file or directory
这是因为我们还没有生成mlocate.db数据库,我们执行以下两条命令:
addgroup mlocate -g21 -S
updatedb
[root@exynos4412 /]# addgroup mlocate -g21 -S
[root@exynos4412 /]# updatedb
[root@exynos4412 /]# locate mycpp
/root/myhello/mycpp
/root/myhello/mycpp.cpp
[root@exynos4412 /]# ls /var/mlocate -l
total 1000
-rw-r-----    1 root     mlocate    1021542 Jan  1 19:17 mlocate.db
添加了mlocate用户组,然后生成数据库文件,locate命令就能执行成功了。
本地编译ntp软件包,通过网络更新系统时间
为了解决make报warning: Clock skew detected. Your build may be incomplete警告的问题,我们需要将系统时间修改正确。
我们可以编译安装ntp软件包,通过ntpupdate命令获取网络时间。
进入ntp的官方网站http://www.ntp.org/downloads.html,下载ntp软件的源代码ntp-4.2.8p15.tar,下载地址为https://www.eecis.udel.edu/~ntp/ntp_spool/ntp4/ntp-4.2/ntp-4.2.8p15.tar.gz。
下载下来后将源代码压缩包上传到板子上。
解压源码包:tar xvf ntp-4.2.8p15.tar.gz
配置:
cd ntp-4.2.8p15/
./configure
编译:make
安装:make install
简简单单三步,ntp软件就安装好了。
执行获取网络时间的命令:ntpdate cn.pool.ntp.org
[root@exynos4412 ~/ntp/ntp-4.2.8p15]# ntpdate cn.pool.ntp.org
14 Sep 06:12:35 ntpdate[21849]: step time server 139.199.215.251 offset +51760.0
06084 sec
[root@exynos4412 ~/ntp/ntp-4.2.8p15]# date
Tue Sep 14 06:12:40 UTC 2021
更新系统时间成功。date命令显示的时间是UTC时间,这个时间加上8小时就是北京时间。
本地编译易受编译环境影响,包含进去一些不该包含的动态库。笔者将本地编译出来的ntp打包,复制到新做好的linux最小系统中使用,提示找不到libcrypto.so.3:
[root@exynos4412 ~/ntp]# /mnt/sdlinux/usr/local/bin/ntpdate
/mnt/sdlinux/usr/local/bin/ntpdate: error while loading shared libraries: libcrypto.so.3: cannot open shared object file: No such file or directory
这是因为笔者的板子里面安装了openssl-3.0.0软件包,本地编译ntp时误包含了openssl/openssl-3.0.0/libcrypto.so.3库。
所以笔者提供的百度网盘资料里面,ntp软件包选择的是交叉编译,编译选项是:
./configure --host=arm-none-linux-gnueabihf --with-yielding-select=yes
生成的ntpdate命令位于/usr/local/sbin文件夹里面,所以使用前需要将sbin文件夹添加到PATH路径中,注意sbin必须放到bin前面:
export PATH=/sbin:/usr/sbin:/usr/local/sbin:/bin:/usr/bin:/usr/local/bin
交叉编译出来的ntpdate命令不需要libcrypto.so.3库也能运行:
[root@exynos4412 /mnt/sdlinux]# usr/local/bin/ntpdate
usr/local/bin/ntpdate: error while loading shared libraries: libcrypto.so.3: cannot open shared object file: No such file or directory
[root@exynos4412 /mnt/sdlinux]# ntpdate
usage: ntpdate [-46bBdqsuv] [-a key#] [-e delay] [-k file] [-p samples] [-o version#] [-t timeo] server ..
[root@exynos4412 ~]# ntpdate cn.pool.ntp.org
 1 Nov 03:34:15 ntpdate[238]: step time server 139.199.215.251 offset +291178971.388825 sec
[root@exynos4412 ~]# date
Mon Nov  1 03:34:20 UTC 2021
创建软件卸载工具
要卸载本地编译的软件,直接make uninstall就可以了。
但交叉编译的软件,在板子上是通过解压压缩包安装的,应该如何卸载呢?
我们可以用C++语言写一个卸载器,代码如下。
uninstaller.cpp:
#include <iostream>
#include <sstream>
#include <stack>
#include <string>
#include <sys/stat.h>
#include <sys/wait.h>
#include <unistd.h>

using namespace std;

static int uninstall(const char *package)
{
	cout << "Uninstalling " << package << endl;

	int pipefd[2];
	int ret = pipe(pipefd);
	if (ret == -1)
	{
		cerr << "Pipe creation failed" << endl;
		return -1;
	}

	pid_t ppid = fork();
	if (ppid == -1)
	{
		cerr << "fork() failed" << endl;
		close(pipefd[0]);
		close(pipefd[1]);
		return -1;
	}
	else if (ppid == 0)
	{
		/* 子进程 */
		// 执行tar tf命令, 获取压缩文件中的文件列表
		const char *cmd[] = {"tar", "tf", package, NULL};
		close(pipefd[0]);
		dup2(pipefd[1], STDOUT_FILENO);
		close(pipefd[1]);
		return execvp(cmd[0], (char **)cmd);
	}
	else
	{
		/* 父进程 */
		// 接收子进程返回的内容
		char buffer[100];
		int len;
		stringstream list;
		close(pipefd[1]);
		while ((len = read(pipefd[0], buffer, sizeof(buffer) - 1)) > 0)
		{
			buffer[len] = '\0';
			list << buffer;
		}
		close(pipefd[0]);

		// 拆分成行
		stack<string> directories;
		do
		{
			string filename;
			getline(list, filename);
			if (!filename.empty())
			{
				struct stat st;
				if (filename[0] != '/')
					filename = "/" + filename;
				ret = stat(filename.c_str(), &st);
				if (ret == 0)
				{
					if (S_ISDIR(st.st_mode))
						directories.push(filename);
					else
					{
						// 删除文件
						ret = unlink(filename.c_str());
						if (ret == 0)
							cout << "Delete " << filename << endl;
						else
							cerr << "\033[33mFailed to delete\033[0m " << filename << endl;
					}
				}
			}
		} while (!list.eof());

		while (!directories.empty())
		{
			// 删除文件夹
			string directory = directories.top();
			ret = rmdir(directory.c_str());
			if (ret == 0)
				cout << "Delete directory " << directory << endl;
			else
				cerr << "\033[33mFailed to delete directory\033[0m " << directory << endl;
			directories.pop();
		}

		// 等待子进程结束
		int wstatus;
		ret = waitpid(ppid, &wstatus, 0);
		if (ret == ppid && WIFEXITED(wstatus) && WEXITSTATUS(wstatus) == 0)
			return 0;
		else
		{
			cerr << "\033[31mFailed to read package file\033[0m" << endl;
			return -1;
		}
	}
}

int main(int argc, char *argv[])
{
	if (argc < 2)
	{
		cerr << "Please specify package name" << endl;
		return -1;
	}

	for (int i = 1; i < argc; i++)
	{
		int ret = uninstall(argv[i]);
		if (ret != 0)
			return ret;
	}
	return 0;
}
dup2(pipefd[1], STDOUT_FILENO)的意思是,关闭原有的stdout,然后将管道的写端重定向到stdout。
程序里面父进程先接收子进程的数据,再等待子进程(tar -tf)结束,这样做的原因是:管道(pipe)是阻塞性质的。如果父进程一开始就waitpid阻塞等待子进程结束,那么如果子进程把管道塞满了,父进程又没有去读,子进程就会阻塞,导致死锁。
按这个程序流程,如果压缩文件不存在,那么子进程tar将报错,且报错信息是输出到stderr里面的,而stdout里面什么都没有,父进程读管道什么都读不到,直接就跑去waitpid获取子进程返回值了。
Makefile:
CXX=/mnt/test/gcc-arm-10.3-2021.07-x86_64-arm-none-linux-gnueabihf/bin/arm-none-linux-gnueabihf-g++

all: uninstaller
在电脑上交叉编译这个代码,然后上传到板子。
执行“./uninstaller 压缩包名”命令,就可以卸载软件了。
rmdir函数只能删除空文件夹,所以请放心使用。
本来笔者想写成shell脚本的,但是坑爹的是busybox的shell不支持数组,所以只好用C++来写了,写起来比shell脚本麻烦点。
安装Bash shell
Busybox自带的那个shell终端不支持数组。为了解决shell脚本里面用不了数组的问题,我们可以再安装一个GNU官方的bash上去。
去官网下载bash的源码包:https://ftp.gnu.org/gnu/bash/bash-5.1.8.tar.gz
上传到板子上,配置、解压并安装:
tar xvf bash-5.1.8.tar.gz
cd bash-5.1.8/
./configure
make
make install
安装好的bash位于/usr/local/bin/bash,我们在/bin下面创建一个bash的软链接:
ln -s /usr/local/bin/bash /bin/bash
然后修改/etc/inittab和/etc/passwd这两个文件,把里面所有的/bin/sh改成/bin/bash
重启板子后,串口和telnet终端里面都能使用数组语法了,也能数组转字符串、字符串转数组,echo $0输出的也是bash了:
[root@exynos4412 /]# echo $0
-/bin/bash
[root@exynos4412 /]# a=("hello" "world" "this is")
[root@exynos4412 /]# echo ${a[0]}
hello
[root@exynos4412 /]# echo ${a[1]}
world
[root@exynos4412 /]# echo ${a[2]}
this is
[root@exynos4412 /]# echo ${#a[@]}
3
[root@exynos4412 /]# echo "${a[*]}"
hello world this is
[root@exynos4412 /]# IFS=":"
[root@exynos4412 /]# echo "${a[*]}"
hello:world:this is
[root@exynos4412 /]# str="${a[*]}"
[root@exynos4412 /]# unset IFS
[root@exynos4412 /]# echo "$str"
hello:world:this is
[root@exynos4412 /]#
[root@exynos4412 /]# str="abc: def : gh ij k :lmn "
[root@exynos4412 /]# IFS=":"
[root@exynos4412 /]# read -ra arr <<< "$str"
[root@exynos4412 /]# unset IFS
[root@exynos4412 /]# echo len=${#arr[@]}
len=4
[root@exynos4412 /]# echo ${arr[0]}
abc
[root@exynos4412 /]# echo ${arr[1]}
def
[root@exynos4412 /]# echo "${arr[1]}"
 def
[root@exynos4412 /]# echo ${arr[2]}
gh ij k
[root@exynos4412 /]# echo "${arr[2]}"
 gh ij k
[root@exynos4412 /]# echo "${arr[3]}"
lmn
现在有了bash,命令提示符PS1里面也可以采用短路径了(\\W)。修改/etc/profile,将PS1改为:
export PS1="[\\u@\\h \\W]\\$ "
修改后保存文件,exit退出一下终端,然后重新进入,就可以看到效果了:
[root@exynos4412 /]# cd /root/gettext/gettext-0.21/gettext-runtime/gnulib-lib/
[root@exynos4412 gnulib-lib]# pwd
/root/gettext/gettext-0.21/gettext-runtime/gnulib-lib
可以看到[]方框内已经能显示短路径了,而且根目录“/”显示也正常。
Busybox自带的shell,用\\W虽然也能显示短路径,但是他无法显示根目录“/”,所以笔者之前一直采用的是长路径“\\w”。
提示:安装好bash后,/bin下面除了bash以外,其他的都还是busybox的东西。
配置库目录
本地编译安装的软件默认的安装路径通常为/usr/local,库目录的路径就是/usr/local/lib。
但是Linux系统默认情况下只有两个库搜索路径:/lib和/usr/lib,这将导致安装的软件无法启动,提示库文件不存在:
[oct1158@exynos4412 ~]$ sudo
sudo: error while loading shared libraries: libcrypto.so.3: cannot open shared object file: No such file or directory
[oct1158@exynos4412 ~]$ python
python: error while loading shared libraries: libpython2.7.so.1.0: cannot open shared object file: No such file or directory
为了解决这个问题,我们需要将/usr/local/lib添加到库搜索路径中。
首先我们最容易想到的方法就是修改环境变量LD_LIBRARY_PATH:
export LD_LIBRARY_PATH=/usr/local/lib
修改后,虽然软件能启动成功了,但是有一个缺点:如果用sudo方式运行软件的话,还是会报错。
提示:sudo命令需要另外安装。(sudo的官网为Sudo Main Page)
这里介绍另外一种更好的方法。我们新建一个/etc/ld.so.conf文件,文件内容为/usr/local/lib。保存好文件后,在root用户下执行ldconfig,就可以了。
[root@exynos4412 etc]# python
python: error while loading shared libraries: libpython2.7.so.1.0: cannot open shared object file: No such file or directory
[root@exynos4412 etc]# vi /etc/ld.so.conf
[root@exynos4412 etc]# ldconfig
[root@exynos4412 etc]# python
Python 2.7.18 (default, Sep 16 2021, 11:49:42)
[GCC 10.3.0] on linux2
Type "help", "copyright", "credits" or "license" for more information.
>>> quit()
[root@exynos4412 etc]# sudo
usage: sudo -h | -K | -k | -V
usage: sudo -v [-ABknS] [-g group] [-h host] [-p prompt] [-u user]
usage: sudo -l [-ABknS] [-g group] [-h host] [-p prompt] [-U user] [-u user]
            [command]
usage: sudo [-ABbEHknPS] [-C num] [-D directory] [-g group] [-h host] [-p
            prompt] [-R directory] [-T timeout] [-u user] [VAR=value] [-i|-s]
            [<command>]
usage: sudo -e [-ABknS] [-C num] [-D directory] [-g group] [-h host] [-p
            prompt] [-R directory] [-T timeout] [-u user] file ...
用ldconfig配置的库搜索路径可以永久生效,而且sudo方式下也不会失效。
[oct1158@exynos4412 ~]$ ls /usr/local/mysql/data
ls: can't open '/usr/local/mysql/data': Permission denied
[oct1158@exynos4412 ~]$ sudo ls /usr/local/mysql/data
Password:
aria_log.00000001        ib_buffer_pool           mysql
aria_log_control         ib_logfile0              performance_schema
ddl_recovery-backup.log  ibdata1                  storedb
ddl_recovery.log         ibtmp1                   sys
exynos4412.err           muji                     test
exynos4412.pid           multi-master.info
提示:
(1) ldconfig这个程序是从交叉编译器里面复制过来的。具体请参阅前面配置busybox根文件系统环境那一节。
(2) sudo加-E参数可以强制保留所有环境变量,如:sudo -E python urltest.py
(3) 修改/etc/sudoers文件,把# Defaults env_keep += "HOME"前面的注释符号去掉,然后再加上Defaults env_keep += "环境变量名",可以强制保留指定名称的环境变量
假如新安装了软件后,比如python3,仍然提示error while loading shared libraries,而locate一查找发现这个库就在/usr/local/lib下,这说明ldconfig缓存没有更新。只需要再执行一下ldconfig命令,就可以了,不需要改其他的文件。
[root@exynos4412 Python-3.9.7]# python3
python3: error while loading shared libraries: libpython3.9.so.1.0: cannot open shared object file: No such file or directory
[root@exynos4412 Python-3.9.7]# find /usr -name libpython3.9.so.1.0
/usr/local/lib/libpython3.9.so.1.0
[root@exynos4412 Python-3.9.7]# ldconfig
[root@exynos4412 Python-3.9.7]# python3
Python 3.9.7 (default, Sep 18 2021, 12:23:40)
[GCC 10.3.0] on linux
Type "help", "copyright", "credits" or "license" for more information.
>>> quit()
解决join命令不存在的问题
电脑上安装的Linux系统是有join命令的,然而嵌入式Linux的Busybox根文件系统却不包含join命令。这会导致本地编译安装某些软件时会提示join: command not found的错误。
我们在电脑上用sudo dnf whatprovides join一查,发现join命令是在coreutils软件包里面,而coreutils这个软件包,功能上和busybox是重复的。换句话说,就是coreutils软件包里面不仅包含了join命令,还包含了其他像echo、ls、chmod这样busybox已提供的命令。
不过不用担心,busybox的安装文件里面没有涉及到/usr/local/文件夹,而coreutils默认是安装在/usr/local里面的,两者并不冲突,可以同时安装。/bin文件夹里面在安装busybox的时候就已经创建了busybox的软链接,所以我们输入ls、chmod等命令的时候,默认调用的是busybox,除非我们修改了/bin里面的软链接的指向。只有/bin里面没有的命令,比如join,才会去调用coreutils的/usr/local/bin/join。
当然,我们如果编译出来后,只把join程序复制出来,应该也没有问题。
解压并交叉编译源码包:
tar xvf coreutils-8.32.tar.xz
mkdir _build
cd _build
../coreutils-8.32/configure --host=arm-none-linux-gnueabihf
make
make install DESTDIR=$(pwd)/_install
生成安装文件并打包:
cd _install
sudo chown -R root:root usr
tar czf coreutils-8.32-binary.tar.gz usr
压缩包上传到板子上,然后解压到根目录:
tar xvf coreutils-8.32-binary.tar.gz -C /
现在join命令已经可以使用了:
[root@exynos4412 coreutils]# join
join: missing operand
Try 'join --help' for more information.
查看expr的帮助信息,可以看到expr仍然是采用的是busybox的expr:
[root@exynos4412 coreutils]# expr --help
BusyBox v1.26.2 (2021-09-01 22:59:32 CST) multi-call binary.
也就是说/usr/bin/expr(busybox版)比/usr/local/bin/expr(coreutils版)的优先级更高。
[root@exynos4412 coreutils]# ls -l /usr/bin/expr
lrwxrwxrwx 1 root root 17 Aug 27 15:57 /usr/bin/expr -> ../../bin/busybox
假如想要改用coreutils的expr,可以修改/usr/bin/expr软链接的指向:
rm /usr/bin/expr
ln -s /usr/local/bin/expr /usr/bin/expr
expr --help
[root@exynos4412 coreutils]# ls -l /usr/bin/expr
lrwxrwxrwx 1 root root 19 Sep 19 09:47 /usr/bin/expr -> /usr/local/bin/expr
展示
Apache服务器
有了本地gcc编译器,编译apache服务器就简单很多了啊!在网上随便找篇文章,照着做就可以了:
apache源码编译安装 - huskiesir - 博客园


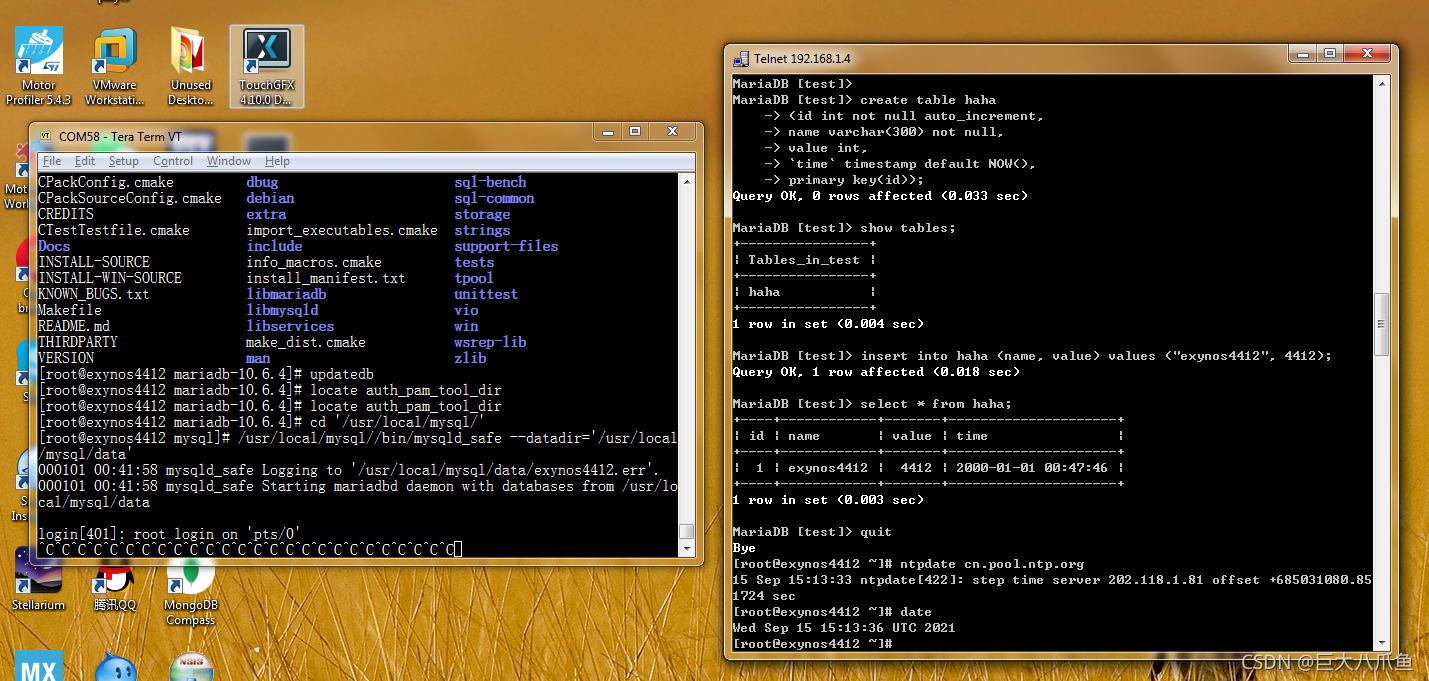
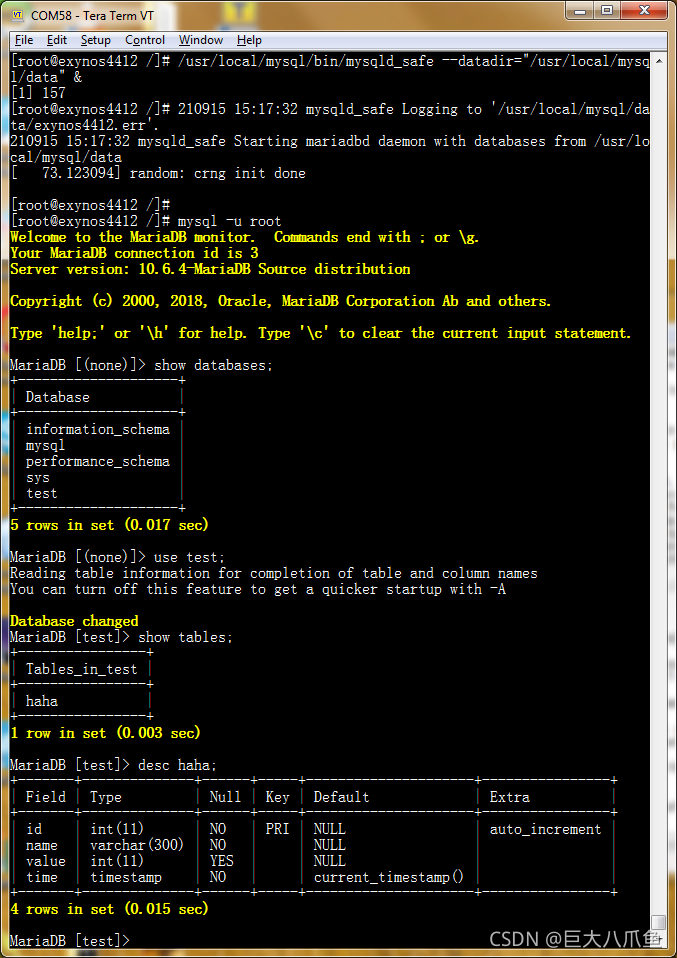
MySQL数据库
mysql数据库服务器也安装成功了,安装的版本是mariadb-10.6.4。

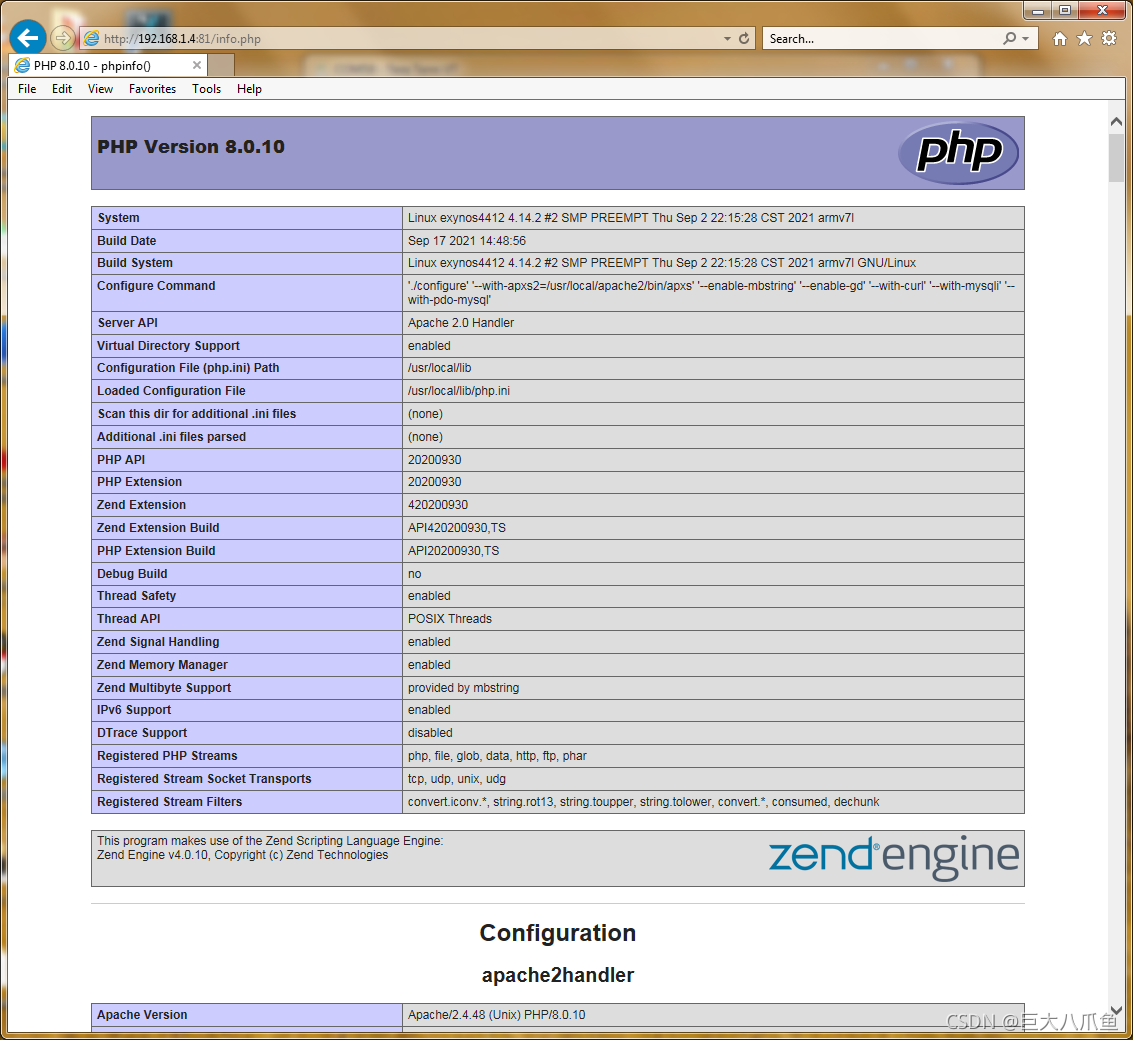
PHP动态网页
运行php8.0.10:


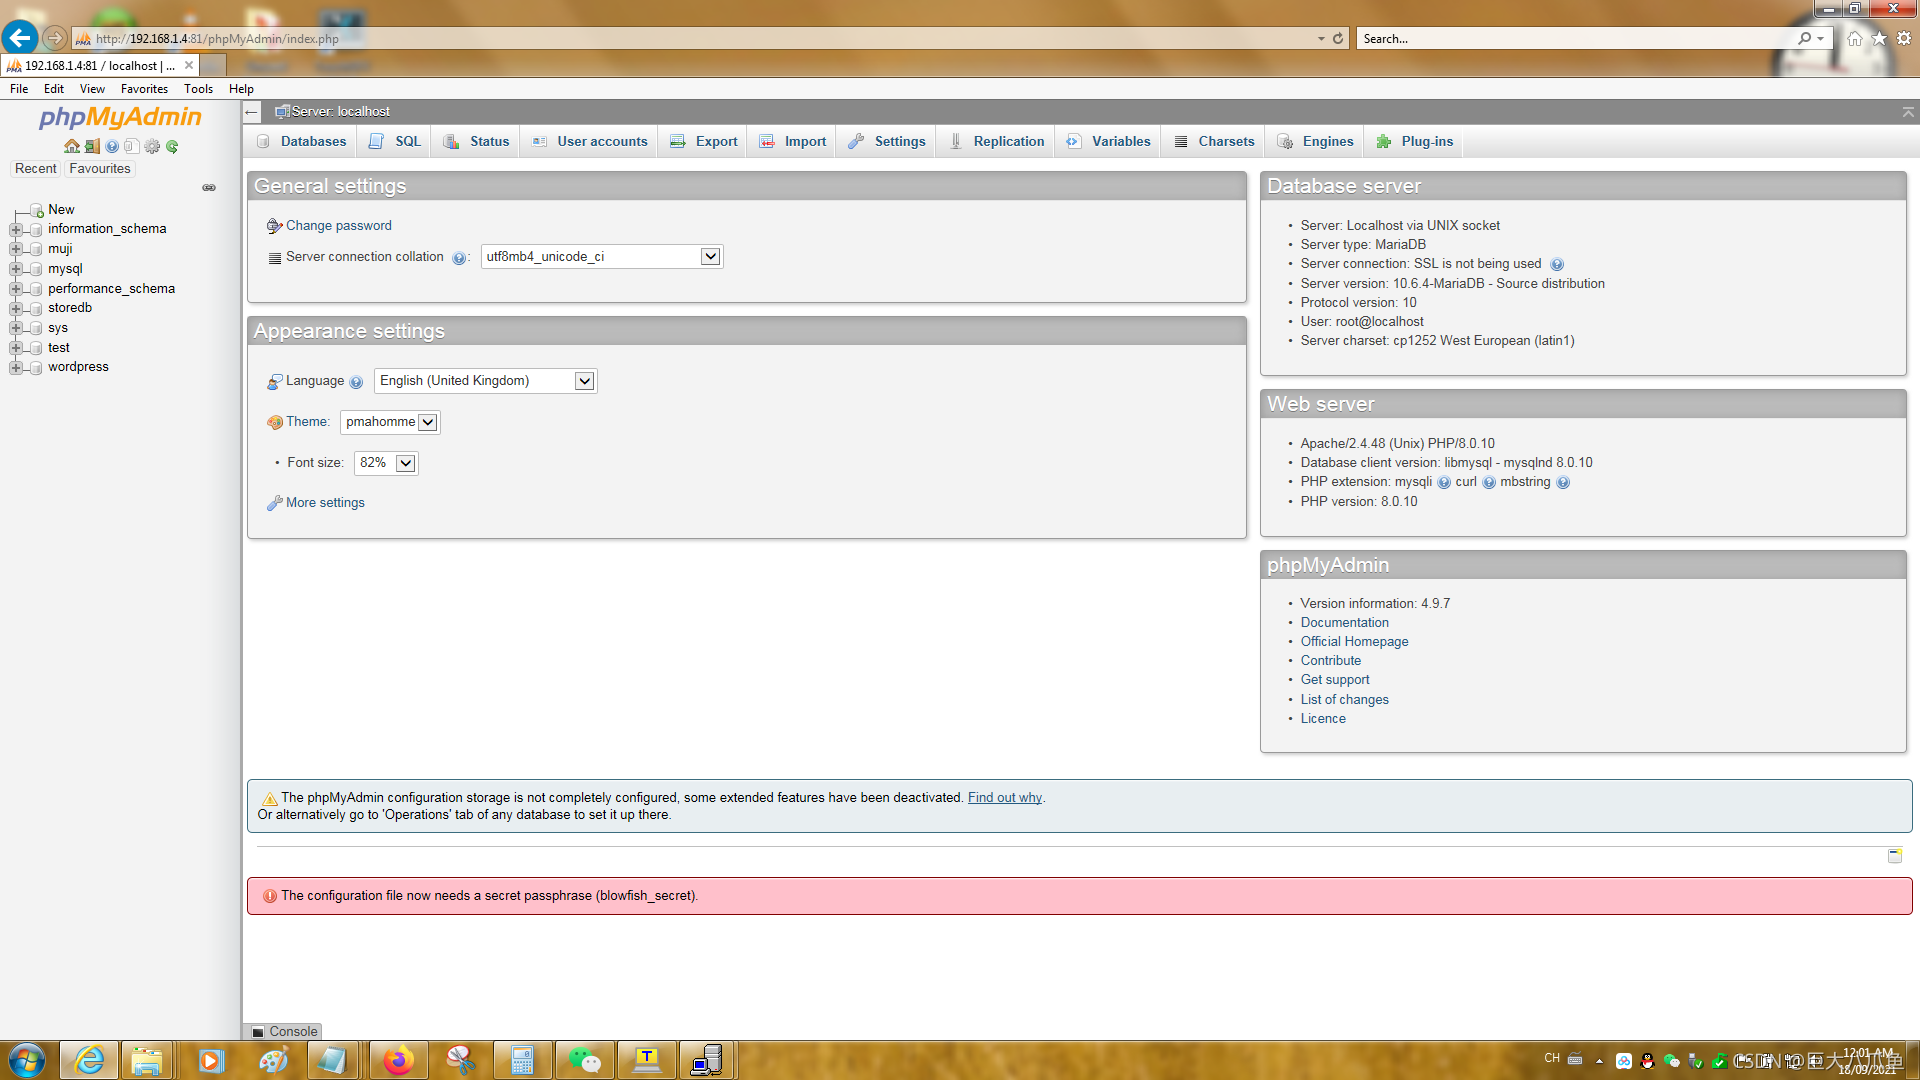
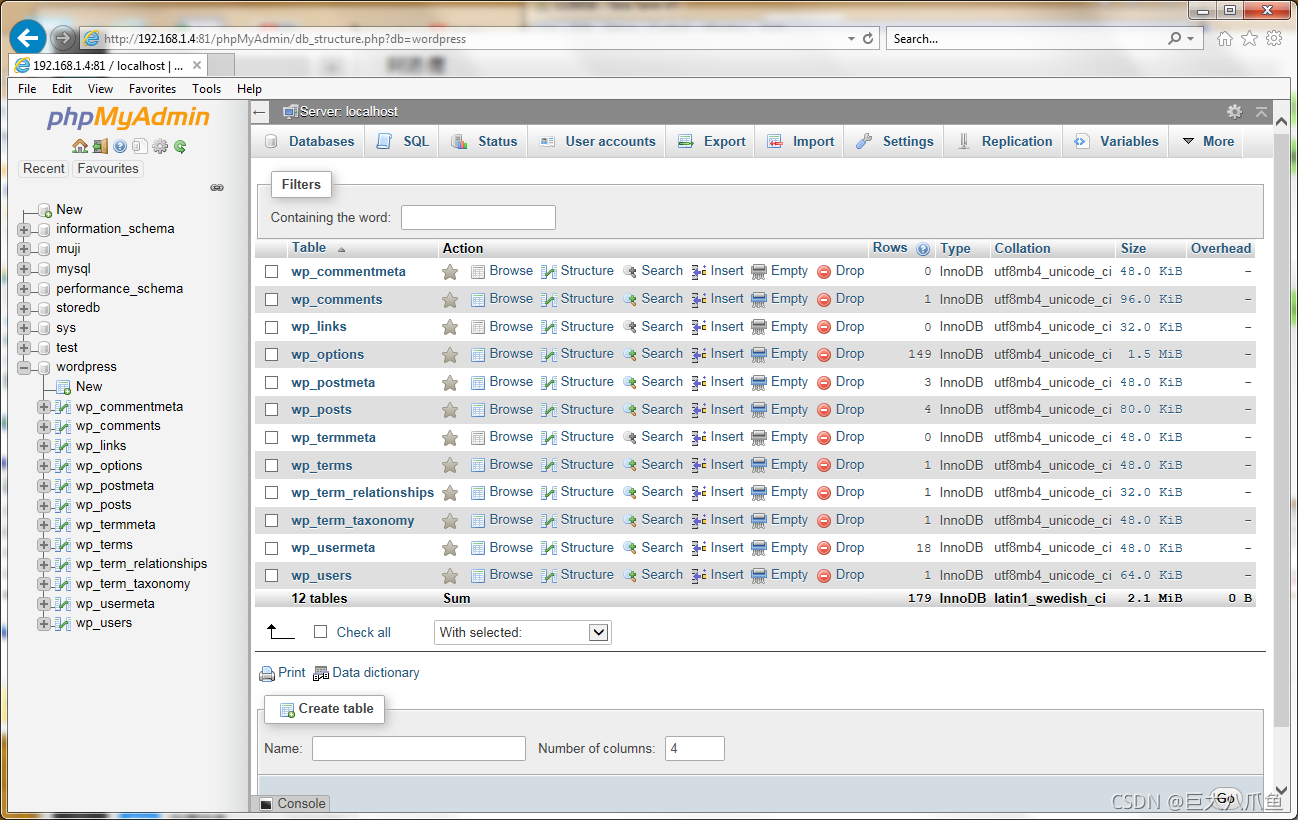
phpMyAdmin管理MySQL数据库:

Samba文件共享
samba版本:samba-4.14.7
samba配置:./configure --without-gpgme
[Samba配置过程]
1. 拷贝配置文件:
[root@exynos4412 scripts]# cd /usr/local/samba/etc/
[root@exynos4412 etc]# ls
[root@exynos4412 etc]# cp 源码包/examples/smb.conf.default smb.conf
2. 修改复制后的smb.conf配置文件:
[global]里面,workgroup由MYGROUP改成WORKGROUP
3. 测试smb.conf的配置是否正确:/usr/local/samba/bin/testparm
4. 添加nobody用户和组:(-S表示编号从100开始)
addgroup -S nobody
adduser -G nobody -SDH nobody
5. 在samba中添加root用户:
[root@exynos4412 etc]# /usr/local/samba/bin/smbpasswd -a root
New SMB password:
Retype new SMB password:
Added user root.
6. 启动samba:
/usr/local/samba/sbin/nmbd -D
/usr/local/samba/sbin/smbd -D
7. 查看samba是否启动成功:
[root@exynos4412 etc]# ps | grep samba
16366 root 0:00 /usr/local/samba/sbin/nmbd -D
16415 root 0:00 /usr/local/samba/sbin/smbd -D
16417 root 0:00 {smbd-notifyd} /usr/local/samba/sbin/smbd -D
16418 root 0:00 {cleanupd} /usr/local/samba/sbin/smbd -D
16419 root 0:00 {lpqd} /usr/local/samba/sbin/smbd -D
16441 root 0:14 /usr/local/samba/sbin/smbd -D
16468 root 0:00 grep samba
有nmbd和smbd说明启动成功了。
其中nmbd负责提供计算机名,smbd负责提供文件共享服务。
若启动失败,
查看nmbd启动失败的原因:cat /usr/local/samba/var/log.nmbd
查看smbd启动失败的原因:cat /usr/local/samba/var/log.smbd
XP系统下无法访问Samba服务器的解决办法:XP系统下无法访问Samba服务器的解决办法_ZLK1214的专栏-CSDN博客
[Samba服务器的使用]
ping通计算机名:

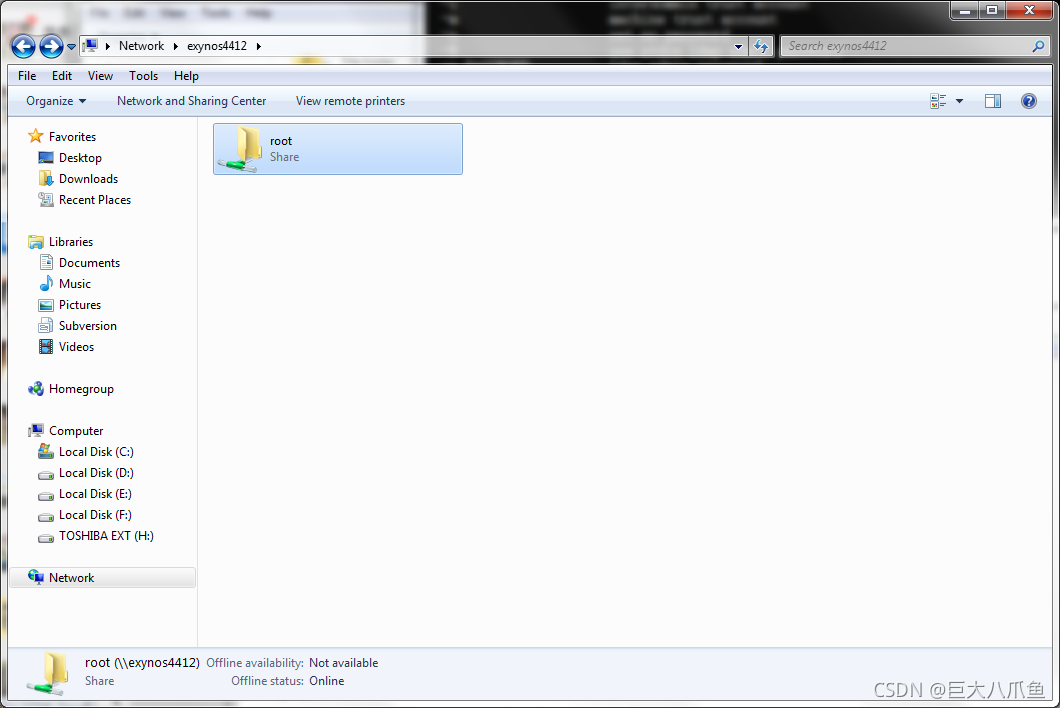
在电脑的文件管理器里面访问\\exynos4412(或\\IP地址),访问时输入用户名和密码:

root用户登录后看到的共享文件夹:
查看共享的文件:
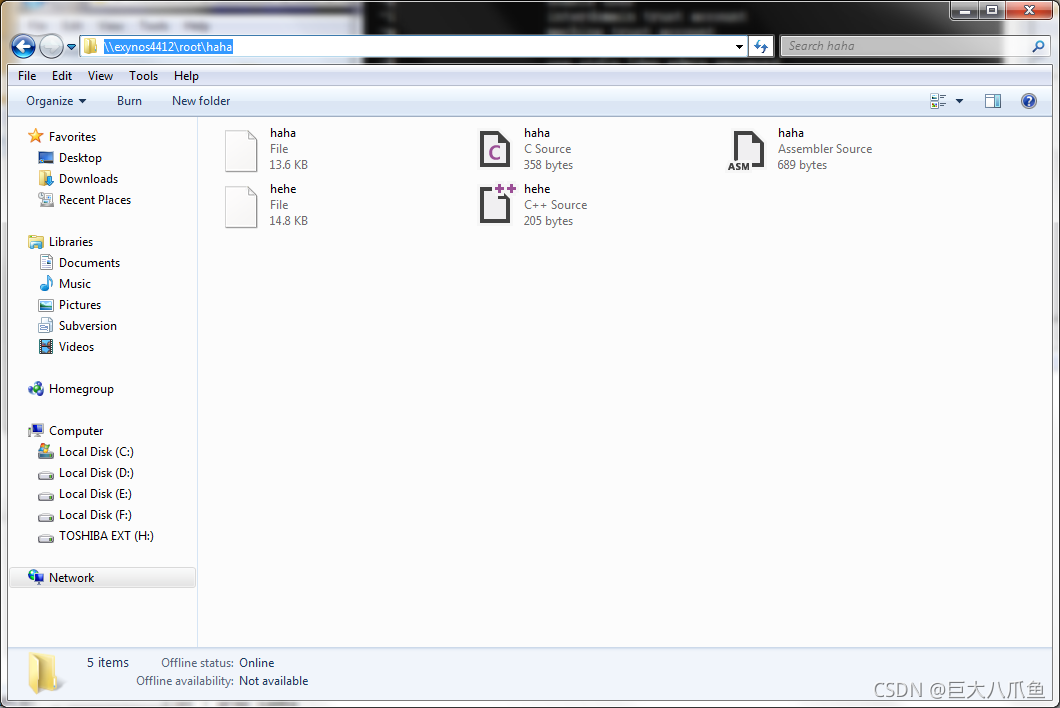
经测试,Windows 7系统下文件的修改时间是没有问题的。虽然板子终端上显示的都是UTC时间,但win7访问samba服务器,可以正确显示UTC+8北京时间。
第一个GCC编译器是怎么来的
gcc源代码是用C写的,编译C语言代码又需要gcc编译器。
现在有一个新的CPU平台,这个新平台上没有gcc编译器,怎样构建这个新平台的gcc本地编译器呢?
这是不是一个类似于鸡生蛋,蛋生鸡的问题?
首先我们要修改gcc的源代码,在里面新增关于新平台CPU指令的代码。
代码写好了之后,我们要在电脑上,用电脑(x86或x86_64)上的gcc编译这套新gcc代码,--host=电脑,--target=新平台,得到一个交叉编译器。这个交叉编译器是在电脑上运行的,但编译出来的程序是在新CPU平台上运行的。
有了交叉编译器,再次在电脑上用这个交叉编译器编译这套新gcc代码,--host=新平台,--target=新平台,就得到了这个新平台的gcc本地编译器。
这下终于有鸡了,鸡就可以生蛋了。所以说,是先有鸡后有蛋。
GCC升级到11.2版本
之前已经说过了,arm官网上最新的交叉编译器是10.3版本,这个版本的交叉编译器最高只能交叉编译gcc官网的10.3版本的gcc源码包,得到10.3版本的gcc本地编译器。
如果用这个交叉编译器交叉编译gcc11的源码包,会报错,报的是关于__is_nothrow_constructible、__is_nothrow_assignable的错误。
那怎样才能得到最新的11.2版本的gcc本地编译器呢?
我们已经有了10.3版本的本地编译器了,用这个本地编译器本地编译gcc官网的gcc11.2源码包,就能成功了。
去官网下载gcc-11.2.0.tar.gz,复制到板子上,然后在板子上解压:tar xvf gcc-11.2.0.tar.gz
下载依赖包(GMP、MPFR、MPC和ISL):
[root@exynos4412 gcc11]# cd gcc-11.2.0
[root@exynos4412 gcc-11.2.0]# contrib/download_prerequisites
Connecting to gcc.gnu.org (8.43.85.97:80)
gmp-6.1.0.tar.bz2    100% |*******************************|  2327k  0:00:00 ETA
Connecting to gcc.gnu.org (8.43.85.97:80)
mpfr-3.1.6.tar.bz2   100% |*******************************|  1257k  0:00:00 ETA
Connecting to gcc.gnu.org (8.43.85.97:80)
mpc-1.0.3.tar.gz     100% |*******************************|   654k  0:00:00 ETA
Connecting to gcc.gnu.org (8.43.85.97:80)
isl-0.18.tar.bz2     100% |*******************************|  1619k  0:00:00 ETA
gmp-6.1.0.tar.bz2: OK
mpfr-3.1.6.tar.bz2: OK
mpc-1.0.3.tar.gz: OK
isl-0.18.tar.bz2: OK
All prerequisites downloaded successfully.
[root@exynos4412 gcc-11.2.0]# cd ..
建立_build文件夹:
mkdir _build
cd _build
vi config.sh
chmod +x config.sh
config.sh文件内容:
#!/bin/sh
../gcc-11.2.0/configure \
--with-bugurl="https://bugs.linaro.org/" \
--enable-shared \
--disable-libssp \
--disable-libmudflap \
--enable-checking=yes \
--enable-languages=c,c++,fortran \
--with-arch=armv7-a \
--with-fpu=neon \
--with-float=hard \
--with-mode=thumb \
--disable-werror
配置:
[root@exynos4412 _build]# ./config.sh
checking build system type... armv7l-unknown-linux-gnueabihf
checking host system type... armv7l-unknown-linux-gnueabihf
checking target system type... armv7l-unknown-linux-gnueabihf
checking for a BSD-compatible install... /usr/bin/install -c
checking whether ln works... yes
checking whether ln -s works... yes
checking for a sed that does not truncate output... /bin/sed
checking for gawk... no
checking for mawk... no
checking for nawk... no
checking for awk... awk
checking for libatomic support... yes
checking for libitm support... yes
checking for libsanitizer support... yes
checking for libvtv support... yes
checking for libhsail-rt support... no
checking for libphobos support... yes
checking for gcc... gcc
checking whether the C compiler works... yes
checking for C compiler default output file name... a.out
checking for suffix of executables...
checking whether we are cross compiling... no
checking for suffix of object files... o
checking whether we are using the GNU C compiler... yes
checking whether gcc accepts -g... yes
checking for gcc option to accept ISO C89... none needed
checking whether we are using the GNU C++ compiler... yes
checking whether g++ accepts -g... yes
checking whether g++ accepts -static-libstdc++ -static-libgcc... yes
checking for gnatbind... no
checking for gnatmake... no
checking whether compiler driver understands Ada... no
checking how to compare bootstrapped objects... cmp $$f1 $$f2 16 16
checking for objdir... .libs
configure: WARNING: using in-tree isl, disabling version check
*** This configuration is not supported in the following subdirectories:
     gnattools gotools target-libada target-libhsail-rt target-libphobos target-zlib target-libgo target-libffi target-libobjc target-liboffloadmic target-libssp
    (Any other directories should still work fine.)
checking for default BUILD_CONFIG... bootstrap-debug
checking for --enable-vtable-verify... no
checking for bison... no
checking for byacc... no
checking for yacc... yacc
checking for bison... no
checking for gm4... no
checking for gnum4... no
checking for m4... m4
checking for flex... flex
checking for flex... flex
checking for makeinfo... makeinfo
checking for expect... no
checking for runtest... no
checking for ar... ar
checking for as... as
checking for dlltool... no
checking for ld... (cached) /usr/local/lib/gcc/arm-none-linux-gnueabihf/10.3.0/../../../../arm-none-linux-gnueabihf/bin/ld
checking for lipo... no
checking for nm... nm
checking for ranlib... ranlib
checking for strip... strip
checking for windres... no
checking for windmc... no
checking for objcopy... objcopy
checking for objdump... objdump
checking for otool... no
checking for readelf... readelf
checking for cc... no
checking for gcc... gcc
checking for c++... c++
checking for gcc... gcc
checking for gfortran... gfortran
checking for gccgo... no
checking for gdc... no
checking for ar... no
checking for ar... ar
checking for as... no
checking for as... as
checking for dlltool... no
checking for dlltool... no
checking for ld... no
checking for ld... ld
checking for lipo... no
checking for lipo... no
checking for nm... no
checking for nm... nm
checking for objcopy... no
checking for objcopy... objcopy
checking for objdump... no
checking for objdump... objdump
checking for otool... no
checking for otool... no
checking for ranlib... no
checking for ranlib... ranlib
checking for readelf... no
checking for readelf... readelf
checking for strip... no
checking for strip... strip
checking for windres... no
checking for windres... no
checking for windmc... no
checking for windmc... no
checking where to find the target ar... host tool
checking where to find the target as... host tool
checking where to find the target cc... just compiled
checking where to find the target c++... just compiled
checking where to find the target c++ for libstdc++... just compiled
checking where to find the target dlltool... host tool
checking where to find the target gcc... just compiled
checking where to find the target gfortran... just compiled
checking where to find the target gccgo... host tool
checking where to find the target gdc... host tool
checking where to find the target ld... host tool
checking where to find the target lipo... host tool
checking where to find the target nm... host tool
checking where to find the target objcopy... host tool
checking where to find the target objdump... host tool
checking where to find the target otool... host tool
checking where to find the target ranlib... host tool
checking where to find the target readelf... host tool
checking where to find the target strip... host tool
checking where to find the target windres... host tool
checking where to find the target windmc... host tool
checking whether to enable maintainer-specific portions of Makefiles... no
configure: creating ./config.status
config.status: creating Makefile
编译:make(大约需要27小时)
生成安装文件:make install DESTDIR=$(pwd)/_install
测试一下看能不能用:
cd ..
mkdir _test
cd _test
vi hello.c
../_build/_install/usr/local/bin/gcc hello.c -o hello
file hello
./hello
../_build/_install/usr/local/bin/gcc -v
能用,那就再本地编译一个binutils。这回我们去gnu官网下载binutils-2.37.tar.xz,然后复制到板子上,用gcc10.3本地编译。
解压:tar xvf binutils-2.37.tar.xz
配置:
mkdir _build
cd _build
../binutils-2.37/configure
编译,并生成安装文件:
make(大约需要22分钟)
make install DESTDIR=$(pwd)/_install
将gcc和binutils的安装文件合并,并打包成gcc-11.2.0-binary.tar.gz:
cp -r /root/compilers/gcc11/_build/_install /root/compilers/binutils/_build
cd _install
sudo chown -R root:root usr
tar czf gcc-11.2.0-binary.tar.gz usr
用uninstaller卸载之前的gcc-10.3.0-binary.tar.gz,再解压gcc-11.2.0-binary.tar.gz到根目录,完美!
cp gcc-11.2.0-binary.tar.gz /root/packages
cd /root/packages
./uninstaller gcc-10.3.0-binary.tar.gz(因为压缩包较大,开始执行命令后需要等一段时间才开始删除系统中的文件)
tar xvf gcc-11.2.0-binary.tar.gz -C /
[root@exynos4412 packages]# gcc -v
Using built-in specs.
COLLECT_GCC=gcc
COLLECT_LTO_WRAPPER=/usr/local/libexec/gcc/armv7l-unknown-linux-gnueabihf/11.2.0/lto-wrapper
Target: armv7l-unknown-linux-gnueabihf
Configured with: ../gcc-11.2.0/configure --with-bugurl=https://bugs.linaro.org/ --enable-shared --disable-libssp --disable-libmudflap --enable-checking=yes --enable-languages=c,c++,fortran --with-arch=armv7-a --with-fpu=neon --with-float=hard --with-mode=thumb --disable-werror
Thread model: posix
Supported LTO compression algorithms: zlib
gcc version 11.2.0 (GCC)
下面这段C++代码, 用gcc11.2可以编译通过,而gcc10.3不行。
/* 编译命令: g++ -std=gnu++20 using_enum.cpp -o using_enum */
#include <iostream>

using namespace std;

enum class fruit
{
	orange,
	apple
};

struct S
{
	using enum fruit;
};

int main(void)
{
	S s;

	cout << "s.orange=" << static_cast<int>(s.orange) << endl;
	cout << "s.apple=" << static_cast<int>(s.apple) << endl;
	cout << "S::orange=" << static_cast<int>(S::orange) << endl;
	cout << "S::apple=" << static_cast<int>(S::apple) << endl;

	return 0;
}
笔者之前在编译samba的时候安装了flex-2.6.0软件包,所以本地编译binutils时会误包含上samba/flex-2.6.0/src/.libs/libfl.so.2库,这会导致ar命令无法在新搭建的最小linux系统中使用:
[root@exynos4412 ~]# /mnt/sdlinux/usr/local/bin/ar
/mnt/sdlinux/usr/local/bin/ar: error while loading shared libraries: libfl.so.2: cannot open shared object file: No such file or directory
为了避免此问题,笔者提供的百度网盘资料里面,binutils软件包选择的是交叉编译,和本地编译的gcc11.2安装文件合并后,得到gcc-11.2.0-binary.tar.gz。
把做好的GCC编译器复制到全志R16开发板上用
全志R16芯片,也是一种32位的四核ARMv7-A架构的芯片,这一点跟三星exynos4412一模一样。那么,理论上来说,exynos4412板子上的可执行文件,直接复制到全志R16开发板里面就能运行。(不过exynos4412属于Cortex-A9系列,全志R16是Cortex-A7系列)
首先我们把uninstaller程序复制到全志板子里面试下。复制好了之后,执行一下不带参数的./uninstaller,提示not found,这是因为系统找不到/lib/ld-linux-armhf.so.3动态库。
root@TinaLinux:/mnt/UDISK/packages/uninstaller# ./uninstaller
/bin/sh: ./uninstaller: not found
如果我们把交叉编译器压缩包gcc-arm-10.3-2021.07-x86_64-arm-none-linux-gnueabihf.tar.xz里面的gcc-arm-10.3-2021.07-x86_64-arm-none-linux-gnueabihf/arm-none-linux-gnueabihf/libc里面的所有文件复制到板子的根目录下,就有/lib/ld-linux-armhf.so.3文件了,我们就能成功运行uninstaller程序,以及gcc编译器,并且gcc编译器能成功编译程序。
但是笔者遇到了一点麻烦,目前全志板子的根文件系统(rootfs)不是挂载的SD卡的分区,而是用的是ramdisk(也就是说rootfs是在内存里面),容量只有77.5MB,太小了!
只有/mnt/UDISK是挂载的板子上的emmc存储器,容量稍微大一点,是6.9GB。并且,目前根文件系统(BusyBox v1.27.2)的tar命令只能解压tar.gz压缩包,无法解压tar.xz压缩包。很不巧,交叉编译器压缩包格式刚好是tar.xz。
笔者不得不在电脑虚拟机上解压交叉编译器压缩包,进入libc文件夹,将里面的所有文件打包成libc_complete.tar,上传到板子上,然后解压到/mnt/UDISK/packages/_install里面:
tar xvf libc_complete.tar -C _install
然后我们配置好LD_LIBRARY_PATH,然后做一个/lib/ld-linux-armhf.so.3的软链接,链接到我们刚解压出来的_install/lib/ld-linux-armhf.so.3:
export LD_LIBRARY_PATH=/usr/lib:/mnt/UDISK/packages/_install/lib:/mnt/UDISK/packages/_install/usr/lib:/mnt/UDISK/packages/_install/usr/local/lib
ln -s /mnt/UDISK/packages/_install/lib/ld-linux-armhf.so.3 /lib/ld-linux-armhf.so.3
现在,就能成功运行uninstaller了:
root@TinaLinux:/mnt/UDISK/packages/uninstaller# ./uninstaller
Please specify package name
uninstaller程序的成功运行说明:exynos4412板子上的可执行文件直接复制到全志R16板子上也能运行。
我们把gcc-11.2.0-binary.tar.gz上传到板子上,同样也解压到_install目录下:
tar xzvf gcc-11.2.0-binary.tar.gz -C _install
运行gcc,同样也能正常运行:(Windows下adb shell不支持改变文字颜色显示,所以会直接输出颜色控制符)
root@TinaLinux:/mnt/UDISK/packages# _install/usr/local/bin/gcc
[01m[Kgcc:[m[K [01;31m[Kfatal error: [m[Kno input files
compilation terminated.
root@TinaLinux:/mnt/UDISK/packages# _install/usr/local/bin/gcc -v
Using built-in specs.
COLLECT_GCC=_install/usr/local/bin/gcc
COLLECT_LTO_WRAPPER=/mnt/UDISK/packages/_install/usr/local/bin/../libexec/gcc/ar
mv7l-unknown-linux-gnueabihf/11.2.0/lto-wrapper
Target: armv7l-unknown-linux-gnueabihf
Configured with: ../gcc-11.2.0/configure --with-bugurl=https://bugs.linaro.org/
--enable-shared --disable-libssp --disable-libmudflap --enable-checking=yes --en
able-languages=c,c++,fortran --with-arch=armv7-a --with-fpu=neon --with-float=ha
rd --with-mode=thumb --disable-werror
Thread model: posix
Supported LTO compression algorithms: zlib
gcc version 11.2.0 (GCC)
让我们编译一个hello.c试试看:
root@TinaLinux:/mnt/UDISK/packages# mkdir test
root@TinaLinux:/mnt/UDISK/packages# cd test
root@TinaLinux:/mnt/UDISK/packages/test# echo "#include <stdio.h>" > hello.c
root@TinaLinux:/mnt/UDISK/packages/test# echo "int main(void)" >> hello.c
root@TinaLinux:/mnt/UDISK/packages/test# echo "{" >> hello.c
root@TinaLinux:/mnt/UDISK/packages/test# echo "    printf(\"Hello World!\n\");" >> hello.c
root@TinaLinux:/mnt/UDISK/packages/test# echo "    return 0;" >> hello.c
root@TinaLinux:/mnt/UDISK/packages/test# echo "}" >> hello.c
root@TinaLinux:/mnt/UDISK/packages/test# cat hello.c
#include <stdio.h>
int main(void)
{
    printf("Hello World!\n");
    return 0;
}
root@TinaLinux:/mnt/UDISK/packages/test# gcc hello.c -o hello
/bin/sh: gcc: not found
root@TinaLinux:/mnt/UDISK/packages/test# ../_install/usr/local/bin/gcc hello.c -o hello
[01m[Khello.c:1:10:[m[K [01;31m[Kfatal error: [m[Kstdio.h: No such file
or directory
    1 | #include [01;31m[K<stdio.h>[m[K
      |          [01;31m[K^~~~~~~~~[m[K
compilation terminated.
root@TinaLinux:/mnt/UDISK/packages/test#
编译出错,提示找不到<stdio.h>。
我们配置一下PATH环境变量,C_INCLUDE_PATH和LIBRARY_PATH环境变量,然后再在/lib下添加两个软链接:
export PATH=/usr/sbin:/usr/bin:/sbin:/bin:/mnt/UDISK/packages/_install/bin:/mnt/UDISK/packages/_install/sbin:/mnt/UDISK/packages/_install/usr/bin:/mnt/UDISK/packages/_install/usr/local/bin
export C_INCLUDE_PATH=/mnt/UDISK/packages/_install/usr/include
export LIBRARY_PATH=/mnt/UDISK/packages/_install/usr/lib
ln -s /mnt/UDISK/packages/_install/lib/libc.so.6 /lib/libc.so.6
ln -s /mnt/UDISK/packages/_install/usr/lib/libc_nonshared.a /usr/lib/libc_nonshared.a
其中,C_INCLUDE_PATH表示编译器查找头文件的目录,LIBRARY_PATH表示编译器查找库文件的目录。
现在,就能编译成功了:
root@TinaLinux:/mnt/UDISK/packages/test# gcc hello.c -o hello
root@TinaLinux:/mnt/UDISK/packages/test# ./hello
Hello World!
root@TinaLinux:/mnt/UDISK/packages/test# ls -l hello
-rwxrwxrwx    1 root     root         13668 Jan  1 10:46 hello

C语言和汇编语言源文件一起编译
main.c:
#include <stdio.h>

#define MAX 100

int test(unsigned int *buffer, int size);

int main(void)
{
    int i, n;
    unsigned int data[MAX] = {0};

    n = test(data, MAX);
    if (n > MAX)
        n = MAX;
    else if (n < 0)
        n = 0;
    printf("n=%d\n", n);

    for (i = 0; i < n; i++)
        printf("data[%d]=0x%08x\n", i, data[i]);

    return 0;
}
test.s:
请注意汇编语言源文件的前三行内容。
    .global test
    .syntax unified
    .thumb
test:
    ldr r1, =0xdeadbeef
    str r1, [r0]
    ldr r1, =0x12345678
    str r1, [r0, #4]
    ldr r1, =number
    ldr r2, [r1]
    str r2, [r0, #8]

    mov r0, #10
    bx lr

number:
    .word 0x61626364
在板子上编译并运行:
[root@exynos4412 learn_asm]# gcc main.c test.s -o main
[root@exynos4412 learn_asm]# ./main
n=10
data[0]=0xdeadbeef
data[1]=0x12345678
data[2]=0x61626364
data[3]=0x00000000
data[4]=0x00000000
data[5]=0x00000000
data[6]=0x00000000
data[7]=0x00000000
data[8]=0x00000000
data[9]=0x00000000
在正点原子阿尔法I.MX6ULL开发板预装的系统上运行GCC编译器
正点原子阿尔法I.MX6ULL开发板的CPU型号为MCIMX6Y2CVM08AB,出厂预装的系统就是一个linux最小系统,是用buildroot搭建的。上面安装有make 4.1,但是没有gcc和g++编译器。
提示:正点原子的出厂默认系统里面,ftp是vsftpd(没有启用root账户)。telnet没有启用,但ssh是启用了的,可以通过ssh连接板子。
把之前编译好的迅为exynos4412开发板的gcc编译器,以及uninstaller程序复制上去直接运行,运行不了,报错信息如下:
root@ATK-IMX6U:~# ./uninstaller
./uninstaller: /lib/libc.so.6: version `GLIBC_2.33' not found (required by ./uninstaller)
./uninstaller: /usr/lib/libstdc++.so.6: version `GLIBCXX_3.4.26' not found (required by ./uninstaller)
root@ATK-IMX6U:~# file uninstaller
uninstaller: ELF 32-bit LSB executable, ARM, EABI5 version 1 (SYSV), dynamically linked, interpreter /lib/ld-linux-armhf.so.3, for GNU/Linux 3.2.0, not stripped
root@ATK-IMX6U:~# file /bin/bash
/bin/bash: ELF 32-bit LSB executable, ARM, EABI5 version 1 (SYSV), dynamically linked, interpreter /lib/ld-linux-armhf.so.3, for GNU/Linux 2.6.32, BuildID[sha1]=77a8b17cdb392c246b2bad6fa3eca93095c00cc5, stripped
虽然迅为itop4412和正点原子imx6ull的cpu平台是一样的,但是就是因为glibc和glibcxx的版本不对,迅为板子上的程序无法在正点原子的板子上运行。必须重新编译。
这个就相当于,两台cpu都是x86的电脑,一台装的是Windows XP系统,另一台装的是Windows 7系统。某个exe程序调用了Windows 7系统里面的dll库,尽管两台电脑的cpu是一样的,但是这个exe程序就只能在装win7系统的那台电脑上运行。要解决这个问题,只有重新编译这个exe程序,链接时换成xp系统的dll库。
正点原子提供的交叉编译器是gcc-linaro-4.9.4-2017.01-x86_64_arm-linux-gnueabihf.tar.xz,版本为4.9.4。我们用这个交叉编译器重新编译gcc源码,gcc源码的版本也选择4.9.4(因为交叉编译器的版本太低了,如果gcc源码包版本太高的话,编译会失败)。
正点原子提供的4.9.4版本的交叉编译器里面没有gcc-linaro-4.9.4-2017.01-x86_64_arm-linux-gnueabihf/arm-linux-gnueabihf/libc/usr/include/bits/types文件夹,所以电脑里面那个gcc本地编译器(HOSTCC)版本也不能太高,电脑系统里面不能有/usr/include/bits/types这个文件夹。如果这个文件夹存在,这个系统就不能使用,必须换系统,换一个自带gcc版本更低的系统。
因此笔者选择了低版本的Fedora25系统(目前最新版本是Fedora35),里面自带的gcc版本比较低。下载好iso镜像后,直接进入LiveCD模式,不用安装系统。
Fedora 25系统下载地址:
https://archives.fedoraproject.org/pub/archive/fedora/linux/releases/25/Workstation/x86_64/iso/Fedora-Workstation-Live-x86_64-25-1.3.iso
在LiveCD模式下安装gcc,g++编译器和一些必要的软件包,就可以开始编译了。
LiveCD已默认安装gcc(gcc version 6.2.1 20160916),只需要再安装一个g++。
sudo dnf install gcc-c++
安装的g++版本是gcc version 6.4.1 20170727,安装的同时gcc也被升级成了相同版本。
# 解压交叉编译器
sudo mkdir /mnt/test
sudo mount /dev/sda /mnt/test
cd /mnt/test
tar xf gcc-linaro-4.9.4-2017.01-x86_64_arm-linux-gnueabihf.tar.xz

# 交叉编译gcc
# 请注意config.sh里面arm-none-linux-gnueabihf变成了arm-linux-gnueabihf
wget ftp://ftp.lip6.fr/pub/gcc/releases/gcc-4.9.4/gcc-4.9.4.tar.bz2
tar xf gcc-4.9.4.tar.bz2
cd gcc-4.9.4
contrib/download_prerequisites
cd ..
mkdir _build4
cd _build4
vim config.sh
chmod +x config.sh
source config.sh config
make
make install DESTDIR=$(pwd)/_install

# 交叉编译binutils
# 编译前必须先安装好texinfo软件包:sudo dnf install texinfo
cd ..
wget http://ftp.gnu.org/pub/gnu/binutils/binutils-2.38.tar.xz
tar xf binutils-2.38.tar.xz
mkdir _build_binutils
cd _build_binutils
vim config.sh
chmod +x config.sh
source config.sh config
make
make install DESTDIR=$(pwd)/_install

# gcc和binutils合并,生成安装文件
cp -r ../_build4/_install .
cd _install
sudo chown -R root:root usr
tar czf gcc-4.9.4-binary.tar.gz usr

# 交叉编译make并生成安装文件
cd ../..
wget http://ftp.gnu.org/gnu/make/make-4.3.tar.gz
tar xf make-4.3.tar.gz
mkdir _build_make
cd _build_make
vim config.sh
chmod +x config.sh
source config.sh config
make
make install DESTDIR=$(pwd)/_install
cd _install
sudo chown -R root:root usr
tar czf make-4.3-binary.tar.gz usr

# 将gcc和make安装到板子上
# 正点原子出厂的系统里面已经有make 4.1了,这里就不安装了
# ntpdate cn.pool.ntp.org
tar xf gcc-4.9.4-binary.tar.gz -C /
# tar xf make-4.3-binary.tar.gz -C /

# 将交叉编译器里面的头文件(如stdio.h)安装到板子上
# 其中第一条命令要执行很长时间,请耐心等待
tar -xvf gcc-linaro-4.9.4-2017.01-x86_64_arm-linux-gnueabihf.tar.xz gcc-linaro-4.9.4-2017.01-x86_64_arm-linux-gnueabihf/arm-linux-gnueabihf/libc/usr/include
mkdir /usr/include
mv gcc-linaro-4.9.4-2017.01-x86_64_arm-linux-gnueabihf/arm-linux-gnueabihf/libc/usr/include /usr
rmdir -p gcc-linaro-4.9.4-2017.01-x86_64_arm-linux-gnueabihf/arm-linux-gnueabihf/libc/usr
编译好的程序的压缩包见网盘资料“正点原子阿尔法I.MX6ULL开发板专用”文件夹。

关于Java
Oracle官网(Java Archive Downloads - Java SE 8)是有编译好的Java JDK版本的,因此Java不需要源码编译安装。
适用于Exynos4412 CPU的Java JDK 8u202版本的文件名为jdk-8u202-linux-arm32-vfp-hflt.tar.gz。
下载下来后,解压到/opt文件夹(或者其他文件夹),然后将/opt/jdk1.8.0_202/bin加入到PATH环境变量中,就可以使用java和javac命令了。
和C语言不同,Java语言的特点是一次编译,处处运行。所以编译好的Java软件包,能在任何平台上直接运行。
1. 在电脑上写个Hello.java源文件,用javac编译成Hello.class后,只需将编译好的Hello.class复制到板子上,就能直接运行
2. 在迅为itop4412板子上安装tomcat服务器,不需要源码编译安装,只需要下载编译好的tomcat版本(apache-tomcat-8.5.71.tar.gz),解压出来,就能直接使用
举例:Tomcat服务器的安装方法
配置PATH环境变量:export PATH=$PATH:/opt/jdk1.8.0_202/bin,然后把这句话加到开机脚本/etc/profile里面
配置JAVA_HOME环境变量:export JAVA_HOME=/opt/jdk1.8.0_202,然后把这句话加到开机脚本/etc/profile里面
解压官网下载的tomcat二进制压缩包:tar xf apache-tomcat-8.5.71.tar.gz -C /opt
修改/opt/jdk1.8.0_202/jre/lib/security/java.security文件,
securerandom.source=file:/dev/random改为securerandom.source=file:/dev/./urandom
(注意多了一个u,修改这个文件是为了避免关闭Tomcat时提示SEVERE: Could not contact [localhost:8005]. Tomcat may not be running.)
启动Tomcat服务器:/opt/apache-tomcat-8.5.71/bin/startup.sh
浏览器访问:http://192.168.1.4:8080/
关闭Tomcat服务器:/opt/apache-tomcat-8.5.71/bin/shutdown.sh
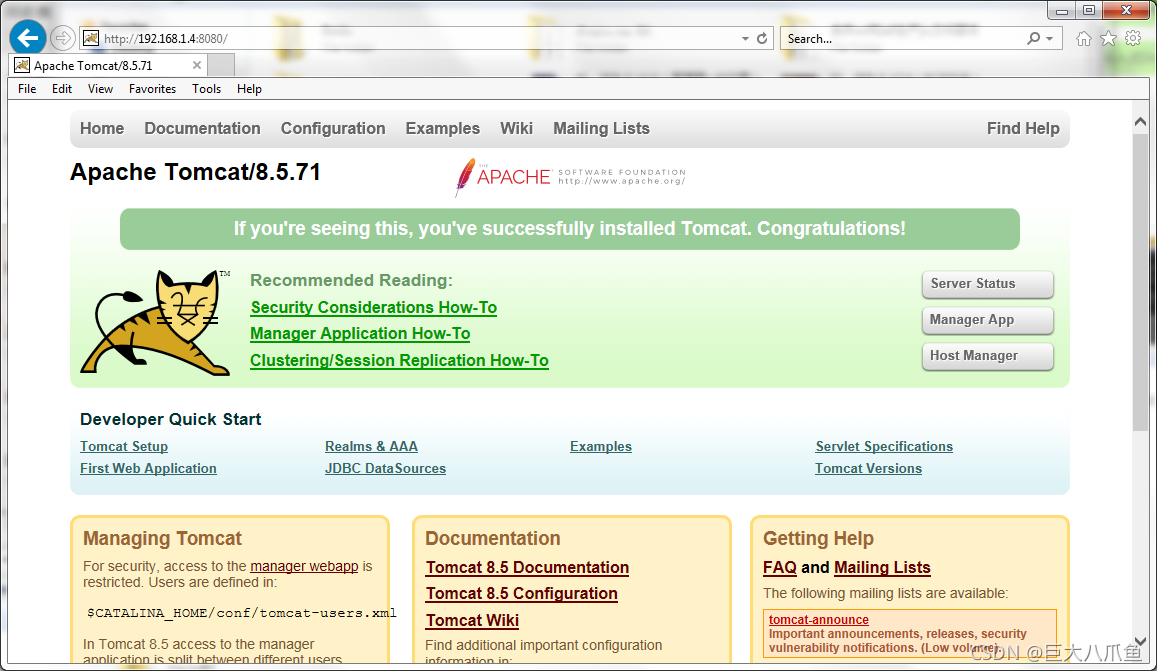
把网页文件放到webapps文件夹中就可以访问了。例如http://192.168.1.4:8080/travel/images/fire.png访问的是/opt/apache-tomcat-8.5.71/webapps/travel/images/fire.png。如果网页项目里面有WEB-INF文件夹,则放进去之后,需要重启Tomcat服务器才能正常访问。